
30 Spooky Halloween Entryway Decor Ideas Guests Will Love
Your entryway is the first thing guests — and trick-or-treaters — see, so it sets the entire tone of your Halloween. These halloween entryway decor ideas cover everything from the front door to the foyer, so your whole entry feels spooky, stylish, and welcoming at once. You don’t need a huge budget or a full-house overhaul; a few smart swaps at the threshold can completely transform your home for the season. Whether you lean cute and cozy or full haunted-house dramatic, there’s an idea here that fits your style, your space, and your budget.
1. Hang a Gothic Black Harvest Wreath

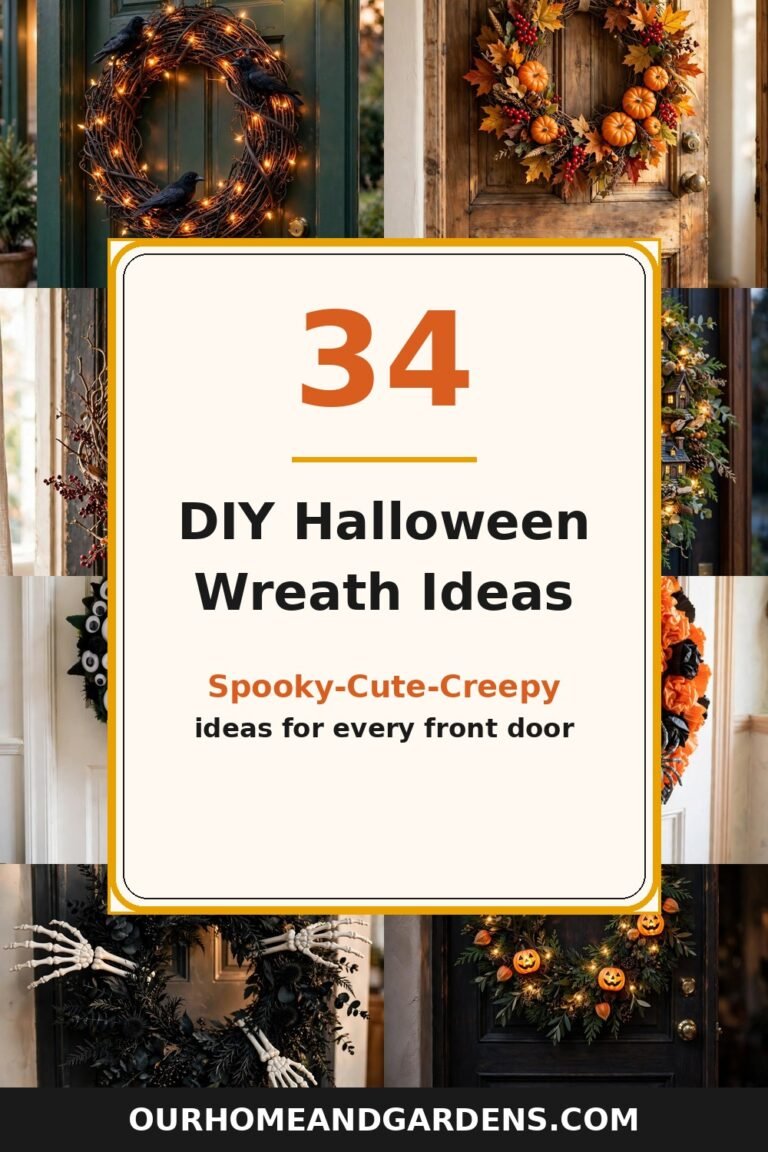
Nothing says “this house takes Halloween seriously” like a dramatic wreath on the front door. A gothic black harvest wreath — wispy black pine, dark branches, maybe a few matte skulls or black roses — reads instantly spooky but stays elegant, never cheesy. It works because the wreath is at eye level for every visitor and photographs beautifully from the street, especially once the porch lights come on. (For even more door-specific inspiration, see our halloween door decor ideas.)
Materials + realistic cost: artificial black-branch wreath or grapevine wreath ($15–25), black spray paint if DIY ($6), matte skull picks, black roses or crows ($8–12 total). Budget: about $20–40 ready-made, or under $15 as a DIY.
To build it, start with a grapevine or pine wreath base and wrap in black eucalyptus or spray-painted branches. Tuck in skull picks, black feathers, or a small crow, keeping everything matte — glossy decor reads less premium. Hang it with a removable over-door wreath hanger so there’s no damage to the door, and add a black velvet ribbon bow at the top for a finished look.
Practical tip: Keep the palette almost entirely black with one accent — deep red berries or a single purple flower — so the wreath looks curated instead of cluttered.
Variation: Swap the gothic black for a pumpkin-and-leaf autumn wreath in early October, then switch to the black version for Halloween week.
2. Layer a Buffalo Plaid Rug Under a Skeleton Doormat

Layered doormats are the single easiest entryway upgrade, and they make your threshold look professionally styled in about two minutes. A classic black-and-white buffalo plaid outdoor rug on the bottom with a thick coir “welcome” mat — featuring minimalist skeleton hands, bats, or a cheeky phrase — on top adds texture, color contrast, and instant Halloween personality before anyone even reaches your door.
Materials + realistic cost: large buffalo plaid cotton or outdoor rug ($18–30), Halloween coir doormat ($15–25). Total: $30–55.
Lay the plaid rug flat against the door, then center the coir mat on top, leaving a 3–4 inch border of plaid visible on all sides. If your porch is covered, cotton works fine; on an exposed stoop, pick an all-weather flat-weave base. Shake both layers out regularly so grit doesn’t grind into the coir fibers.
Practical tip: Measure your threshold first — the bottom layer should be about 6–8 inches wider than your door for the best proportions.
Variation: Swap the coir top mat for a plain orange one and paint your own stencil design with outdoor acrylic paint for a custom look under $20 total.
3. Float Witch Hats From the Entryway Ceiling

Floating witch hats are pure Halloween magic — they add movement, drama, and a little whimsy the second someone steps inside. Hung at staggered heights from clear fishing line, black witch hats seem to hover and sway gently with every breeze, giving your foyer that enchanted feeling without taking up any floor space. They’re also one of the most-pinned halloween entryway decor ideas this year.
Materials + realistic cost: set of 3–5 black witch hats ($10–18), clear fishing line ($4), small removable ceiling hooks ($5). Total: about $15–25.
Hang the hats at varied heights — roughly 12 inches apart vertically — clustered near the entry or over the console table rather than spread across the whole room. Attach the fishing line to the cone tip so each hat hangs slightly tilted, like it’s mid-flight. Keep the lowest hat well above head height so guests don’t bump it.
Practical tip: Add a battery tea light inside one or two hats for a soft upward glow after dark — it looks like the hats are smoldering.
Variation: Swap the witch hats for floating white cheesecloth ghosts if you want a softer, family-friendly vibe.
4. Flank the Door With No-Carve Pumpkin Topiaries
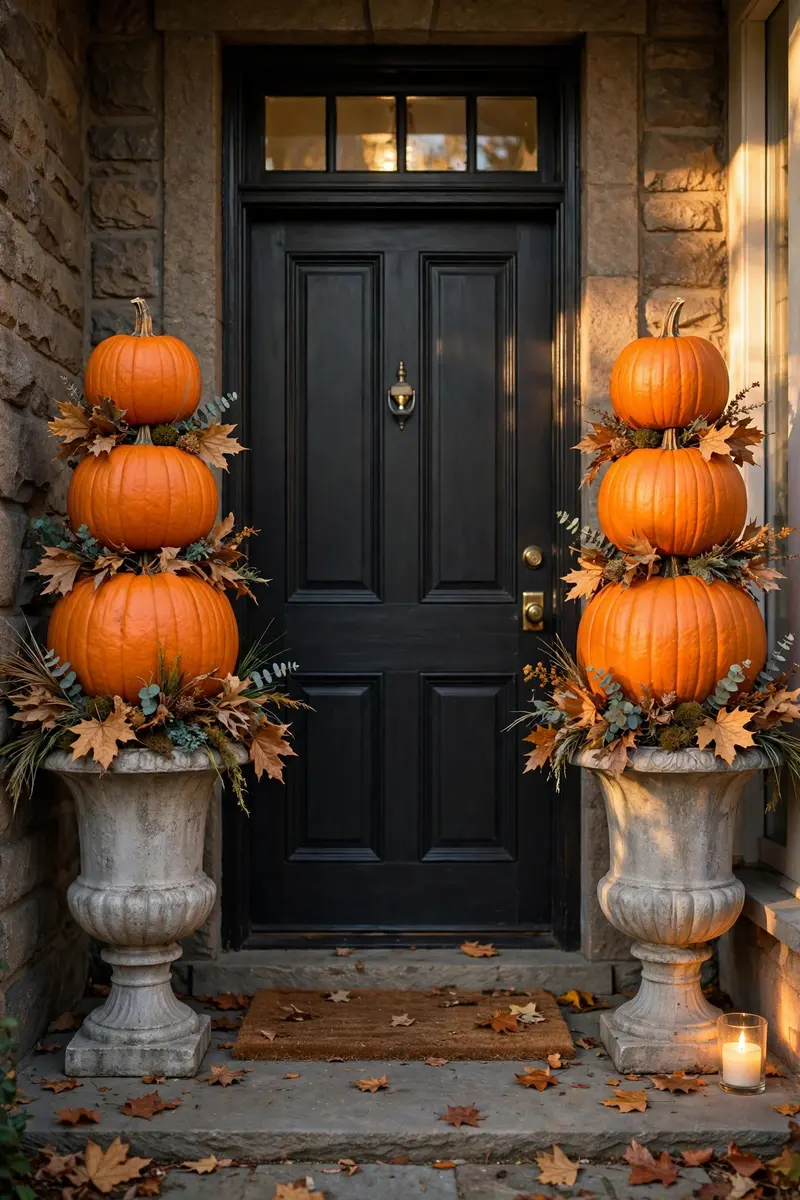
Stacked pumpkin topiaries give you that classic Halloween look without a single knife, and they anchor both sides of your doorway beautifully. Three graduated pumpkins — real or faux — stacked on a planter or in a tall urn create a vertical accent that draws the eye up and makes even a plain door feel styled and intentional.
Materials + realistic cost: 3 pumpkins in graduated sizes per side, real ($9–15 total) or faux ($25–40 per set), plus two planters or urns ($20–40). Total: $30–95.
Place the largest pumpkin on top of the soil in your planter, then the medium, then the smallest, pressing firmly so the stack is stable. Tuck Spanish moss around the base to hide gaps, and weave a few dried leaves or black berries between the pumpkins. Add a battery LED candle beside each topiary for a warm glow at night.
Practical tip: For a no-fuss version that lasts the whole month, go faux — today’s foam pumpkins look convincingly real and survive rain.
Variation: Paint the pumpkins matte black or metallic gold for a modern, spooky-elegant take that skips orange entirely.
5. Drape Black Gauze Creepy Cloth Around the Door Frame
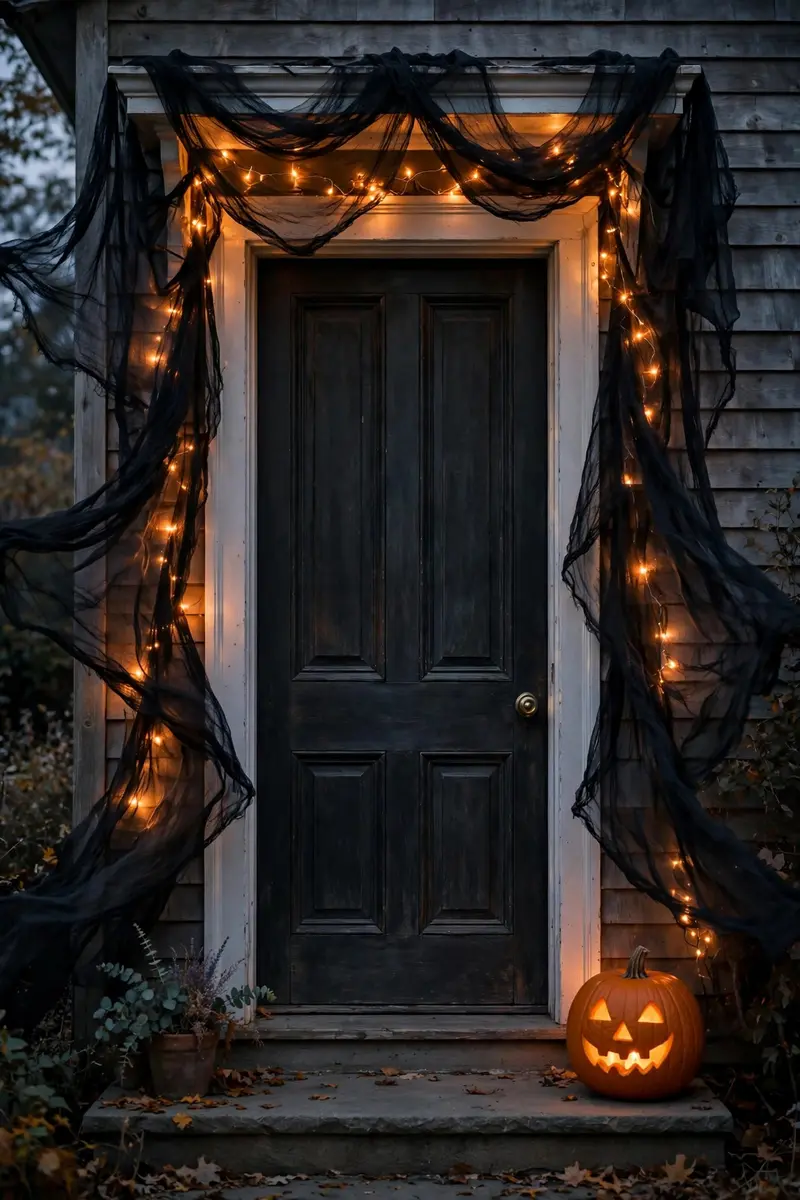
Black gauze — the porous “creepy cloth” sold at every Halloween store — is the fastest way to add haunted-house drama to your door frame. Draped loosely over the lintel and down both sides of the door, it sags and billows naturally, framing your doorway with eerie texture that moves in the wind. It costs almost nothing but reads like a movie set.
Materials + realistic cost: 1–2 packages of black creepy cloth ($4–10), removable adhesive hooks or tacks ($4). Total: under $15.
Start by securing the cloth at the top center of the door frame, then let it drape down both sides, pulling a few sections outward so it billows instead of hanging flat. Tear a few vertical slits for a tattered look, and twist one corner into a loose knot so it doesn’t look too perfect. Keep it clear of the walkway and door swing.
Practical tip: Layer white or orange fairy lights UNDER the gauze — the fabric diffuses the light into a gorgeous eerie glow.
Variation: Use deep purple or blood-red gauze instead of black for a rich, gothic color story.
6. Set Out a Pair of Glowing Ghost Decorations
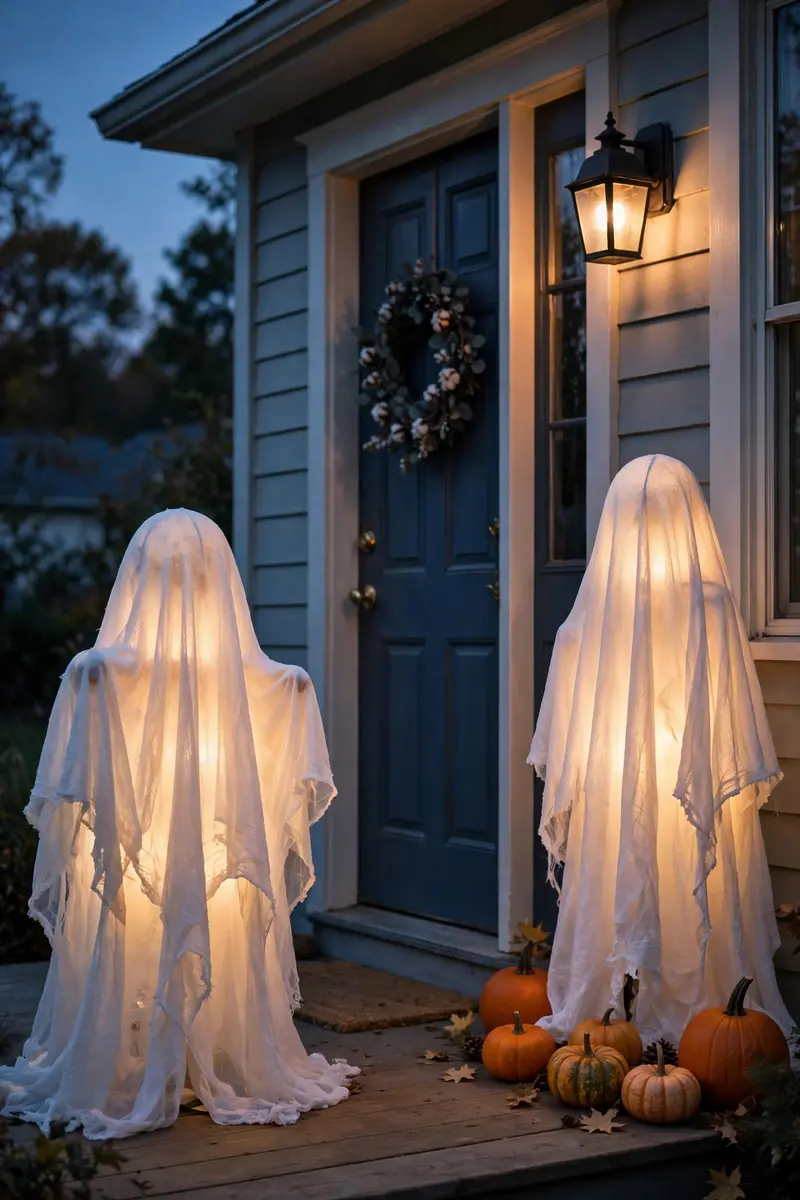
A pair of glowing ghosts flanking your entry is charming rather than scary — perfect if you want Halloween spirit without frightening small trick-or-treaters. Their soft warm illumination reads beautifully after dark, and because ghosts are the most universally recognized Halloween symbol, they instantly communicate the theme with zero explanation needed.
Materials + realistic cost: pair of pre-lit ghost figures ($20–35), or DIY with white fabric, foam heads, and battery fairy lights ($12–18). Total: $12–35.
Place one on each side of the door, the console, or the entry steps — pairs always look more intentional than a single figure. If you’re DIYing, stuff white fabric over a foam ball head, bunch the fabric at the base, and coil battery-operated fairy lights inside so the whole ghost glows. Timer-set lights turn on automatically at dusk.
Practical tip: Put the ghosts on risers — small crates or stacked books — so they vary in height and don’t look flat against the door.
Variation: Give each ghost a tiny witch hat for a playful twist that kids love.
7. Style Black Lanterns at Varying Heights
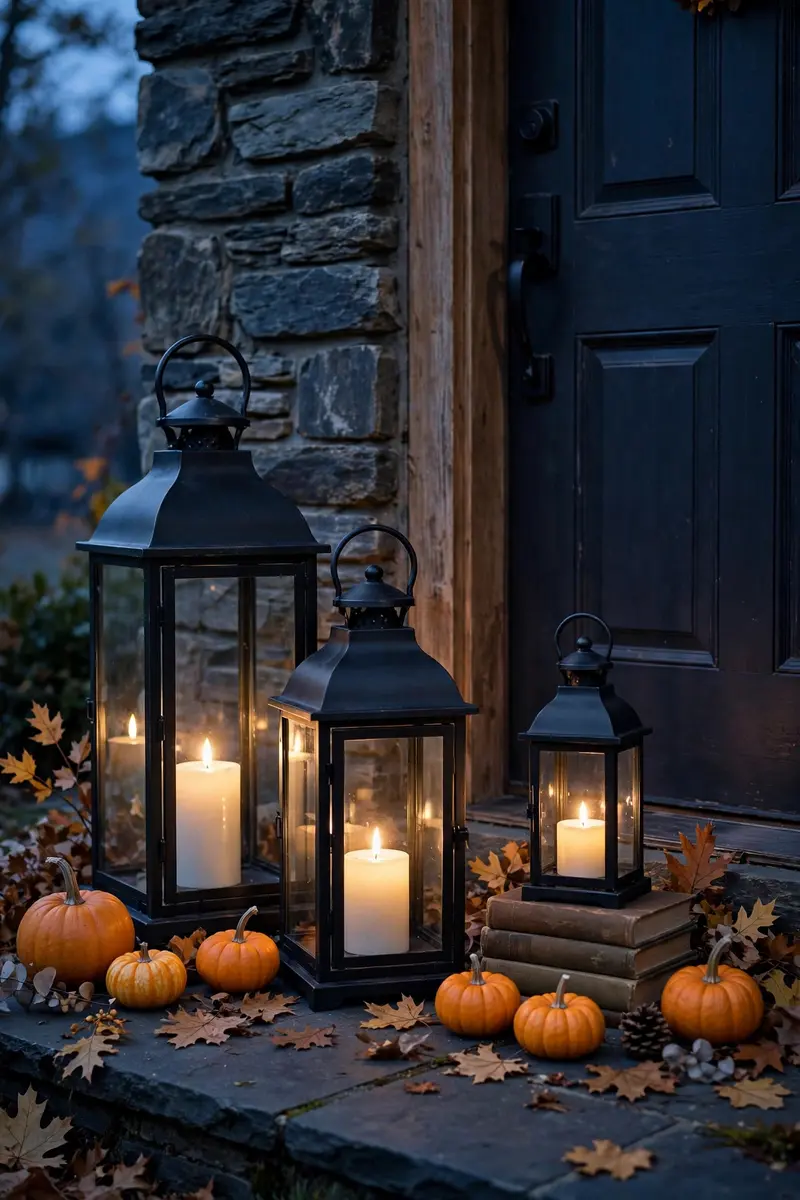
Black metal lanterns are the workhorse of spooky-elegant entryways: simple, sturdy, and endlessly reusable. Two or three lanterns of different sizes beside your front door or along the entry steps create a layered lighting look that feels expensive but costs very little. With LED candles inside, they throw a flickering warm glow that makes everything around them look more atmospheric.
Materials + realistic cost: 2–3 black metal lanterns in varied sizes ($8–18 each), flameless LED candles ($10–15 for a set). Total: $30–65.
Group them in odd numbers — three is the magic number — on one side of the door or split asymmetrically across both sides. Vary the heights by setting one on a stack of books, a crate, or an overturned bucket hidden under a hay bale. Use timer candles so they light themselves at dusk every night.
Practical tip: Surround the lantern bases with a few mini pumpkins and dried leaves so the grouping looks styled rather than just placed.
Variation: Fill the lanterns with black sand, mini skulls, or black roses instead of candles for a daylight display.
8. Build an Eerie Candle Cluster on the Console Table
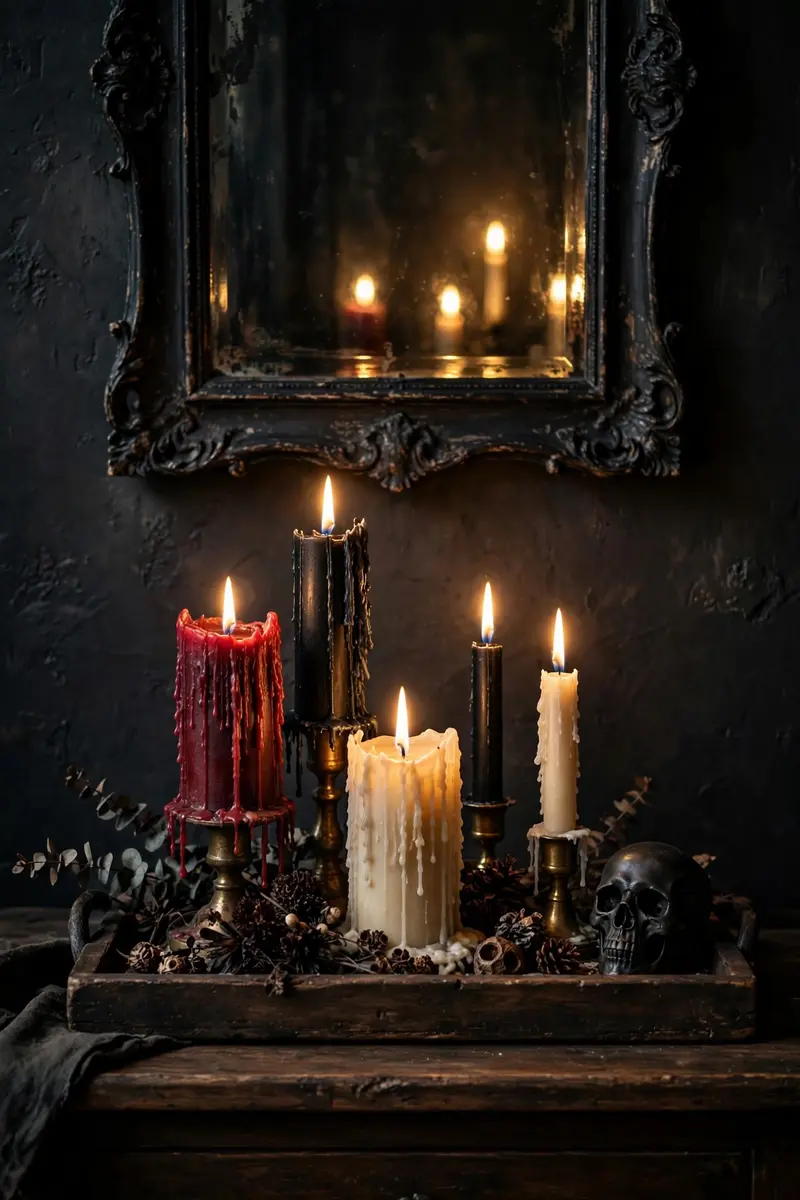
If your entry opens into a foyer, the console table is your indoor stage. A cluster of candles at varying heights — black, ivory, and blood-red pillars mixed with a few dripping tapers — turns that table into a haunted-mansion vignette that greets everyone who walks in. Candlelight is the single fastest way to make a space feel spooky and sophisticated at the same time.
Materials + realistic cost: 5–7 pillar and taper candles in mixed heights ($15–25), brass or black candlesticks ($12–20), LED taper options ($12 for a set). Total: $25–45.
Arrange candles in an asymmetric cluster toward one end of the console, leaving space for a small pumpkin or skull at the other end. Mix heights deliberately — a tall taper next to a squat pillar creates rhythm. Drip melted wax down a couple of pillars for an aged, haunted look (or buy pre-dripped ones). Keep everything on a tray or mirror so wax doesn’t damage the table.
Practical tip: Use real candles only when you’ll be home and awake — swap in flickering LED versions for the hours the entry is unattended.
Variation: Add a small black mirror behind the candles to double the flickering light effect.
9. Style the Console With a Gauzy Runner, Skeletons, and Bats

The full console-table moment — a gauzy black runner layered with mini skeletons, bat cutouts, and a small garland — gives your indoor entry a collected, magazine-worthy Halloween scene. The trick is the layering: fabric first, then larger pieces, then small details, so it reads as a deliberate display instead of random clutter.
Materials + realistic cost: black gauze runner ($8–12), mini skeleton figures ($10–15 for a set), bat cutouts ($6), mini pumpkin garland ($8). Total: $30–45.
Lay the gauze runner down the console, letting the ends puddle slightly off the edges. Place the tallest item — a small pumpkin stack or skull — off-center, then arrange skeletons at varied angles around it, as if caught mid-scamper. Scatter bat cutouts up the wall behind the table so the display climbs vertically. Finish with the mini garland weaving through everything.
Practical tip: Odd numbers and asymmetry are your friends — a group of three skeletons always looks better than two perfectly spaced ones.
Variation: Go all-white with ivory gauze, white pumpkins, and pearl-painted skeletons for a chic ghostly look.
10. Pose a Skeleton Greeter Holding the Candy Bowl
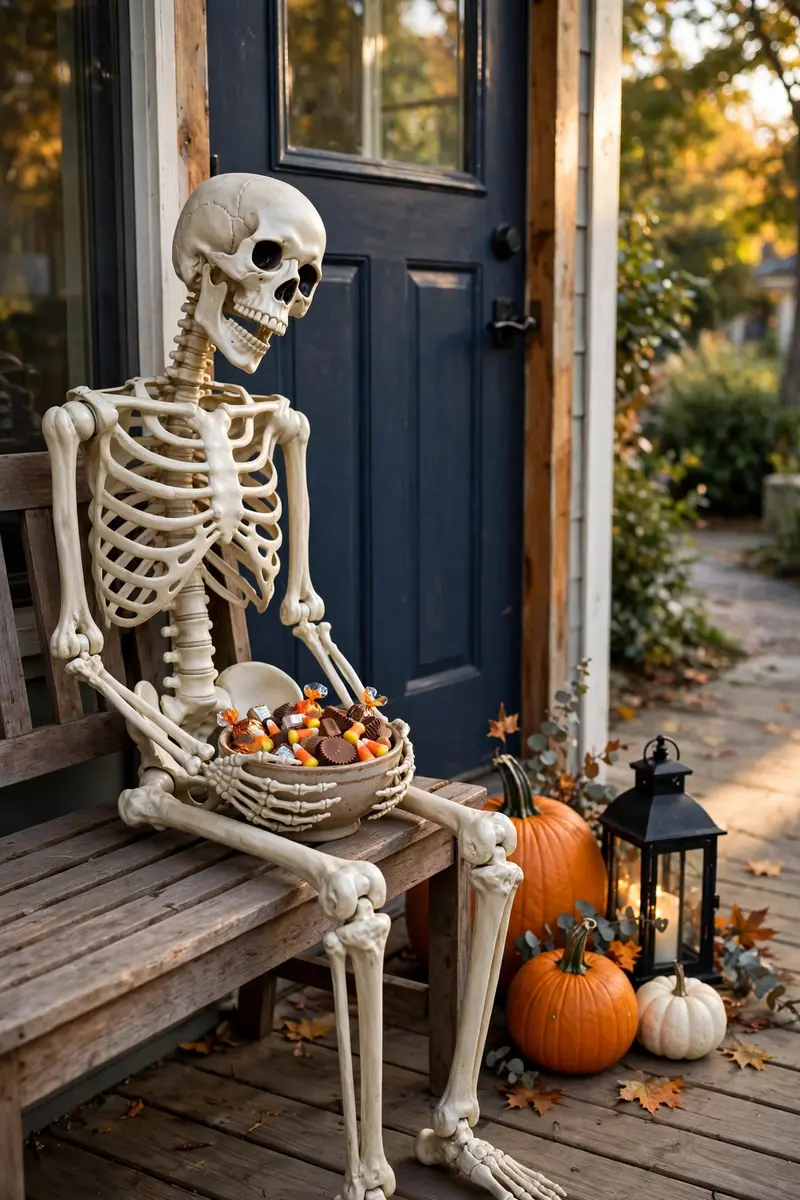
A poseable skeleton greeting visitors with a candy bowl is the friendliest kind of spooky — it makes trick-or-treaters grin and gives adults something to photograph. Seated on your porch bench or standing beside the door, the skeleton becomes the personality of your whole entry, and the candy bowl turns decoration into an interactive welcome.
Materials + realistic cost: poseable plastic skeleton ($15–30), Halloween candy bowl ($8–12). Total: $25–45.
Sit the skeleton on a bench or chair near the door, or stand it upright with its feet braced against the door frame. Position one arm so the bowl rests in its lap or hangs from its hand — a little hot glue on the fingers helps if the bowl keeps slipping. Tilt the skull slightly toward the walkway so it seems to be watching visitors approach.
Practical tip: Weight the skeleton’s seat with a sandbag or a brick hidden under fabric so wind doesn’t topple your greeter.
Variation: Dress the skeleton in a cape, top hat, or tiny costume for a character — a “butler” with a bow tie is a crowd favorite.
11. Line the Steps With Mini Jack-o’-Lanterns
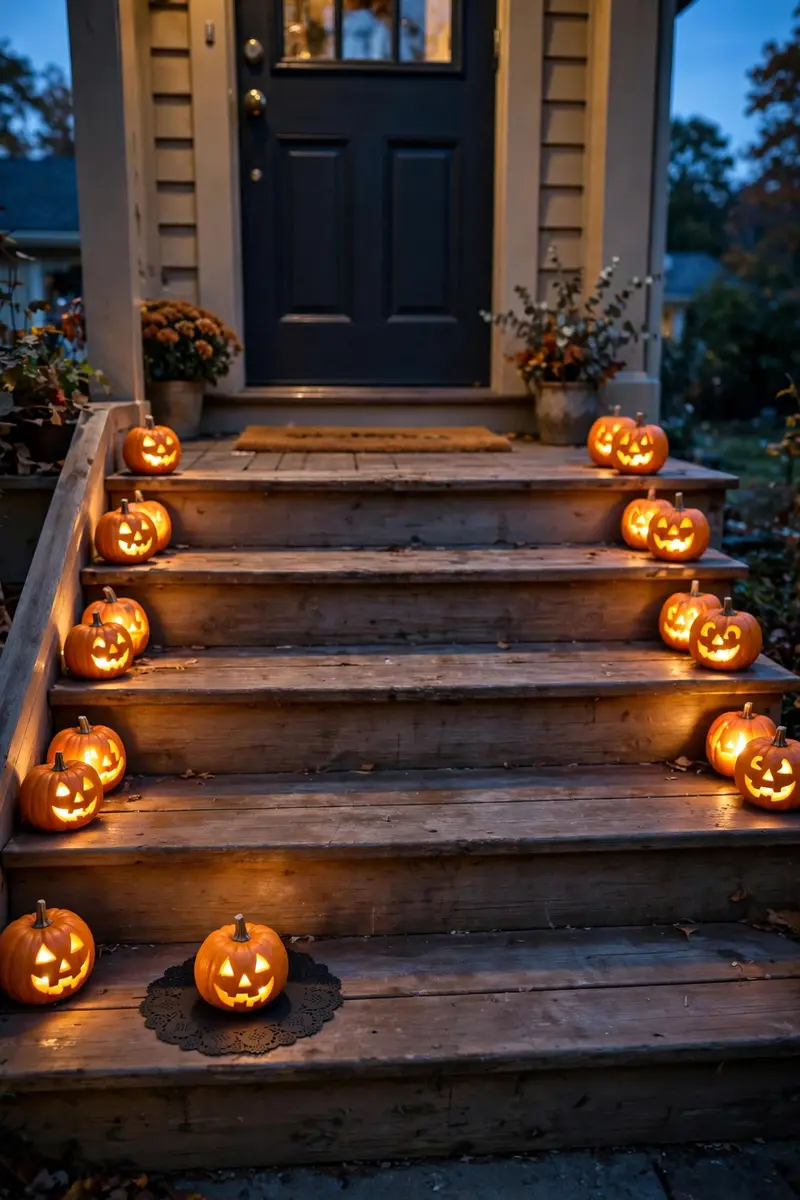
A row of glowing mini pumpkins marching up your entry steps is simple, cheap, and ridiculously charming. Individually they’re cute; lined up they become a glowing pathway that guides trick-or-treaters straight to your door and makes your entry look intentional from the street.
Materials + realistic cost: 6–10 mini pumpkins ($6–12 total), battery tea lights ($8 for a pack), or a carving tool set ($6). Total: $15–25.
Carve simple faces — dots, triangles, zigzags — or skip carving and just dot them with adhesive face decals. Tuck a tea light inside each and line them along both edges of the steps or down the walkway edge. Turn the lights on with the built-in timer so you never have to remember.
Practical tip: Place mini pumpkins on small black paper doilies or coasters so they don’t roll on smooth steps.
Variation: Paint the minis white and carve ghost faces for a softer “boo” lane instead of classic jack-o’-lanterns.
12. Hang a “Enter If You Dare” Welcome Sign
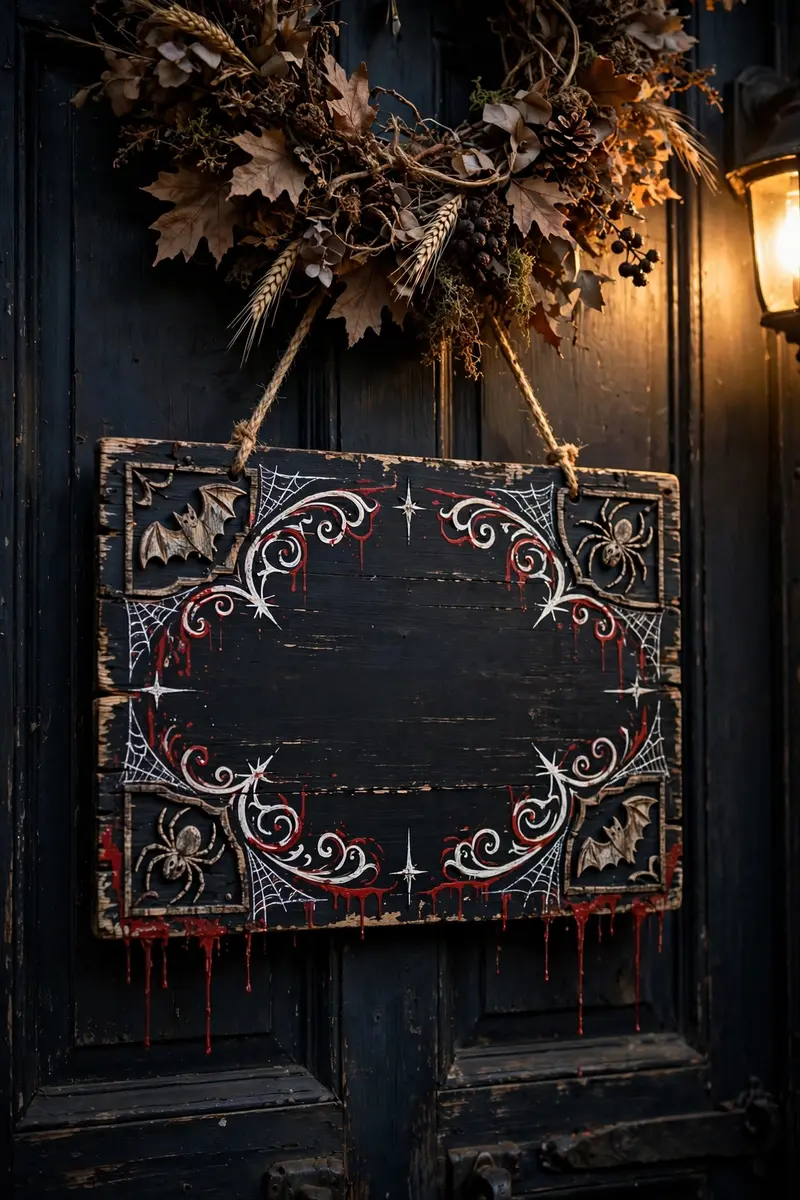
A spooky welcome sign turns your entry into a story — it gives visitors a wink before they even knock. Whether it’s a distressed wooden plaque, a chalkboard with curly lettering, or a hanging banner over the door, the words set the playful tone for everything else in your display.
Materials + realistic cost: wooden plaque ($8–14), chalkboard sign ($10–16), or DIY from a thrifted frame + paint ($6–10). Total: $6–10.
Hang the sign at eye level on the door itself, on the wall beside it, or from a hook under the porch light. If you’re making one, dry-brush black paint over a wood board, then letter your phrase in white or blood-red acrylic with a slightly shaky hand for that haunted feel. Seal outdoor signs with a clear matte spray.
Practical tip: Keep the wording short — three to five words max — so it reads from the sidewalk, not just the doorstep.
Variation: Swap the sign seasonally: “Happy Haunting” for early October, “Enter If You Dare” for Halloween week.
13. Weave Purple Fairy Lights Through an Autumn Garland
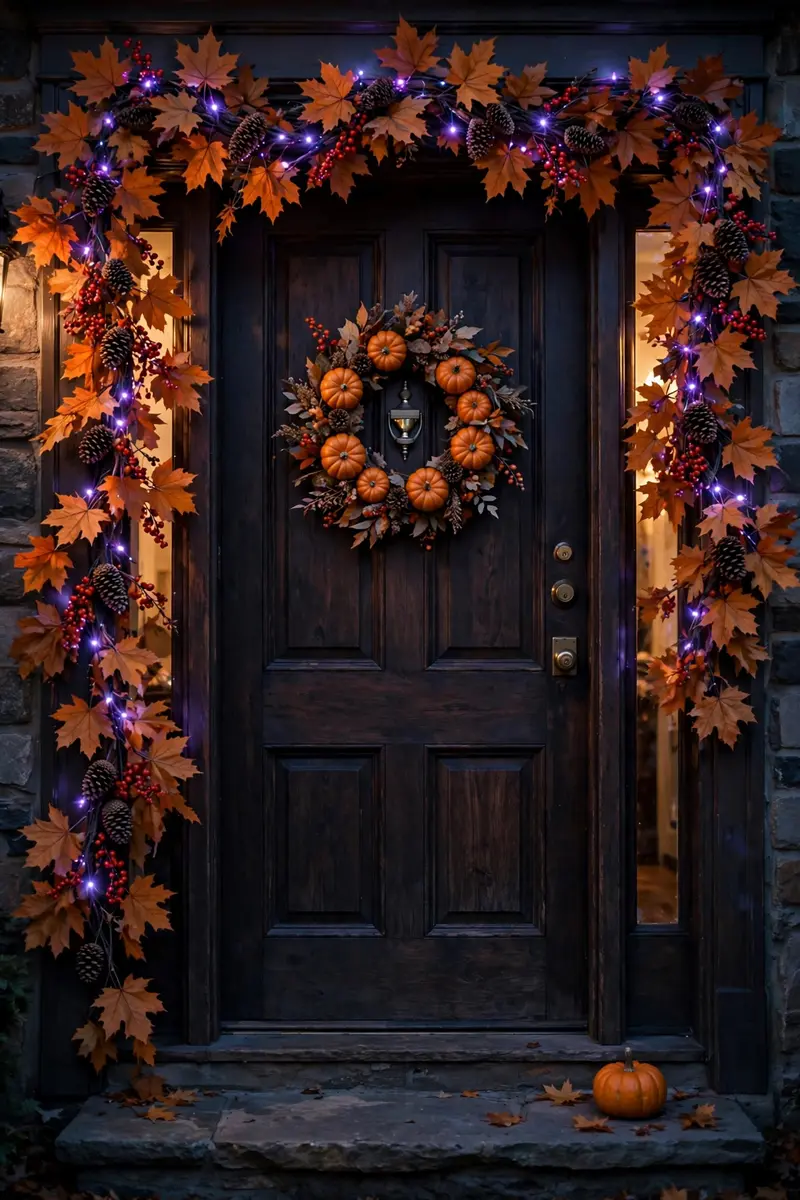
Fairy lights woven through a fall garland give your entry a warm, magical base layer that works day and night. The garland brings the autumn texture — leaves, berries, pinecones — and the lights make it glow after dark, so your doorway never looks flat once the sun goes down.
Materials + realistic cost: 6-foot fall garland ($12–20), warm-white or purple battery fairy lights ($8–12). Total: $20–30.
Wrap the fairy light strand around the garland in a loose spiral, about one loop every 6 inches, tucking the battery pack behind a pumpkin or inside the garland itself. Drape the garland over the door frame, across the console, or along the porch railing. Use the timer function so it lights up at dusk automatically.
Practical tip: Purple lights over orange-and-gold garland give you that classic Halloween glow; warm white reads cozier and more fall.
Variation: Weave the lights through a grapevine-only garland for a woodsy, witchy base instead of a colorful fall one.
14. Set a Spooky Apothecary Jar Collection on the Entry Table
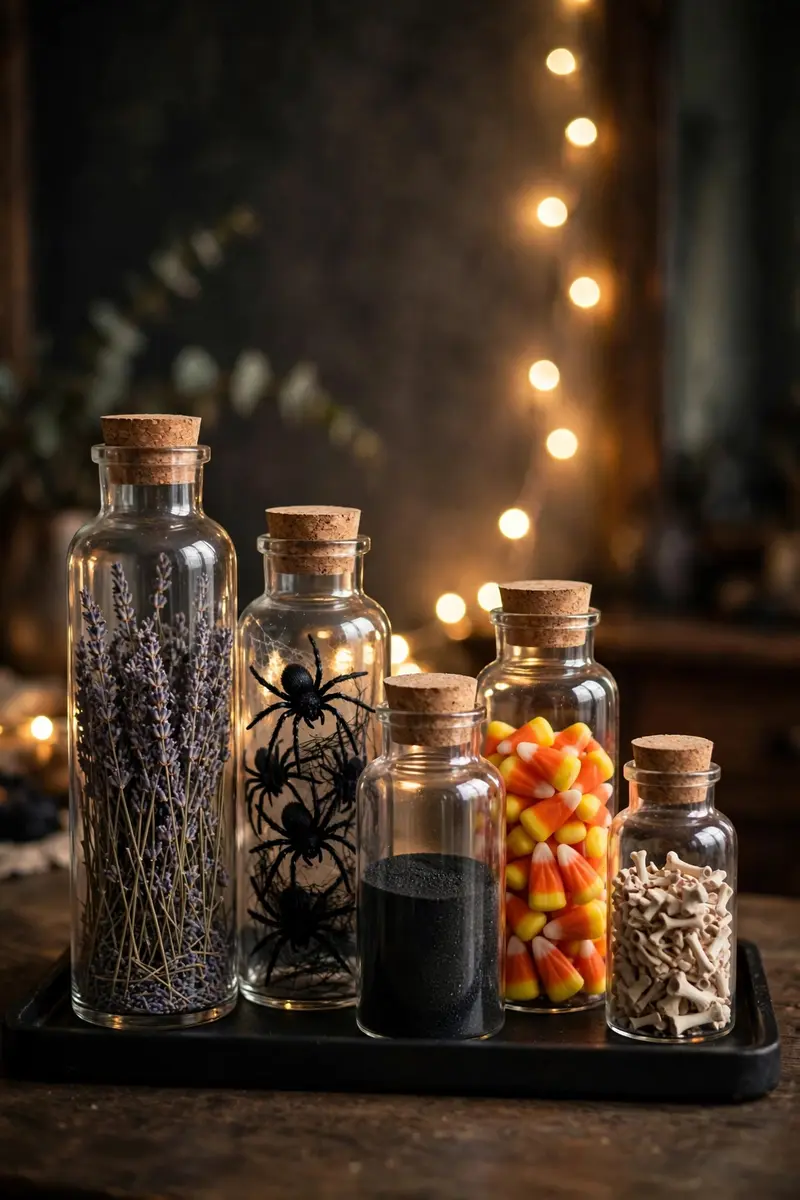
Apothecary jars filled with “potion ingredients” are the perfect indoor entryway accent — they’re compact, endlessly customizable, and they make guests lean in for a closer look. Dried herbs, fake spiders, colored water, black sand, tiny bones: each jar becomes a tiny story.
Materials + realistic cost: 3–5 glass jars or canisters (thrifted, $1–3 each), fillers — dried lavender, faux spiders, candy corn, black rice ($8–12). Total: $12–25.
Group the jars on the console or entry table in a tight cluster of odd numbers, varying heights. Label each with a tag — “Wolfsbane,” “Eye of Newt,” “Bat Wings” — written in spidery handwriting. Add a cork stopper or black lid to each for a finished look, and tuck a strand of fairy lights behind the jars so they glow.
Practical tip: Layer fillers for depth — sand on the bottom, a mid layer of moss or herbs, then the creepy topper.
Variation: Use the jars as a candy station on Halloween night — fill them with wrapped treats instead of props.
15. Lean a Decorated Witch Broom by the Door

A witch’s broom propped by the door is a charming, instantly readable Halloween symbol that takes up almost no space. Dress it up with a black bow, a few faux leaves, or a tiny “parking for witches” tag, and it becomes the kind of detail guests remember.
Materials + realistic cost: rustic broom or cinnamon broom ($10–18), black ribbon ($4), faux leaves or berries ($5). Total: $15–25.
Lean the broom handle-side-up against the wall beside the door or across a corner of the porch. Tie a wide black ribbon bow around the bristles and tuck in a few dried leaves or small faux pumpkins. If you’re using a cinnamon broom, the whole entry will smell like fall — a bonus nobody expects.
Practical tip: Secure the top of the broom to the wall with a removable hook so a gust of wind doesn’t send it clattering.
Variation: Lean two brooms crossed like an X with a small “Witch Parking” sign between them for a playful vignette.
16. Send Bats Climbing Up the Entryway Wall

Bat decals climbing from the door frame up the wall or across the ceiling corner add motion and mischief to your entry. Because they work in 2D, they’re perfect for small foyers where floor space is precious — all the spooky, none of the clutter.
Materials + realistic cost: pack of 3D bat decals or wall stickers ($8–14), removable adhesive dots ($4). Total: $8–18.
Start with a few large bats near the door frame and let the swarm get smaller and sparser as it “flies” up the wall — the size gradient sells the movement. Bend the wings of 3D bats slightly forward so they cast little shadows. Keep them high enough that guests won’t brush against them.
Practical tip: Plan the swarm path with painter’s tape first — a gentle S-curve reads more natural than a straight line.
Variation: Use black paper bats on the OUTSIDE of the front door with a wreath for a graphic, high-contrast look.
17. Weave a Spiderweb Across the Entry Corner
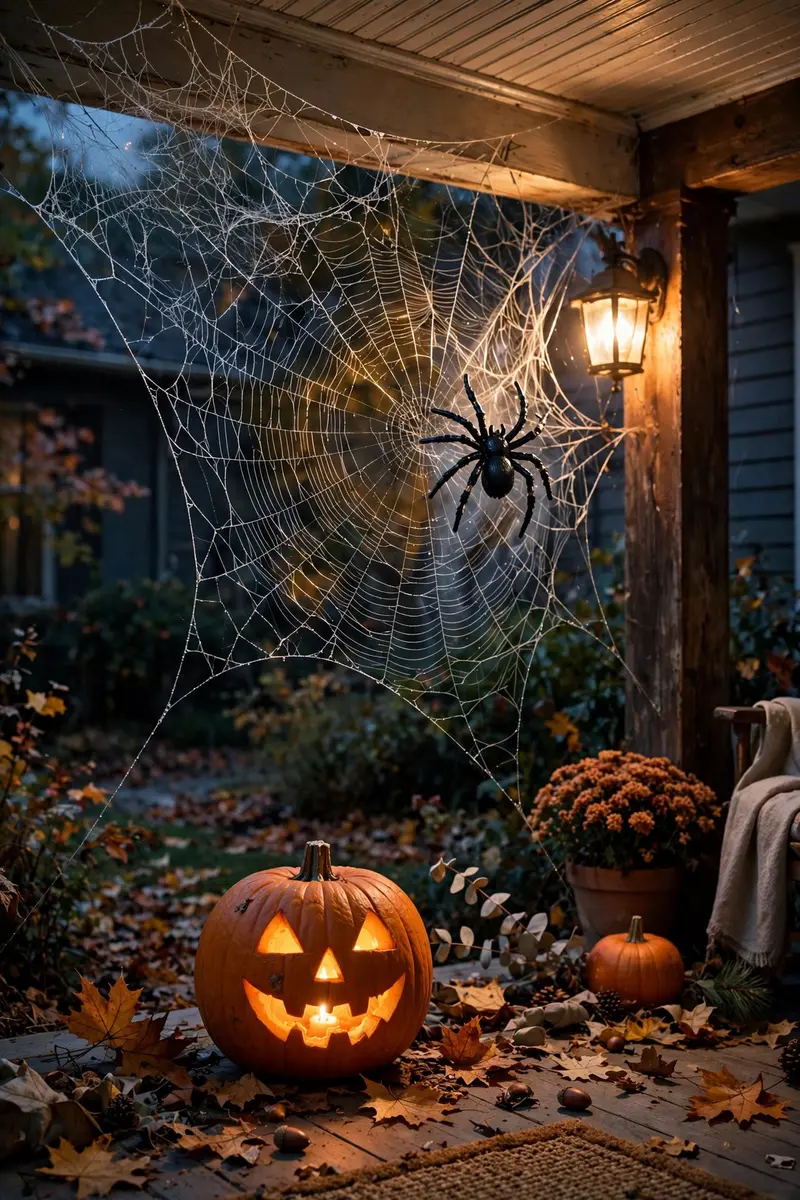
A giant spiderweb stretched across the top corner of your entry is peak Halloween for almost zero dollars. Whether you use the bagged stretchy webbing or spin one from white yarn, the web fills vertical dead space beautifully and makes any corner look instantly haunted — especially with a big spider sitting in the middle.
Materials + realistic cost: stretchy spiderweb bag ($3–5) or white yarn ($4), large plastic spider ($3–6). Total: under $10.
Stretch the webbing between two points — the door frame corner, the porch ceiling, the console mirror — pulling it thin so it reads delicate, not clumpy. For a yarn web, tie radial lines first, then spiral the yarn around them. Perch the spider slightly off-center; off-center always looks more natural.
Practical tip: A light mist of spray starch keeps stretchy webbing from sagging overnight in humid air.
Variation: Weave tiny battery fairy lights into the web for a glowing “caught in the web” effect after dark.
18. Add Floating Candles to the Foyer Ceiling

Floating candles — the kind that look straight out of a wizarding hall — turn an ordinary foyer ceiling into something magical. Suspended at staggered heights from clear fishing line with flickering LED flames, they cast a warm, moving glow that makes the whole entry feel enchanted the moment you walk in.
Materials + realistic cost: set of floating LED candles with wands or remotes ($15–25), clear fishing line ($4). Total: $20–30.
Hang 6–10 candles in a loose cluster over the entry area at heights between 7 and 9 feet, staggering them by 4–6 inches so they read as a floating swarm. Attach each line to a small ceiling hook and the candle’s top ring. Turn them on with the remote just before guests arrive.
Practical tip: Mix candle heights but keep the flames at least a foot below the ceiling so the “flame” light pools nicely overhead.
Variation: Pair the candles with a few floating witch hats from idea 3 for a full enchanted-entry moment.
19. Build an Eerie Portrait Gallery on the Entry Wall
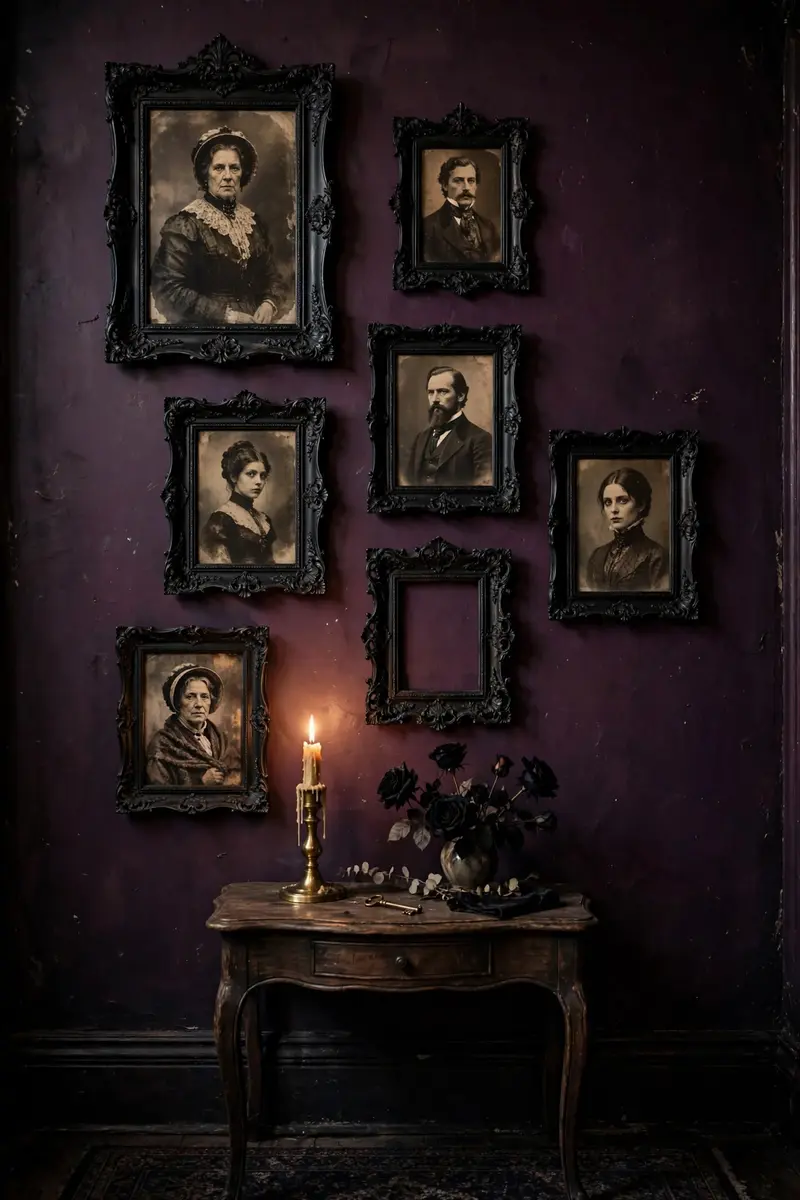
Swap your usual entryway art for “haunted portraits” and your wall becomes the spookiest part of the house. Printable eerie portraits — Victorian figures with hollow eyes, creepy landscapes, vintage Halloween prints — slipped into your existing frames take about ten minutes and cost almost nothing.
Materials + realistic cost: printable haunted portraits (free–$8 online), existing frames, removable mounting squares ($4). Total: under $12.
Print 3–5 portraits in sepia or black-and-white, trim to fit your frames, and hang them in the same arrangement you already had — the familiarity makes the swap delightfully jarring.
Practical tip: Keep one frame conspicuously EMPTY with a small plaque reading “Reserved” — it’s the detail people talk about.
Variation: Lean into the vintage look with thrifted ornate gold frames — spray-painted black, they read perfectly haunted.
20. Pot Mums and Kale in Halloween Planters
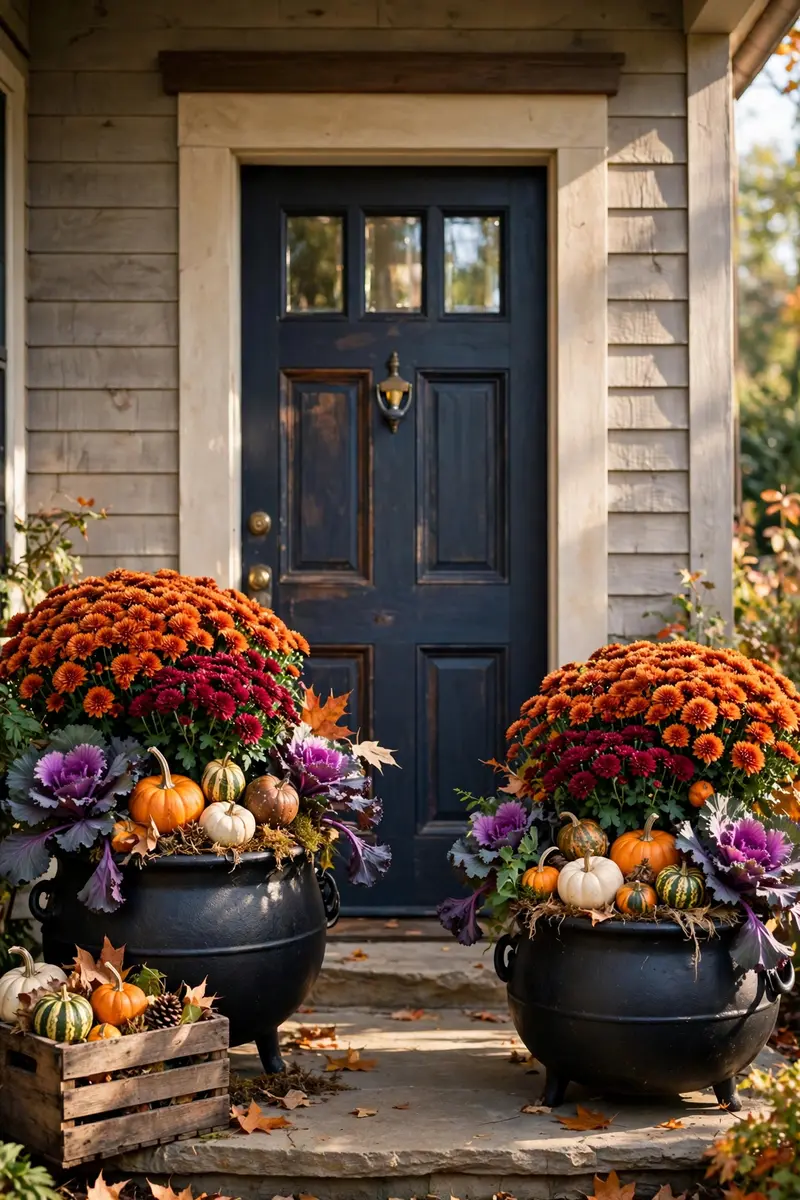
Mums are the fall porch classic, and they pull double duty for your Halloween entry. Potted in black cauldrons, galvanized buckets, or rustic wooden crates, deep-orange and burgundy mums add living color that softens all the black and makes your entry feel abundant rather than stark. Pair them with ideas from our halloween porch decor ideas guide for a fully styled front.
Materials + realistic cost: 2–4 potted mums ($5–10 each), cauldron planters or buckets ($8–15 each), ornamental kale for contrast ($4 each). Total: $30–70.
Place a large mum on each side of the door in matching black cauldron planters, and tuck ornamental kale or purple fountain grass around the bases for texture contrast. Water them well — October sun can still be strong — and deadhead spent blooms so they look fresh through Halloween.
Practical tip: Choose mums that are mostly buds, not fully open — they’ll peak right around Halloween week.
Variation: Nestle a few mini pumpkins and gourds into the planter soil for a harvest-meets-Halloween look.
21. Stack Cornstalks and Hay Bales Beside the Door

Cornstalks and hay bales give your entry that farmhouse-harvest backbone that makes Halloween decor feel grounded and abundant. They add height, texture, and a golden color that balances all the black — plus they double as display stands for pumpkins, lanterns, and skeletons.
Materials + realistic cost: 2 bundles of cornstalks ($8–14 each), 1–2 small hay bales ($8–12 each). Total: $25–40.
Tie cornstalk bundles to porch columns or the door frame with twine, fanning them slightly outward. Set a hay bale on each side of the steps and style the tops — a pumpkin stack on one, a lantern and a small skeleton on the other. Keep everything a foot clear of the walkway so trick-or-treaters don’t snag.
Practical tip: Spray cornstalks with clear matte sealer to keep them from shedding all over your porch for a month.
Variation: Wrap the hay bales in black fabric or drape them with creepy cloth to turn harvest into haunted.
22. Place a Candy Station for Trick-or-Treaters

A dedicated candy station — apothecary jars and a cauldron bowl of treats styled on a small table by the door — turns your entry into the house every kid wants to visit. It’s decor AND function: the jars look great all month, then do their real job on Halloween night.
Materials + realistic cost: small side table or crate ($0–15, use what you have), cauldron candy bowl ($10–15), glass jars ($8–12), wrapped candy ($10–20). Total: $30–60.
Set the table just inside or beside the door where it’s sheltered but visible. Fill jars with wrapped candy at different heights — risers or stacked books underneath create the layers. Add a small sign: “Take One (or Two, We Won’t Tell).” Keep a backup candy stash hidden so you can refill between rushes.
Practical tip: Keep unwrapped or homemade treats off the station — pre-wrapped only keeps every parent comfortable.
Variation: Add a “trick” jar with fake spiders or temporary tattoos alongside the candy for kids who’ve had enough sugar.
23. Frame the Door With a Balloon Garland Arch
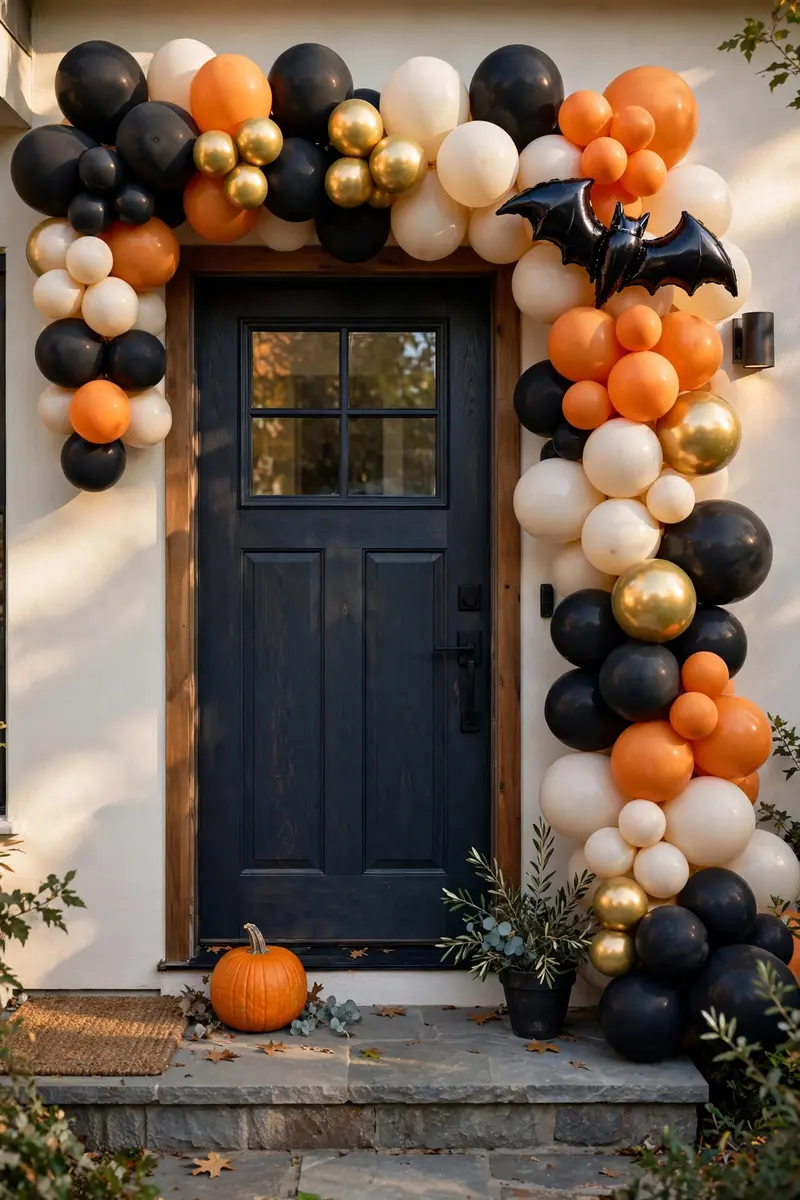
A balloon garland arch in black, orange, cream, and metallic gold framing your front door is the boldest, most photographable entry idea on this list. It reads festive and modern — more “Halloween party” than “haunted house” — and it takes an ordinary door from flat to full celebration.
Materials + realistic cost: balloon garland kit with 100+ balloons in Halloween colors ($15–25), balloon pump ($8), command hooks ($6). Total: $30–40.
Assemble the garland on the decorating strip following the kit’s pattern — alternate sizes and colors for a full, organic look. Hang it in an arch over the door frame or sweep it asymmetrically up one side using removable hooks. Add a few mylar bat or ghost balloons as accents.
Practical tip: Build the garland the DAY of your party or Halloween — latex balloons start to dull and deflate after 2–3 days outdoors.
Variation: Go chic with an all-black-and-gold garland for a “spooky elegant” party entry instead of classic orange.
24. Welcome Guests With a Black Cat and Ghost Duo

A plush black cat beside a stack of pumpkins plus a couple of friendly fabric ghosts gives your entry a cute-spooky personality that works for all ages. It’s the sweet spot between festive and frightening — adorable in daylight, gently glowing at night.
Materials + realistic cost: plush black cat ($10–18), white fabric + stuffing for DIY ghosts ($8–12), or pre-made hanging ghosts ($10–15). Total: $20–35.
Perch the black cat on the pumpkin stack or beside the door like a little guardian. Hang the ghosts from the porch ceiling or a nearby branch with fishing line so they sway in the breeze. Tuck battery tea lights into the ghost fabric for a soft glow.
Practical tip: Give the cat a tiny orange bow tie — it photographs adorably and signals “friendly, not feral” to nervous little visitors.
Variation: Swap the cat for a plush owl or raven if you want a slightly more mysterious familiar.
25. Add a Low Fog Machine at the Threshold

Nothing says haunted like fog rolling across your entry as guests approach. A small ground-fog machine at the threshold turns your doorway into a movie scene for Halloween night — and it’s far cheaper and easier than it sounds.
Materials + realistic cost: small fog machine ($30–50), fog juice ($10–15), outdoor-rated extension cord ($10). Total: $50–75.
Set the machine behind a hay bale, planter, or pumpkin so it’s hidden, aimed low across the entry. Run it in short bursts — 30 seconds on, a few minutes off — so the fog billows without becoming a wall. Keep the nozzle pointed AWAY from the walkway so nobody walks blind into a step.
Practical tip: Test it on a dry evening first — wind direction determines where the fog goes, and you want it drifting across, not into, the path.
Variation: Add a color-changing LED light aimed at the fog for an eerie green or purple glow effect.
26. Hide a Motion-Activated Sound Module Behind the Door
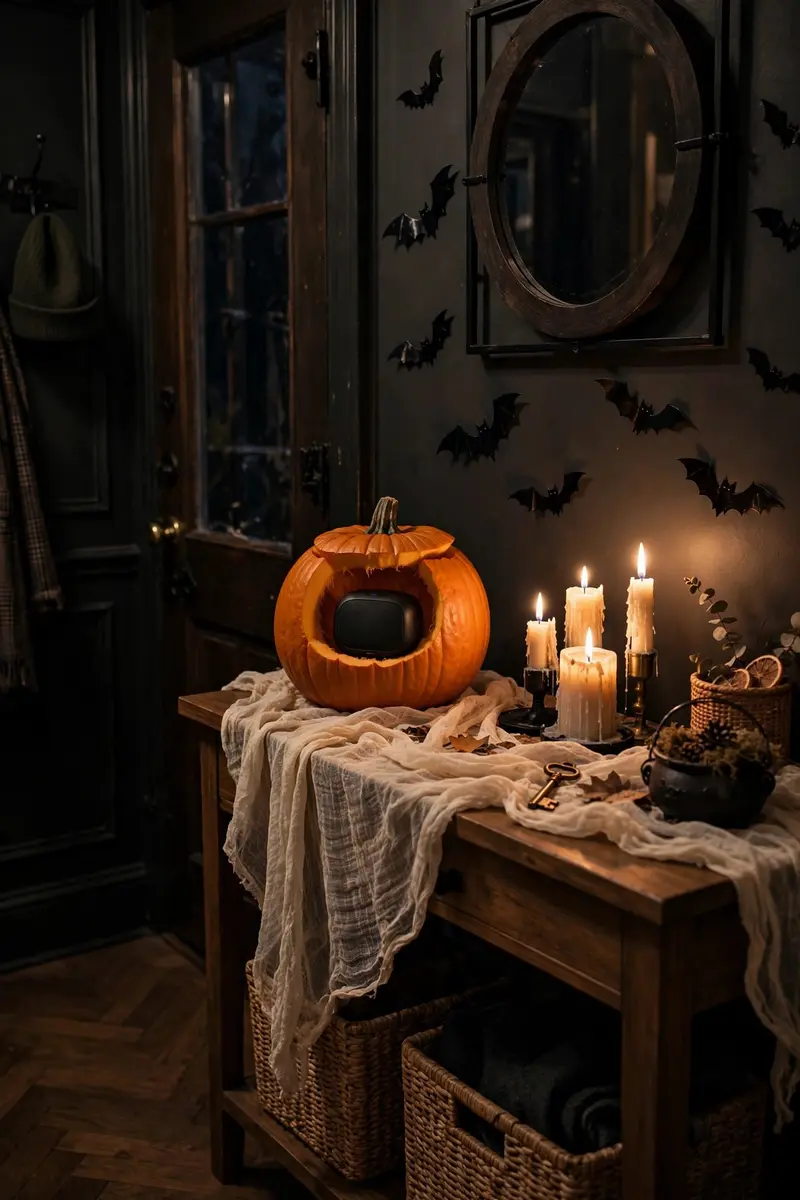
Sound is the secret weapon of a spooky entry — a motion-activated module that creaks, cackles, or whispers when someone approaches adds a layer of scare no visual can match. It’s a tiny detail with an outsized effect, and guests never see it coming.
Materials + realistic cost: motion-activated Halloween sound box ($12–20), or a small Bluetooth speaker + phone with a sound app ($0 if you own one). Total: $0–20.
Hide the speaker behind the door, under the console, or inside a pumpkin near the walkway — out of sight is essential. Choose sounds that match your vibe: creaking doors and wind for elegant-spooky, cackles and screams for full haunted. Set the sensitivity so it triggers at 6–8 feet, not at every passing car.
Practical tip: Keep the volume at “startling, not traumatizing” — about conversation level is perfect for families with small kids.
Variation: Use a doorbell chime that plays a spooky tune — it replaces your normal ding-dong for the whole month.
27. Try a Bat-Embellished or Broomstick Wreath Instead
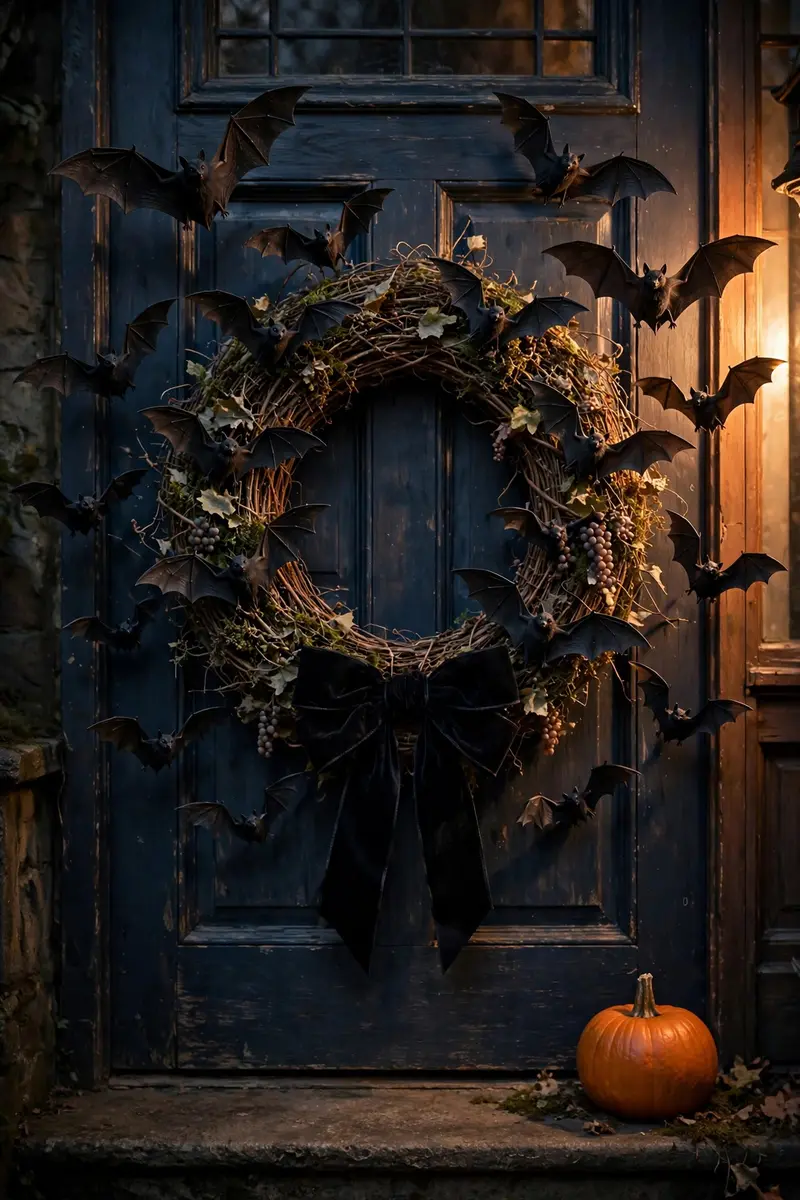
If the classic round wreath feels expected, try its edgier cousins: a grapevine wreath swarming with bats, or a broomstick wreath with bristles fanning outward. Both use the same door real estate but read more creative and more Halloween-specific.
Materials + realistic cost: grapevine wreath ($10–15), bat cutouts or picks ($6–10); OR small decorative broom ($8–12), ribbon and florals ($8). Total: $15–30.
For the bat wreath, hot-glue 15–20 black bats across the grapevine at varied angles so they look like they’re swarming. For the broomstick wreath, secure the broom diagonally on a wreath ring, fan the bristles, and dress it with black ribbon, dried berries, and a tiny hanging “witch parking” tag.
Practical tip: Hang bat wreaths slightly lower than usual — the swarm reads best at eye level, not above it.
Variation: Combine both — a broomstick wreath WITH bats swarming off the bristles is a showstopper.
28. Style a Halloween Umbrella Stand Vignette
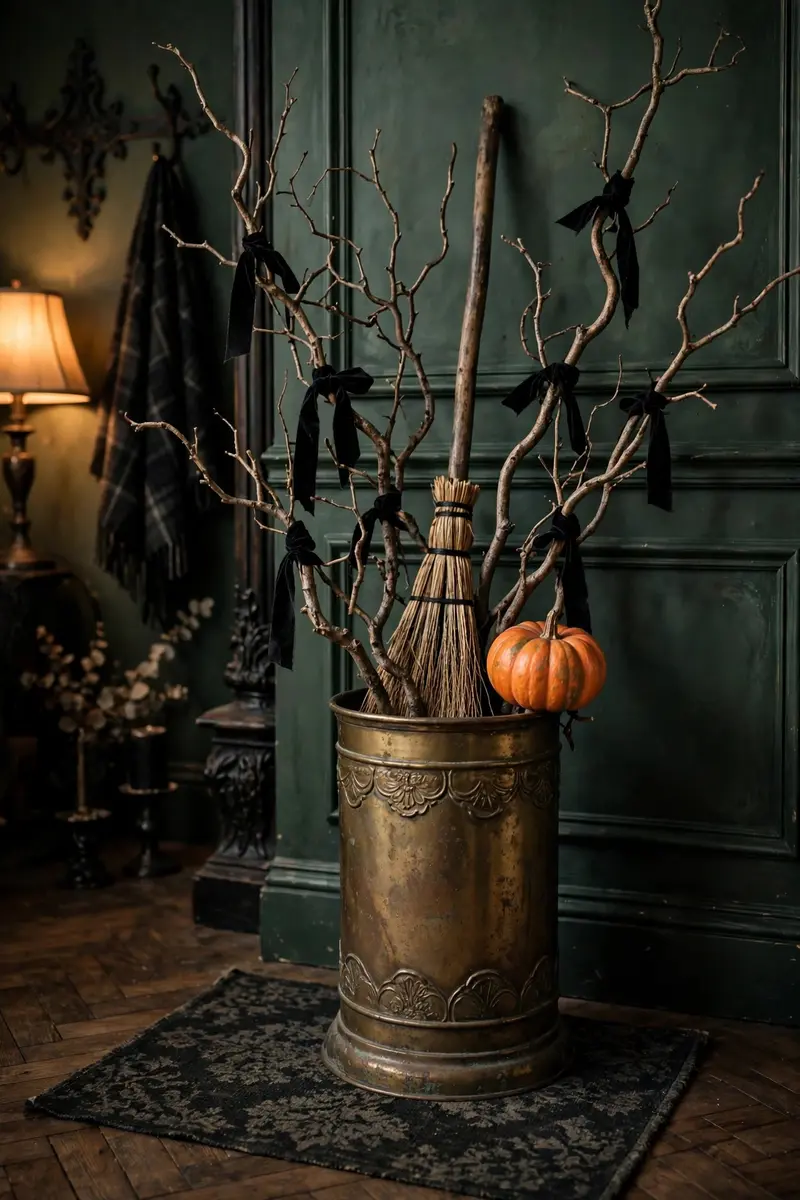
The humble umbrella stand is an underused styling opportunity. Fill yours with black taper “canes,” a witch broom handle-down, or bare twisted branches, and it becomes a quirky vertical accent that fills that awkward corner by the door.
Materials + realistic cost: umbrella stand you own ($0) or thrifted ($8–15), bare branches (free), black ribbon ($4), mini pumpkin ($3). Total: $0–20.
Stand 3–5 bare branches in the umbrella stand, twisting them into a slight spiral. Wrap black ribbon around a couple of stems and perch a mini pumpkin on the rim of the stand. If you’d rather, drop a broom in handle-first so the bristles fan out at the top.
Practical tip: Weight the stand with a bag of sand at the bottom if it’s top-heavy — branches catch wind indoors too.
Variation: Use the stand as a “candy cane” holder on Halloween night — fill it with wrapped treat bags for grab-and-go trick-or-treaters.
29. Set a Skeleton-Hands Serving Tray on the Console

Skeleton hands holding a tray — of candy, candles, or tiny pumpkins — is the kind of macabre-chic detail that makes an indoor entry feel like a haunted mansion parlor. It’s small, it’s weird, and it’s exactly the conversation piece guests pick up and examine.
Materials + realistic cost: pair of skeleton hands ($8–12), small tray or charger plate ($6–10). Total: $15–22.
Position the skeleton hands palms-up on the console, resting the tray across them so it looks like they’re presenting it. Fill the tray with wrapped candy, a cluster of tea lights, or a few mini pumpkins and black berries. Angle the whole thing slightly — dead-center looks staged; a slight tilt looks discovered.
Practical tip: Glue the hands to the tray’s underside with a dot of hot glue so the whole piece moves as one when you dust.
Variation: Use the tray as your key dish — skeleton hands holding your everyday keys is delightfully gothic year-round.
30. Wash the Entry in Purple Uplighting

Colored uplighting is the fastest evening transformation you can buy: one purple or orange LED wash light aimed up the wall behind your console — or up the front of your house — turns an ordinary entry into a glowing Halloween scene after dark. It’s the trick professional decorators use, and it works on any budget.
Materials + realistic cost: LED color-changing uplight or floodlight ($15–25), or a colored bulb in an existing porch fixture ($6–10). Total: $6–25.
Place the light low — on the floor behind the console, or at the base of the porch wall — angled upward so the color washes the wall and ceiling. Purple reads spooky-elegant; orange reads classic Halloween; green reads full haunted house. Put it on a timer or smart plug so it comes on at dusk.
Practical tip: Uplight ONE surface, not everything — a single washed wall looks dramatic; washing every wall looks like a nightclub.
Variation: Layer two colors — purple uplight plus warm amber fairy lights — for depth that a single color can’t give.
How do I make my entryway look spooky for Halloween without it looking tacky?
Start with a tight color palette — black plus ONE accent color like orange, purple, or blood red — and stick to it across every piece. Choose lighting as your main tool (lanterns, fairy lights, candles) rather than piling on props, and give each item breathing room. One dramatic wreath plus layered lighting beats twenty random decorations every time.
What’s the easiest Halloween entryway decoration for renters or small spaces?
Layered doormats, bat wall decals, and floating witch hats or candles are the easiest wins — no damage, no floor space needed, and they come down in minutes. A single statement wreath on a removable over-door hook also makes a huge impact with zero commitment.
Can I use real pumpkins inside my entryway — will they last?
Yes, uncarved pumpkins last 4–8 weeks indoors, so they’re perfect for entryway styling all October. Keep them away from direct heat vents and check for soft spots weekly. Carved pumpkins only last 3–5 days, so save carving for the week of Halloween — or use faux pumpkins for a zero-maintenance display.
How do I keep my Halloween entryway safe for kids and trick-or-treaters?
Keep the walkway completely clear of cords, props, and tripping hazards; use flameless LED candles instead of real flames anywhere near the path; secure anything top-heavy so wind can’t knock it over; and keep sound effects at a startling-but-friendly volume. Save the truly scary stuff for inside, past the candy.
What Halloween entryway decor is trending in 2026?
The big 2026 trend is “spooky elegance” — a chic, moody entryway look going viral on Pinterest: gothic black wreaths, layered buffalo-plaid-and-coir doormats, black gauze drapery, and midnight-glow lanterns. Floating witch hats and enchanted candlelight are also huge indoors, replacing the old plastic-everything look.
Make Your Entry the One Everyone Remembers
Thirty ideas, one unforgettable entryway — and you don’t need them all. Pick the three or four that made you smile, start with the door (wreath + layered doormat + lighting), and build from there. If you found an idea you love, save this post to your Halloween board on Pinterest so it’s there when the bins come out — and if you’re styling the whole exterior too, our halloween outdoor decor ideas guide has you covered. Happy haunting!