
30 Stunning Halloween Door Decor Ideas That Wow Guests
Your front door is the first thing trick-or-treaters, party guests, and neighbors see — which makes it the single most important surface to dress up for the season. These 30 halloween door decor ideas cover every style and budget: goofy monster faces, elegant gothic wreaths, kid-friendly ghosts, dramatic full-door covers, and clever DIYs that cost less than a pizza. Whether you want full haunted-house drama or a chic autumn look that survives past October 31, you will find a look here you can copy this weekend.
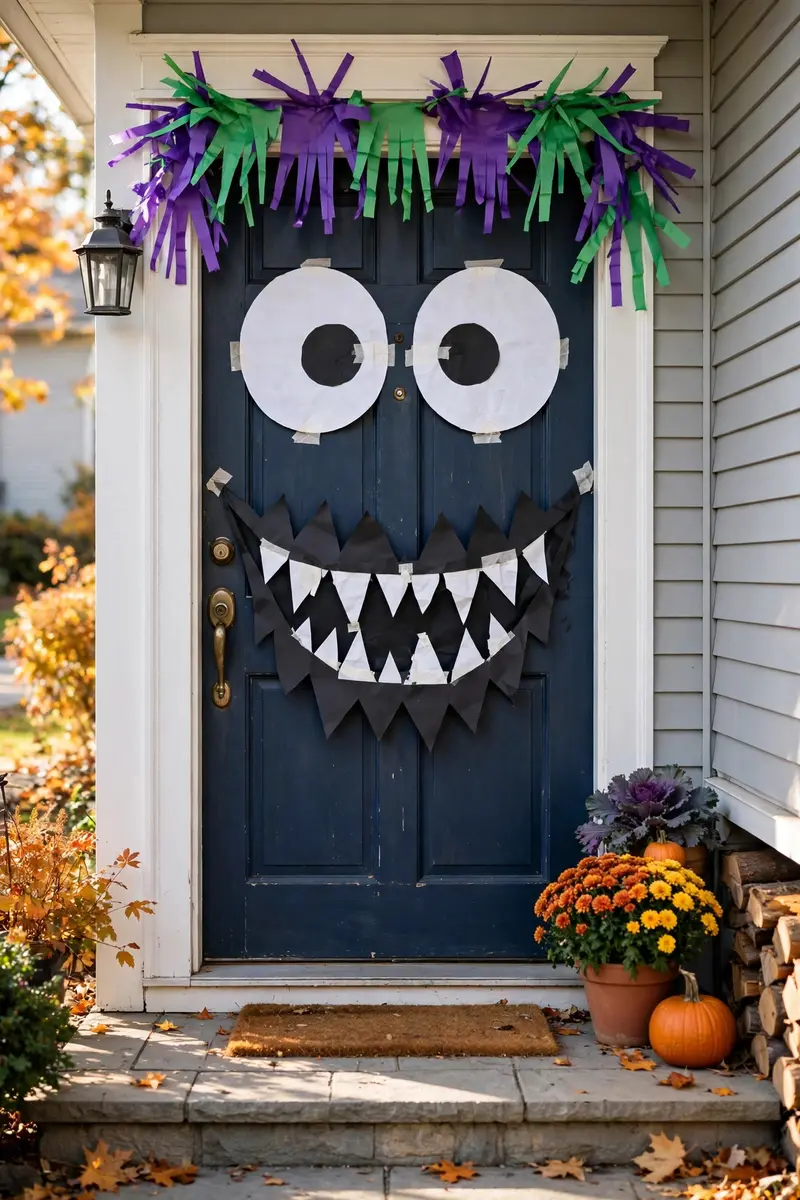
1. Monster-Face Door: The Boldest of These Halloween Door Decor Ideas
Turn your entire door into a grinning monster face and watch kids slow down to stare. It works because scale does the talking — two giant eyes, a toothy grin, and wild "hair" read clearly from the street and photograph brilliantly.
Materials & cost: White and black cardstock or poster board ($5–8), big googly eyes from a craft store ($4–6), colored construction paper for teeth and hair ($3), painter's tape ($4). Total: about $12–20.
Tape the eyes and eyebrows near the top of the door, arrange jagged paper teeth around a wide "mouth" cut from black paper in the middle, and stick spiky strips of purple or green paper along the top edge for monster hair. Stand back across the street to check the face reads clearly, then nudge pieces until it does.
Pro tip: Use painter's tape or removable adhesive dots instead of regular tape so nothing peels your paint.
Variation: Give the monster a cyclops look with one oversized eye, or add a red tongue hanging out of the mouth for extra silliness.
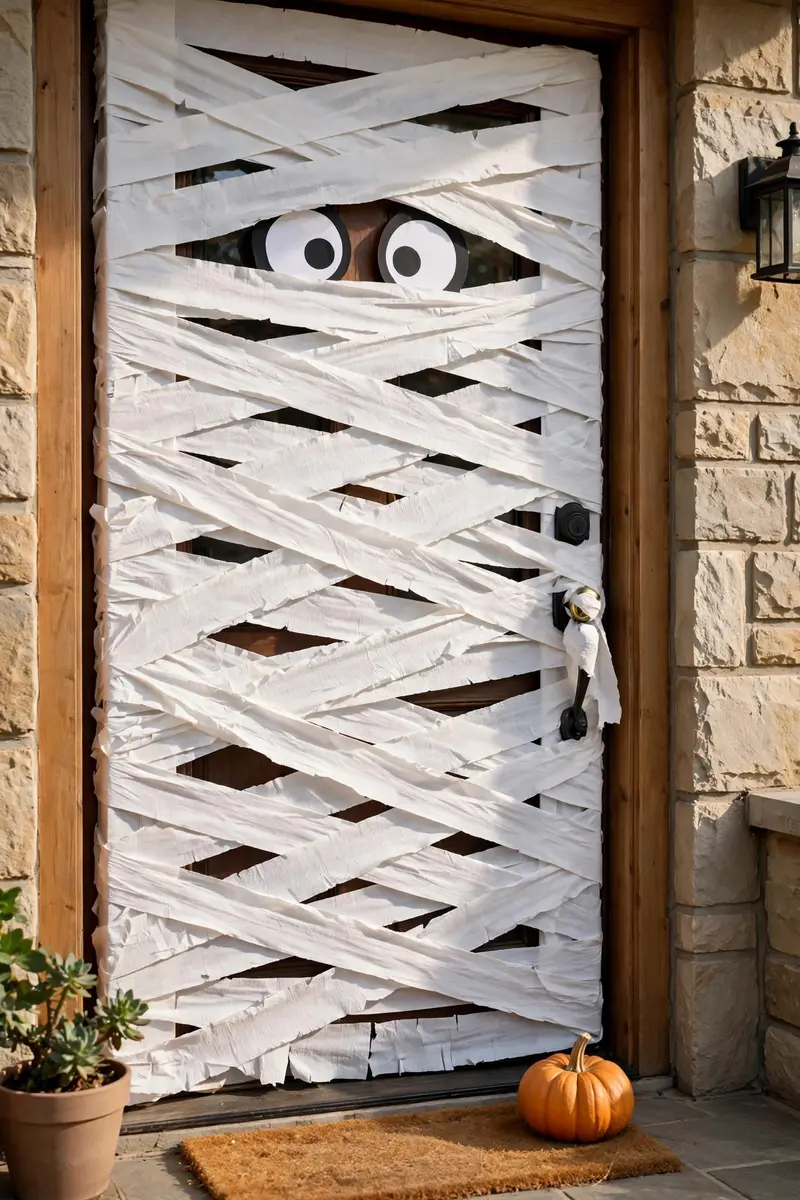
2. Mummy-Wrapped Door
Wrap your door like a mummy for an instant Halloween costume for your house. White streamers or gauze crisscrossed over the door create that classic wrapped look, and two oversized eyes peeking through the bandages make it genuinely charming rather than creepy.
Materials & cost: 3–4 rolls of white crepe-paper streamers ($6–8), two large paper eyes or printable eyeballs ($3), painter's tape ($4). Total: about $12–15.
Start at the top corner and wrap streamers diagonally across the door in both directions, overlapping loosely for that authentic mummy texture, and tape the ends on the inside edge of the door. Finish by sticking the eyes near the peephole so they seem to stare out at visitors.
Pro tip: Leave the doorknob and deadbolt accessible — wrap around the hardware, not over it, or you will fight your own mummy every time you come home.
Variation: Drape the streamers slightly torn and add gray cheesecloth for a weathered, ancient-mummy feel.
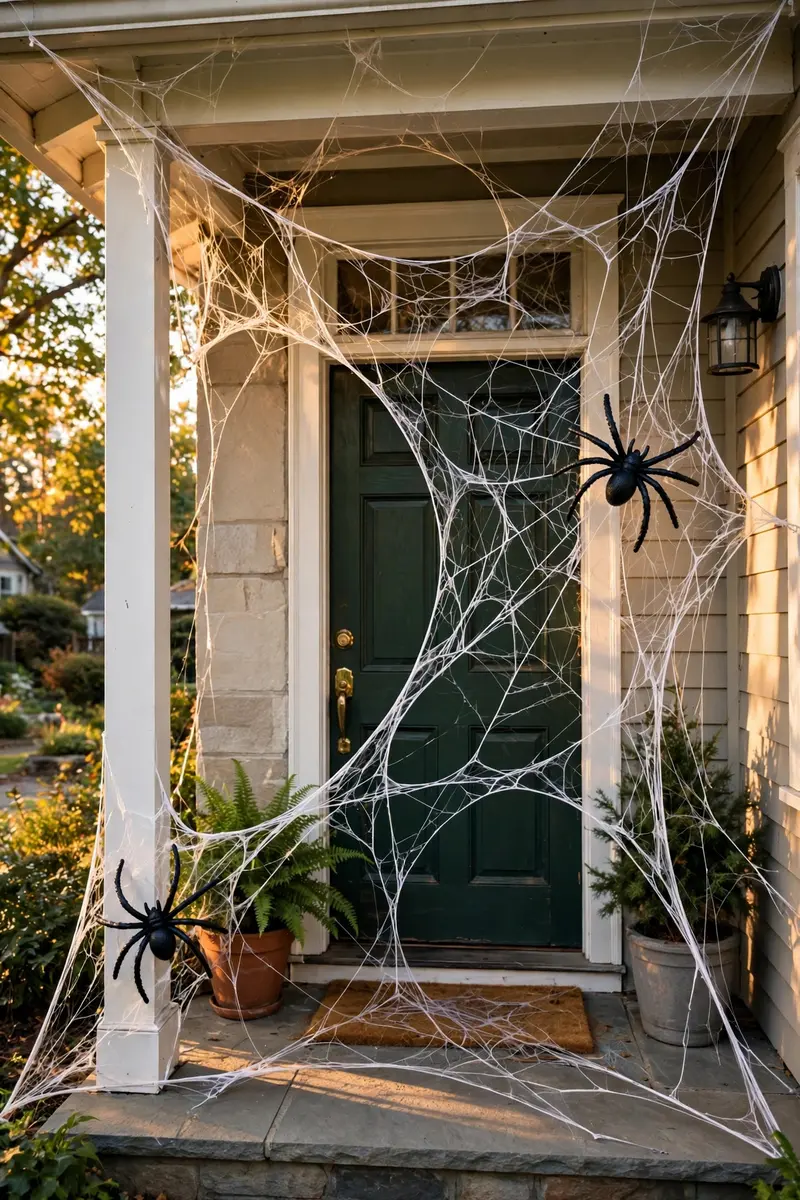
3. Spooky Stretched Spider Web Door
A giant stretched spider web turns your door into the entrance of a haunted cave. White stretchy webbing pulled taut from corner to corner creates depth and drama, and a few oversized spiders make the whole thing pop.
Materials & cost: Bag of stretchy spider webbing ($6–10), 2–3 large plastic spiders ($5–8), adhesive hooks or thumbtacks ($4). Total: about $15–22.
Stretch a thin rope or yarn from the top corners to the bottom to form the web's spokes, then weave the stretchy webbing in concentric circles, pulling and stretching it so it looks delicate, not clumpy. Anchor the corners firmly so wind cannot undo your work.
Pro tip: Keep the web at least a foot clear of the door handle so nobody gets tangled opening the door.
Variation: Weave small battery-operated fairy lights through the web for a glowing Halloween night effect.
4. Bat Flight Path Across the Door
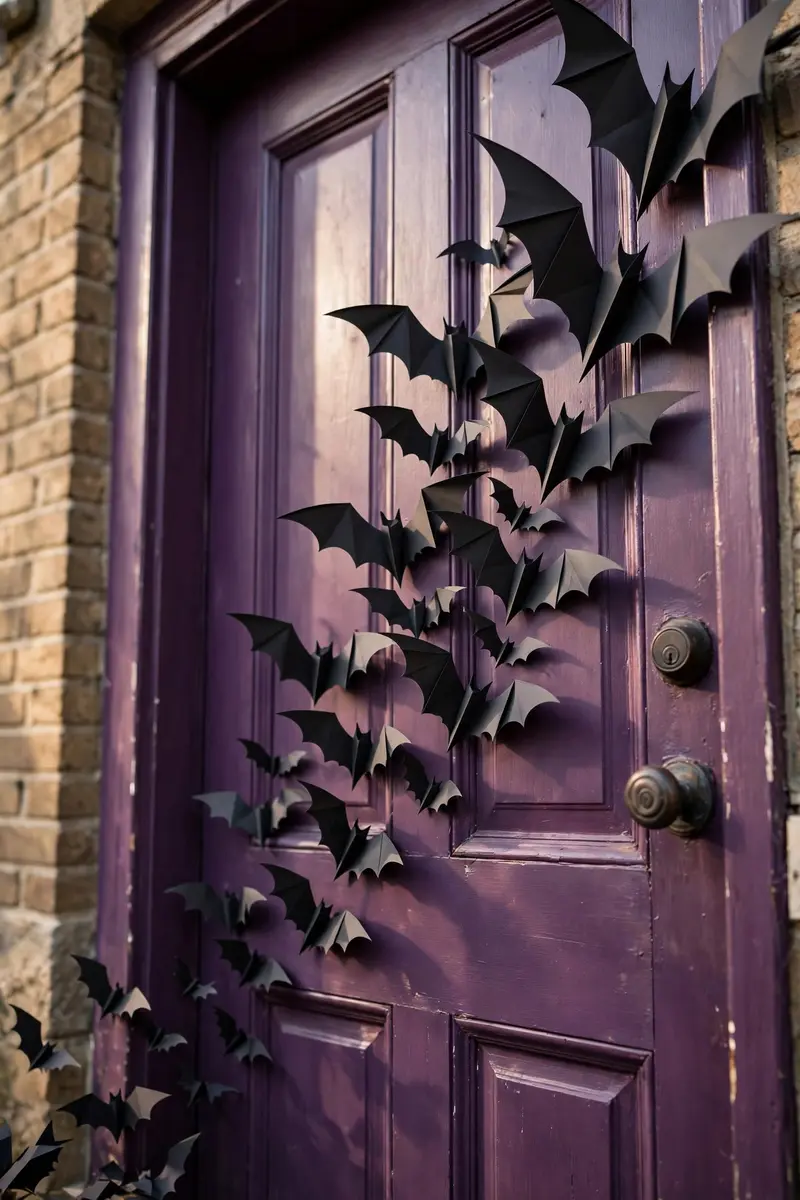
A swarm of paper bats "flying" up and outward across your door creates movement and spooky elegance in one. It is one of the cheapest looks here, and the flight-path arrangement — small bats low, bigger ones rising toward the corner — gives it a designed feel rather than random clutter.
Materials & cost: Black cardstock ($5), scissors, removable adhesive dots ($4), optional free printable bat template. Total: about $8–12. HGTV's own bat door tutorial shows just how high-impact paper bats can be — cover your front door in a spooky swarm of bats for proof.
Cut 25–40 bats in three sizes, score the wings so they fold slightly for a 3D flapping effect, then start with the smallest bats near the bottom corner of the door and graduate to larger ones swooping toward the top opposite corner. Step back and squint: gaps should feel intentional, not empty.
Pro tip: Score the center of each bat and fold the wings up slightly — flat bats look like stickers, folded ones look alive.
Variation: Use deep purple or metallic gold bats for a gothic-glam twist on the classic black swarm.
5. Classic Orange-and-Black Halloween Wreath
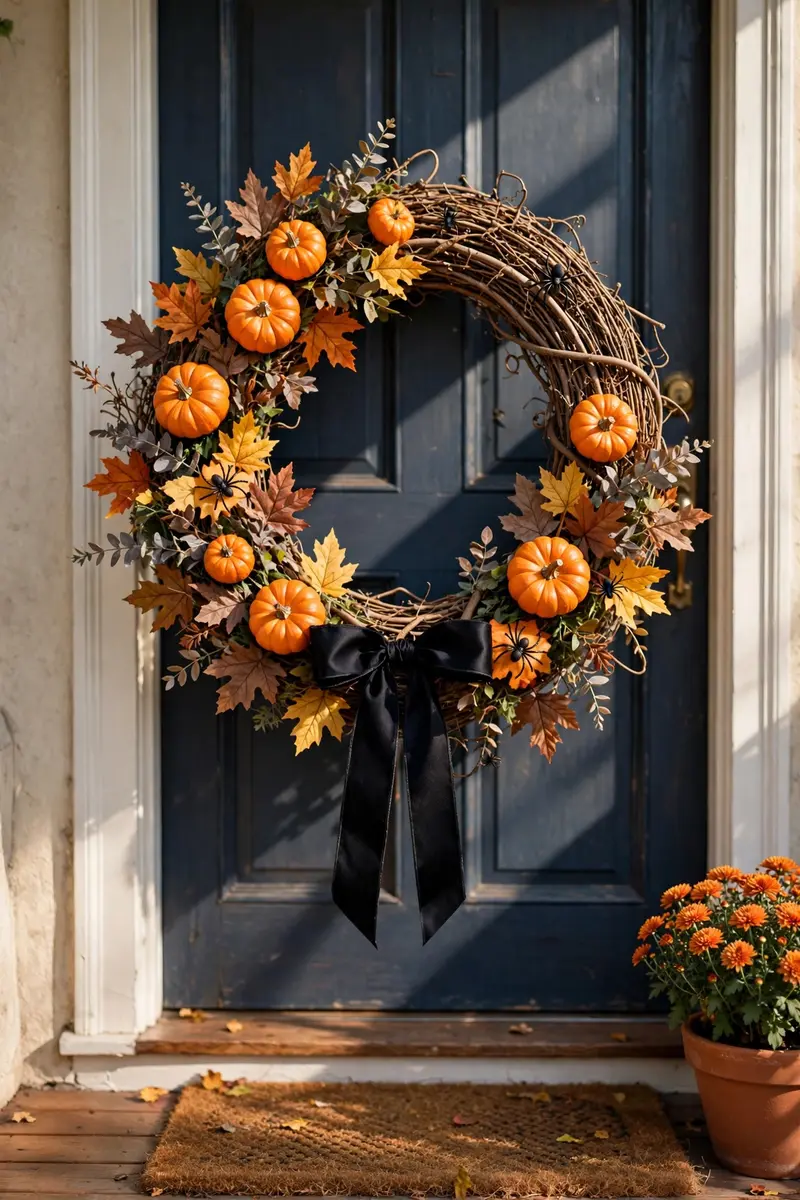
Nothing says Halloween at the front door like a wreath in orange and black. Mini pumpkins, faux autumn leaves, black ribbon, and a few black spiders on a grapevine base give you a polished seasonal statement in under an hour.
Materials & cost: Grapevine wreath base ($8–12), faux leaves and mini pumpkins ($10–15), black ribbon ($3), plastic spiders ($3). Total: about $24–33.
Hot-glue larger elements (pumpkins, a bow) to the base first, then fill gaps with leaves, tucking stems under the vine so no glue shows. Hang it with a simple over-the-door wreath hook.
Pro tip: Hang the wreath at eye level — about 57 inches from the ground — so it greets visitors face-to-face.
Variation: Swap the bow for a tiny witch hat perched on top for a playful touch.
6. Lit LED Halloween Wreath
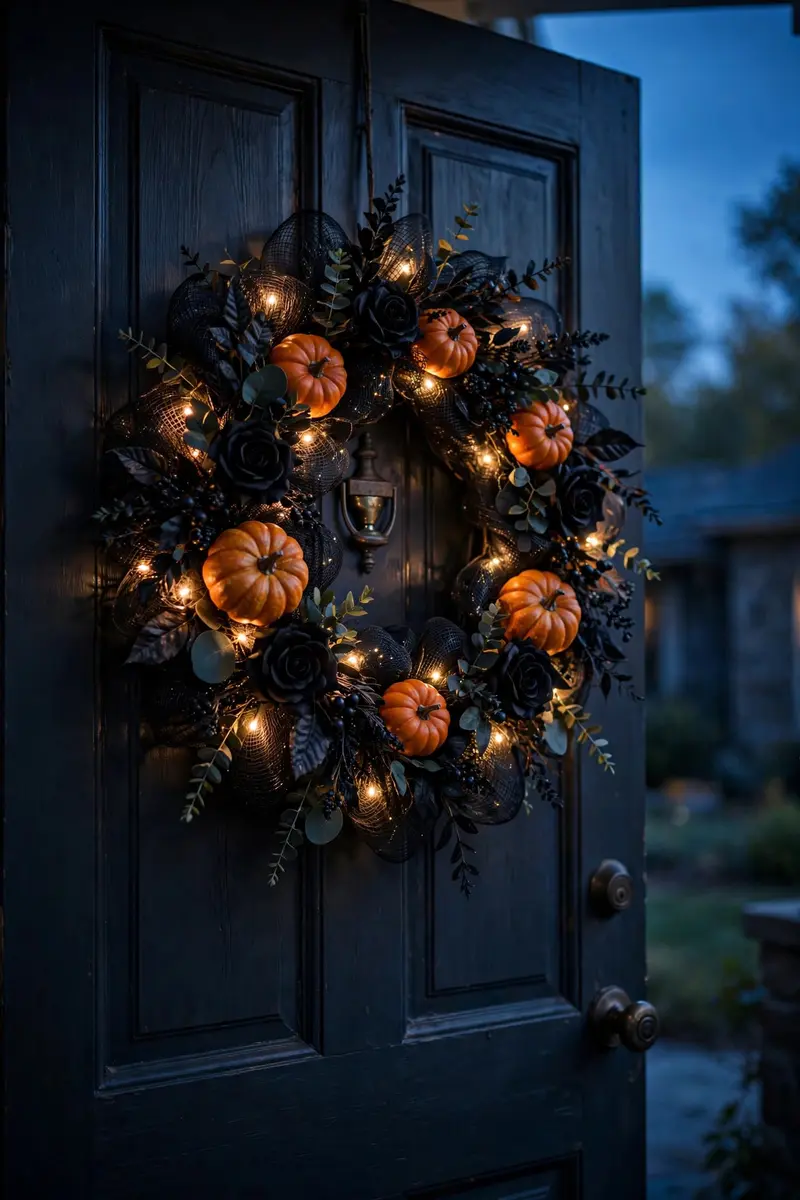
Integrated fairy lights make your wreath glow after dark, which is when Halloween magic actually happens. Lit wreaths are trending hard on Pinterest this year, and they take your door from daytime pretty to nighttime unforgettable.
Materials & cost: Dark grapevine or black mesh wreath ($12–18), battery-operated fairy light strand with timer ($8–12), a few mini pumpkins or black roses ($8). Total: about $28–38.
Weave the fairy light strand through the wreath first, hiding the battery box at the back, then add your decorative elements. Set the timer function so it switches on at dusk and off by midnight — no remembering required.
Pro tip: Use warm-white lights for a cozy glow or orange lights for full spooky vibes — avoid cool white, which reads more Christmas than Halloween.
Variation: Add tiny skeleton hands or faux crows peeking out of the wreath for after-dark surprises.
7. Matte Black Wreath with Faux Crows
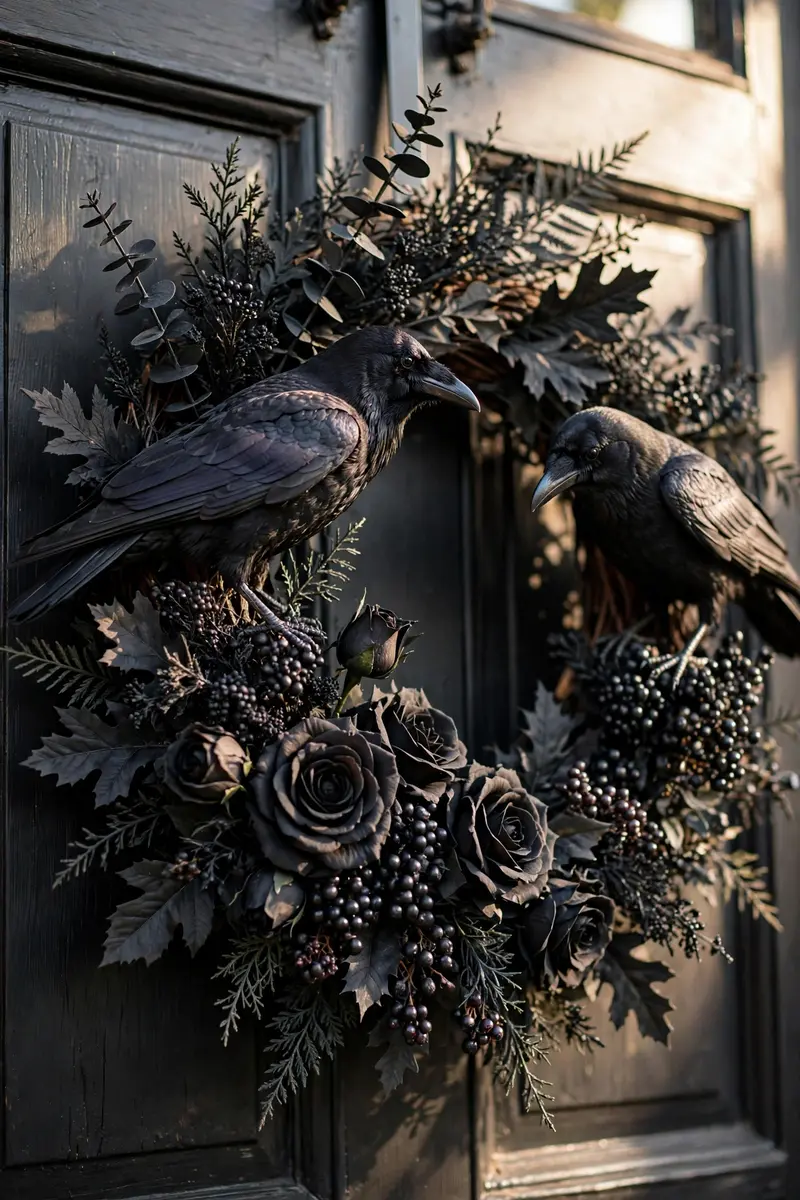
For a sophisticated, slightly dark Halloween, a matte black wreath with faux crows is pure gothic elegance. It skips the orange entirely, so it reads expensive and mysterious instead of crafty.
Materials & cost: Black wreath base ($10–15), 2–3 faux crows ($12–18), black roses or dark berries ($8–10). Total: about $30–43.
Attach the crows with floral wire so they perch at different angles, then cluster the black roses beneath them to fill the base. Keep everything in the same near-black palette — the silhouette is the whole point.
Pro tip: Spray everything with one coat of matte black paint first so all the pieces share the same finish and look like one intentional design.
Variation: Add a single deep-red rose or a small gold moon for a dramatic accent.
8. Pumpkin Stack Flanking the Door
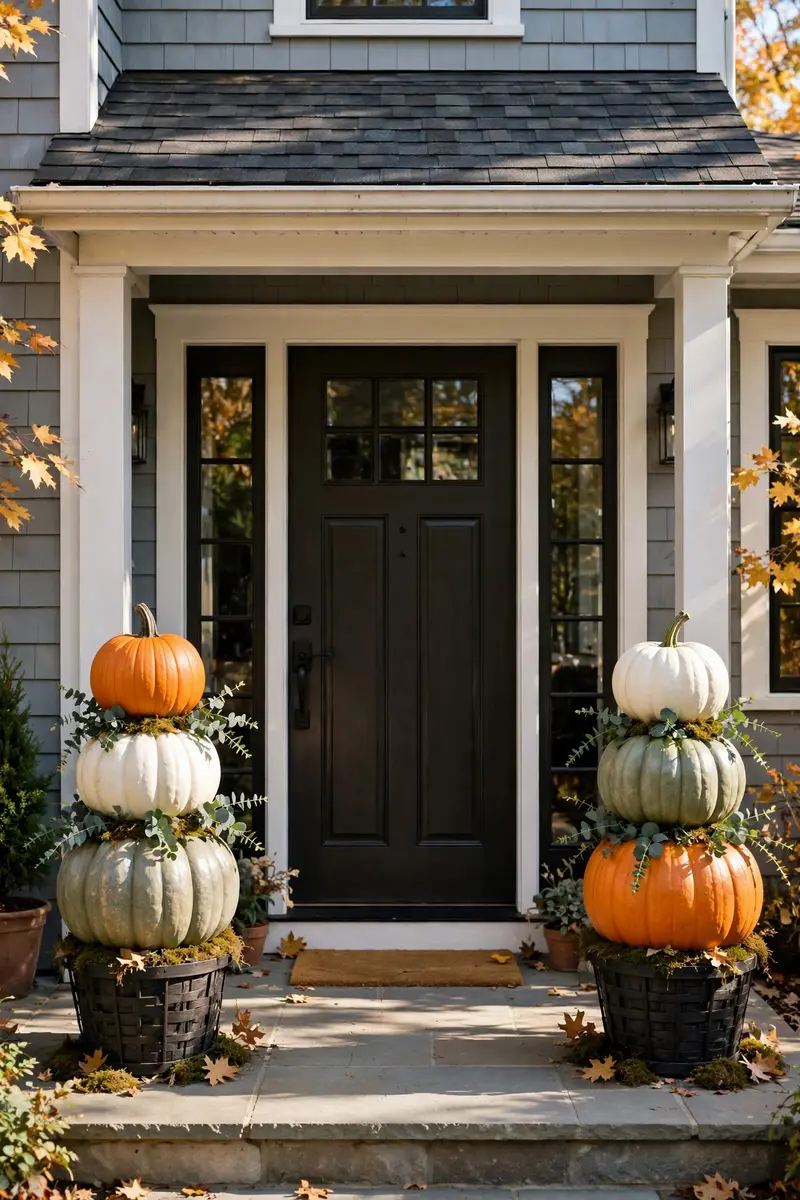
Stacked pumpkin topiaries on both sides of your door give you that classic autumn symmetry with almost zero skill required. Varying sizes, colors, and finishes — white, orange, sage — keeps the look styled instead of grocery-store.
Materials & cost: 6–8 faux pumpkins in mixed sizes ($25–40), planters or crates ($15–25). Total: about $40–65. (Use real pumpkins for less, but they rot fast in warm weather.)
Place the largest pumpkin at the bottom and work upward, turning each one so its stem faces a different direction. Tuck eucalyptus or faux autumn leaves between layers to hide seams.
Pro tip: Glue a wooden dowel through the center of faux-pumpkin stacks so wind cannot topple your tower.
Variation: Paint the pumpkins all one color — matte black or creamy white — for a modern monochrome look.
9. Ghost Garland Draped Over the Door
A garland of little ghosts hung over your door looks like they are floating down to greet visitors. Soft white fabric ghosts with painted faces are friendly, not frightening — perfect if your street has lots of small kids.
Materials & cost: White fabric or cheesecloth ($6), small foam balls ($4), black marker ($2), twine ($3). Total: about $12–15.
Tie a foam ball in the center of a white fabric square, secure it with a rubber band, and draw two eyes and an open mouth on each "head." String 8–12 ghosts on twine and drape the garland in a swag across the top of your door.
Pro tip: Vary the string lengths slightly so the ghosts hang at different heights — the uneven float looks far more natural.
Variation: Make them from white balloons instead of fabric for a puffy, weather-resistant version.

10. Layered Doormats (Off-Center and Spooky)
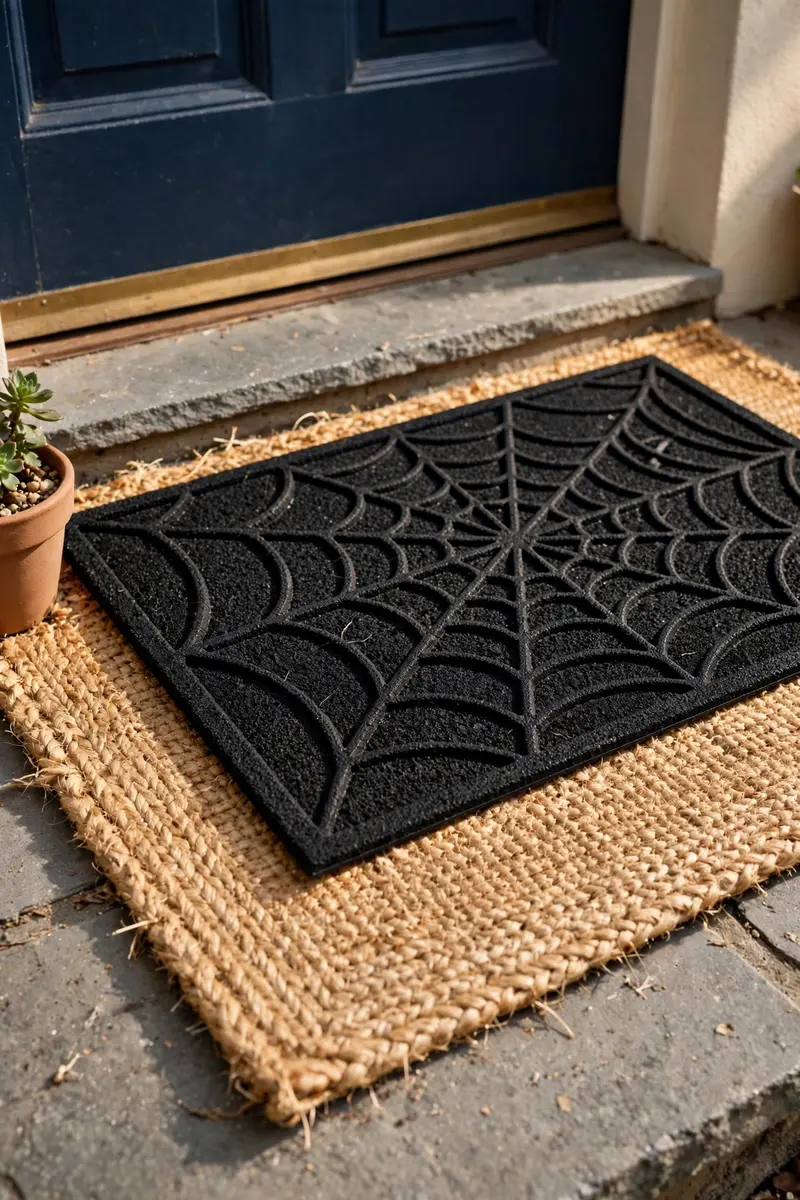
Layering a Halloween doormat over a larger patterned mat is the easiest trick in this whole list, and the off-center placement Pinterest loves makes it look styled instead of slapped down. It takes thirty seconds and costs almost nothing if you already own a buffalo-check or jute mat.
Materials & cost: Halloween doormat ($12–20), larger neutral mat if you don't own one ($20–30). Total: about $12–50 depending on what you already have.
Lay the big mat down first, then place the Halloween mat on top, shifted slightly to one side rather than perfectly centered. Choose a Halloween mat with a fun greeting — "Hey Boo," "Trick or Treat," or a spiderweb pattern.
Pro tip: Pick a rubber-backed Halloween mat so the top layer does not slide off the base mat on Halloween night.
Variation: Swap the Halloween layer for a fall-leaf mat after October 31 and keep the base all season.
11. Gothic Glam: Emerald + Gold Door
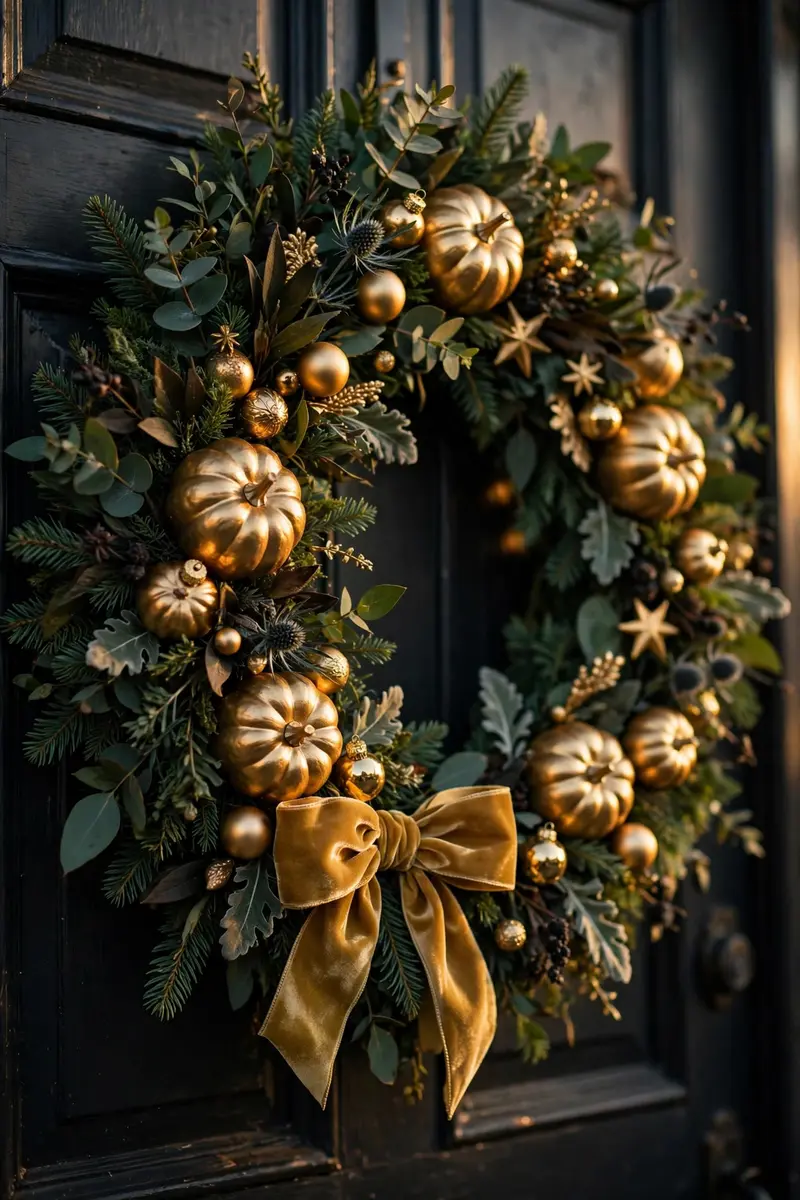
Deep emerald green paired with gold is 2026's breakout Halloween palette, and your front door is the perfect place to try it. An emerald wreath with gold accents looks expensive, dramatic, and unmistakably Halloween without a single orange pumpkin.
Materials & cost: Green wreath base or faux boxwood wreath ($15–20), gold spray paint ($6), gold ribbon and small gold ornaments ($10–12). Total: about $31–38.
Spray small pumpkins, pinecones, or leaves gold and tuck them into the green wreath, then add a gold velvet bow. Hang it on a dark or black door if you can — the contrast is what makes this look sing.
Pro tip: Keep the gold accents to three or four pieces max — restraint is what separates "glam" from "gaudy."
Variation: Add a gold door knocker or gold-painted house numbers to echo the wreath.
12. Cute Kid-Friendly Ghost Door (A Sweet Take on Halloween Door Decor Ideas)
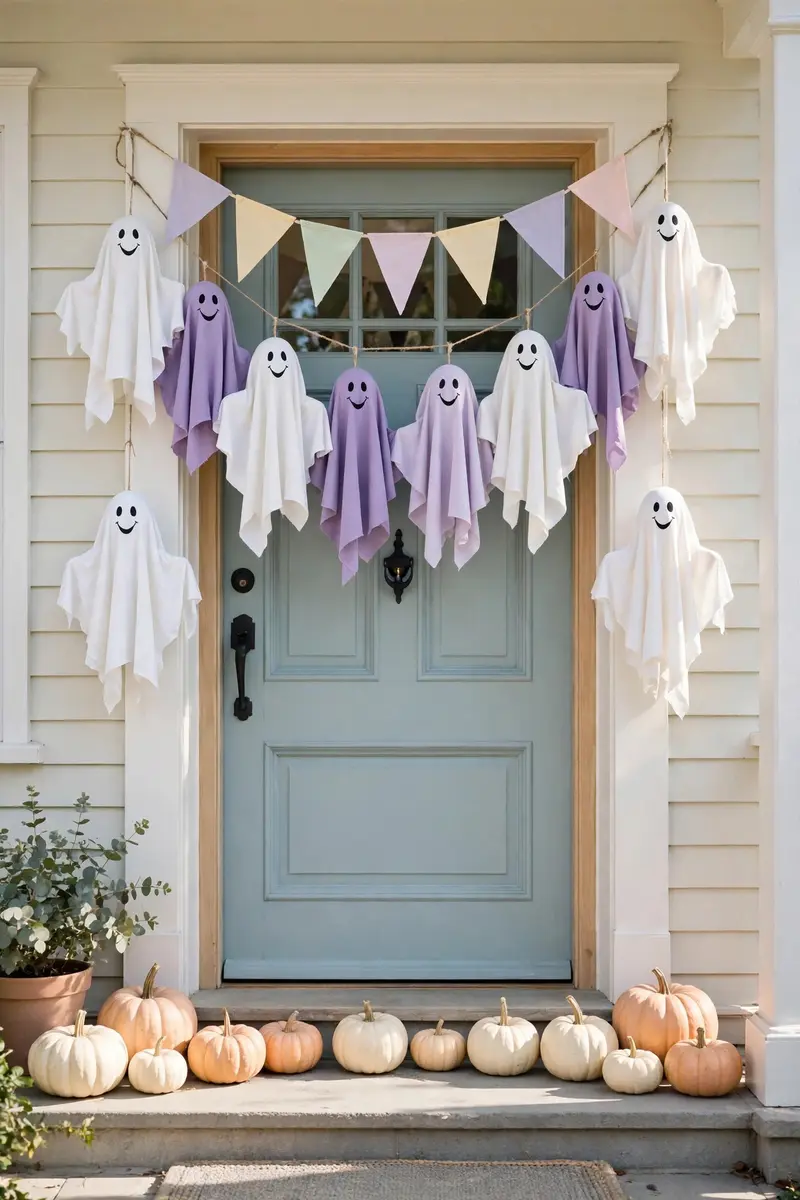
Not every household wants scares. A soft-lavender and cream ghost door — smiling sheet ghosts, pastel bunting, a few cream pumpkins — keeps the Halloween spirit while staying 100% toddler-approved. This whimsical palette is one of Pinterest's biggest 2026 kid-friendly trends.
Materials & cost: White and lavender fabric or paper ($8), cream mini pumpkins ($10–12), pastel bunting ($8–10). Total: about $26–30.
Cut smiling ghost shapes from white fabric, hang them in a loose garland with the pastel bunting across the door, and line the step with cream pumpkins. Add round pink cheeks to the ghosts with a marker for maximum cuteness.
Pro tip: Draw the ghost faces AFTER hanging them — marker looks different at a distance, so step back and check the expressions before committing.
Variation: Add a "Boo!" letterboard leaning by the door for a photo-ready corner.
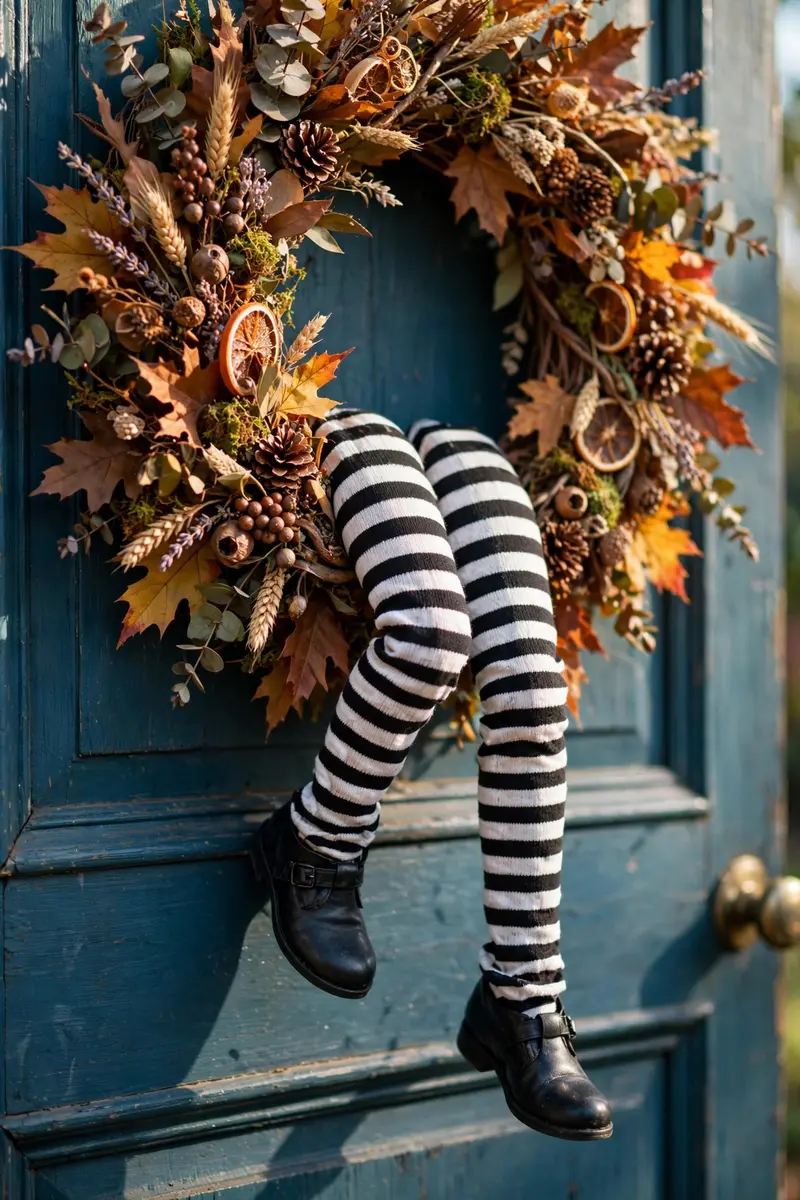
13. Witch Legs Sticking Out of the Door
A pair of striped witch legs dangling from under your wreath — or poking out of a pumpkin by the door — is pure Wizard of Oz comedy. Kids find it hilarious, adults get the reference, and it takes about ten minutes.
Materials & cost: Black-and-white striped tights ($6–8), red or black shoes from a thrift store ($5–10), pillow stuffing ($4). Total: about $15–22.
Stuff the tights, attach the shoes, and tuck the "legs" behind your wreath or under a door-top swag so they dangle down. Bend the knees slightly with wire for a natural flop.
Pro tip: Anchor the legs with a command hook inside the wreath so they survive wind and curious little hands.
Variation: Stick the legs out of a large pumpkin planter by the door instead of the door itself.
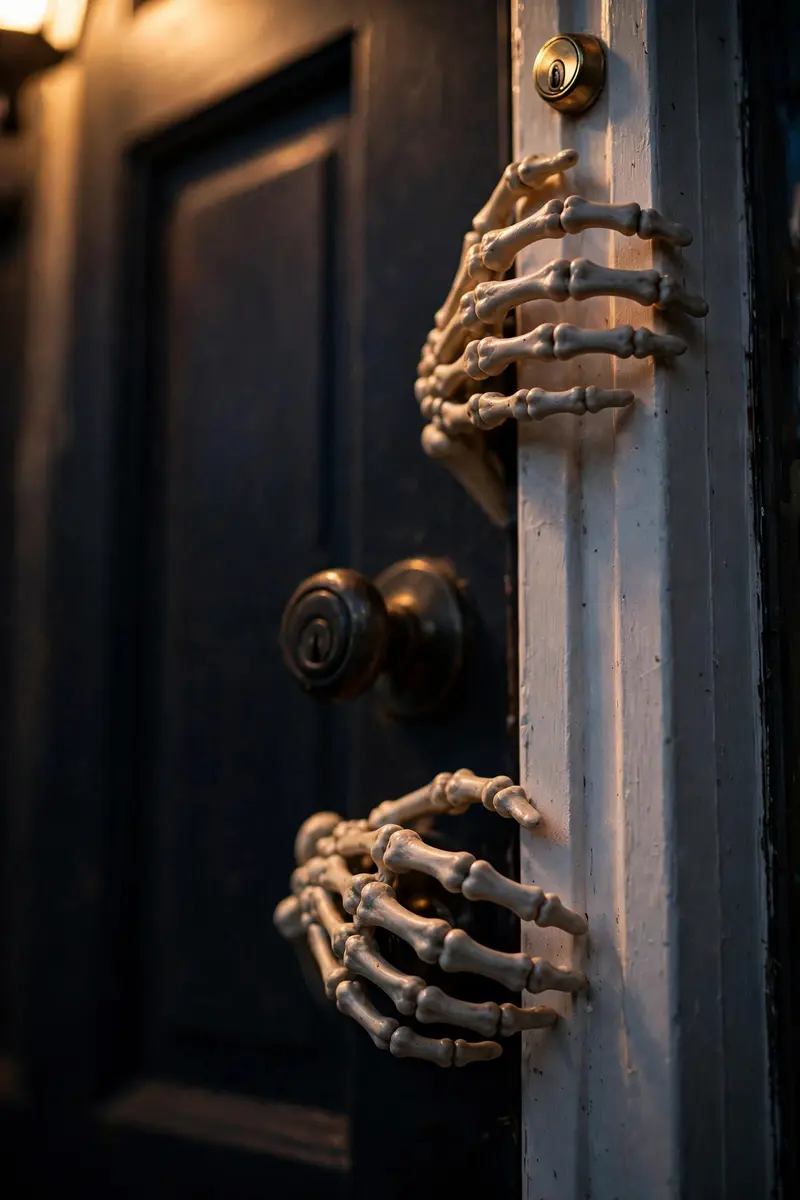
14. Skeleton Hands Reaching from the Doorway
Bony hands creeping around the door frame look like something is trying to escape your house. It is a small-budget, big-impact scare that works especially well flanking the doorbell — right where every visitor's hand goes.
Materials & cost: 2–4 plastic skeleton hands or arm sets ($10–16), black floral wire ($3). Total: about $13–19.
Wire the hands to the door frame, a wreath, or the trim around the doorbell so the fingers curl naturally. Position one pair at knob height for maximum startle factor.
Pro tip: Pose the fingers in different curls — identical stiff fingers look like toys, varied ones look like a real grab.
Variation: Paint the bones to glow in the dark with a coat of glow paint for a nighttime surprise.
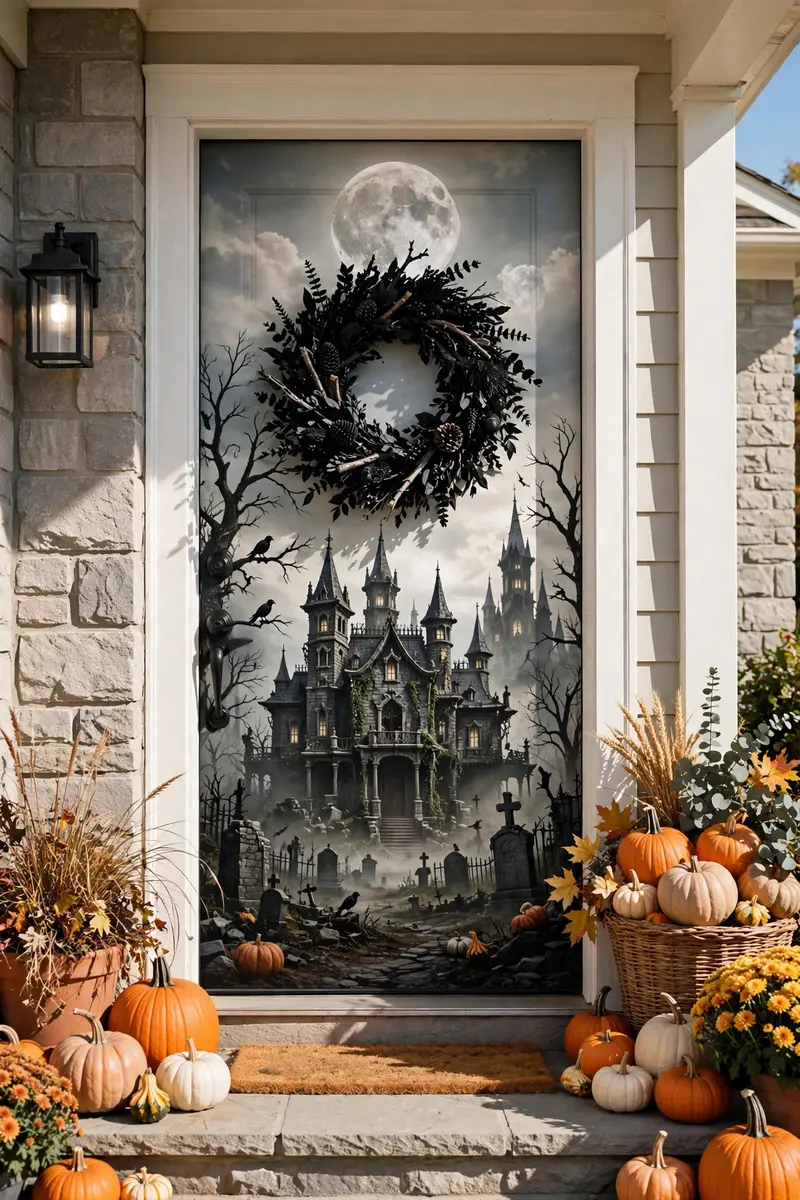
15. Full Halloween Door Cover (Instant Haunted House)
A full-door cover — a printed haunted-house scene, creepy portrait, or cemetery gate — transforms your door in literally five minutes. Covers are trending because they deliver maximum drama with zero craft skills, and they store flat for next year.
Materials & cost: Printed door cover ($15–30), painter's tape or adhesive strips ($4). Total: about $19–34.
Unroll the cover, align the top edge with the top of your door, and tape it down on the backside of the door so no tape shows from the front. Cut a neat slit for the handle and lock.
Pro tip: Measure your door before ordering — covers sized for standard 36-inch doors wrinkle badly on wider or narrower doors.
Variation: Layer a real wreath or webbing OVER the printed cover for a 3D effect that fools the eye.
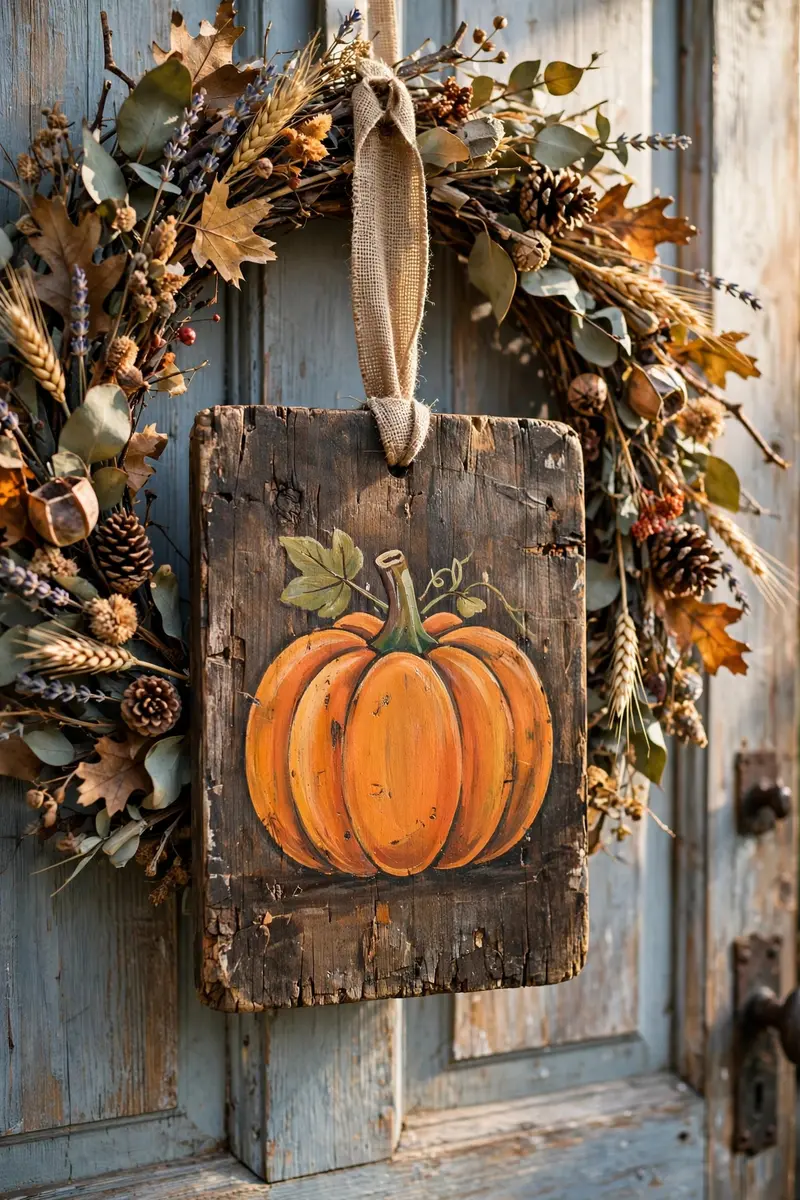
16. Wooden "Trick or Treat" Sign Door Hanger
A chunky wooden sign hung on the door — "Trick or Treat," "Welcome Witches," "Enter If You Dare" — adds farmhouse warmth to your Halloween. It pairs beautifully with mums and pumpkins for a look that reads festive, not frightening.
Materials & cost: Wooden sign or DIY blank ($10–18), or paint your own with a $5 wood slice and stencils. Total: about $10–20.
Hang the sign from a ribbon on a wreath hook, layering it over a simple fall wreath. Keep the lettering large and readable from the sidewalk.
Pro tip: Seal a DIY wooden sign with outdoor polyurethane so rain and dew do not warp it by Halloween.
Variation: Make it double-sided: "Trick or Treat" on one side, "Happy Fall" on the other, and flip it on November 1.
17. Trick-or-Treat Candy Station at the Door
Turn your doorstep into a self-serve candy station with a decorated "Take One" setup. A small table or crate dressed in Halloween fabric, holding a big bowl of candy under a cute sign, keeps the line moving and looks adorable in photos.
Materials & cost: Small side table or crate (use what you own), Halloween tablecloth ($6–8), large candy bowl ($5), printable "Take One, Please!" sign ($2). Total: about $13–15 plus candy.
Drape the table, center the bowl, and prop the sign where grabby hands will see it. Add a few mini pumpkins and battery candles around the bowl so the station looks styled, not sad.
Pro tip: Tape a second, hidden bowl of candy nearby to refill quickly — nothing kills the vibe like an empty bowl at 7pm.
Variation: Theme the station to your door: monster-face tablecloth under a monster-face door.

18. Fall-Transition Wreath (Works Past October 31)
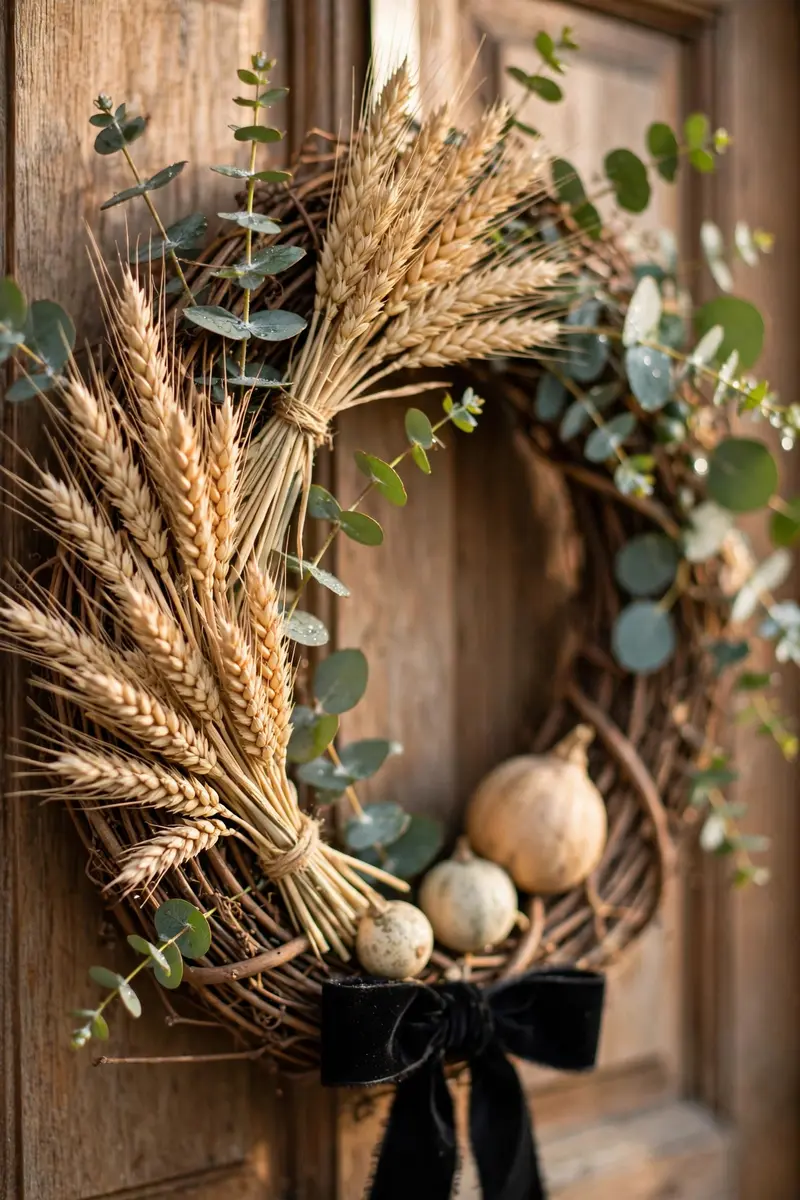
A wheat, eucalyptus, and gourd wreath with just a hint of Halloween — maybe black ribbon or a tiny skull — carries you from October into Thanksgiving without a second purchase. It is the practical decorator's secret weapon.
Materials & cost: Grapevine base ($8–12), dried wheat bundles ($8), faux gourds ($10), black velvet ribbon ($4). Total: about $30–36.
Build the wreath in fall neutrals first, then add exactly one Halloween accent — the black ribbon bow or a single small skull tucked into the foliage. When November arrives, remove the accent and you have a Thanksgiving wreath.
Pro tip: Stick to warm neutrals for 90% of the wreath — the single dark accent reads "Halloween" without dating the whole piece.
Variation: Add tiny pumpkins in early October, swap them for pinecones in November.
19. Cornstalks and Gourds Framing the Door
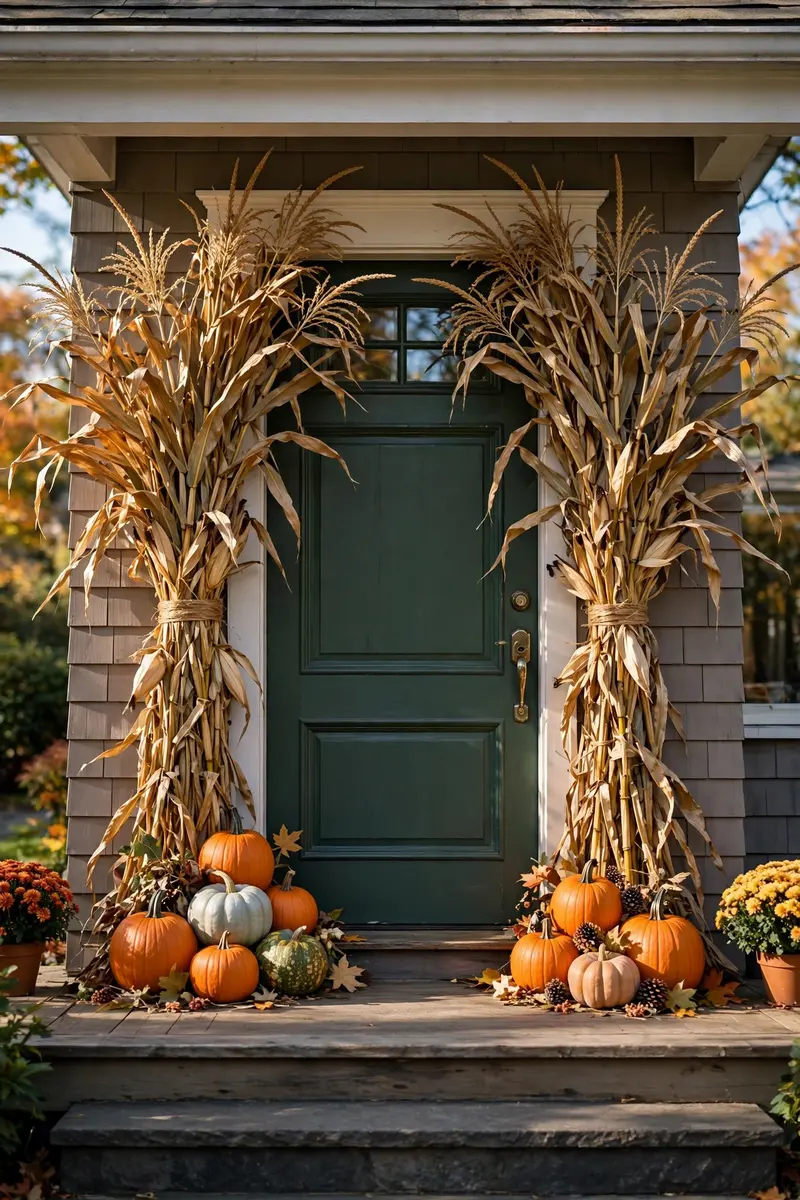
Tie bundles of cornstalks to your porch posts and pile gourds at the base for a harvest look that frames your door like a stage. It is the most traditional autumn entry of all, and it smells like a farm stand in the best way.
Materials & cost: 2 bundles of cornstalks ($12–16), assorted gourds and pumpkins ($15–25), twine ($3). Total: about $30–44.
Lash the cornstalk bundles to your porch columns or the door frame with twine, fanning the tops outward. Cluster gourds at the base in odd numbers, tallest in the middle.
Pro tip: Buy cornstalks the week before Halloween — they dry out and shed fast if you decorate too early.
Variation: Spray the cornstalks black and add purple gourds for a spooky harvest twist.
20. Glowing Eyes Peeking from the Door
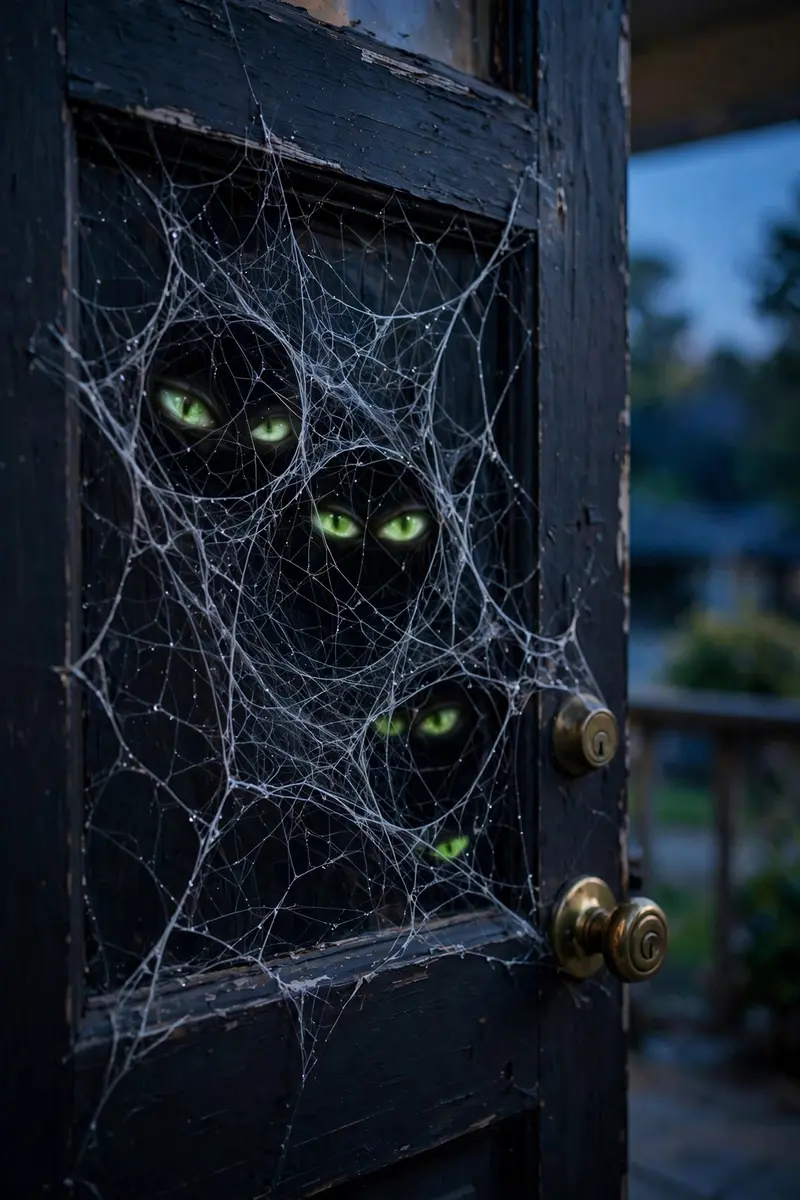
Pairs of glowing eyes "watching" from behind your door decorations are a classic scare that costs almost nothing. Paper-towel tubes with eye slits and glow sticks tucked inside, hidden in wreaths, webs, or bushes by the door, create genuine jump-scares after dark.
Materials & cost: Paper towel tubes (free), glow sticks ($5 for a pack), black construction paper ($3). Total: about $5–8.
Cut almond-shaped eyes from each tube, drop a cracked glow stick inside, and tuck the tubes behind your wreath or into the spider webbing so only the glowing eyes show.
Pro tip: Use green or orange glow sticks — red reads "alarm," blue reads "Christmas."
Variation: Hide a pair inside your pumpkin stack for eyes that seem to float in the dark.
21. Vintage Halloween Poster Door
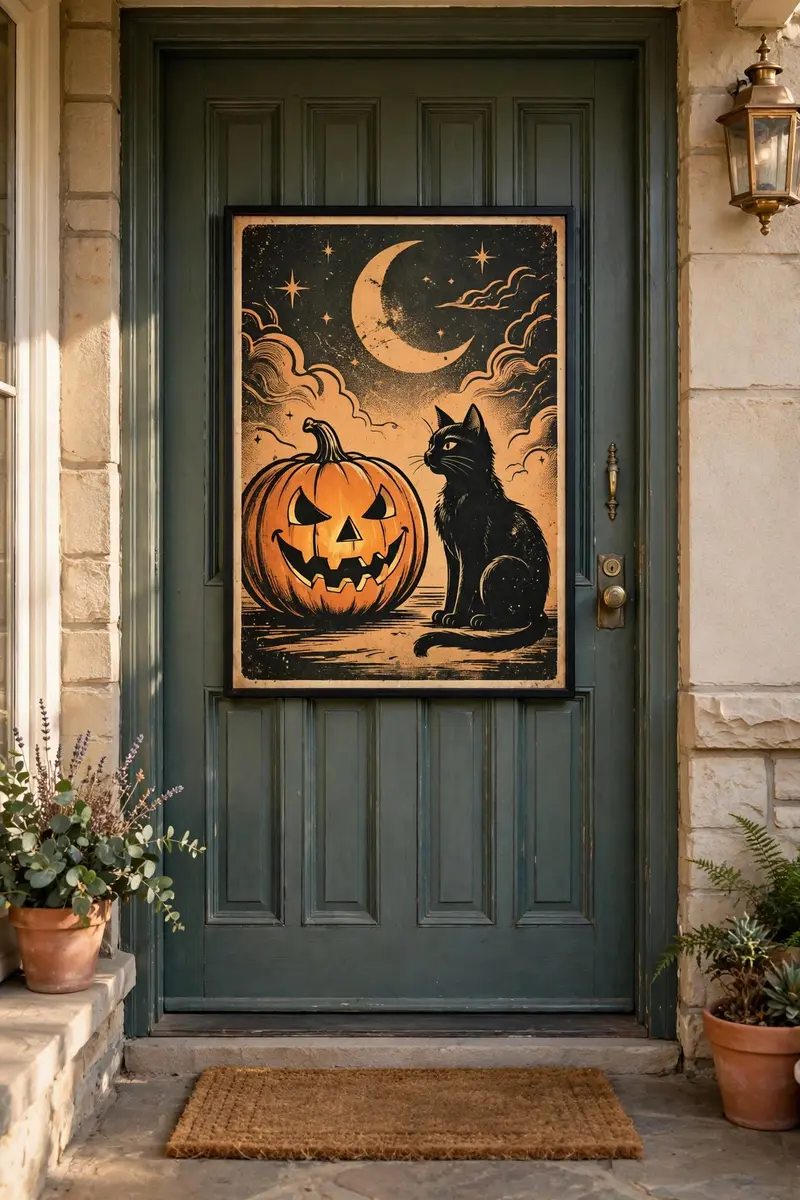
Blow up a vintage Halloween illustration — black cats, moon-faced witches, art-deco jack-o'-lanterns — as a poster on your door for instant old-soul charm. Nostalgic 90s and vintage Halloween decor is roaring back into style this year, so your thrift-store aesthetic is officially on-trend.
Materials & cost: Large printed poster or engineering print ($8–15), painter's tape ($4), thin black frame optional ($12). Total: about $12–31.
Print a public-domain vintage Halloween image at poster size (engineering prints at office stores are dirt cheap), center it on the door, and tape the edges on the backside. A thin frame makes it look like gallery art.
Pro tip: Search public-domain archives for the artwork — vintage Halloween postcards from the 1920s are copyright-free and gorgeous.
Variation: Frame three smaller vintage prints in a vertical row for a gallery-wall effect.
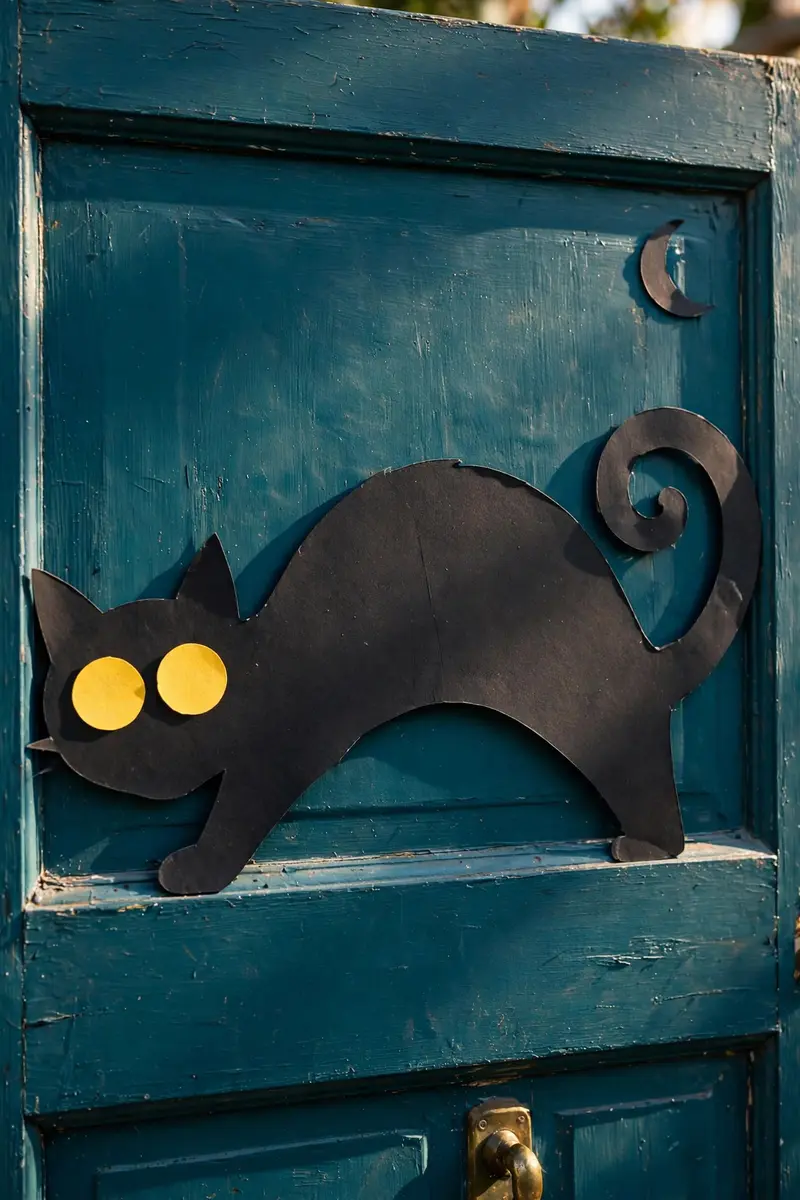
22. Black Cat Silhouette Door
A sleek black cat silhouette arched across your door — tail curled, back arched — is the essence of Halloween in one shape. It is bold, graphic, and unmistakable from across the street.
Materials & cost: Black poster board or vinyl decal ($8–15), removable adhesive ($4). Total: about $12–19.
Cut or buy a large cat silhouette (aim for 3 feet tall), center it on the door, and add two yellow paper eyes for a glowing stare. Pair it with a crescent moon cutout in the upper corner for a complete scene.
Pro tip: A pre-cut vinyl decal gives the cleanest edges — hand-cut silhouettes show every wobble at this size.
Variation: Add two smaller kitten silhouettes "following" the big cat up the door.
23. Creepy Tattered Cloth Door Drape
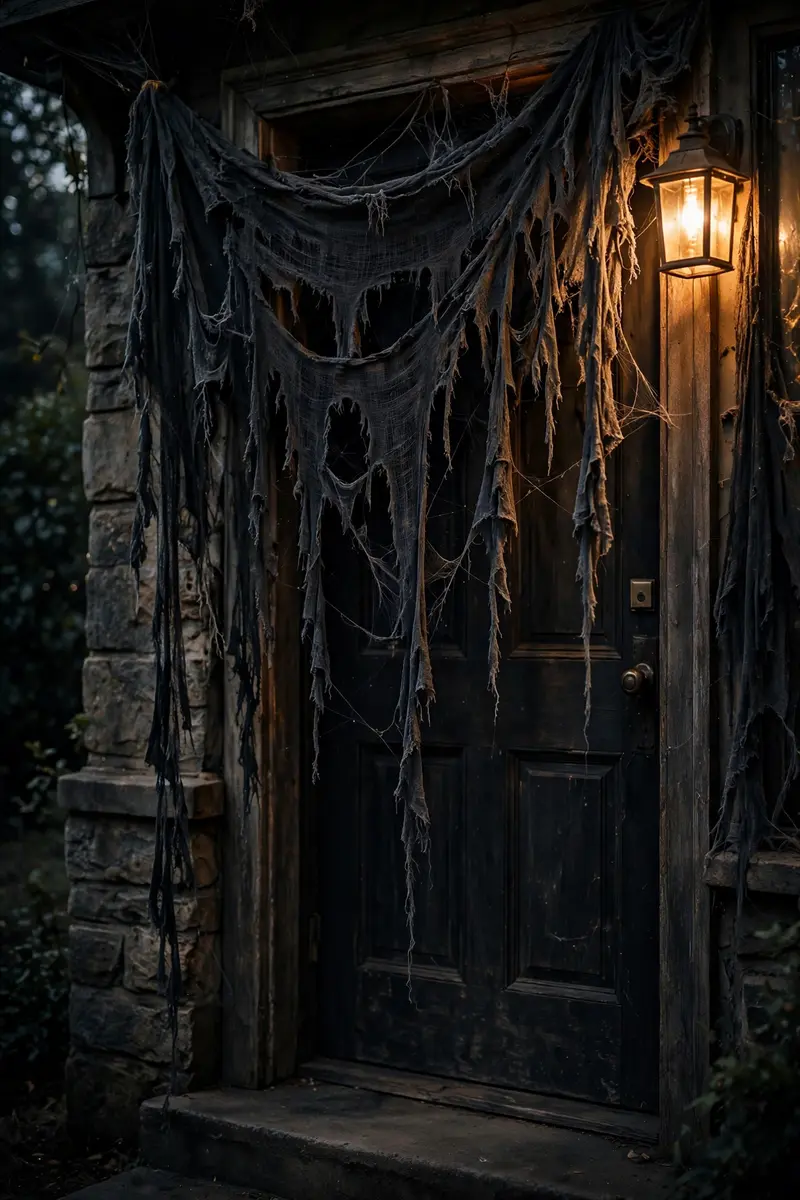
Drape black or gray tattered cheesecloth over the top of your door like torn curtains, and your entry instantly feels like a haunted mansion. The fabric moves in the breeze, which adds an eerie aliveness no static decoration can match.
Materials & cost: Black cheesecloth or gauze ($8–12), a tension rod or adhesive hooks ($6). Total: about $14–18.
Tear the cloth into uneven strips, drape them over a rod or hooks mounted above the door, and let them hang to different lengths. Fray the edges with scissors for extra decay.
Pro tip: Mist the cloth lightly with water and let it dry crumpled — the wrinkles make it look ancient instead of brand-new.
Variation: Layer gray over black for depth, or add spiderweb strands between the strips.
24. Pumpkin Vine Garland Around the Door Frame
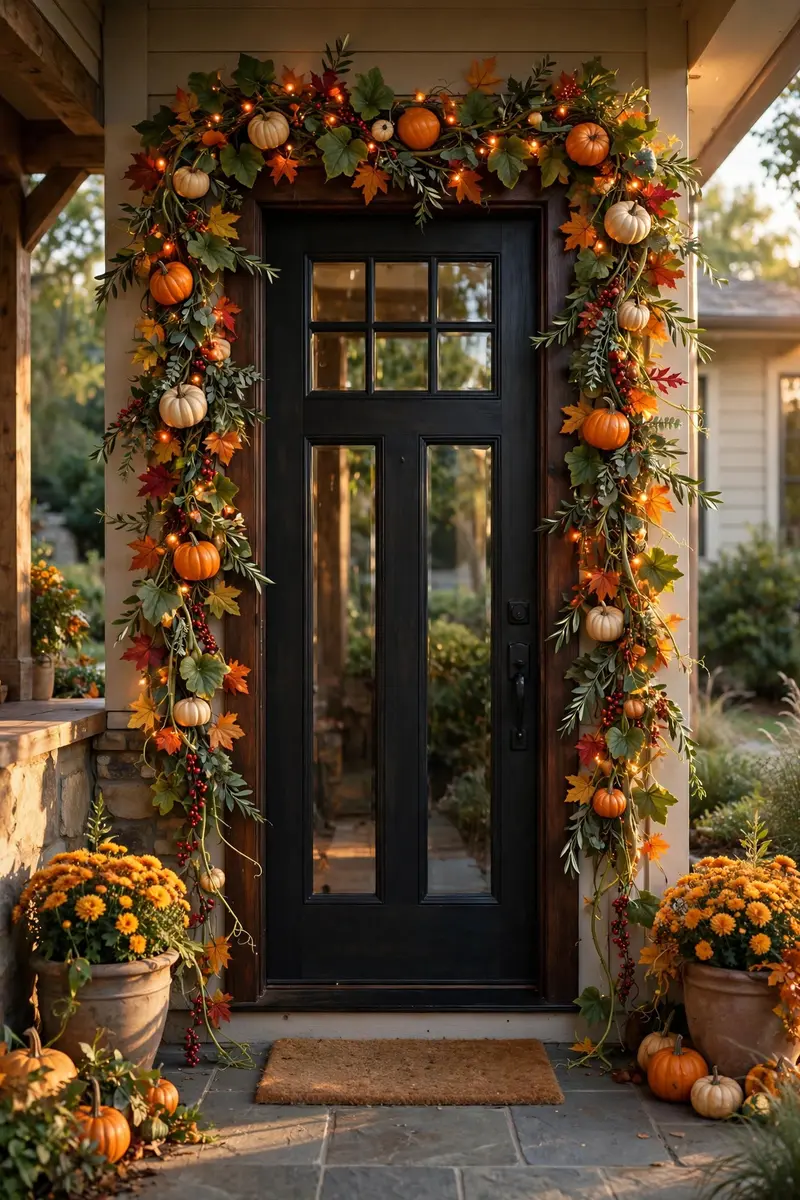
A garland of small pumpkins, leaves, and berries wrapped around your entire door frame turns the doorway itself into the decoration. It photographs like a magazine cover and works for the whole fall season.
Materials & cost: Faux pumpkin-and-leaf garland, 2–3 strands ($20–35), adhesive hooks ($5). Total: about $25–40.
Hook one end at the top corner and swag the garland around all three sides of the frame, letting the ends drape down the sides. Overlap strands so no bare frame shows through.
Pro tip: Use outdoor-rated adhesive hooks — indoor ones fail the first humid night and your garland ends up on the welcome mat.
Variation: Weave orange fairy lights through the garland for a glowing frame at night.
25. Spirit Board Door (Ouija-Inspired, Minus the Spook)
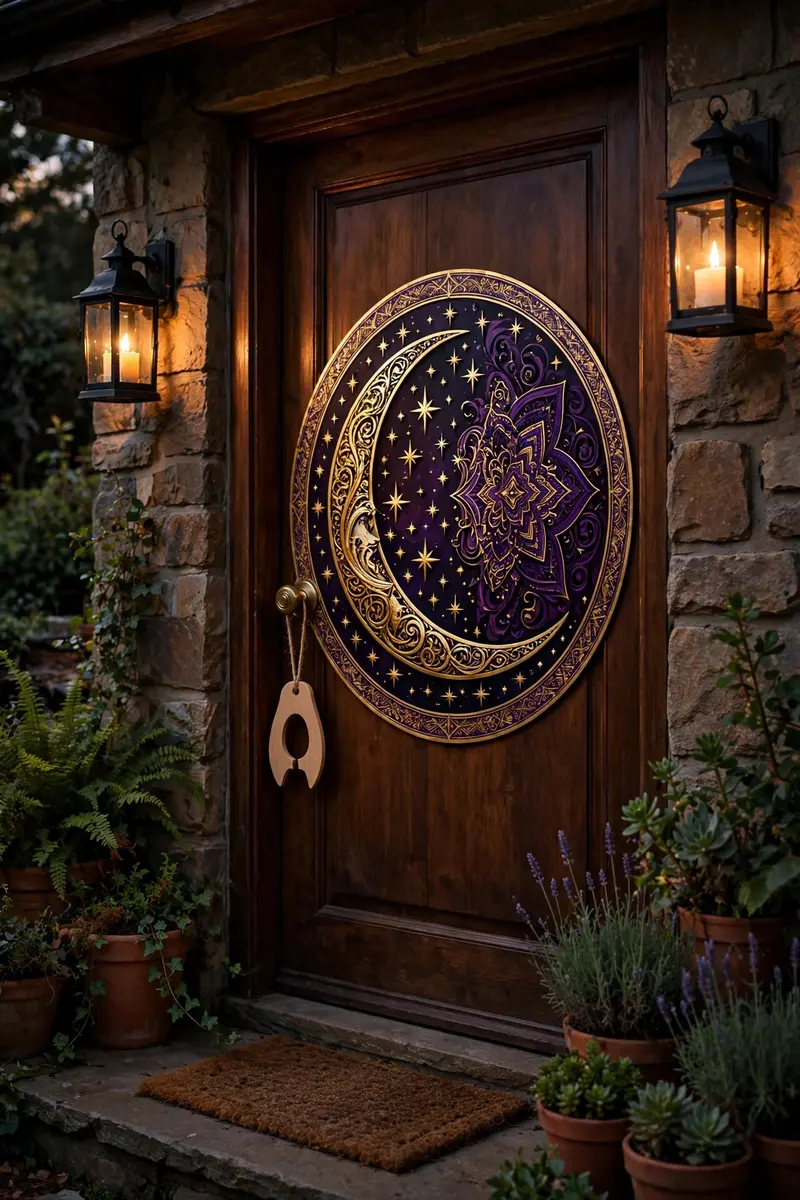
A giant spirit-board-inspired door decal — planchette, alphabet arc, "yes" and "no" corners — is the perfect Halloween-party door. It is graphic, conversation-starting, and reads instantly even to guests who have never touched a real board.
Materials & cost: 3 glass cylinders, 2–3 bags of candy corn, floating candles, water. Cost: $15–25.
Center the board design on the door, smooth out bubbles with a credit card, and add a hanging planchette cutout from the doorknob. Pair it with candle-style lanterns for full séance vibes — and if you love carrying a theme through the house, these Halloween living room decor ideas show how to keep the spooky mood going indoors.
Pro tip: Place the decal slightly above center — doors read best when the design sits at eye level, not dead center.
Variation: Add guests' names written in "spirit handwriting" around the alphabet for a party-night personalized touch.
26. Bloody Handprint Door
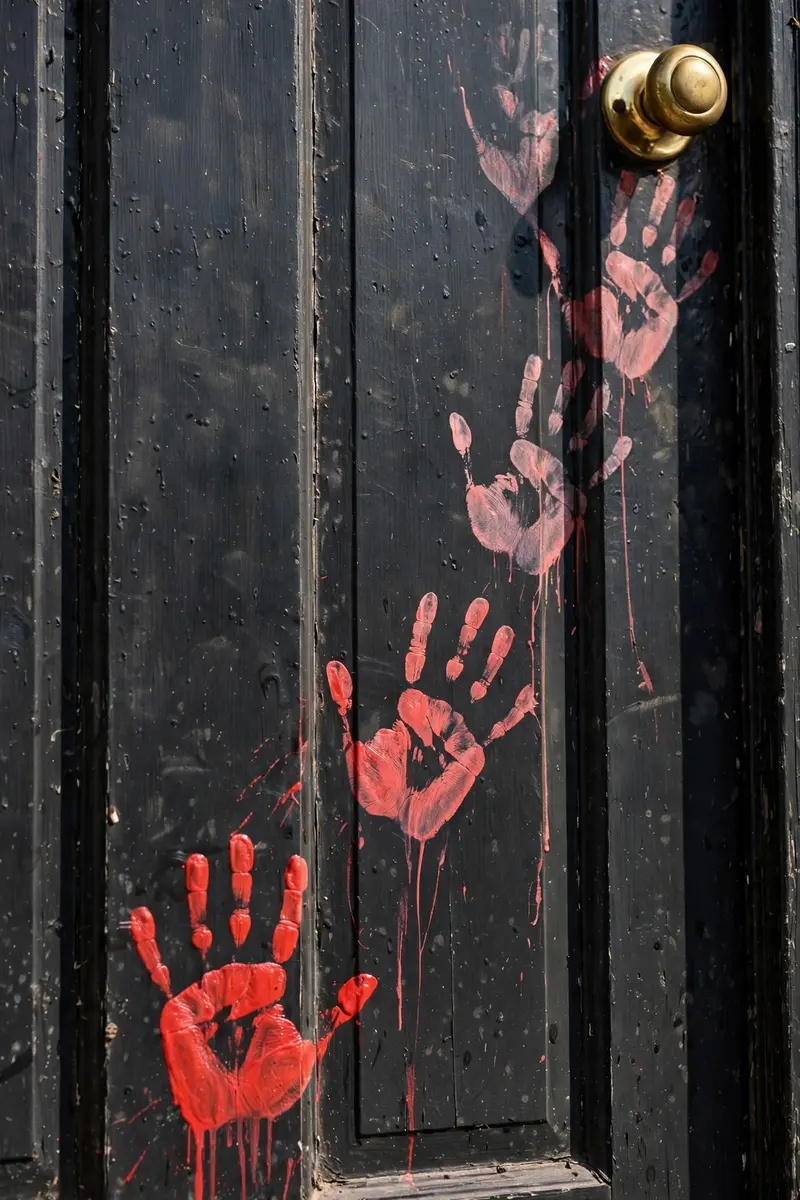
Handprints in washable red paint trailing toward your doorknob look like something tried to get in — or out. It is gloriously gross, costs almost nothing, and washes off completely with a hose.
Materials & cost: Washable red tempera or finger paint ($5–7), disposable gloves ($2). Total: about $7–9.
Press your (gloved) hand into the paint and stamp prints up the door in a wandering trail, fading the pressure as you go so the last prints look smeared. Add a few drips running down for realism.
Pro tip: Test your paint on an inconspicuous corner first — "washable" varies by brand, and you want proof it rinses clean.
Variation: Use glow-in-the-dark paint over the red for handprints that haunt after dark.
27. Candy Corn Garland Door
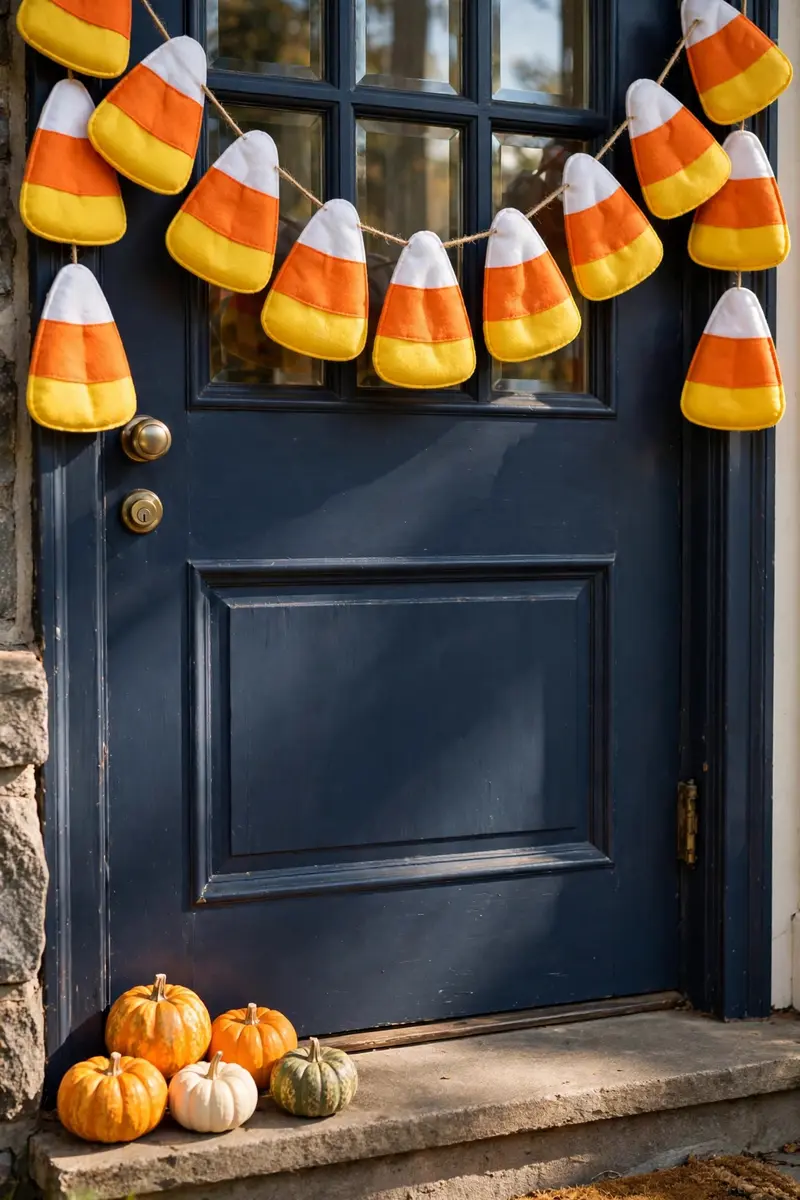
Oversized candy corn shapes strung into a garland give your door a sweet, retro Halloween look that kids adore. It is cheerful, colorful, and one of the fastest crafts on this list.
Materials & cost: Craft foam or felt in white, orange, yellow ($8–10), twine ($3). Total: about $11–13. If you are decorating on a tight budget, our Dollar Tree Halloween decor DIY ideas have even more under-$10 tricks.
Cut 10–14 large candy corn triangles (white tip, orange middle, yellow base), string them on twine, and drape the garland in a swag across the top of the door. Add a matching candy corn wreath if you are feeling ambitious.
Pro tip: Cut all three color layers slightly different sizes and layer them — flat one-piece candy corn looks cheap, layered looks crafted.
Variation: Make mini candy corn ornaments and hang them from your wreath too.
28. Flanking Lantern Pair with a Spooky Glow
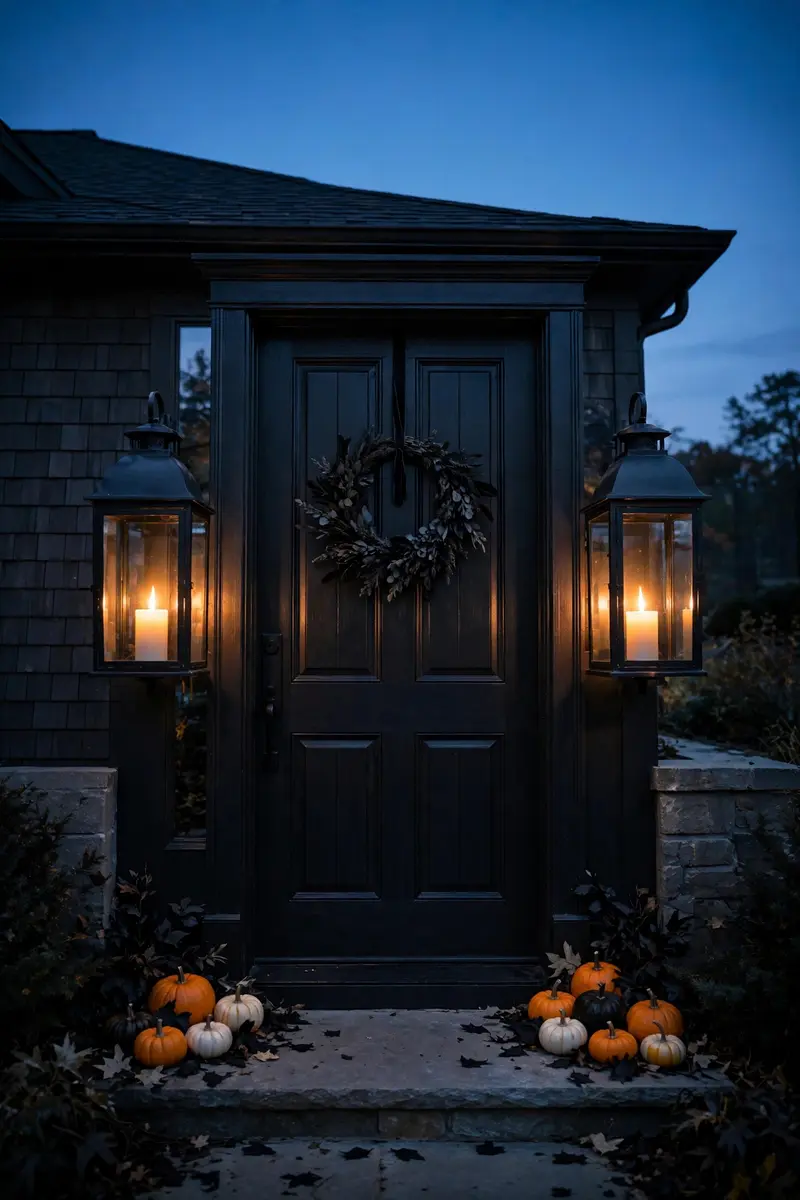
Two matching lanterns flanking your door — with flickering LED candles inside — create the grandest entrance of all. Symmetry signals "designed," and the warm glow makes your door the beacon of the block on Halloween night.
Materials & cost: 2 large lanterns ($25–40), LED pillar candles with flicker ($10–14). Total: about $35–54.
Place identical lanterns on both sides of the door, drop in the LED candles, and set them on the timer function. Surround the bases with mini pumpkins or black leaves.
Pro tip: Buy lanterns with glass panels — open-frame lanterns let wind blow out real candles and look dimmer with LEDs.
Variation: Fill one lantern with candy and leave it open for trick-or-treaters.
29. Haunted Talking Door Knocker
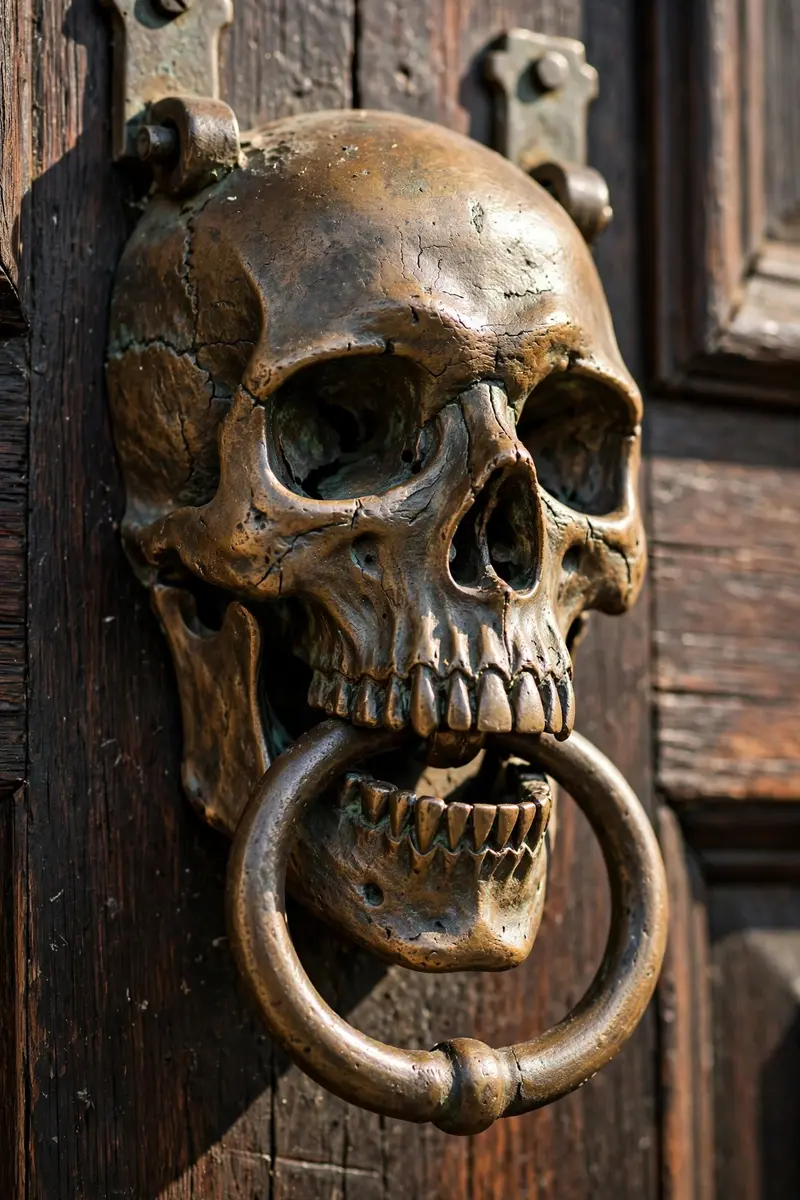
A gargoyle or skull door knocker — especially one with a motion-activated cackle — turns the simple act of knocking into a scare. Guests will jump, laugh, and remember your house.
Materials & cost: Decorative skull or gargoyle knocker ($15–25), optional motion-activated sound box ($10). Total: about $15–35.
Mount the knocker at standard height with the included screws or heavy-duty adhesive for renters. If you add sound, position the sensor so it triggers when someone reaches for the knocker.
Pro tip: Warn the delivery driver — a screaming door knocker at 2pm is funny exactly once.
Variation: Hang the knocker on a wreath instead of the door for a renter-friendly version.
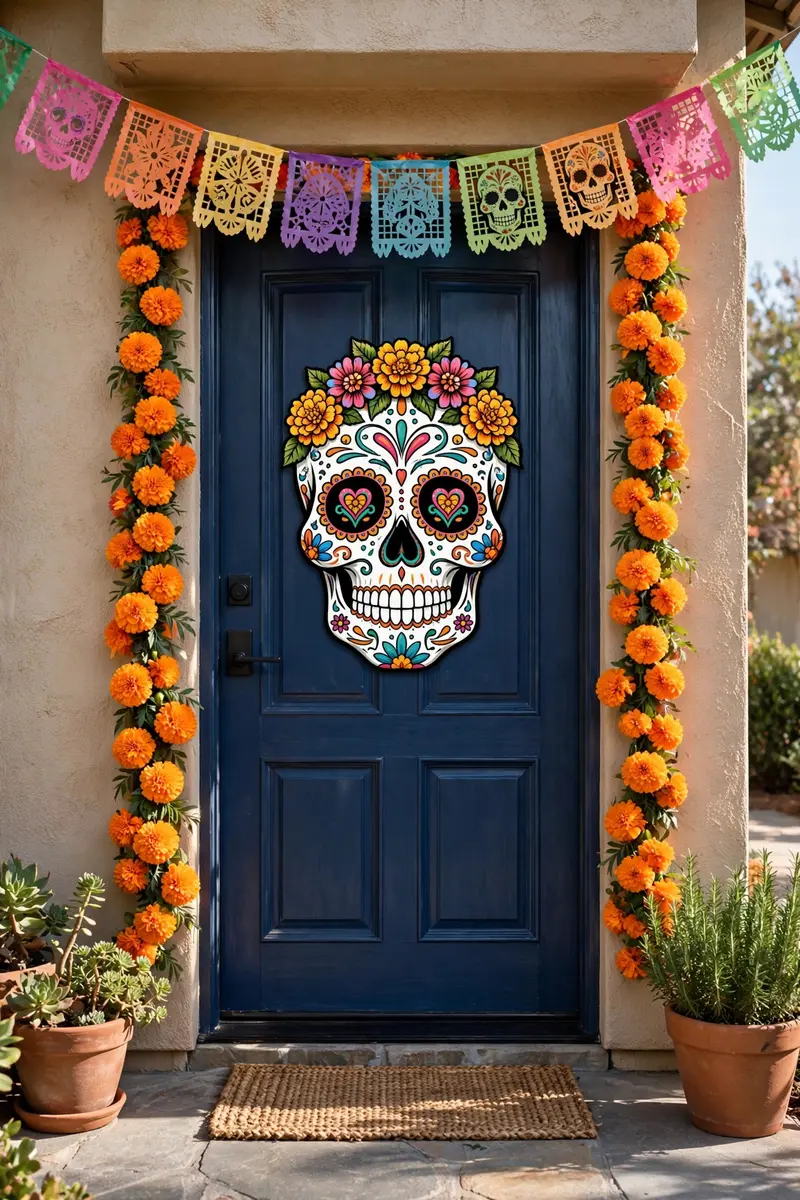
30. Day of the Dead Sugar Skull Door
End the list with color: a Día de los Muertos-inspired door covered in vibrant marigolds, sugar skull art, and papel picado banners. It is joyful, artistic, and celebrates the season's deeper roots.
Materials & cost: Faux marigold garlands ($12–18), sugar skull decal or poster ($8–15), papel picado banner ($6–10). Total: about $26–43.
Hang the papel picado across the top of the door, frame it with marigold garlands down both sides, and center a large sugar skull decal. The color riot does all the work — no scares needed.
Pro tip: Keep the marigolds dense — sparse garlands read "leftover party," lush ones read "celebration."
Variation: Add framed photos of loved ones' favorite treats on the step for a heartfelt ofrenda touch.
Halloween Door Decor FAQs
What do you put on a door for Halloween?
The classics are a Halloween wreath, a door cover or decal, garlands (ghosts, bats, candy corn), and flanking decor like pumpkin stacks or lanterns. Pick one hero piece — a monster face, a mummy wrap, or a full door cover — then add one or two supporting touches like a layered doormat or spider webbing. One strong focal point beats five small random items every time.
How can I decorate my front door for Halloween on a budget?
Paper is your best friend: cardstock bats, poster-board monster faces, and crepe-paper mummy wraps each cost under $15 total. Dollar stores carry spiders, webbing, and mini pumpkins for a few dollars, and many of the ideas above reuse fall items you already own. Start with the bat flight path or glowing eyes — both land under $12 and look far more expensive than they are.
How do I make my Halloween door decorations weatherproof?
Choose materials rated for outdoor use: faux over real for pumpkins and garlands, outdoor adhesive hooks instead of indoor ones, and laminated or plastic versions of paper crafts if your porch is uncovered. Bring fabric ghosts and paper bats inside during heavy rain, and seal any DIY wooden signs with outdoor polyurethane. A covered porch buys you a lot of forgiveness.
Will Halloween door covers damage my door?
Not if you hang them right. Use painter's tape or removable adhesive strips applied to the backside of the door rather than the front face, and avoid duct tape or hot glue directly on paint. Vinyl decals labeled "removable" peel off cleanly within a few weeks. Always test any adhesive on a hidden spot first, especially on freshly painted doors.
How do I hang a Halloween wreath without damaging the door?
An over-the-door wreath hook is the easiest damage-free option and works on most standard doors. For heavier wreaths, use two large outdoor-rated adhesive hooks (one holds the weight, the second steadies it). Avoid hammering nails into the door itself — and never hang a wreath from the peephole or knocker, which strains the hardware.
Make Your Door the One Everyone Photographs
Thirty ideas, one front door — now it is your turn to pick your favorite and make it yours. Start with a single hero look this weekend, snap a photo when it is done, and save this post to your Halloween Pinterest board so you can find it again next October (and the October after that). For the full entryway picture, pair your door with our Halloween porch decor ideas — wreath on the door, pumpkins on the steps, lanterns glowing — and your house will be the one the whole street talks about.



4 Comments