
28 Halloween Outdoor Decor Ideas That Spook the Street
There’s nothing quite like the house on the block that goes all-out for Halloween — the one trick-or-treaters whisper about and drivers slow down to stare at. These Halloween outdoor decor ideas turn your yard, porch, and walkway into a glowing, spooky spectacle that looks incredible from the curb. Whether you want creepy-cute for little ghouls or genuinely spine-chilling for brave teenagers, the ideas below work for every yard size and budget.
The secret to a great outdoor display? One strong focal point (a graveyard, a giant spider, a glowing archway), a lit path that guides visitors to your door, and layers of lighting that transform everything after dark. Most of these Halloween outdoor decor ideas cost under $30 and take an afternoon. And because October weather can be unpredictable, you’ll find weatherproofing tips throughout — no melted ghosts on your lawn.
Before you start hauling boxes from the attic, pick a lane: spooky-scary, cute-family-friendly, or elegant harvest-with-a-wink. Mixing a few lanes is fine, but keeping one dominant theme makes your whole yard look intentional instead of cluttered. Now grab your pumpkins and let’s build the most memorable yard on the street.
1. Jack-o’-Lantern Pathway Lineup
Nothing says “Halloween is HERE” like a glowing row of jack-o’-lanterns leading trick-or-treaters to your front door. A lit pathway is also the single best way to make your whole display look bigger and more intentional, because it pulls the eye from the street straight to your porch — which is why pathway lighting anchors so many Halloween outdoor decor ideas.
Materials + cost: 6–10 real pumpkins ($3–5 each) or faux carvable pumpkins ($8–12 each, reusable); battery LED tea lights ($8 for a 24-pack). Real-pumpkin route: ~$30–50. Faux route: ~$70–100 but lasts for years.
Carve classic faces, cats, ghosts, or moon shapes — mixing two or three designs looks more designer than repeating the same grin. Place a battery LED light inside each pumpkin and line them along both sides of your walkway, slightly staggered. Real flames are a no-go outdoors near costumes; LEDs give the same glow with zero fire risk.
Practical tip: Carve your pumpkins no more than 2 days before Halloween (or buy faux ones) — real pumpkins in October heat and rain can rot fast. Rub petroleum jelly on the cut edges to buy an extra day or two of freshness.
Variation idea: Go upscale with white mini pumpkins carved with star and moon patterns — it reads more “elegant harvest” and photographs beautifully at dusk.
2. Haunted Graveyard Corner
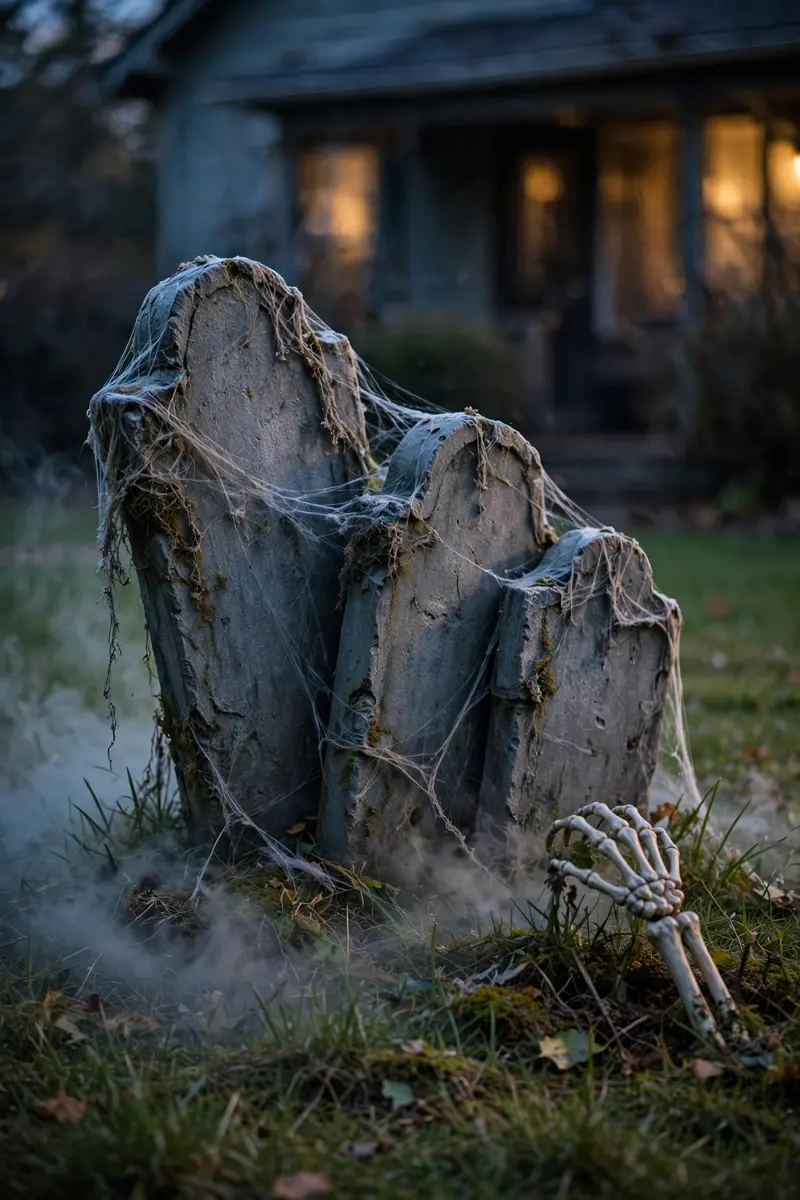
A graveyard vignette is the fastest way to give a plain lawn instant spooky credibility — no wonder it’s a staple among Halloween outdoor decor ideas. It reads clearly from the street, needs no power, and kids absolutely love reading the silly epitaphs — it invites people to walk closer and explore.
Materials + cost: Foam tombstones ($5–12 each, or DIY from cardboard); faux moss or Spanish moss ($6); skeleton arms and bones ($8–15); a low-lying fog machine ($30–40) or dry ice. Basic setup: ~$30–60.
Cluster 5–9 tombstones at slight angles (crooked looks better than straight), push skeleton arms and a skull out of the “ground” between them, and drape cobwebs over the tops. Give each stone a punny epitaph — “Here Lies Barry M. Deep” or “I. M. Gone” — written with a paint pen. On Halloween night, run the fog machine behind the stones for a ground-hugging mist.
Practical tip: Anchor foam tombstones with landscape stakes or wire hangers bent into a J shape, pushed through the back and into the soil — otherwise one gust of wind ruins your cemetery.
Variation idea: Theme it — a “pet cemetery” with tiny stones for “Fluffy” and “Goldie,” or a pirate graveyard with skull-and-crossbones motifs.
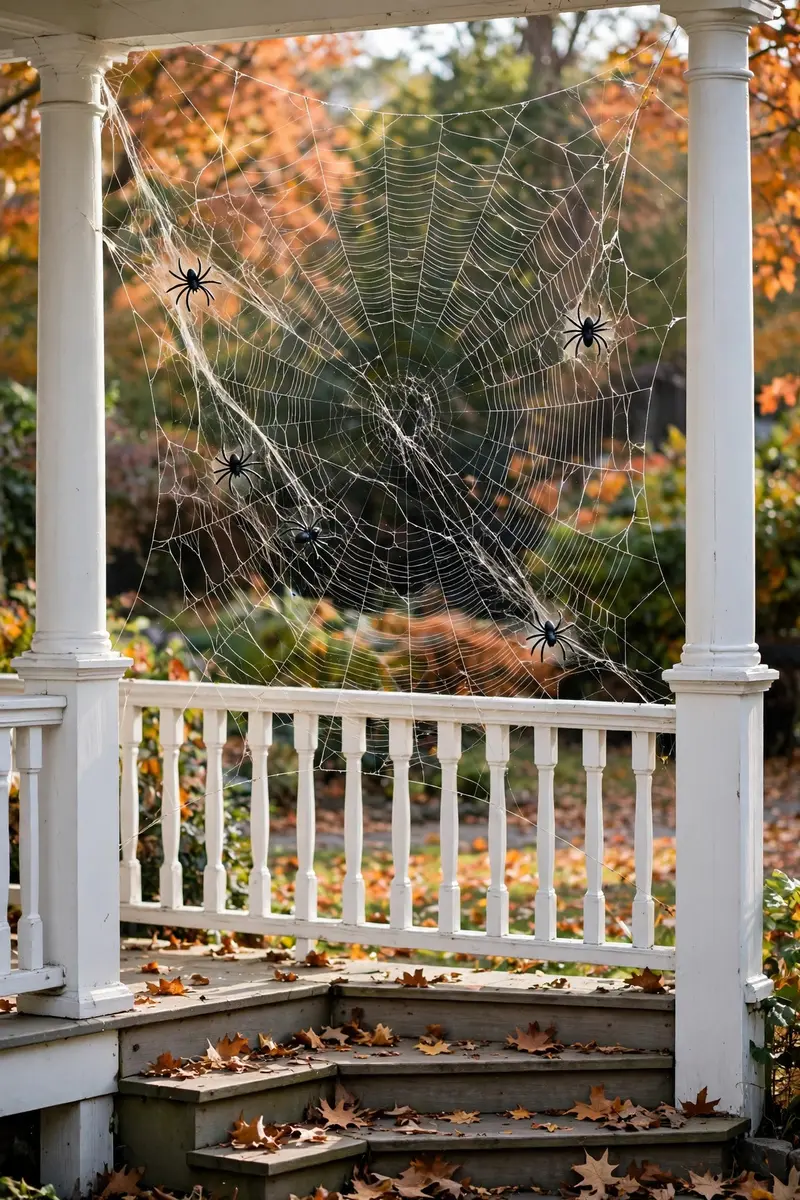
3. Giant Spiderweb Across the Porch
One oversized spiderweb stretched across your porch ceiling or between two posts gives you maximum drama for minimum money. It’s a DIY classic among Halloween outdoor decor ideas because it photographs well, costs almost nothing, and works as the backbone for spiders, lights, and hanging ghosts.
Materials + cost: Stretchable spider web material ($6–10 covers a whole porch) or DIY with white rope/yarn ($4); plastic spiders ($5 for a bag of mixed sizes). Total: ~$10–15.
Find your anchor points (porch posts, ceiling hooks, a railing), stretch the web material between them, and pull it thin in spots so it looks like real strands rather than a solid sheet. Tuck in plastic spiders of different sizes — one big “queen” spider plus smaller ones looks natural. Add a strand of orange fairy lights woven through for nighttime pop.
Practical tip: Stretch the web on a dry, calm day and keep it 6–8 inches clear of walkway edges so visitors don’t walk face-first into your handiwork.
Variation idea: Spray the finished web lightly with glow-in-the-dark paint before nightfall — it charges during the day and glows faintly green all evening.
4. Floating Witch-Hat Luminaries
Witch hats strung with fairy lights and “floating” over your walkway or lawn is one of Pinterest’s favorite Halloween outdoor decor ideas — it’s whimsical, glows beautifully after dark, and takes under an hour to set up.
Materials + cost: 5–8 plastic witch hats ($1–2 each at dollar stores); clear fishing line ($3); battery fairy lights ($10 for 2 strands). Total: ~$20–30.
Thread fishing line through each hat’s tip, hang them from shepherd’s hooks, tree branches, or a clothesline strung across the yard at varying heights (5–7 feet up), and wrap a strand of warm-white fairy lights around each hat’s cone. From the street, the glowing cones appear to hover in midair.
Practical tip: Hang the lowest hats at least 6 feet above paths — excited trick-or-treaters run, and nobody wants a hat to the face.
Variation idea: Swap fairy lights for orange or purple glow sticks inside each hat for a no-battery, kid-proof option that lasts one party night.

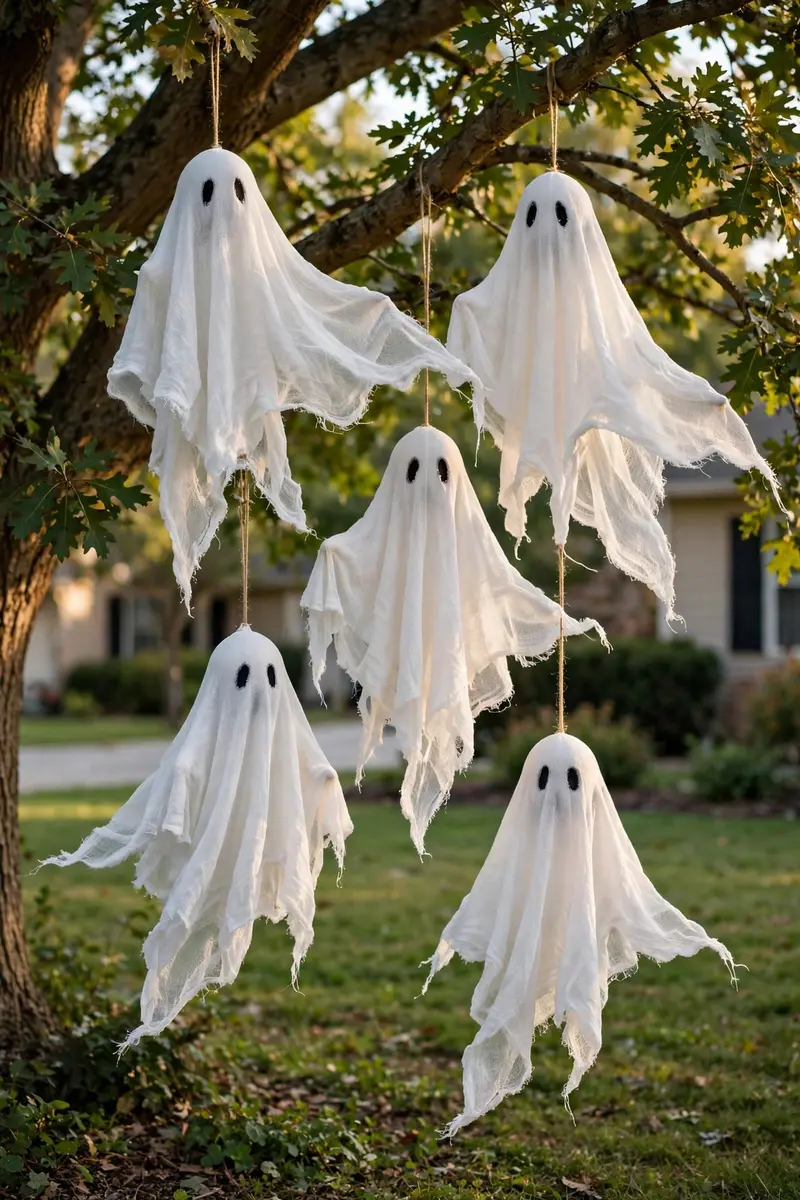
5. Cheesecloth Ghost Figures
Cheesecloth ghosts are the workhorse of budget Halloween outdoor decor ideas: cheap, weather-tough, and genuinely eerie when they sway in the breeze. A cluster of them along a fence or in a tree turns any yard corner into a haunted grove.
Materials + cost: Cheesecloth ($8–12 for a few yards); white balloons or foam balls for heads ($5); string; LED tea lights ($8/24-pack). Total: ~$20–30 for 5–6 ghosts.
Drape a length of cheesecloth over an inflated balloon tied to a stick or string, pinch it at the neck with a rubber band, and draw simple spooky eyes with a black marker. Hang the ghosts from trees, fence posts, or your porch eave at different heights. Pop an LED tea light inside the “head” area at dusk so the faces glow.
Practical tip: Cheesecloth shrinks and stiffens when wet — hang ghosts under eaves or trees if rain is forecast, and they’ll survive the whole month.
Variation idea: Make one giant “king ghost” — 3 yards of cheesecloth over a large beach ball — as the centerpiece of your ghost grove.
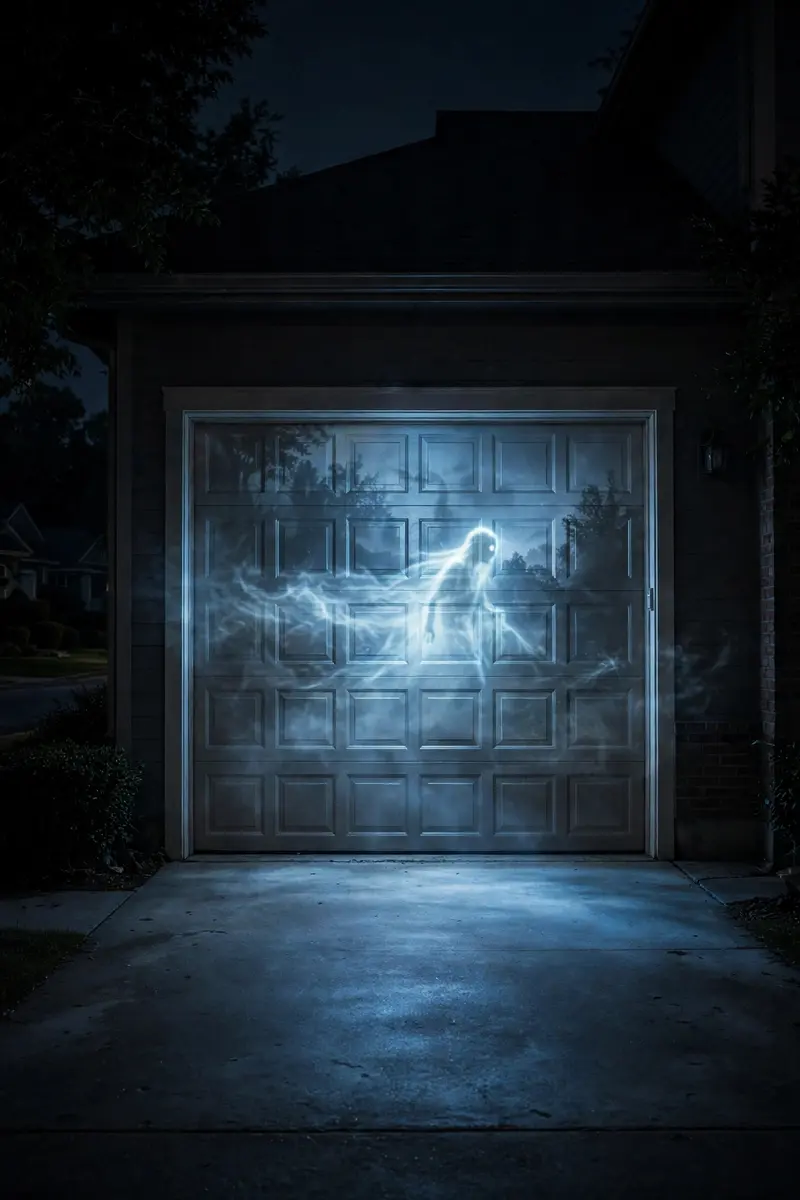
6. Projector Horror Scene on the Garage
A window projector (or an inexpensive outdoor projector) playing looping ghost or zombie scenes on your garage door is the ultimate lazy-genius display — zero construction, one plug, and it looks like a Hollywood haunted house from the curb. Of all the Halloween outdoor decor ideas on this list, this one takes the least effort for the biggest payoff.
Materials + cost: Holiday window projector ($25–50); projection screen or a white shower curtain ($10); or a basic outdoor projector ($80–120) with free YouTube Halloween loop videos. Total: ~$35–150 depending on setup.
Stretch a white shower curtain or screen in your garage-door frame, set the projector inside the garage (protected from weather) shining outward, and loop a ghostly scene video. Ghosts drifting, zombies crawling, bats swarming — the loops are widely available and sell the illusion completely after dark.
Practical tip: Blackout any competing light near the projection surface — even a bright porch bulb will wash out the scene. Face the screen toward the street for maximum drive-by impact.
Variation idea: Project a subtle “haunted window” loop onto an upstairs window instead — silhouettes pacing behind curtains are quietly terrifying.
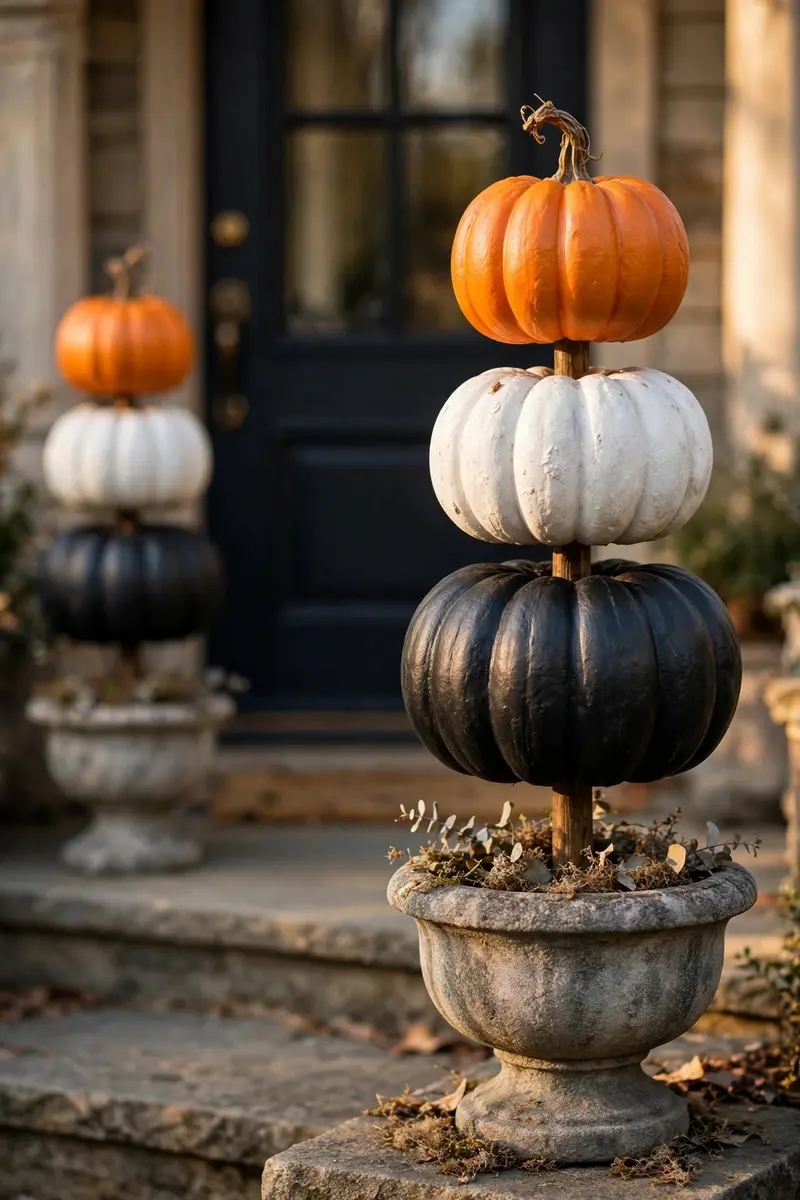
7. Pumpkin Stack Topiary
Stacked-pumpkin topiaries flanking your front door give you that high-end, storefront look with almost no skill required. They’re the “curb appeal” version of Halloween outdoor decor ideas — polished, photogenic, and reusable year after year if you use faux pumpkins.
Materials + cost: 3–5 faux pumpkins in graduated sizes per stack ($30–50 for two stacks); a wooden dowel or PVC pipe to thread them on ($4); a weighted planter or urn ($15–25). Total: ~$50–80 for a pair.
Thread the pumpkins onto the dowel from largest to smallest, set the dowel into a heavy planter filled with soil or sand, and nest the bottom pumpkin over the planter’s rim. Alternate colors — orange, white, and black — for a designer look. Tuck in a few faux leaves or berries between layers.
Practical tip: Use faux pumpkins only for stacking — real pumpkins soften and the stack will collapse mid-month. Spray-painted faux ones look convincingly real.
Variation idea: Wrap a strand of warm fairy lights around each stack so the whole topiary glows at night.
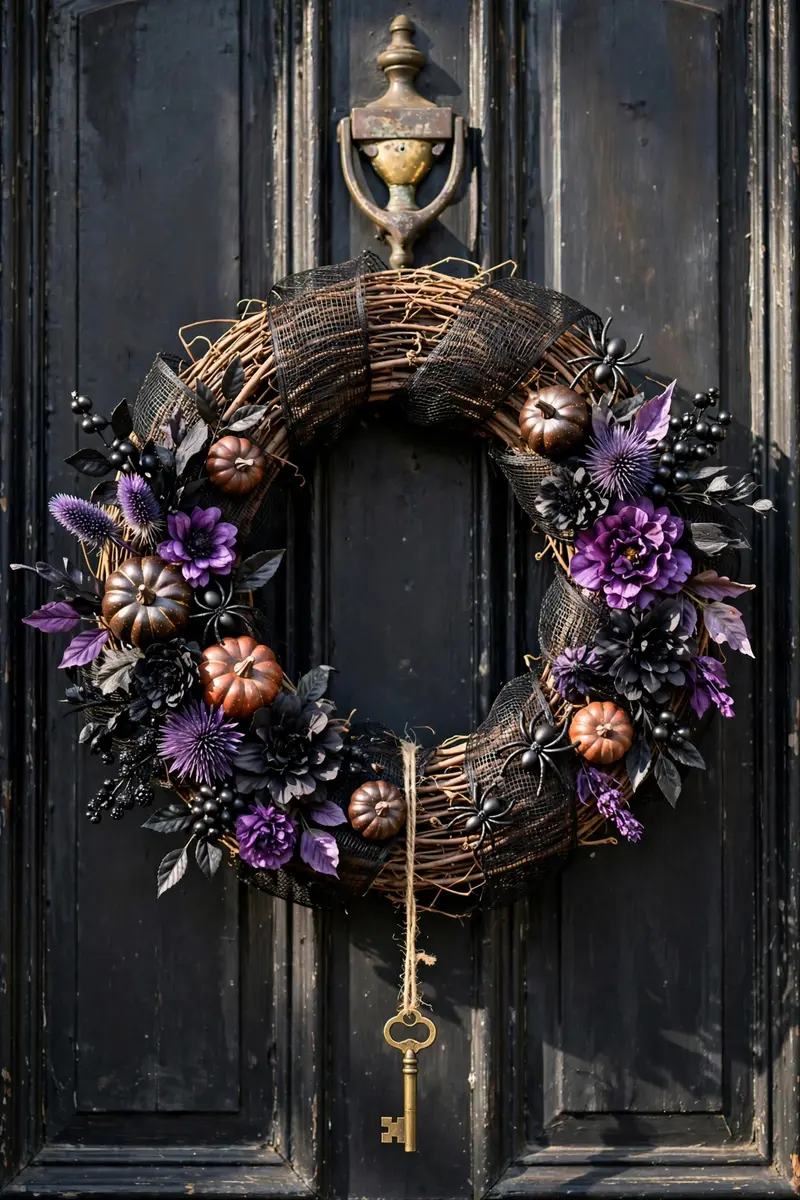
8. Spooky Front-Door Wreath
Your front door is the focal point every visitor reaches, so a Halloween wreath there ties the entire yard display together. It’s also the easiest of these Halloween outdoor decor ideas — a thirty-minute craft that reads “done on purpose” from the curb.
Materials + cost: Grapevine wreath base ($8–12); black and purple faux flowers, mini pumpkins, ribbon ($10–15); hot glue. Or grab a ready-made Halloween wreath ($25–35). Total: ~$20–35 DIY.
Wrap the wreath base with black mesh ribbon, then hot-glue clusters of purple and black flowers, two or three mini pumpkins, a few plastic spiders, and a dangling “Boo” sign or skeleton key. Hang it at eye level on your door with an over-the-door hanger so you don’t damage the finish.
Practical tip: Spray your finished wreath with a clear outdoor sealant — morning dew fades cheap faux flowers fast.
Variation idea: Go harvest-elegant with a wheat, dried-flower, and white-pumpkin wreath — it carries you from early October straight through Thanksgiving.
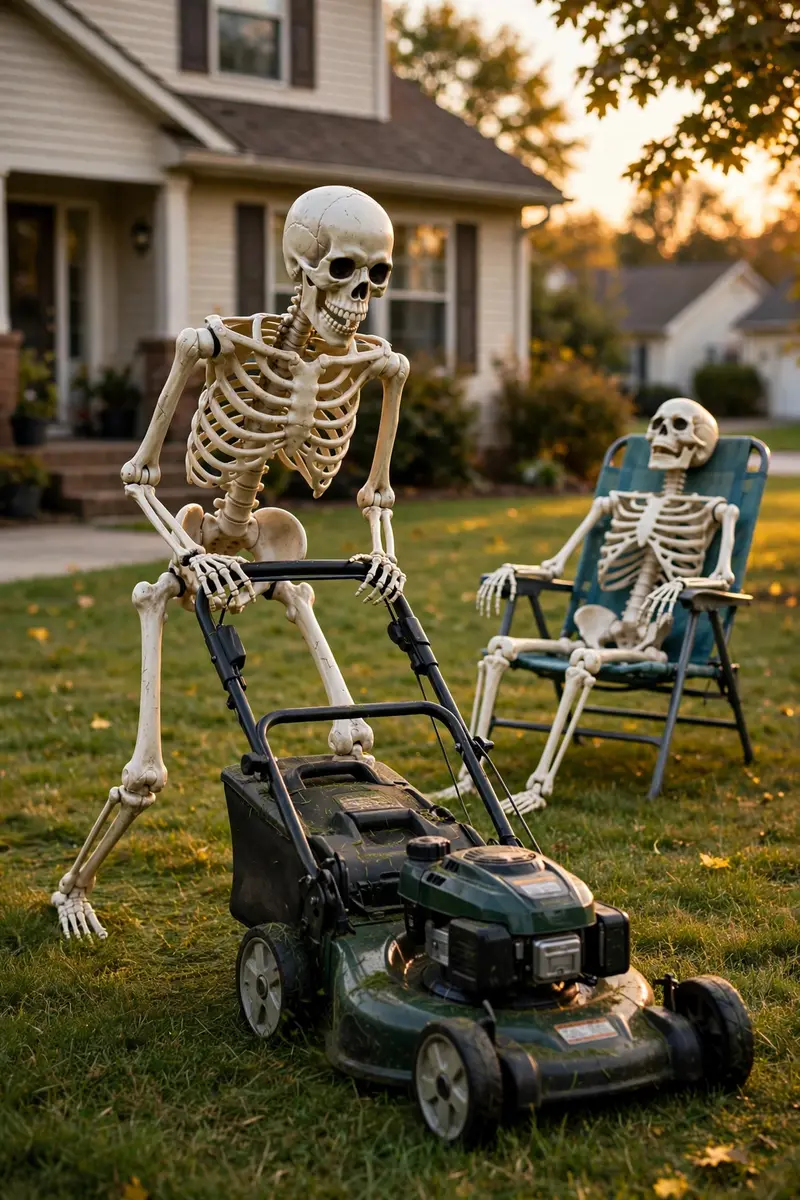
9. Skeleton Family Tableau
Posable plastic skeletons doing something funny in your yard — raking leaves, grilling, sitting in lawn chairs — get more laughs and photos than any other single prop in your Halloween outdoor decor ideas lineup. People come back year after year to see what your skeletons are up to.
Materials + cost: One 5-foot posable skeleton ($25–40); extra poseable skeletons or animals ($15–30 each). One-skeleton scene: ~$25–40; a family of three: ~$70–100.
Pose your skeleton in a relatable scene on the lawn: mowing the lawn (with a real mower), sunbathing in a lounge chair, or walking a skeleton dog. Rotate the scene weekly through October so neighbors keep noticing. Wire the joints loosely so wind doesn’t slowly topple the pose.
Practical tip: Spray skeletons with a UV-resistant clear coat — cheap plastic skeletons bleach and yellow in direct sun within weeks.
Variation idea: Stage a “skeleton prom” on the porch or a skeleton band in the yard with thrift-store instruments.
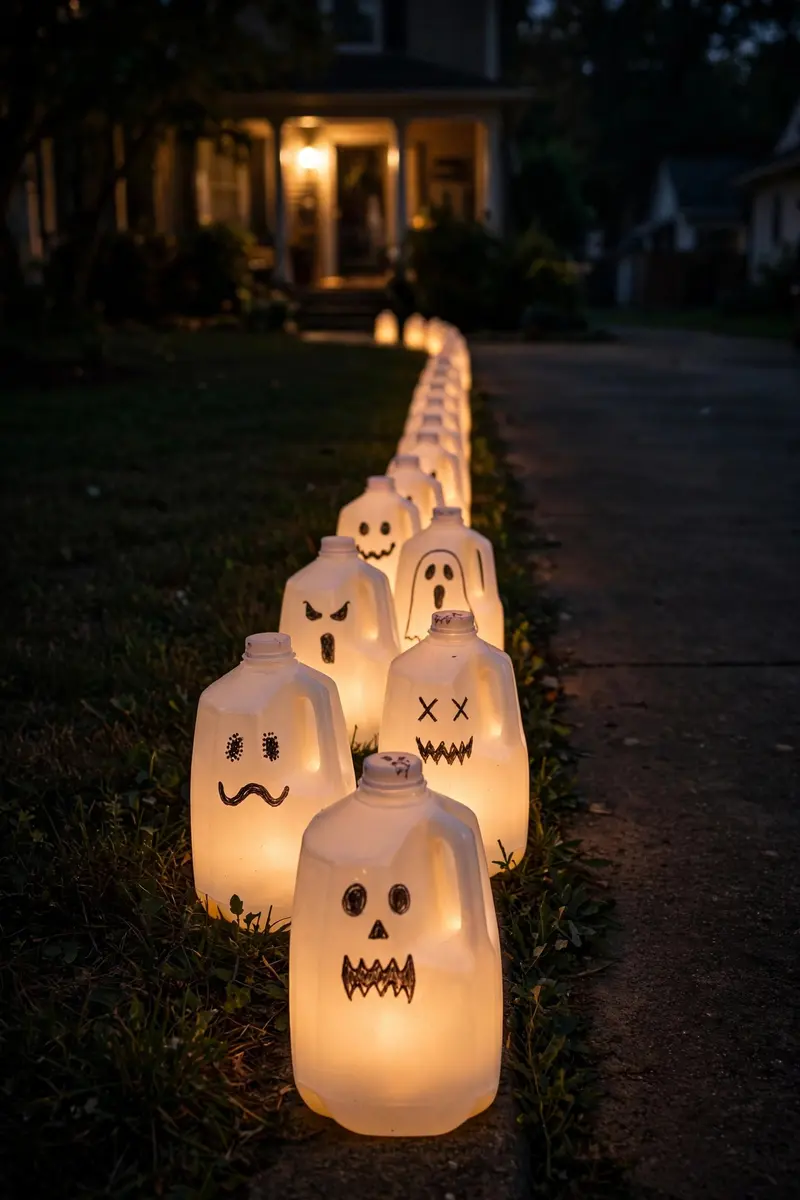
10. Glowing Milk-Jug Ghost Luminaries
Milk-jug luminaries are the ultimate budget Halloween outdoor decor ideas — practically free, takes an hour, and the glowing faces lining a driveway look genuinely magical after dark.
Materials + cost: 10–15 clean plastic milk or water jugs (free); black permanent marker; battery LED tea lights ($8/24-pack). Total: under $10.
Rinse and dry the jugs, draw ghost faces on each with a black marker (vary the expressions — spooky, silly, surprised), drop an LED tea light inside, and line them along your driveway edges, porch steps, or flowerbed borders. The translucent plastic diffuses the light into a soft ghostly glow.
Practical tip: Put a handful of sand or pebbles in each jug so they don’t blow away — this is the single most common failure of this DIY.
Variation idea: Paint the jugs orange and draw jack-o’-lantern faces for pumpkin-style luminaries without carving a single pumpkin.
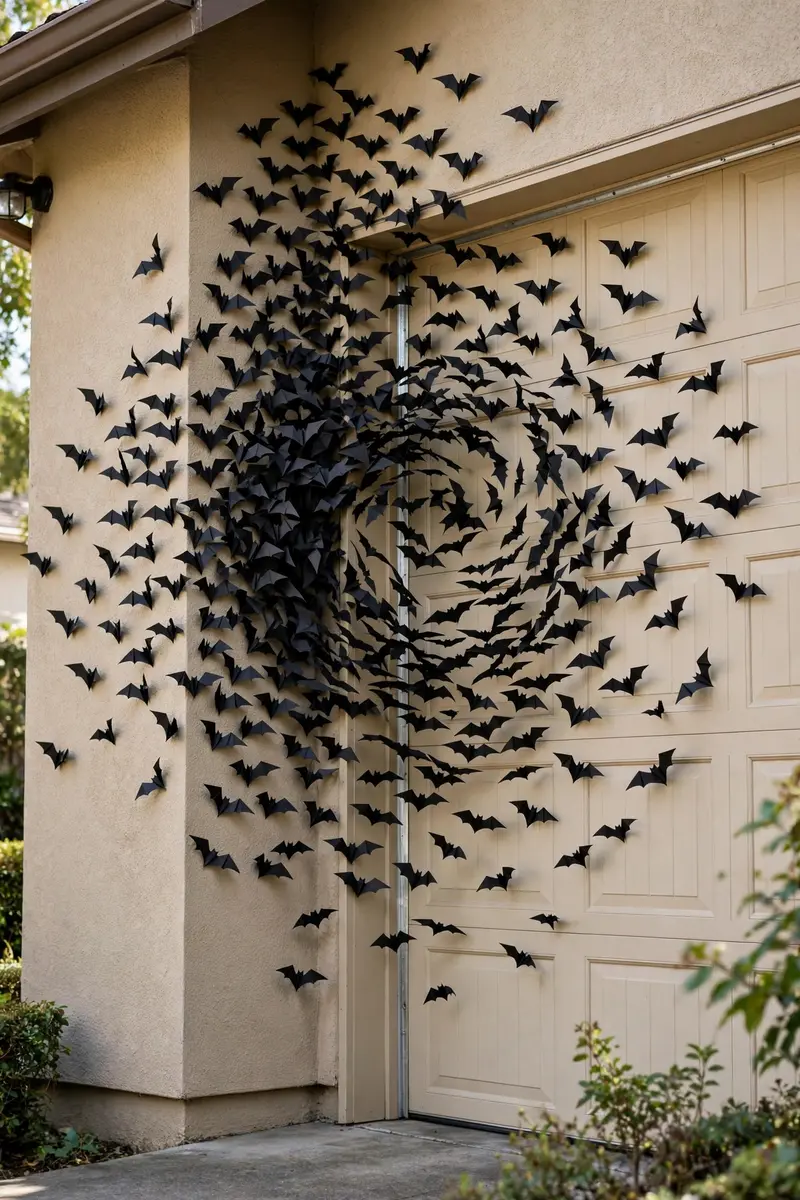
11. Bat Swarm on the Facade
A swarm of black bats “flying” up your house wall or across the garage door creates motion and drama for pennies. It’s one of the simplest Halloween outdoor decor ideas here, but from the street it looks like your house is being taken over — in the best way.
Materials + cost: Black cardstock or foam sheets ($6–10); bat template (free printable); removable mounting putty or Command strips ($5). Total: ~$10–15.
Cut out 30–50 bats in three sizes from black cardstock, fold each slightly down the middle so the wings lift off the surface, and stick them to your house facade in a swirling flight path — dense near the “entry” point, spreading out as they “fly.” Start at a corner and spiral outward.
Practical tip: Use outdoor-rated mounting putty or Command strips, not tape — tape fails in damp October air and leaves residue on siding.
Variation idea: Spray half the bats with glow-in-the-dark paint so a phantom swarm remains visible after the porch lights go off.
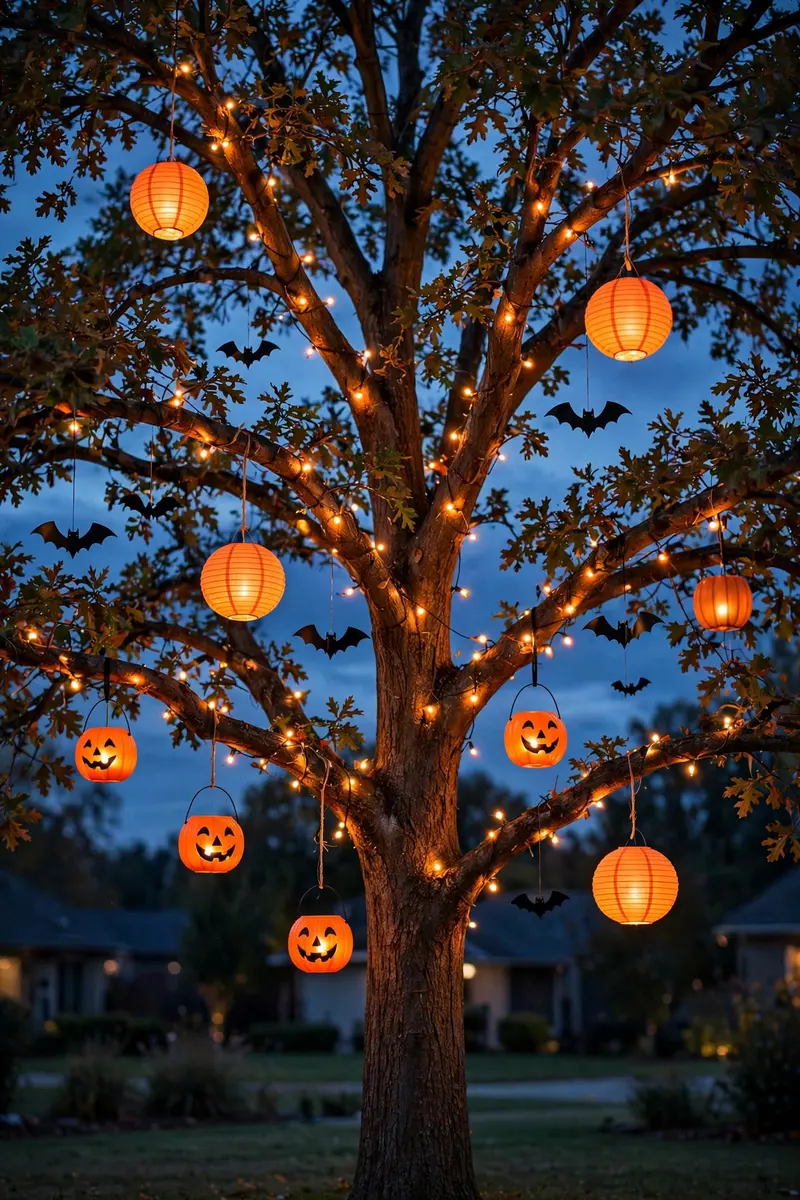
12. Haunted Tree With Hanging Lanterns
If you have a tree in your front yard, you already own the best Halloween prop there is. A few hanging lanterns, ghosts, and lights turn it into a haunted centerpiece that anchors your whole display — one of the highest-impact Halloween outdoor decor ideas for homes with mature trees.
Materials + cost: Paper lanterns or plastic jack-o’-lantern buckets ($1–3 each); orange string lights ($12); hanging ghost or bat cutouts ($5). Total: ~$20–35.
Hang lanterns and pumpkin buckets from sturdy branches at varying heights using twine or fishing line, wind an orange string-light strand through the branches, and add a couple of cheesecloth ghosts or bat cutouts. Light it all up at dusk — a glowing tree reads from three houses away.
Practical tip: Hang everything with quick-release knots or S-hooks so you can take it down fast if a windstorm hits — lanterns become kites in 30mph gusts.
Variation idea: Hang small “potion bottles” (plastic bottles with glow sticks inside) from the branches for a witch’s-tree look.
13. Witch Cauldron With Dry-Ice Fog
A bubbling witch’s cauldron on your porch or lawn is peak Halloween theater. The rolling fog does all the work — even a cheap plastic cauldron looks legit when dry ice is involved, which is why fog effects rank among the most dramatic Halloween outdoor decor ideas.
Materials + cost: Plastic cauldron ($12–20); dry ice ($10–15 per use, from grocery stores); warm water; purple or green LED puck light ($8). Total: ~$30–45.
Set the cauldron on a stable surface away from the walkway, place a metal bowl of warm water inside, drop in chunks of dry ice, and set a green or purple LED light under the rim. The fog pours over the sides and crawls across the ground. Add a broomstick leaning nearby and a witch hat on a stake to sell the scene.
Practical tip: Never handle dry ice with bare hands — use tongs and thick gloves, and keep the cauldron where small kids can’t reach in. Refresh the water every 20–30 minutes for all-night fog.
Variation idea: Skip the dry ice and use an ultrasonic mister (pond fogger, ~$12) floating in the water — it’s reusable, kid-safe, and runs for hours.

14. Creepy Fence Draped With Skeletons
If you have a front fence, it’s free display real estate for Halloween outdoor decor ideas. Skeletons climbing, hanging, or “bursting through” the fence is a Pinterest-favorite angle that looks incredible in photos and costs very little.
Materials + cost: 2–3 posable skeletons ($25–40 each); zip ties ($4); faux cobwebs ($6); orange string lights ($12). Total: ~$60–140 depending on skeleton count.
Zip-tie skeletons to the fence in action poses — one climbing over, one hanging upside down, one peeking through the slats. Drape cobwebs across the top rail, weave in string lights, and add a hand-lettered “Keep Out” or “Beware” sign. The skeletons read as characters, not clutter.
Practical tip: Zip-tie skeletons at two points minimum (ribs and pelvis) — a single tie lets them swing and tangle in wind.
Variation idea: Line the fence with glowing skull lanterns instead — less scary, more elegant, and great for neighborhoods with small kids.

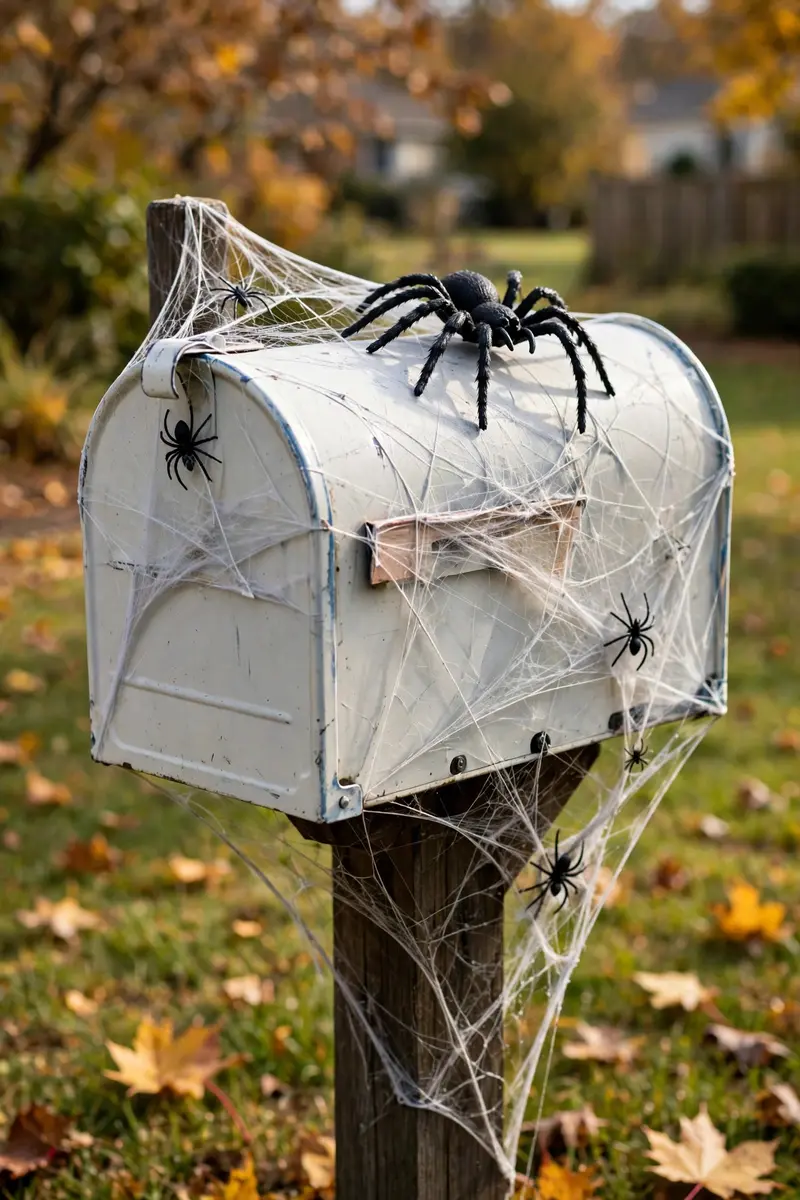
15. Spider-Infested Mailbox
Your mailbox is one of the first things visitors touch — covering it in a spiderweb with a giant spider on top is a small, cheap scare that punches way above its weight — proof that the best Halloween outdoor decor ideas don’t have to be big.
Materials + cost: Stretchable spider web ($4); 1 large plastic spider ($6–10); a few small spiders ($3). Total: ~$10–15.
Wrap the mailbox post and box in webbing, stretching it thin so it looks like real strands. Perch the big spider on top of the box or crawling up the post, and tuck smaller spiders into the web. Leave the mailbox door functional — the mail carrier will thank you.
Practical tip: Keep the web off the mailbox door hinge and flag so the box still opens and the flag still raises — blocked mailboxes annoy carriers fast.
Variation idea: Swap the spider for a black cat silhouette perched on the mailbox with glowing eyes (two LED tea lights behind the cutout).
16. Monster Eyes in the Bushes
Pairs of glowing eyes peering out of dark bushes are one of the cheapest, creepiest Halloween outdoor decor ideas there is. They cost almost nothing and genuinely startle people walking past at night.
Materials + cost: Cardboard tubes (paper towel rolls, free) or foam balls; glow sticks or LED tea lights ($8); black tape. Total: under $10.
Cut eye shapes out of cardboard tubes, tape a glow stick or LED light inside each tube, and nestle the tubes deep in your bushes, hedges, or flowerbeds in pairs at different heights. From the sidewalk, all anyone sees is disembodied glowing eyes watching them. Red and green glow sticks look the eeriest.
Practical tip: Place eyes at “creature” heights — some low (cat), some high (monster) — and turn them slightly askew so they look like they’re moving when you walk past.
Variation idea: Add a pair of eyes to a dark upstairs window too — one watcher in the bushes, one in the house.

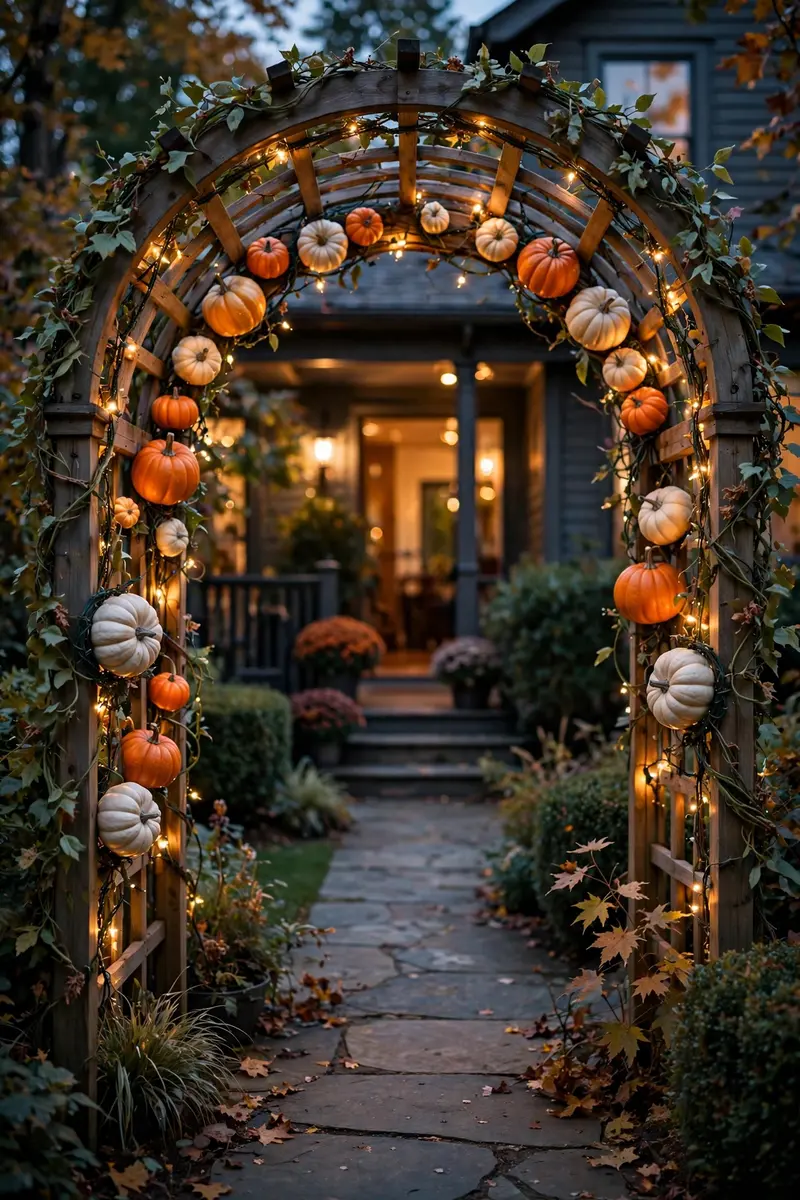
17. Pumpkin Archway Entrance
An archway of pumpkins, vines, and lights framing your walkway or front steps is a showstopper — the kind of display people photograph and post. It says “Halloween headquarters” like nothing else — no wonder it tops so many Halloween outdoor decor ideas roundups.
Materials + cost: A garden arch or two shepherd’s hooks + PVC pipe arch ($30–50); faux pumpkins and gourds ($20–30); faux vines or garland ($10); orange string lights ($12). Total: ~$70–100.
Assemble the arch over your walkway, weave faux vines around the frame, wire on pumpkins and gourds of different sizes (use floral wire through the stems), and wrap the whole thing in string lights. Anchor the arch legs in planters or with ground stakes so it can’t tip.
Practical tip: Build the arch on a calm day and have someone hold it while you anchor — a top-heavy pumpkin arch catches wind like a sail.
Variation idea: Do a “haunted harvest” arch instead — corn stalks, dried wheat, and white pumpkins for a look that lasts through Thanksgiving.
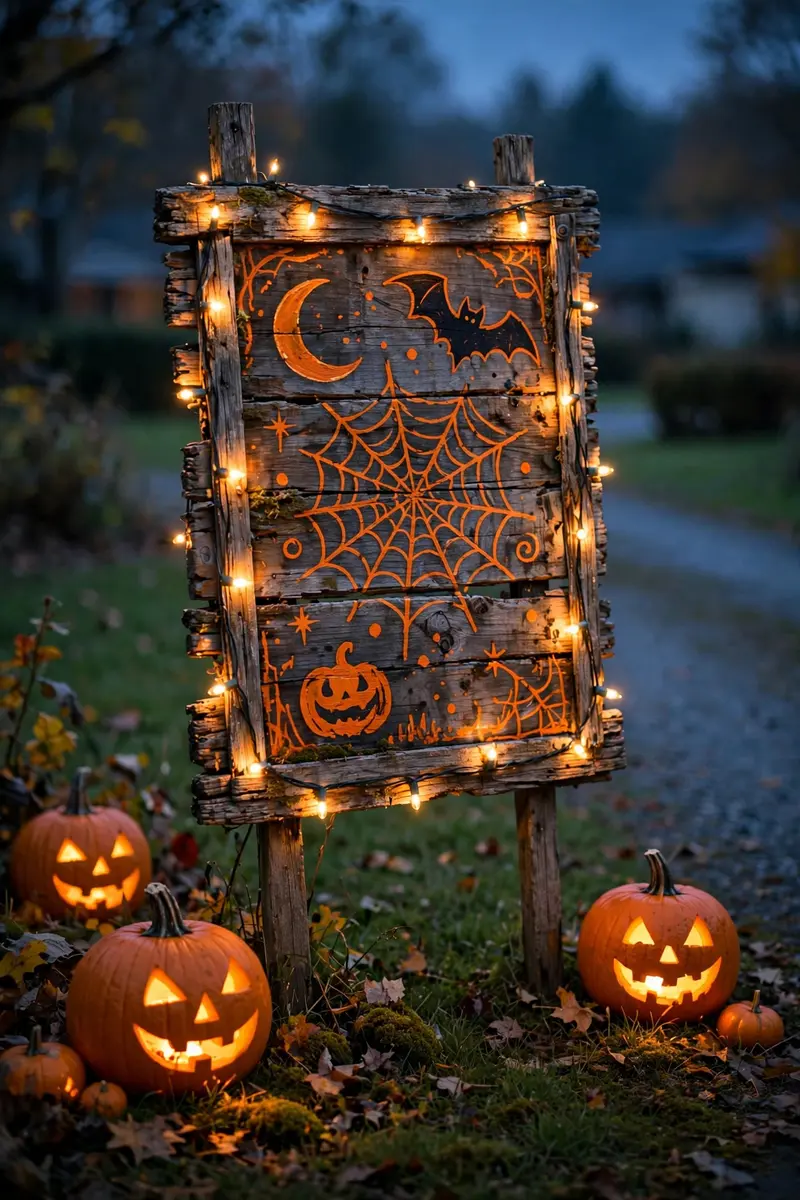
18. Light-Up “Trick or Treat” Wood Sign
A hand-painted wooden sign pointing the way (“Trick or Treat →” or “This Way to Candy”) is charming, useful, and keeps visitors from wandering around your yard looking for the door.
Materials + cost: Wooden plank or pallet board ($5–10); outdoor acrylic paint ($8–12); string lights or LED strip ($10). Total: ~$20–30.
Paint the board with a fun message — “Trick or Treat This Way,” “Enter If You Dare,” or your house number in spooky lettering — then outline the letters with a battery LED strip or poke string lights around the frame. Stake it at the end of your driveway where it’s visible from the street.
Practical tip: Seal both sides with outdoor polyurethane — an unsealed sign warps and the paint peels after one rainy week.
Variation idea: Make it double-sided with a cute daytime message (“Happy Halloween!”) and a spooky nighttime one (“Turn Back Now”).
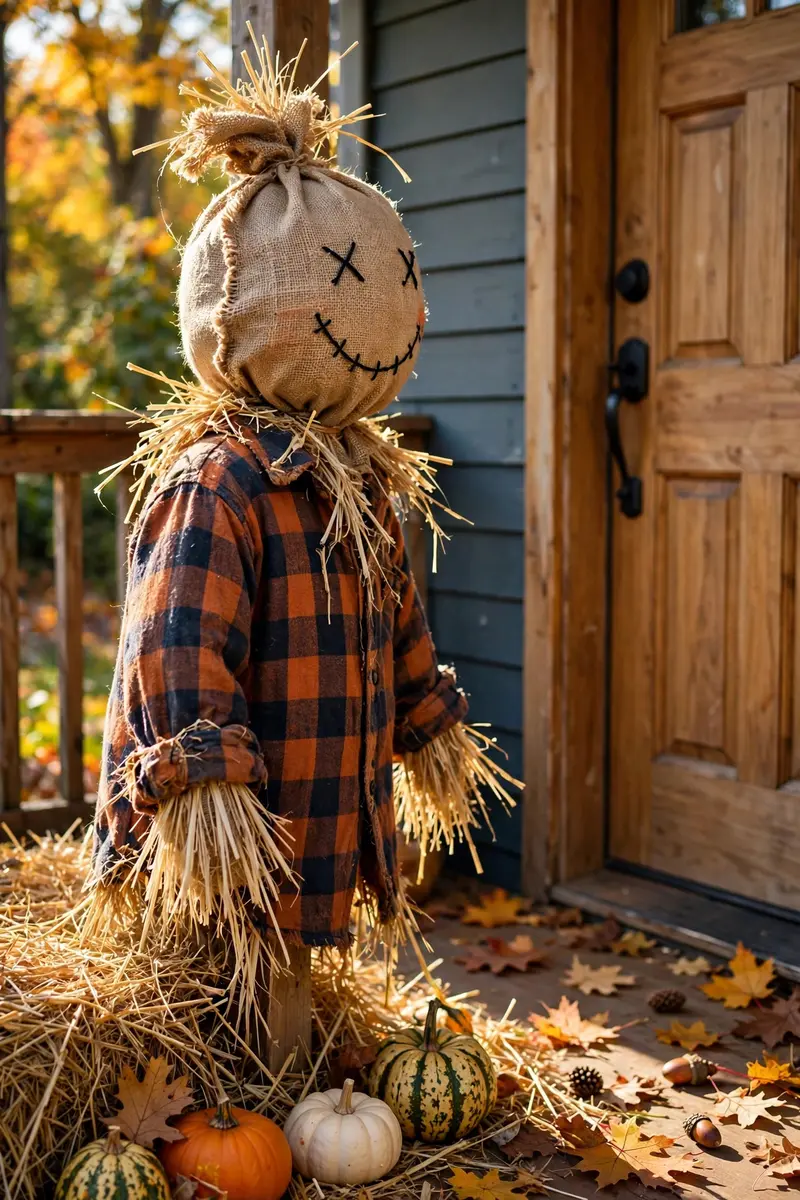
19. Scarecrow Doorman
A friendly (or creepy) scarecrow standing guard by your front door is a classic for a reason — it greets every visitor, works for the whole fall season, and you can build one entirely from old clothes — the very definition of budget Halloween outdoor decor ideas.
Materials + cost: Old flannel shirt, jeans, and a hat (free from the closet); straw or crumpled newspaper for stuffing (free); burlap sack or old pillowcase for the head ($3); twine. Total: nearly free.
Stuff the shirt and jeans with straw or newspaper, tie off the wrists and ankles with twine, mount the head (draw a face or leave it blank for creepiness), and prop your scarecrow on a chair by the door or stake him in the lawn. Add a pumpkin head for instant Halloween mode, or a witch hat for a wizardly twist.
Practical tip: Weigh the base down with a sandbag or bricks hidden inside the pants — a stuffed scarecrow is basically a sail in October wind.
Variation idea: Build a matching pair — one smiling, one sinister — flanking the front steps like stone lions with personality.
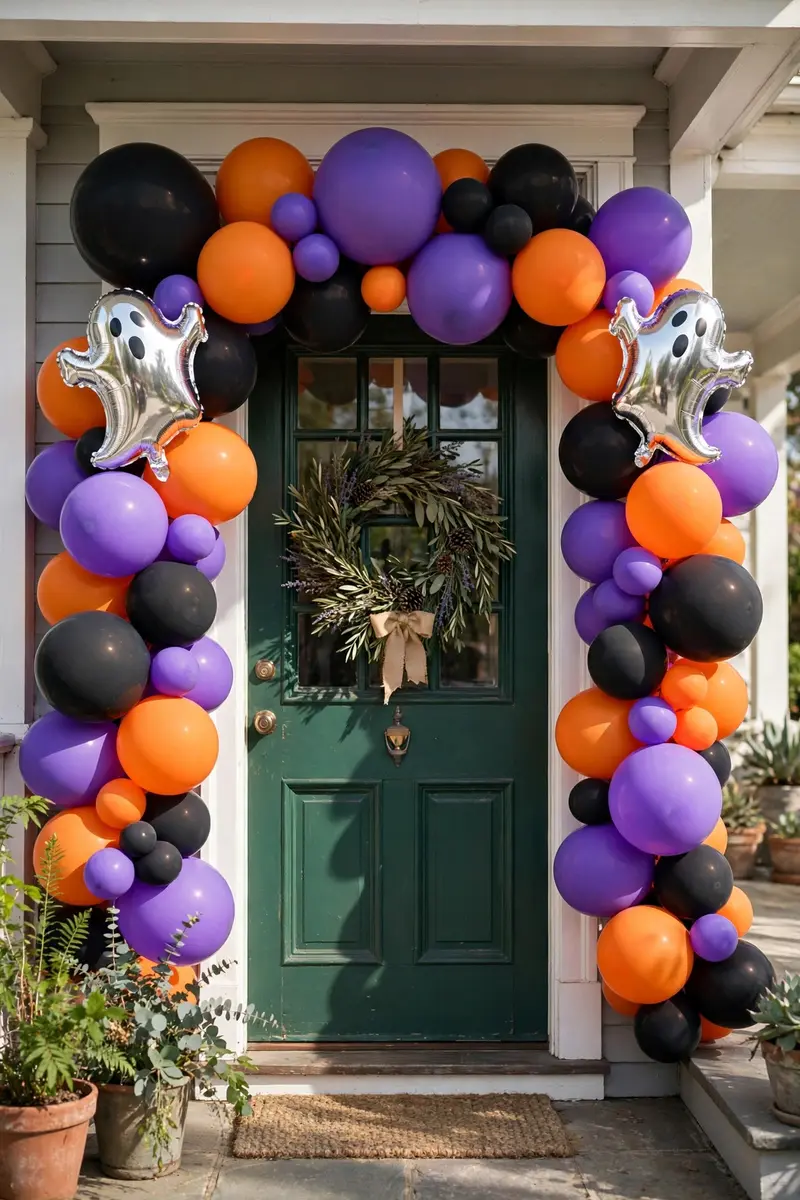
20. Black-and-Orange Balloon Garland at the Entry
A balloon garland in Halloween colors framing your doorway or porch columns is fast, festive, and photographs beautifully. It’s the party-decor trick that works just as well for trick-or-treat night, and one of the fastest Halloween outdoor decor ideas to pull off.
Materials + cost: Balloon garland kit with black, orange, and purple balloons ($15–25); balloon strip and glue dots (included in kits); a few mylar ghost or pumpkin balloons ($3–5 each). Total: ~$20–35.
Inflate balloons in three sizes, clip them onto the garland strip alternating colors, and drape the garland around your doorframe or along the porch railing. Tuck in a couple of mylar ghost balloons as accents. Hang it the day before Halloween for maximum freshness.
Practical tip: Keep the garland out of direct afternoon sun — UV and heat pop balloons fast. A shaded porch can keep it looking good for a week.
Variation idea: Add faux spiderweb draped over the garland and a few hanging plastic spiders for a “haunted party” upgrade.
21. Hay Bale and Mum Porch Display
Before the spooky stuff goes up, hay bales and chrysanthemums give you a gorgeous fall foundation that transitions perfectly into Halloween. Add a few pumpkins and you’re done — it’s the highest-impact-per-dollar of all these Halloween outdoor decor ideas.
Materials + cost: Straw bales ($8–12 each); mums in fall colors ($6–10 each); pumpkins and gourds ($10–20). A full porch display: ~$40–70.
Stack one or two bales beside your door or on the porch steps, top them with mums in rust, gold, and burgundy, and nestle pumpkins and gourds around the base. On Halloween week, add a witch hat on a stake, a “Boo” sign, or a few plastic crows to Halloween-ify it instantly.
Practical tip: Set bales on a tarp or tray — straw sheds, and your porch will thank you. Compost the bales after the season instead of trashing them.
Variation idea: Hollow out a large pumpkin, drop in a potted mum, and use it as a living planter — it lasts about two weeks and looks incredible.

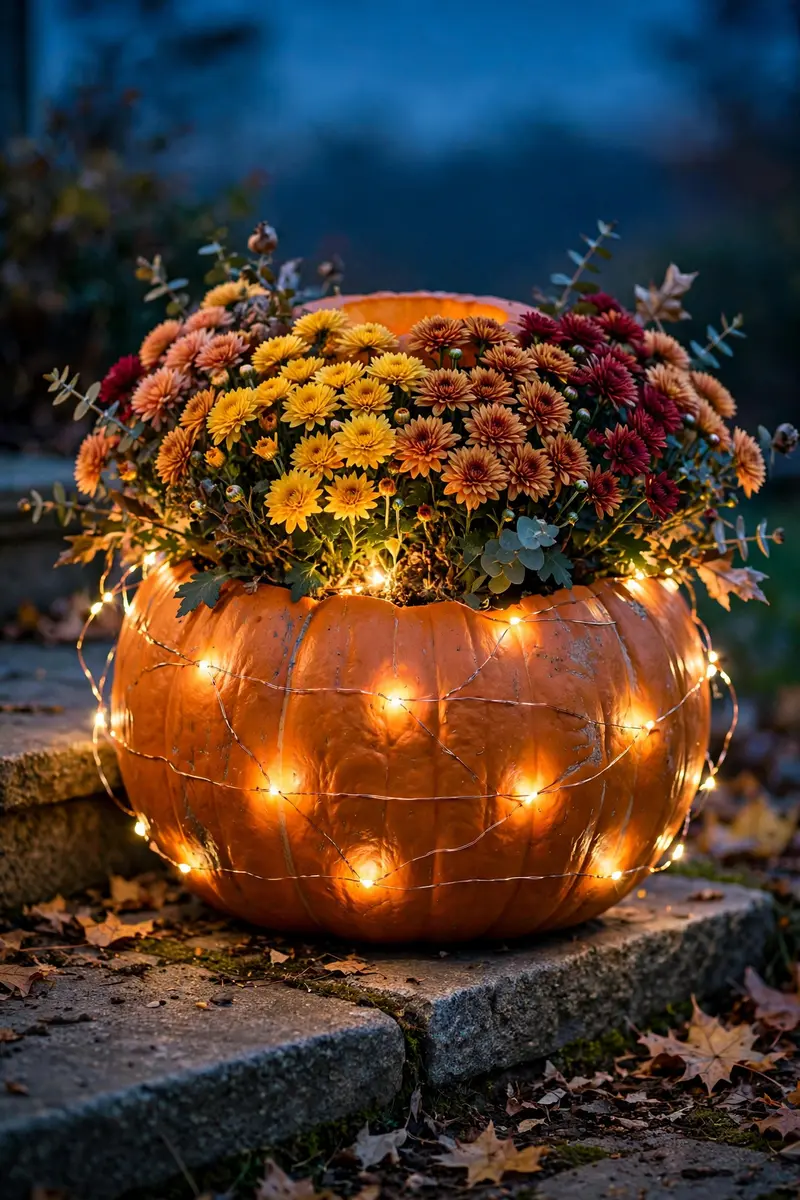
22. Glowing Pumpkin Planter With Mums
A pumpkin carved into a planter and filled with fall flowers is the elegant cousin of the jack-o’-lantern — it glows softly at night and looks like something from a magazine during the day.
Materials + cost: One large pumpkin ($5–8); a potted mum or fall arrangement ($8–12); battery LED string lights ($8). Total: ~$20–30.
Cut the top off a large pumpkin, scoop it out, and drop in a potted mum (keep it in its nursery pot for drainage). Wrap a short strand of warm LED fairy lights around the flowers. Set it on your porch steps or flanking the door — at dusk the whole thing glows from within.
Practical tip: Line the pumpkin with a plastic bag before adding the plant — direct soil contact rots the pumpkin in days.
Variation idea: Use white “ghost” pumpkins with purple mums for a chic monochrome look that still reads Halloween.
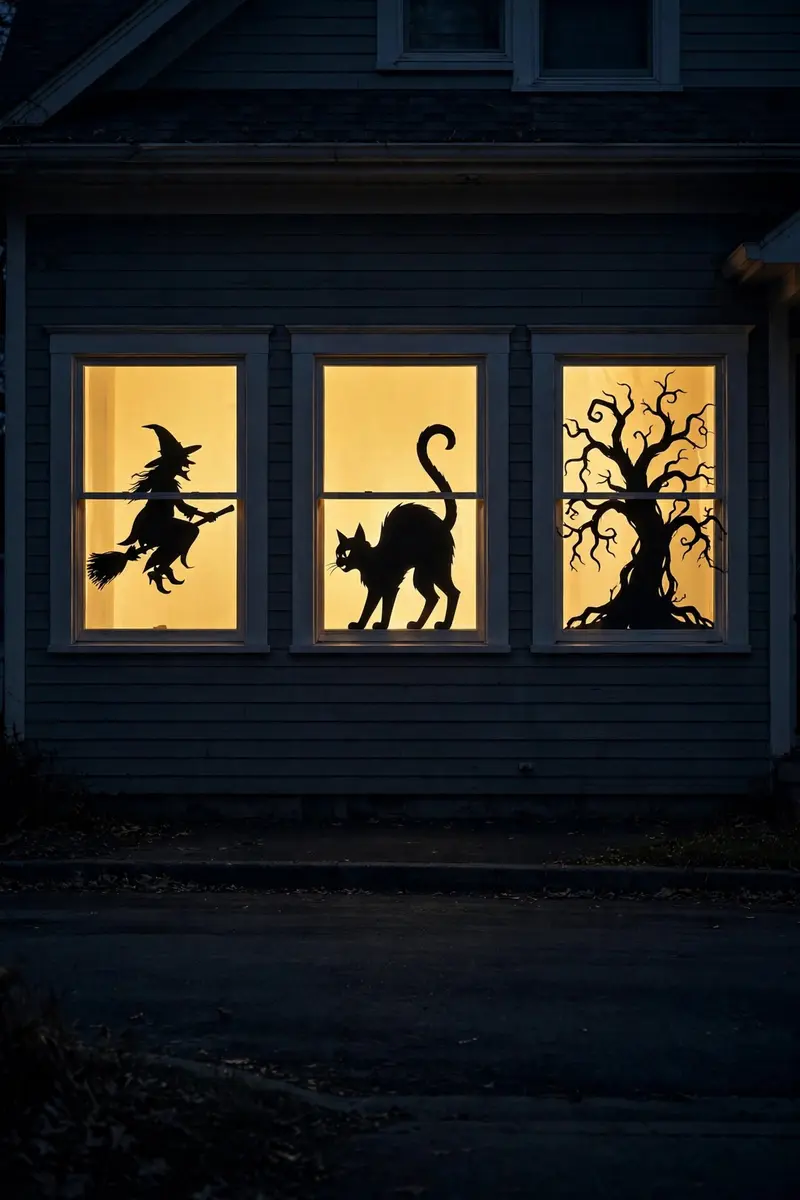
23. Phantom Window Silhouettes
Backlit silhouettes in your windows — a witch on a broom, a black cat, a haunted tree — turn your whole house into part of the display. This is one of the most-seen Halloween outdoor decor ideas because it’s visible from far down the street.
Materials + cost: Black poster board or cardstock ($5–8); printed silhouette templates (free online); tape; a bright lamp or LED strip behind each window ($10–15). Total: ~$15–25.
Cut out silhouettes, tape them to the inside of the glass, and place a bright light behind them — a floor lamp, LED strip, or even a string of white lights. Turn off the room’s main light so the silhouette reads as a crisp black shape against the glow. Do three or four windows for a full haunted-house effect.
Practical tip: Test the look from the street before Halloween night — what looks perfect from inside can be invisible from the curb if the backlight is too dim.
Variation idea: Add slow-moving “ghost” silhouettes by hanging a cutout from a ceiling fan on low — the drifting shadow is genuinely unnerving.
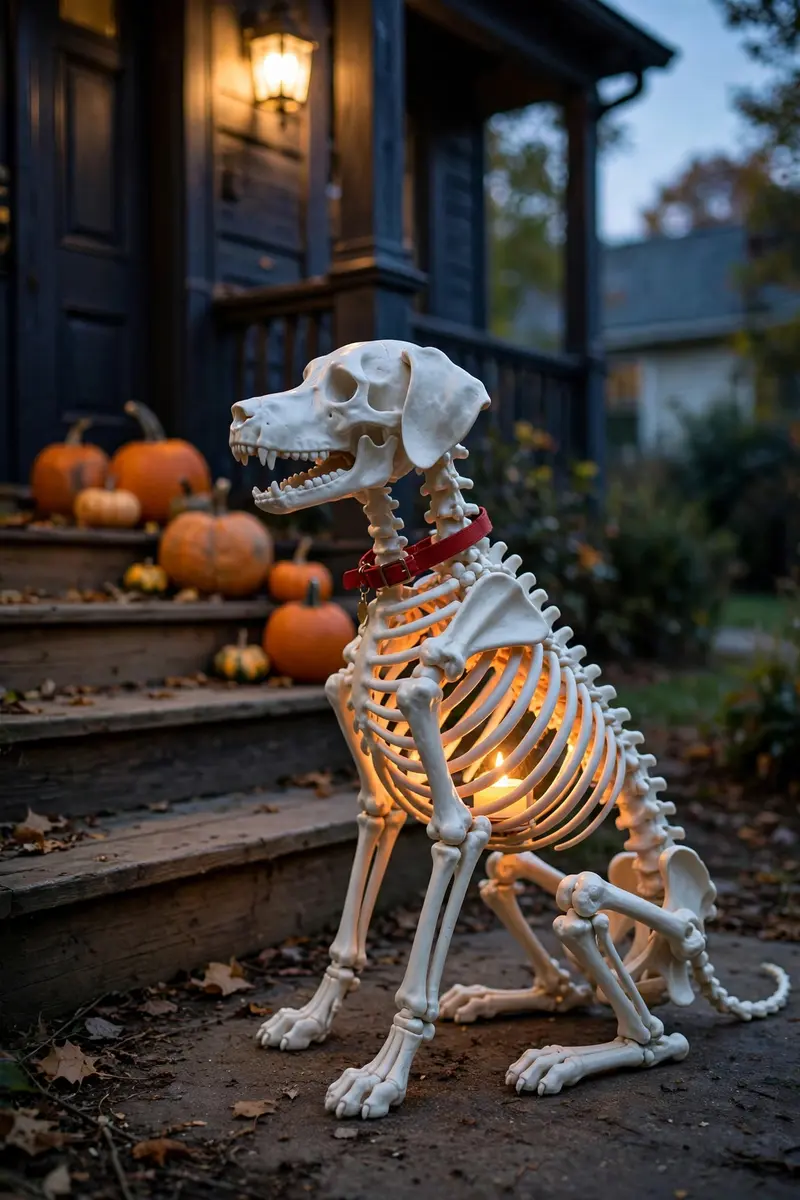
24. Skeleton Dog (or Cat) Companion
A skeleton pet posed next to your skeleton family — or guarding the walkway alone — is the detail that makes people laugh out loud. It’s small, cheap, and disproportionately delightful.
Materials + cost: Plastic skeleton dog or cat ($15–25); a leash or collar ($3). Total: ~$15–30.
Pose the skeleton dog sitting by your front steps like a guard, “walking” with your skeleton family, or digging in the graveyard corner. Add a red collar or a tiny Halloween bandana for personality. At night, tuck an LED tea light in its ribcage for a glowing-belly effect.
Practical tip: Skeleton pets are top-heavy and tip easily — stake them through the pelvis with a landscape staple or lean them against something solid.
Variation idea: Pose the skeleton dog “fetching” a bone near the graveyard, or have a skeleton cat perched on the mailbox watching the street.
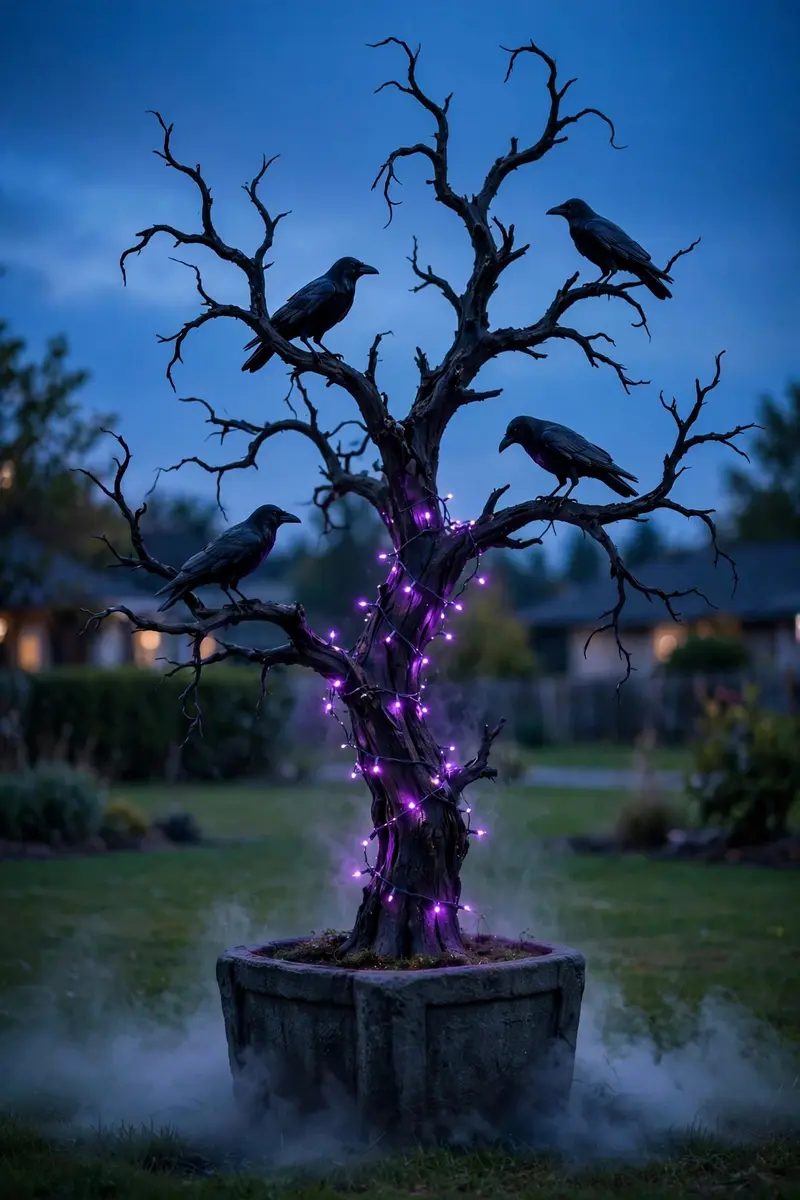
25. Twisted-Branch Spooky Tree With Crows
A bare, twisted branch “tree” studded with black crows is pure gothic elegance — it’s the Halloween outdoor decor idea for people who want spooky without silly. It looks like it belongs in a Tim Burton film.
Materials + cost: Large fallen branches or a dead sapling (free); a heavy planter with concrete or plaster base ($15–25); plastic crows ($3–5 each, need 4–6); black spray paint ($6). Total: ~$30–55.
Arrange the branches in the planter like a dead tree, secure the base with plaster or concrete, spray everything matte black, and perch crows on the branches at different angles. Wrap a strand of purple fairy lights around the trunk for nighttime drama. A light ground fog finishes the scene.
Practical tip: Make the base HEAVY — a tall branch arrangement is extremely top-heavy. A 5-gallon bucket of concrete is the minimum for a 5-foot tree.
Variation idea: Hang tiny orange lanterns or glowing “eyes” from the branches instead of crows for a haunted-forest look.
26. Motion-Sensor Cackling Witch
A witch figure that cackles and lights up when someone walks past is the jump-scare your Halloween outdoor decor ideas have been missing. Motion-activated props do the entertaining for you all night long.
Materials + cost: Animated witch prop ($30–60 at Halloween stores); or DIY: a witch hat on a stake + a motion-sensor sound box ($15–25). Total: ~$25–60.
Position the witch near the walkway where visitors naturally pass — beside the steps or at a turn in the path. Set the motion sensor to face the approach, test the trigger distance (usually 6–10 feet), and make sure the volume is startling but not neighborhood-waking. A strobe or glowing eyes on the figure doubles the effect.
Practical tip: Bring sound-based props inside after trick-or-treat hours — a 2am motion trigger from a passing cat will not make you popular with neighbors.
Variation idea: Hide a motion-sensor speaker in the bushes playing creaking-door and wolf-howl sounds — invisible scares are the best scares.

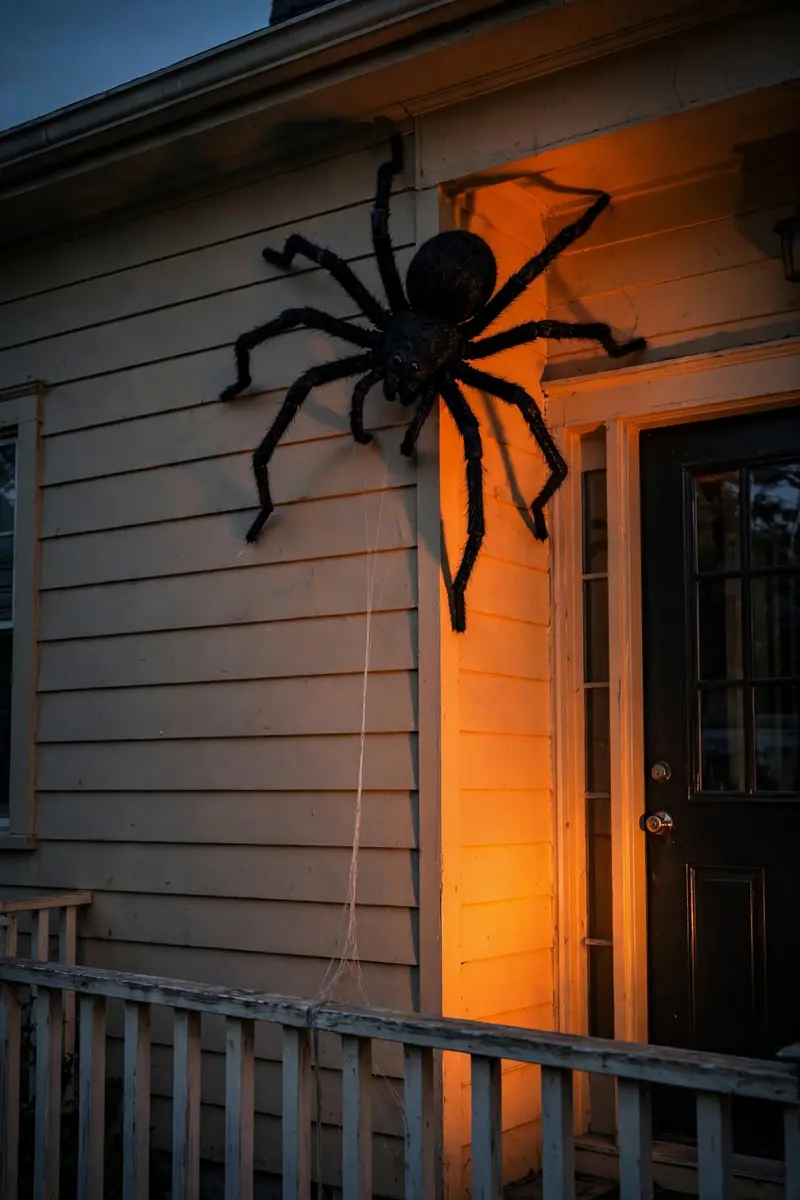
27. Giant Spider Climbing the House
A massive spider scaling your house wall is the single most dramatic thing you can do to a facade. It’s bold, it’s unmistakable from down the block, and kids will talk about “the spider house” all year.
Materials + cost: Large spider prop ($25–50); or DIY: black beach ball body + pool-noodle legs wrapped in black fabric ($20–30); mounting hooks or strong suction cups ($8). Total: ~$30–60.
Mount the spider on a visible wall — beside the front door, on the garage, or climbing a porch column. Bend the legs so it looks mid-climb, and add a web strand or two from its spinneret to the ground. At night, hit it with a colored spotlight (orange or green) so it glows ominously.
Practical tip: Test your mounting method in daylight and check it after the first windy night — a 4-foot spider falling on a trick-or-treater is memorable for the wrong reasons.
Variation idea: Add a smaller “baby spider” on the opposite side of the house — the pair tells a story.
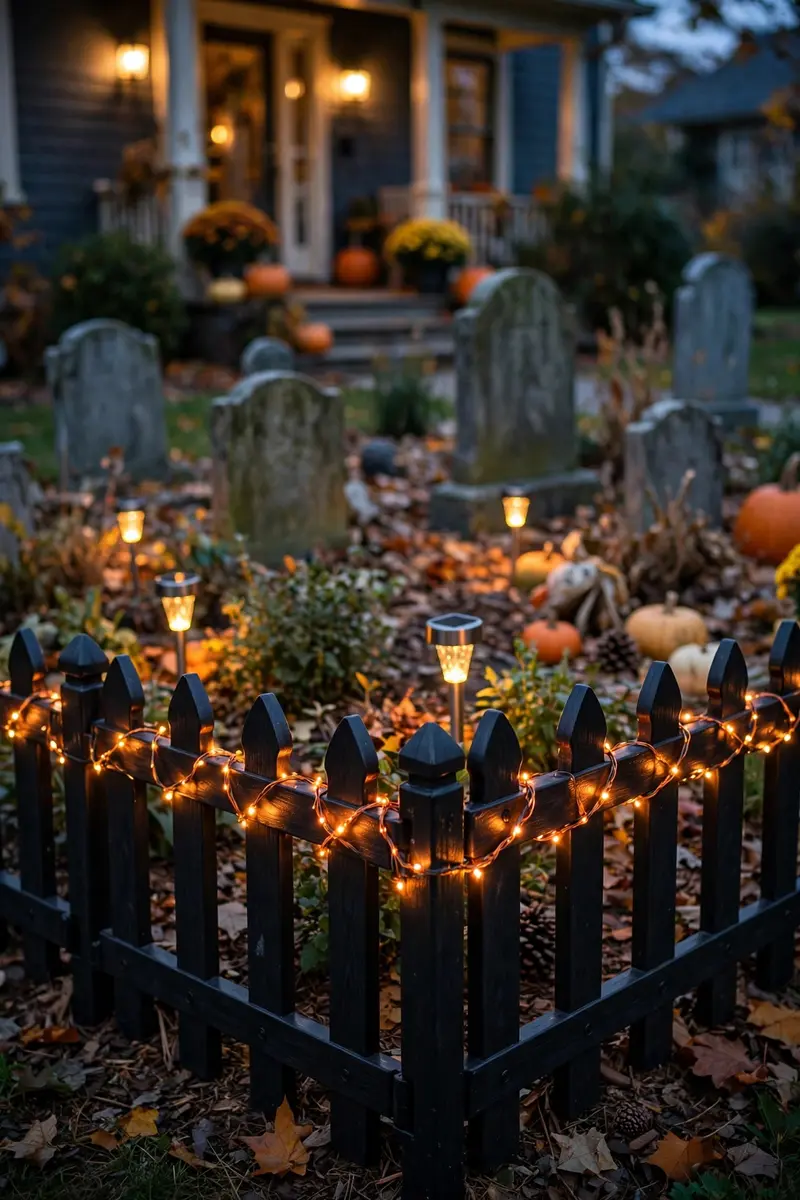
28. Lighted Cemetery Fence Border
A low black “cemetery fence” bordering your flowerbeds or walkway gives your whole yard a finished, haunted-estate look. It’s the framing device that makes every other decoration look more intentional.
Materials + cost: Plastic cemetery fence panels ($15–25 for a 2–3 foot section run); solar stake lights or LED tea lights ($10–15); zip ties ($4). Total: ~$30–45.
Push the fence panels into the soil along your walkway or around the graveyard corner, linking them with zip ties. Weave a strand of orange fairy lights along the top rail, or stake small solar lights behind every few panels so the fence glows from behind. Add a tiny “RIP” gate sign at the walkway entrance.
Practical tip: Install the fence a week before Halloween and let it settle — panels shift in soft soil, and you’ll want to re-straighten them once.
Variation idea: Drape the fence with faux ivy and cobwebs for an overgrown, abandoned-cemetery look that photographs beautifully.
How can I decorate my yard for Halloween on a budget?
For budget Halloween outdoor decor ideas, start with the dollar store and your recycling bin. Milk-jug ghost luminaries, cardboard-tube monster eyes, cheesecloth ghosts, and paper bats cost under $30 combined and cover a whole yard. One bag of stretchable spiderweb ($6) draped over bushes looks like you spent fifty dollars. Faux pumpkins and plastic skeletons from discount stores are reusable, so your per-year cost drops to nearly zero after the first October.
How do I make my house look spooky at night?
When it comes to Halloween outdoor decor ideas, lighting is everything. Swap your porch bulb for an orange or purple LED, uplight your biggest decorations with cheap solar spotlights, and put glowing elements (lanterns, luminaries, backlit silhouettes) at different depths — near the street, mid-yard, and at the door. Layered light at three depths creates the haunted-mansion depth that flat, single-source lighting can’t.
How do I keep outdoor Halloween decorations from blowing away?
Anchor everything: landscape staples for tombstones and fence panels, sand in luminaries, zip ties at two points for hanging skeletons, and heavy bases for anything tall. Take down or secure lightweight items (lanterns, ghosts, webs) before windstorms. As a rule, if a decoration can catch wind like a sail, it needs a stake, a weight, or a sheltered spot.
How do I light up my yard for Halloween safely?
Use outdoor-rated extension cords and lights, plug everything into GFCI-protected outlets, and keep cords off walkways (bury them under mulch or tape them down). Swap real candles for battery LEDs — open flames near costumes are the top Halloween fire risk. Solar stake lights are the easiest safe option: no cords, no outlets, no worries.
When should I put up outdoor Halloween decorations?
Most neighborhoods start the last week of September, with the full display up by the first weekend of October. Put weather-tough items (fence, arch, faux pumpkins) up early; save delicate pieces (real carved pumpkins, balloons, dry-ice scenes) for Halloween week. Taking real pumpkins down or refreshing them a day or two before the 31st keeps everything looking fresh.
Final Thoughts
Your yard is the first thing trick-or-treaters see and the last thing they remember — and it doesn’t take a Hollywood budget to make it unforgettable. Pick one showstopper from these Halloween outdoor decor ideas, light a glowing path to your door, and layer in a few budget DIYs around it. That’s the whole formula.
Start this weekend with the easy wins among these Halloween outdoor decor ideas — the milk-jug luminaries, the monster eyes in the bushes, the bat swarm — and add your big focal piece the following week. By Halloween night, you’ll have the house everyone slows down for. Found a favorite? Save this post to your Halloween board on Pinterest so you have the full list handy when decorating day arrives — and tag us in your yard photos. We’d love to see which idea owns your street.
Looking for more ways to greet trick-or-treaters? Check out our Halloween porch decor ideas and Halloween door decor ideas — and if you still need carving inspiration, our pumpkin carving ideas have you covered.