26 Halloween Window Decor Ideas That Spook and Dazzle
Your windows are the biggest blank canvas on your house — and for Halloween, they’re pure gold. These Halloween window decor ideas turn ordinary glass into glowing haunted scenes, spooky silhouettes, and twinkling displays that stop foot traffic and make trick-or-treaters gasp. The best part? Almost everything here goes on the inside of the glass, so your decorations stay dry, safe, and easy to remove on November 1st.
Whether you love creepy haunted-house vibes, cute kid-friendly pumpkins, or renter-safe clings with zero residue, there’s something below for every window in your home. Most ideas cost under $15, take less than an hour, and look best after dark — when a little backlighting turns paper and plastic into pure magic. Grab your black cardstock and fairy lights, and let’s make your windows the talk of the street.
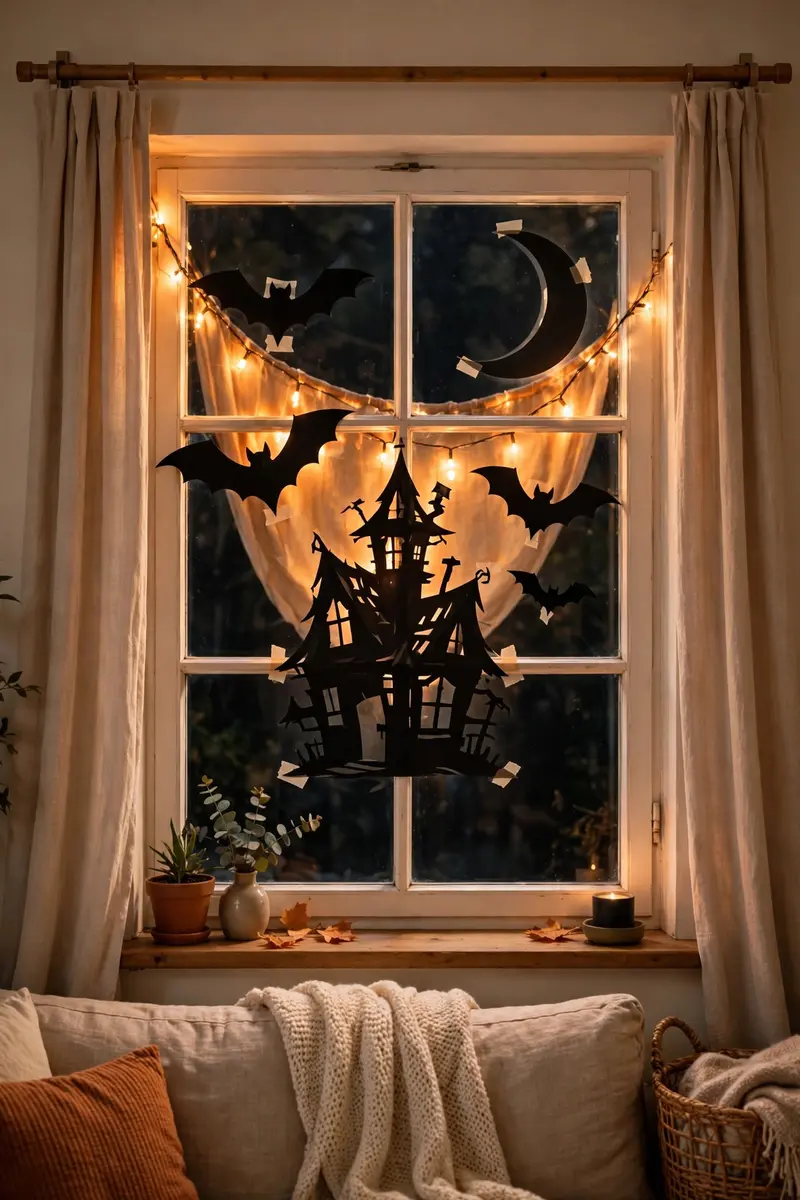
1. Classic Black-Paper Silhouette Scene
Nothing says Halloween like a glowing window full of black-paper silhouettes — bats, a crooked haunted house, and a grinning moon, all backlit so they blaze against the night. It’s the single most-pinned Halloween window look for a reason: from the street, it reads as one dramatic haunted scene, and from inside, it’s just paper taped to glass.
Materials + cost: Black construction paper or cardstock ($4), painter’s tape or adhesive putty ($4), one string of warm-white or orange fairy lights ($6). Total: about $10–14.
Cut your shapes freehand or print templates, then tape them to the inside of the window in a layered composition — big shapes in back, small bats up top. Hang the fairy lights on the wall or curtain rod behind the paper so the silhouettes glow. Step outside after dark to check the effect, since indoor reflections can wash it out.
Practical tip: Put the lights on a timer plug ($8) so the scene switches on at dusk automatically — you never have to remember.
Variation: Swap the haunted house for a witch-on-broomstick silhouette (idea #2) for a second window. Need bat shapes in a hurry? HGTV’s DIY Halloween decorations roundup includes a free printable bat template sized for walls, doors, or windows.
2. Witch Flying Across the Moon
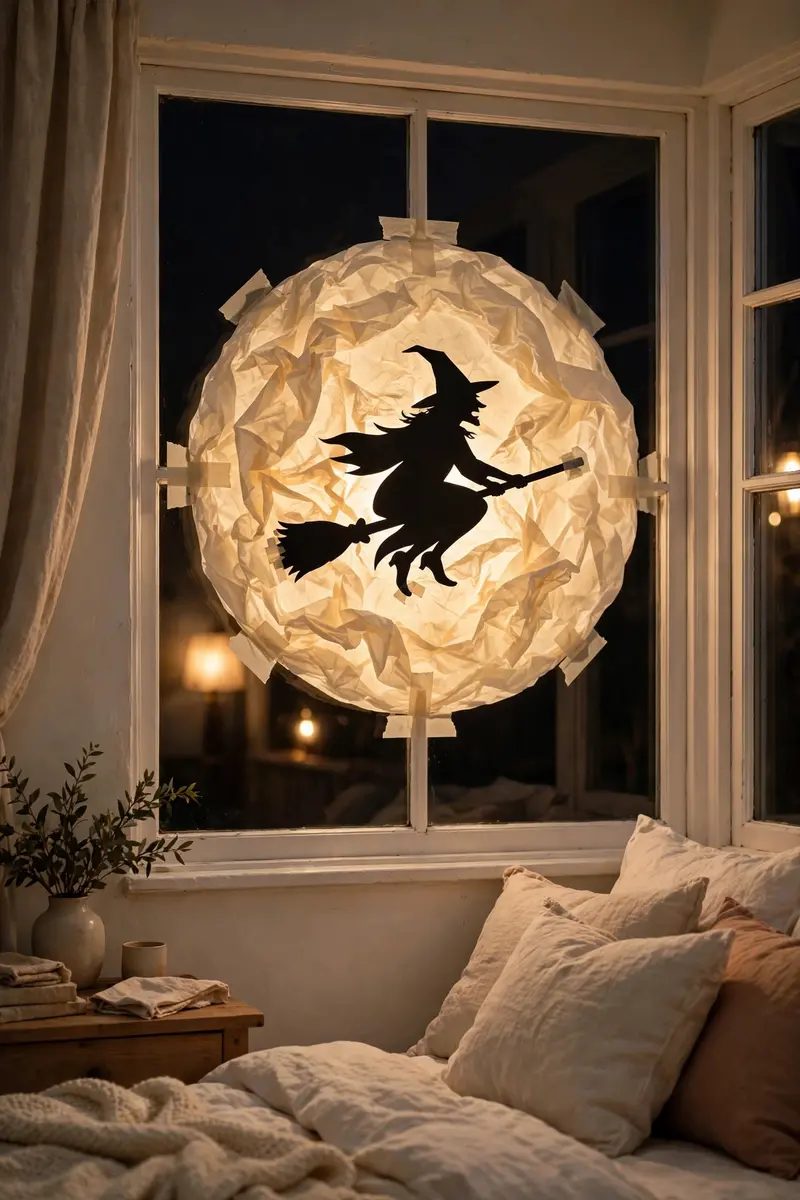
A witch silhouette soaring past a giant paper moon is the most iconic Halloween window image there is — and it’s nearly free to make. The huge glowing circle draws the eye from half a block away, and the witch’s jagged profile gives it that storybook-spooky feel kids and adults both love.
Materials + cost: Yellow or cream tissue paper ($2), black cardstock ($3), tape ($3). Total: under $10.
Tape a big circle of tissue paper to the window (about 2 feet across), then layer a black witch cutout over it. Backlight with a single warm lamp or a short LED strip placed a foot behind the glass. The tissue diffuses the light into a soft lunar glow while the witch stays pitch black.
Practical tip: Crinkle the tissue slightly before taping — the wrinkles catch light and look like real moon craters from the street.
Variation: Add two or three tiny bat cutouts trailing behind the witch for motion.
3. Spooky Cat Silhouette Duo
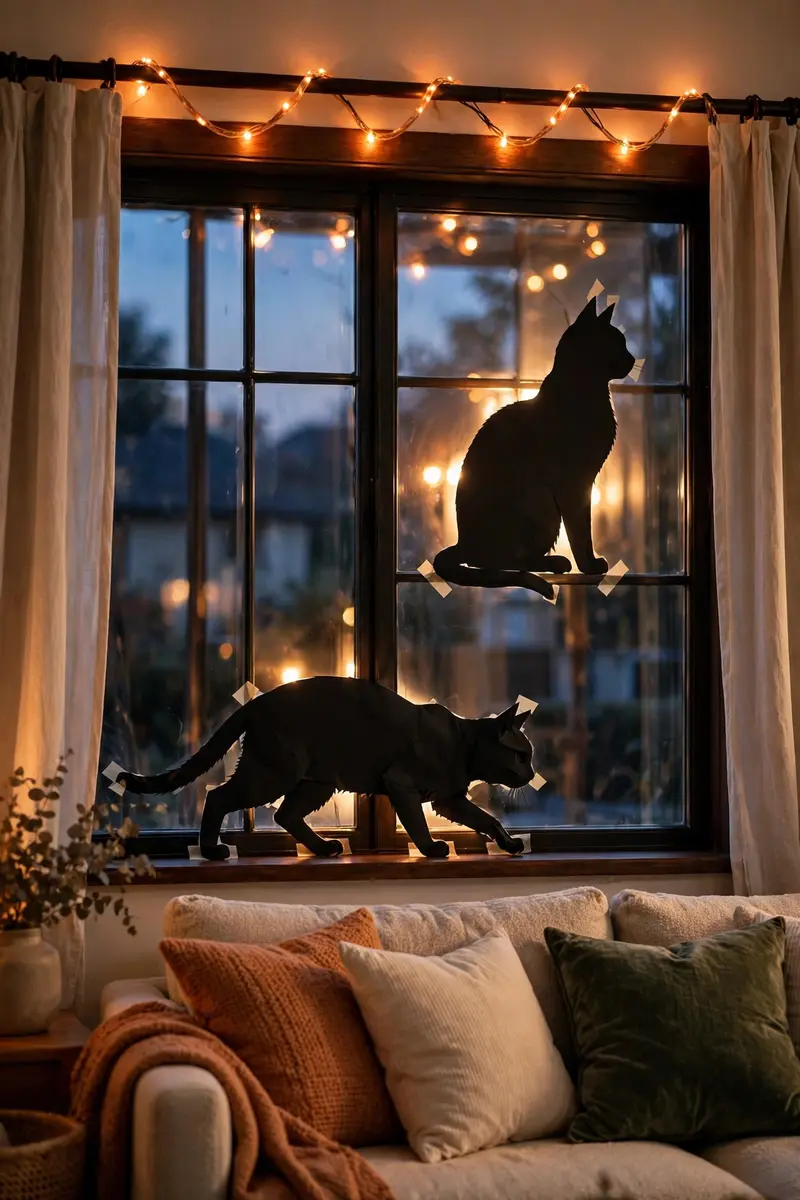
Arched-back black cats are a Halloween classic, and a pair of them — one sitting, one mid-prowl — makes a window look instantly haunted without a drop of gore. This is a great pick for homes with little kids: spooky enough for the season, friendly enough for toddlers.
Materials + cost: Black poster board ($5), scissors, removable adhesive dots ($4). Total: about $9.
Cut two large cat profiles (aim for 18–24 inches tall so they read from the sidewalk). Place one low near the sill as if prowling, one higher up sitting and watching. Backlight with orange string lights draped along the curtain rod behind them.
Practical tip: Give the sitting cat green reflective “eyes” using two tiny pieces of reflective tape — headlights and porch lights will make them flash.
Variation: Add a crescent moon behind the prowling cat for a storybook scene.
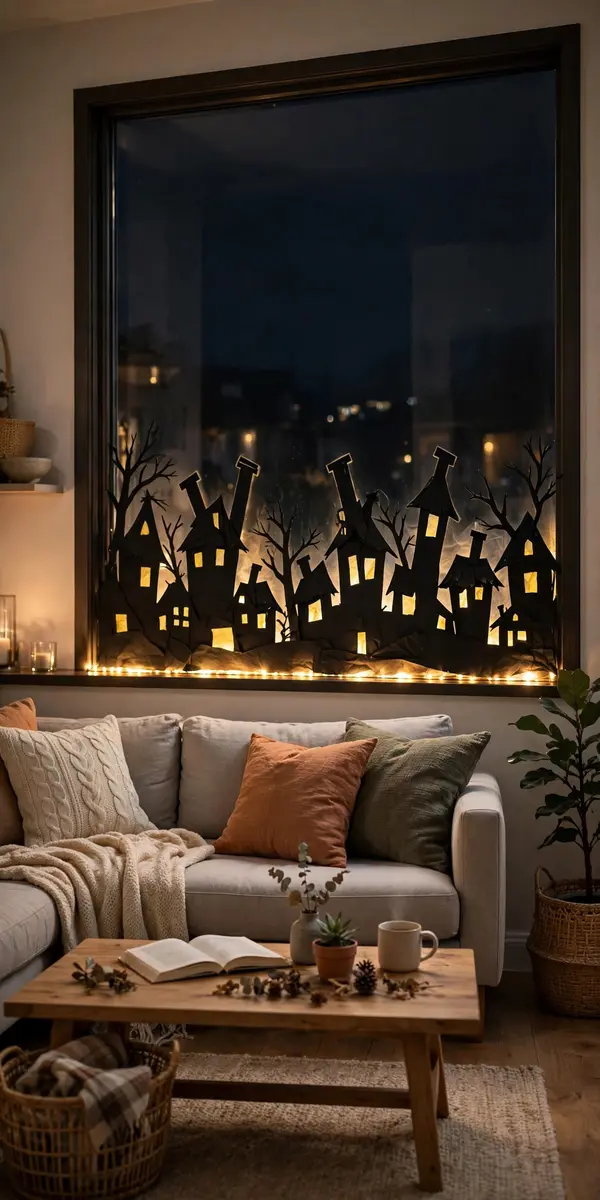
4. Haunted House Skyline Row
Turn a wide picture window into a full haunted-neighborhood skyline: crooked rooftops, leaning chimneys, bare trees, and glowing windows. From the curb it looks like an entire spooky village lit from within — one of the most impressive DIY Halloween window decorations for the effort involved.
Materials + cost: Black bulletin-board paper roll ($8), yellow tissue scraps ($2), tape ($3). Total: about $13.
Cut a single long strip of black paper to run the full width of your window. Cut the top edge into jagged rooftops, chimneys, and dead trees. Tape it along the bottom of the glass, then stick small yellow tissue squares behind some “windows” so they glow. Run a warm LED strip along the sill behind the paper.
Practical tip: Keep the skyline to the bottom half of the window — the dark upper glass makes the glowing rooftops pop harder.
Variation: Cut tiny bat shapes into the “sky” above the rooftops with an X-Acto knife.
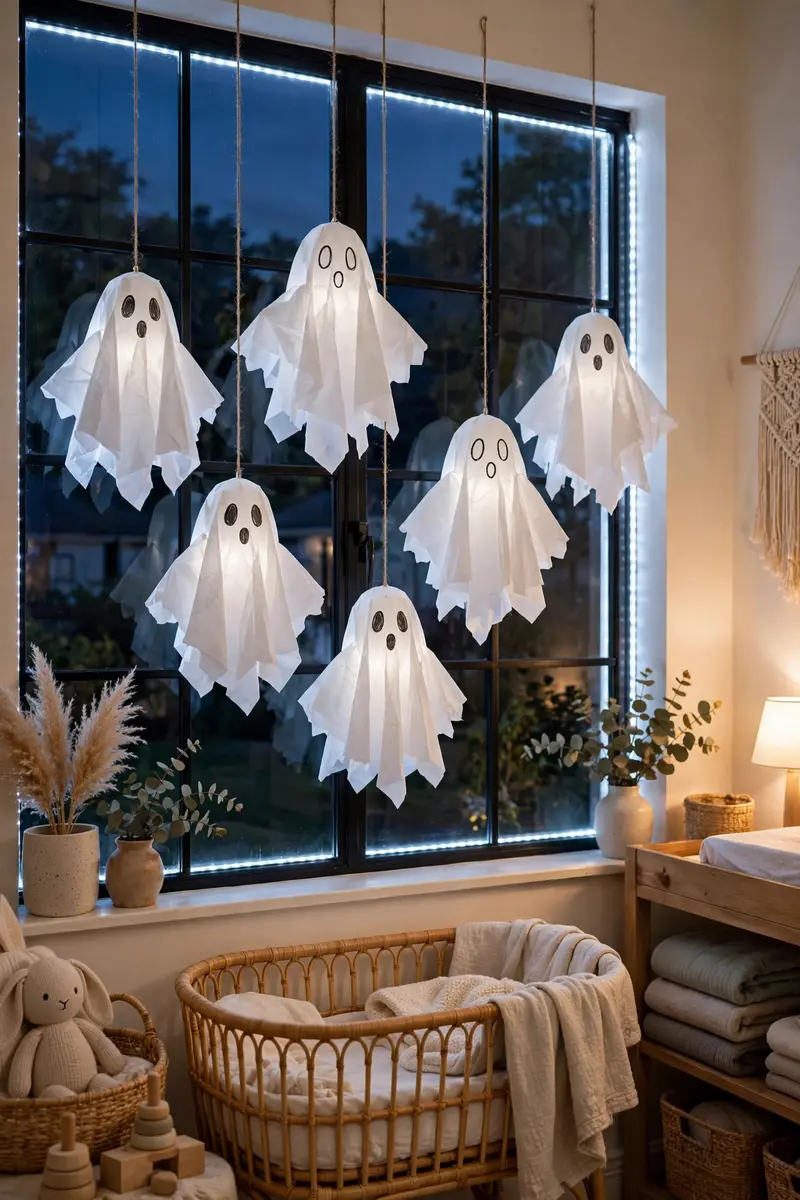
5. Ghost Family Parade
A row of friendly white ghosts drifting across the window is the cutest of all Halloween window decor ideas — perfect for nurseries, playrooms, and anyone who wants festive without frightful. Tissue-paper ghosts glow softly when backlit and flutter if a vent blows nearby, which looks wonderfully alive after dark.
Materials + cost: White tissue paper ($3), black marker ($2), fishing line or thread ($3), tape. Total: under $10.
Cut ghost shapes (rounded top, wavy bottom), draw two oval eyes and a wobbly mouth on each, and hang them at staggered heights from the top of the window frame with thread. Place a cool-white LED strip or lamp behind them so they glow like real apparitions.
Practical tip: Make ghosts in three sizes — big ones read from the street, small ones add depth up close.
Variation: Write each family member’s name on a ghost in pencil for a personalized touch.
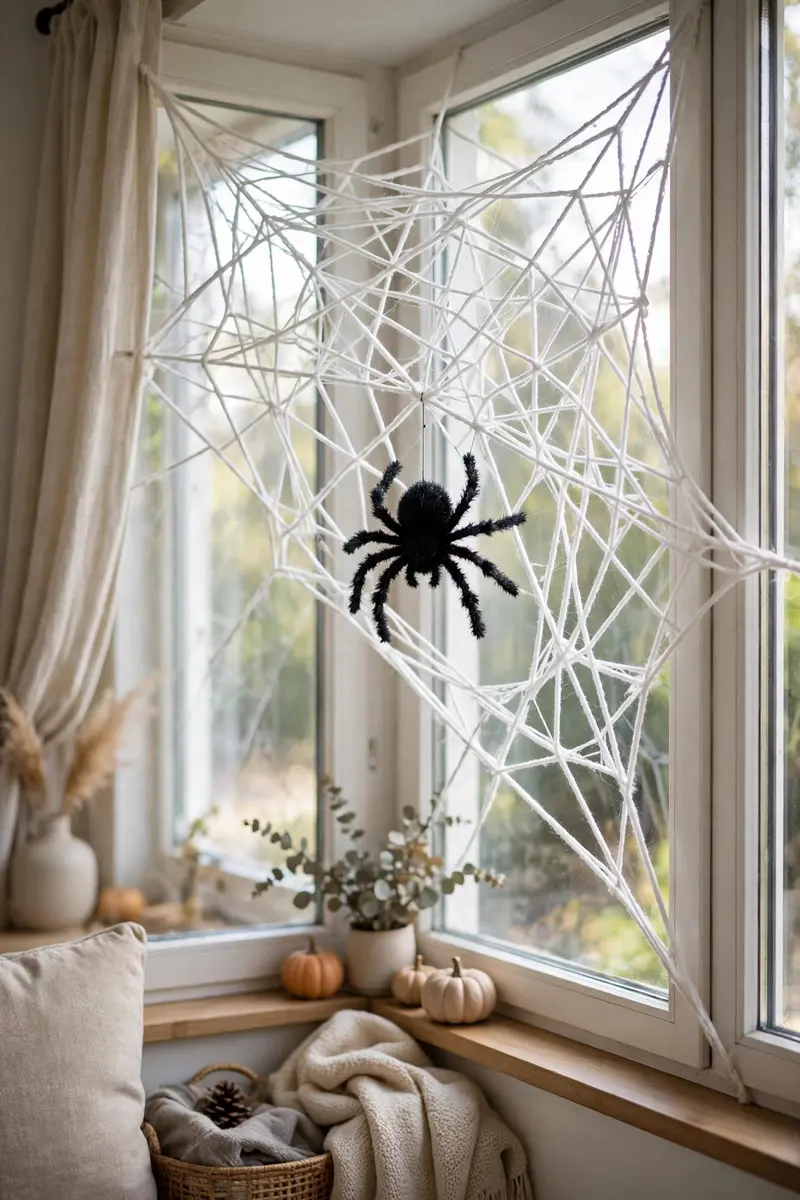
6. Giant Spider and Web Corner
A huge spiderweb stretched across one corner of the window, with a fat fuzzy spider dangling in the middle, delivers maximum creep for minimum money. This is the Halloween window decor idea neighbors photograph — it looks genuinely startling when headlights catch the web’s threads.
Materials + cost: White yarn or string ($3), large plastic spider ($4), removable hooks ($4). Total: about $11.
Anchor yarn strands from one top corner fanning out like spokes, then weave a spiral of yarn around them to form the web. Hang the spider from the center on a short thread so it dangles and sways. Stick it in an upstairs window for extra “how did that get there?” effect.
Practical tip: Spray the finished web lightly with water from a mister — droplets catch porch light and make the web shimmer.
Variation: Add two or three tiny spiders “crawling” up the glass with adhesive dots.
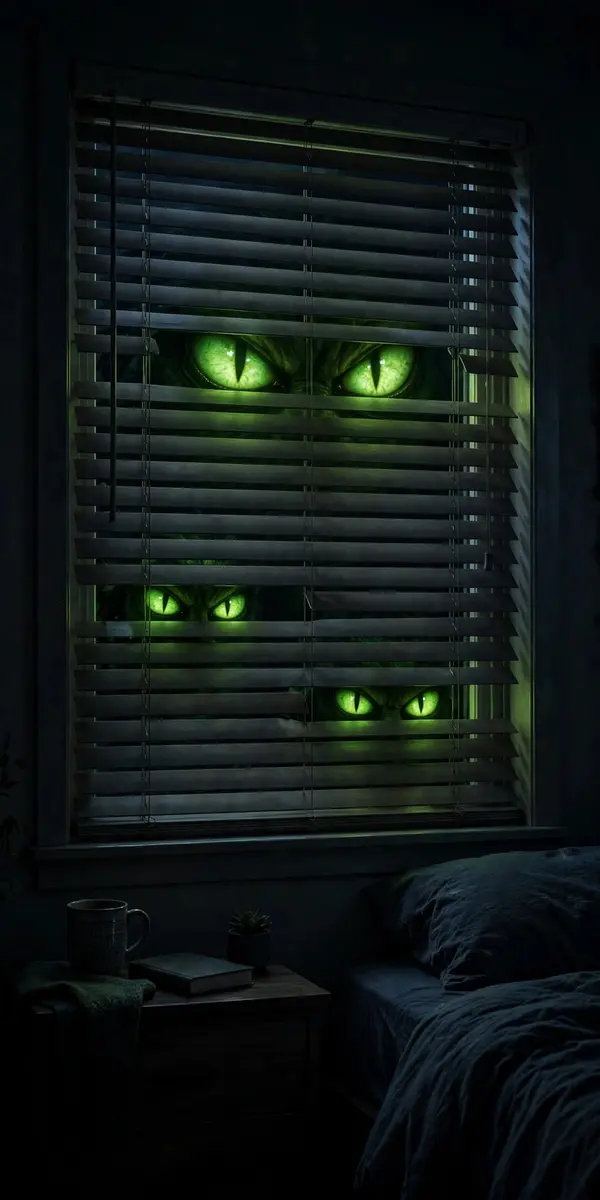
7. Monster Eyes in the Dark
Peeking monster eyes between half-closed blinds are deliciously creepy and take five minutes. By day the window looks normal; after dark, glowing eyes stare out at the street. It’s the easiest scare on this list and a favorite for upstairs kids’ rooms.
Materials + cost: Cardstock ($3), glow-in-the-dark paint or self-adhesive googly eyes ($5), tape. Total: under $10.
Cut pairs of almond-shaped eyes from cardstock, paint them with glow-in-the-dark paint (or stick on big googly eyes), and tape pairs at different heights between the blind slats. Charge the paint with a lamp for an hour before dusk.
Practical tip: Vary the eye sizes and spacing — one huge pair plus two small pairs suggests a whole monster family lurking inside.
Variation: Use red-tinted eyes on one window for the “haunted house” room.
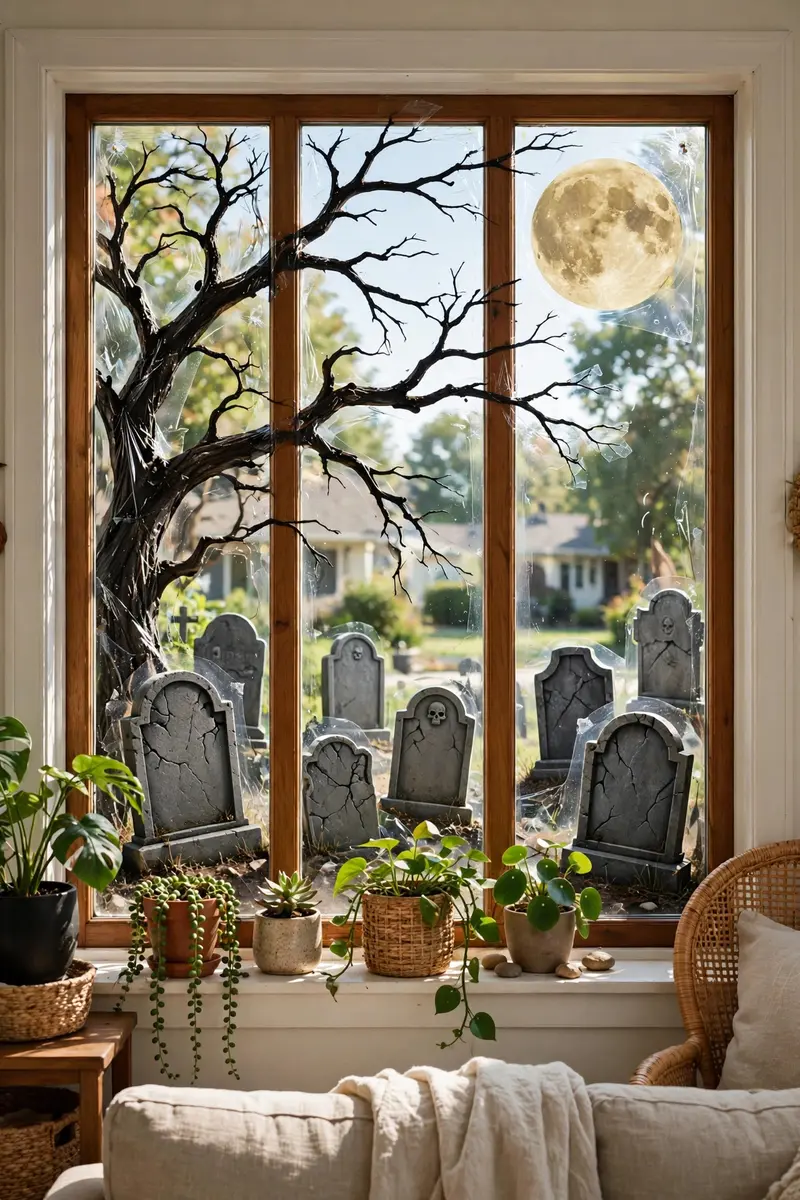
8. Window Cling Graveyard Scene
Store-bought Halloween window clings are the ultimate no-fuss option: peel, stick, and you’ve got tombstones, dead trees, and a full moon — no cutting, no tape, no damage. They’re the backbone of renter-friendly Halloween window decorations since static clings lift off with zero residue.
Materials + cost: 1–2 packs of Halloween window clings ($6–12), spray bottle with water ($1). Total: about $8–13.
Clean the glass first, mist it lightly with water, and smooth each cling on from the center outward to push out bubbles. Layer a big moon cling behind tombstone clings for depth. They reposition easily, so play with the arrangement until it looks right from outside.
Practical tip: Buy double-sided clings if your windows are visible from inside too — one-sided designs look backwards from the other side.
Variation: If you own a Cricut, cut your own clings from removable vinyl in custom shapes for pennies.
9. Midnight Bat Swarm Decals
A swarm of black bat decals swooping across a big window looks like a scene straight out of a vampire movie — hundreds of tiny wings frozen mid-flight. It’s dramatic, unmistakably Halloween, and one of the fastest full-window transformations you can buy.
Materials + cost: Pack of 100+ black bat wall/window decals ($8), purple LED strip for backlight ($9, optional). Total: about $8–17.
Stick the bats to the inside of the glass in a flowing S-curve, dense at one corner and scattering toward the other — the “in motion” arrangement is what sells it. A purple LED strip behind the glass at night turns the swarm into a glowing night-sky scene.
Practical tip: Vary the bat sizes and tilt every single one at a slightly different angle — uniform bats look like wallpaper, scattered ones look alive.
Variation: Let the swarm “fly” from the window onto the adjacent wall for a spillover effect guests will photograph.

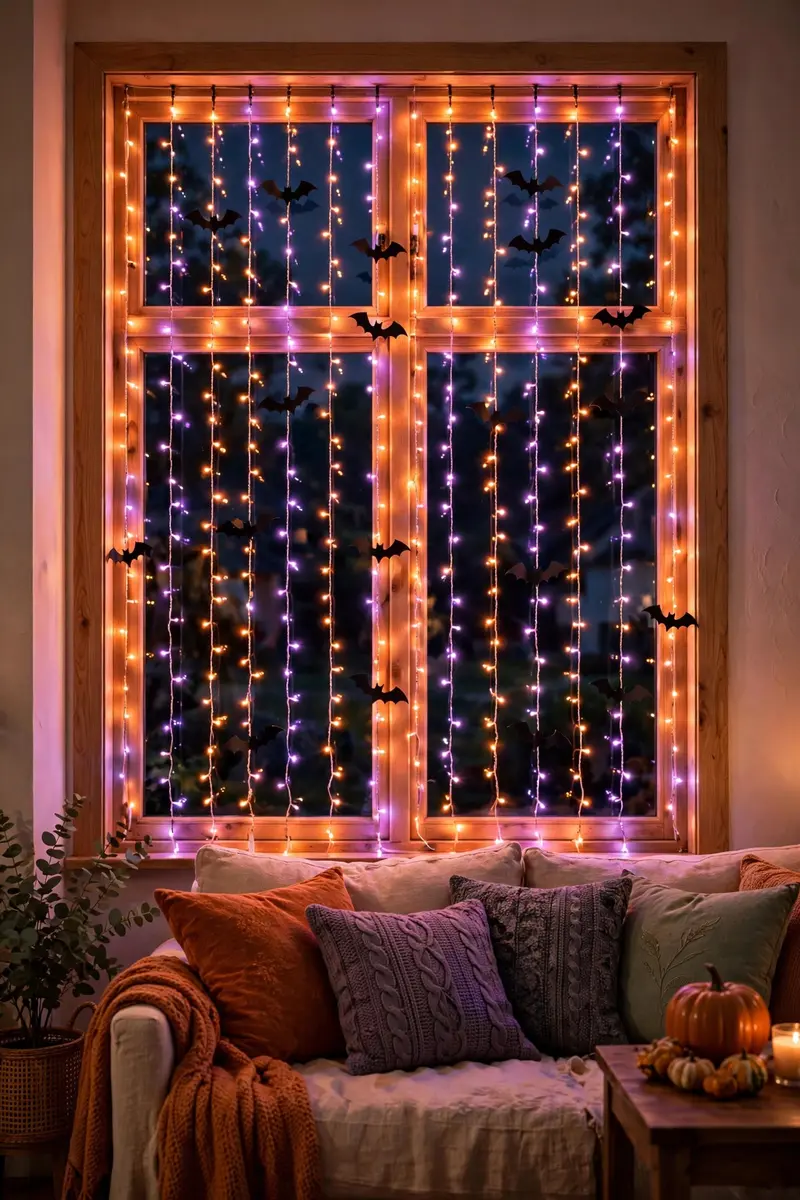
10. Orange-and-Purple Fairy Light Curtain
A curtain of orange and purple fairy lights hung inside the window frame turns plain glass into a glowing jewel box. It needs zero crafting skill, photographs beautifully, and works from October 1st straight through — the definition of easy Halloween window decor.
Materials + cost: 2 sets of 66-ft orange/purple fairy lights ($12), 3M removable hooks ($5). Total: about $17.
Hang curtain-style light strands from removable hooks across the top of the window frame, letting them fall straight. Weave in a few black bat cutouts or hang mini pumpkins from the strands. Put them on a dusk-to-dawn timer so the window glows every evening.
Practical tip: Use copper-wire fairy lights rather than thick green-wire sets — the thin wire disappears and the window looks like it’s full of floating sparks.
Variation: Add a sheer black curtain panel behind the lights for a moody, layered glow.
11. Flickering Candle Sill Display
A row of flickering LED candles on the windowsill, ringed with mini pumpkins and faux autumn leaves, is Halloween elegance — the look fancy home magazines do. It glows warmly through the glass all evening and takes ten minutes to arrange.
Materials + cost: Set of 6 flameless LED candles ($12), mini pumpkins ($5), faux leaves ($4). Total: about $20.
Line the candles along the inside of the sill at varying heights (stack some on books for levels), nestle mini pumpkins and leaves between them, and switch the candles to flicker mode. The warm light silhouettes everything behind it from the street.
Practical tip: Choose candles with built-in timers (6 hours on, 18 off) — set once and forget for the whole season.
Variation: Swap pumpkins for black taper candles in brass holders for a gothic mantel-like window.

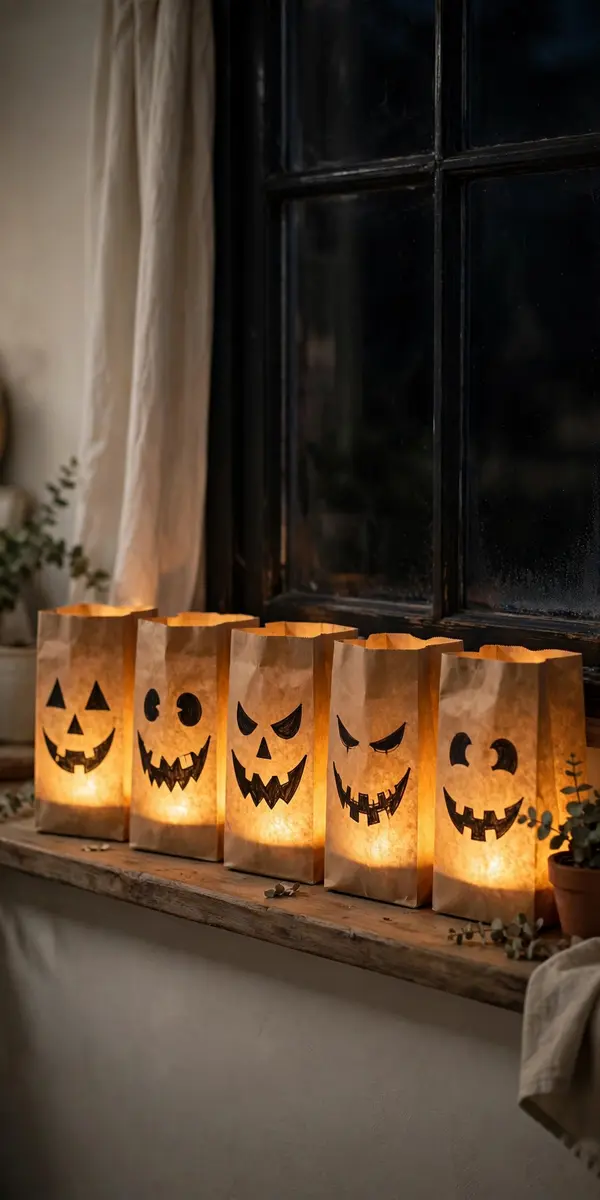
12. Jack-o’-Lantern Paper Bag Luminaries
Brown paper bags with jack-o’-lantern faces, lit from inside by LED tea lights, lined up on the sill — a glowing row of grinning pumpkins that costs almost nothing. This old-school luminary trick looks spectacular through glass because the whole bag glows.
Materials + cost: Brown paper lunch bags ($3), black marker ($2), LED tea lights 12-pack ($8). Total: about $13.
Draw a different jack-o’-lantern face on each bag, fold the tops down an inch for sturdiness, drop in one LED tea light per bag, and line them along the windowsill. Never use real flames — paper and fire are a terrible combination.
Practical tip: Double-bag each luminary (one bag inside another) so the glow is even and the bag stands up straight.
Variation: Cut the faces out instead of drawing them, and use orange tissue behind the holes for stained-glass jack-o’-lanterns.
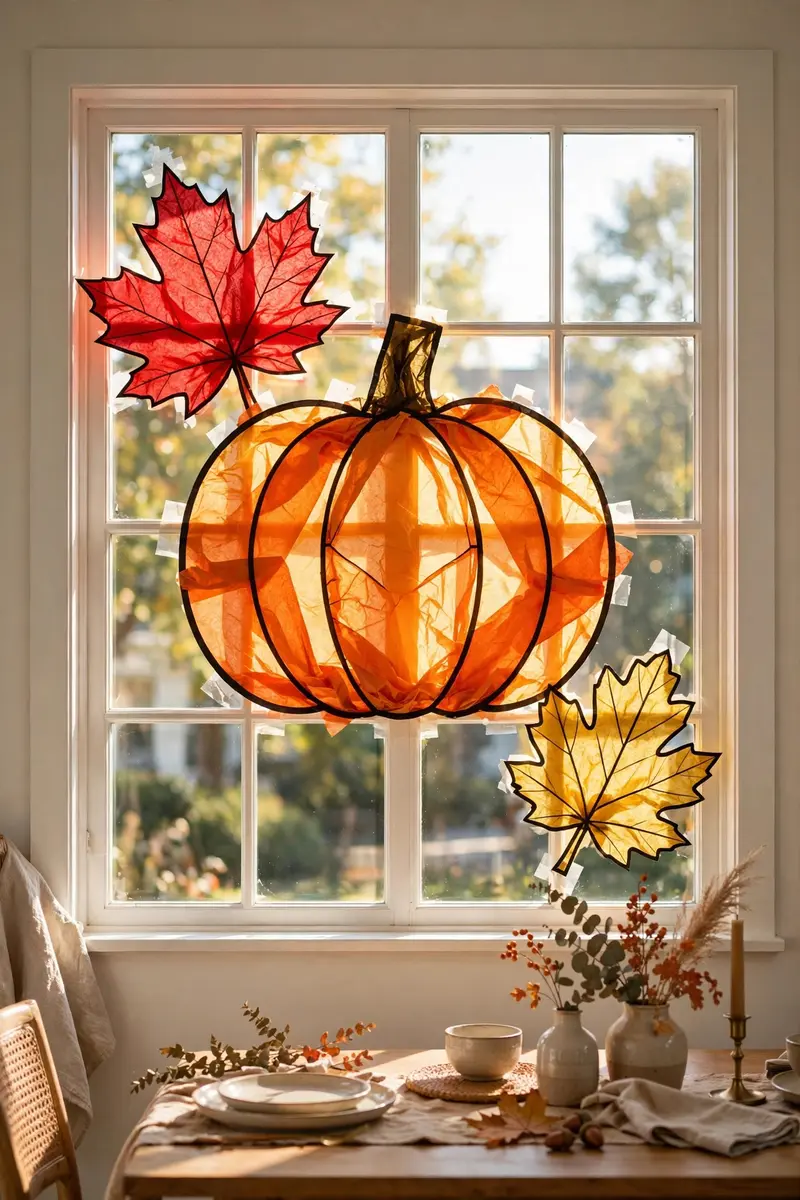
13. Stained-Glass Tissue Paper Pumpkins
Tissue paper stuck to glass with a little soapy water looks exactly like stained glass when sunlight — or backlighting — shines through it. Big pumpkin and leaf shapes in orange, red, and gold turn your window into a glowing autumn chapel, festive all season long.
Materials + cost: Colored tissue paper ($4), black construction paper for outlines ($3), spray bottle with diluted dish soap ($1). Total: under $10.
Cut pumpkin and leaf shapes from tissue, outline them with thin black paper strips, mist the glass with soapy water, and smooth the shapes on. They’ll stay up for weeks and peel off cleanly. Backlight with warm white lights at night for the full cathedral effect.
Practical tip: Work in small sections and smooth from the center out — tissue tears easily when wet, so be gentle.
Variation: Add black cat or bat tissue silhouettes among the pumpkins for a Halloween-specific version.
14. Chalk-Marker Window Doodles
Liquid chalk markers let you draw directly on the glass — spiderwebs in the corners, “BOO!” in drippy letters, bats swooping across the pane — and it all washes off with a damp cloth. It’s the most creative of these DIY Halloween window decorations and kids absolutely love doing it.
Materials + cost: Liquid chalk markers, white + orange ($8). Total: about $8.
Sketch lightly first (chalk wipes off, so mistakes don’t matter), then go over your final design. Corner spiderwebs, a big moon, and scattered bats are the classic combo. Draw on the inside so rain never touches it.
Practical tip: Outline your design in white first, then fill accents in orange — the two-tone look reads much more polished from the street.
Variation: Let each kid decorate their own bedroom window — instant personalized Halloween pride.

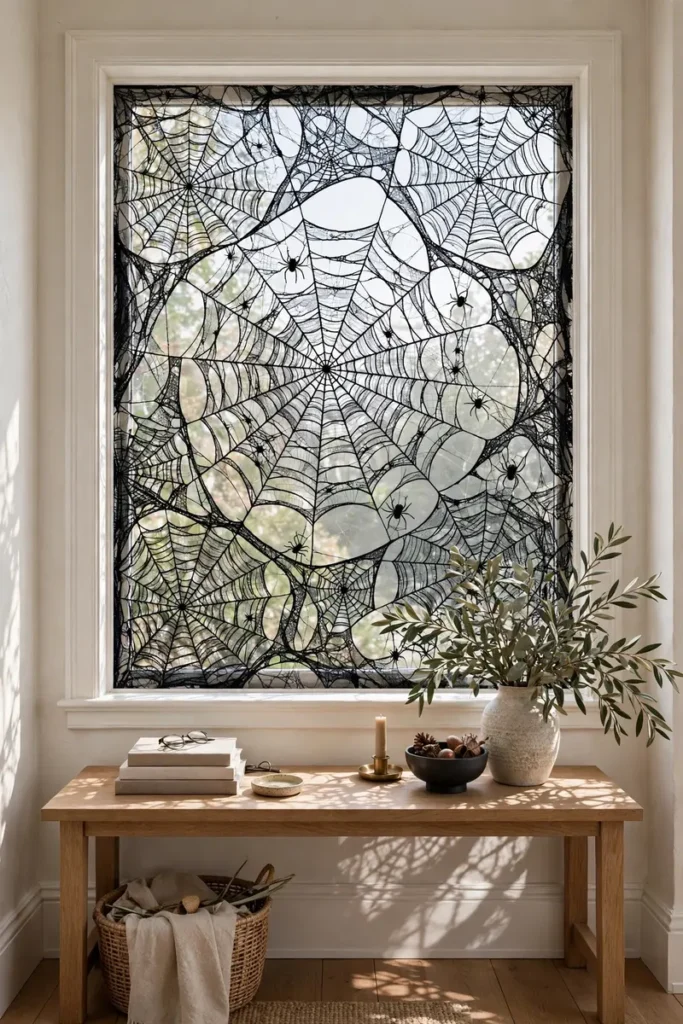
15. Spiderweb Lace Window Film
Black lace spiderweb window film gives you the haunted-mansion look in minutes: it clings by static, cuts light into lacy patterns by day, and glows eerily when backlit at night. It’s the fastest full-window transformation on this list.
Materials + cost: Static-cling lace window film roll ($12), scissors, spray bottle ($1). Total: about $13.
Measure the pane, cut the film an inch oversized, mist the glass, and smooth the film on, trimming edges with a craft knife. The web pattern reads as elegant-spooky rather than gory — great for dining rooms and entryways.
Practical tip: Save the trimmed scraps — small pieces make perfect web accents on mirrors and picture frames.
Variation: Layer orange fairy lights behind the film for a glowing web effect after dark.
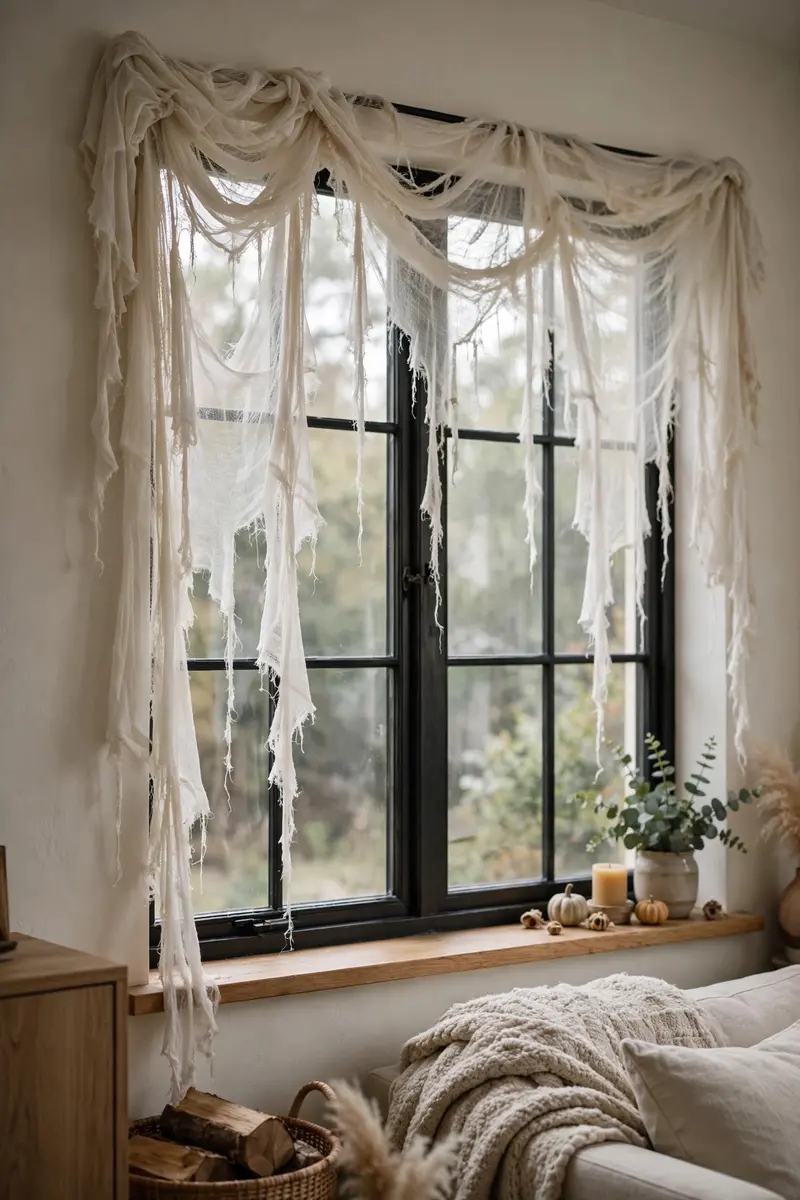
16. Gauzy Cheesecloth Drapes
Draped cheesecloth turns any window into an abandoned-house window — dusty, tattered, and wonderfully creepy. It’s the cheapest fabric trick in Halloween decorating, and the gauzy layers diffuse backlight into a ghostly haze.
Materials + cost: Cheesecloth roll or gauze fabric ($6), scissors, tension rod or removable hooks ($5). Total: about $11.
Cut the cheesecloth into long strips, tear (don’t cut) the bottom edges for ragged hems, and drape them over a tension rod or hooks so they hang unevenly. Pull a few strands loose for cobweb wisps. Backlight with a single cool-white bulb for maximum haunted-house gloom.
Practical tip: Tea-dye the cheesecloth (soak in strong black tea, then dry) for an authentically aged, yellowed look.
Variation: Drape the cheesecloth over a wreath form first for a tattered wreath-window combo.
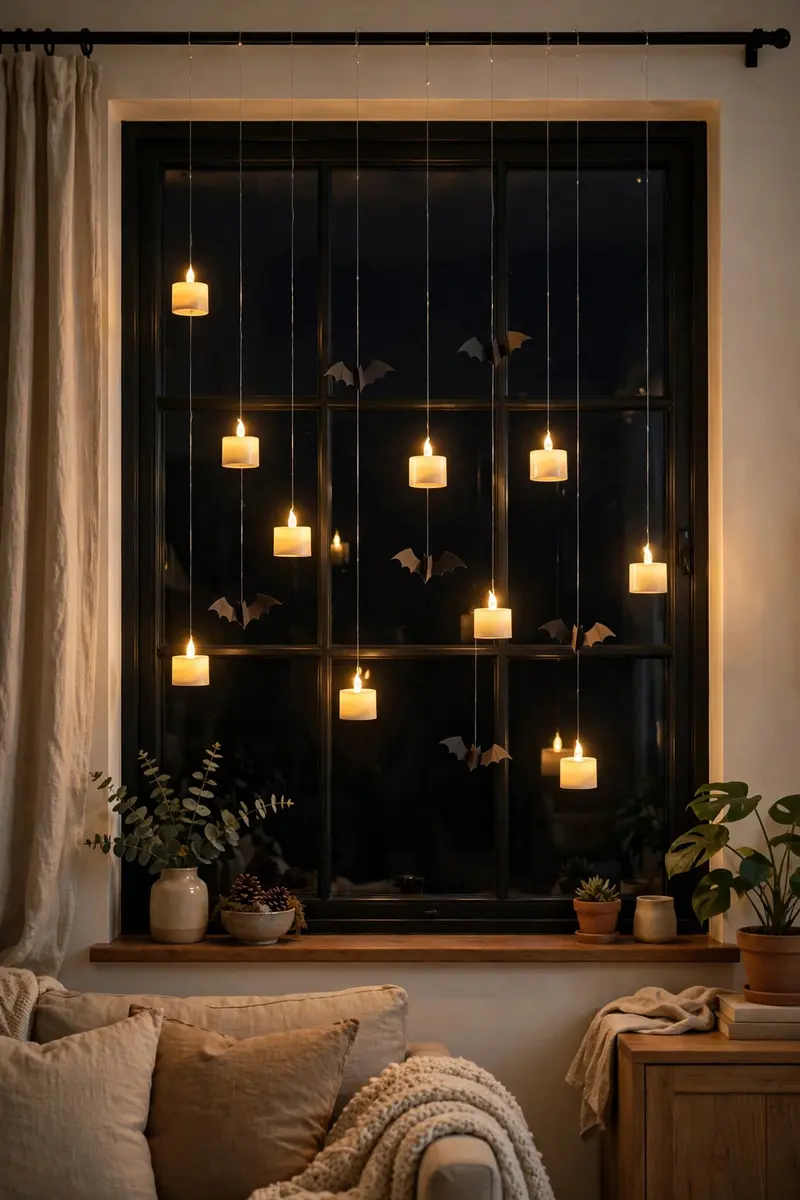
17. Floating Candle Illusion
Flickering LED tea lights hung on invisible fishing line at different heights look exactly like floating candles drifting past your window. It’s the Harry-Potter-meets-Halloween trick that makes guests stop and stare — and it takes twenty minutes.
Materials + cost: LED tea lights 12-pack ($8), clear fishing line ($4), removable ceiling hooks ($4). Total: about $16.
Tie each tea light with fishing line at staggered lengths, hang from small hooks on the top of the window frame, and switch to flicker mode. From outside, the flames appear to hover in midair. Keep them a few inches from the glass so they don’t tap in a breeze.
Practical tip: Hang a few higher and a few lower in a loose zigzag — perfect rows look staged, random heights look magical.
Variation: Add tiny paper bats on thread between the candles for a full enchanted-sky window.
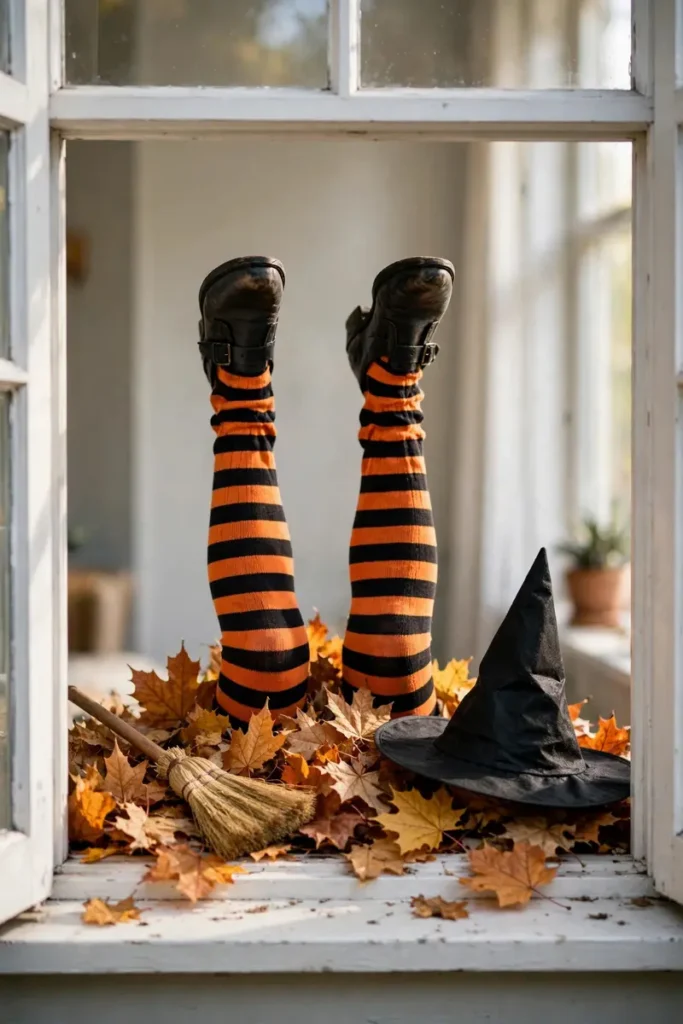
18. Witch Crash-Landing Scene
A pair of witch legs sticking out of a pile of “crashed” broom and hat against the window is pure comedy-horror — the Wicked-Witch-under-the-house gag, window edition. Kids shriek with laughter at this one, and it’s endlessly photographable.
Materials + cost: Striped tights or leggings ($6), old shoes ($0 from closet), pillow stuffing ($4), toy broom ($5), witch hat ($5). Total: about $20.
Stuff the tights with pillow filling, attach the shoes, and arrange the “legs” poking out from behind a potted plant or pile of faux leaves on the sill, broom and hat scattered nearby. Viewed through the glass, it looks like she flew straight into your house.
Practical tip: Angle the legs slightly upward — “crashed from above” reads funnier and more dramatic than legs lying flat.
Variation: Add a taped “SPLAT!” starburst (cardboard, comic-book style) on the glass above the crash site.
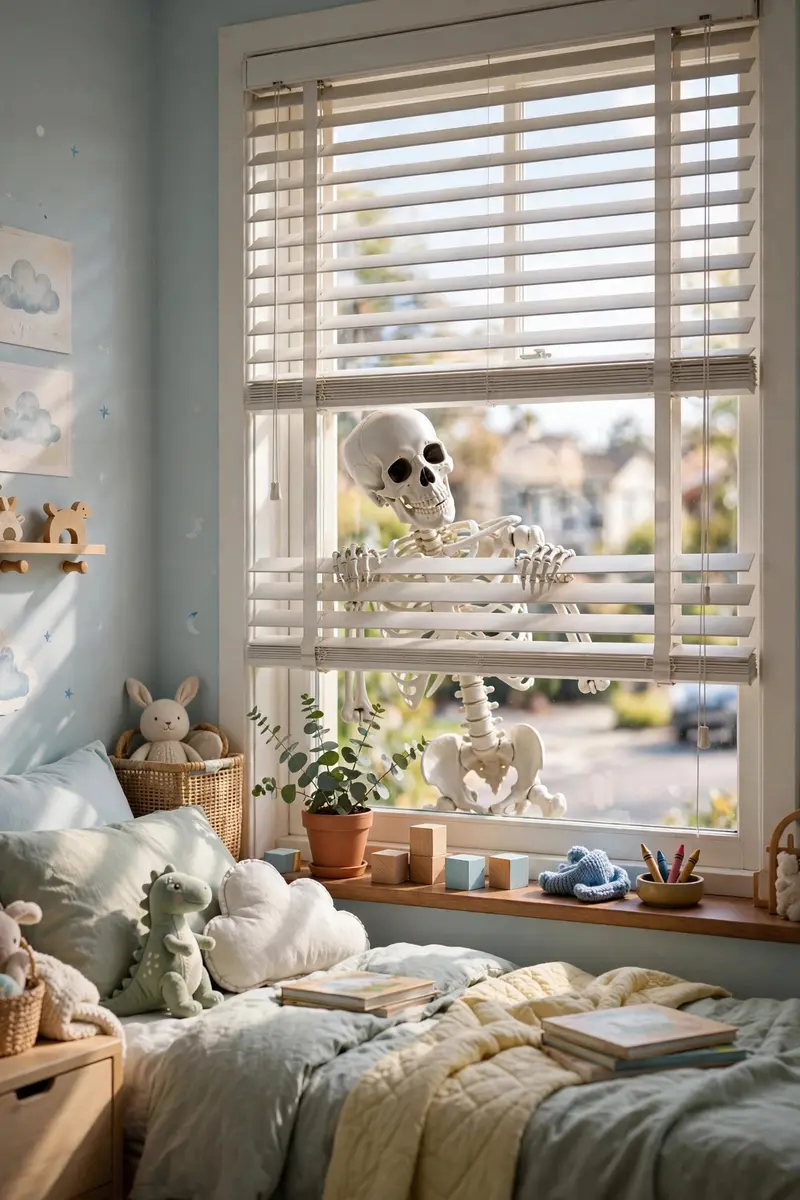
19. Skeleton Peeking Through Blinds
Pose a plastic skeleton so it appears to be peeking through the window blinds — hands gripping two slats, skull tilted curiously. It’s funny by day and genuinely startling at night when a porch light catches the white bones.
Materials + cost: 3-ft posable plastic skeleton ($12), tape or zip ties ($3). Total: about $15.
Open the blinds slightly, position the skeleton behind them with its hands on the slats and skull angled down toward the sidewalk. Secure with zip ties so it doesn’t topple. A small spotlight on the floor aimed up makes the bones glow after dark.
Practical tip: Tilt the skull 15 degrees — a straight-on skeleton looks like a decoration, a tilted one looks alive.
Variation: Dress the skeleton in a tiny witch hat for a second window — instant skeleton family.
20. Candy Corn Bunting Garland
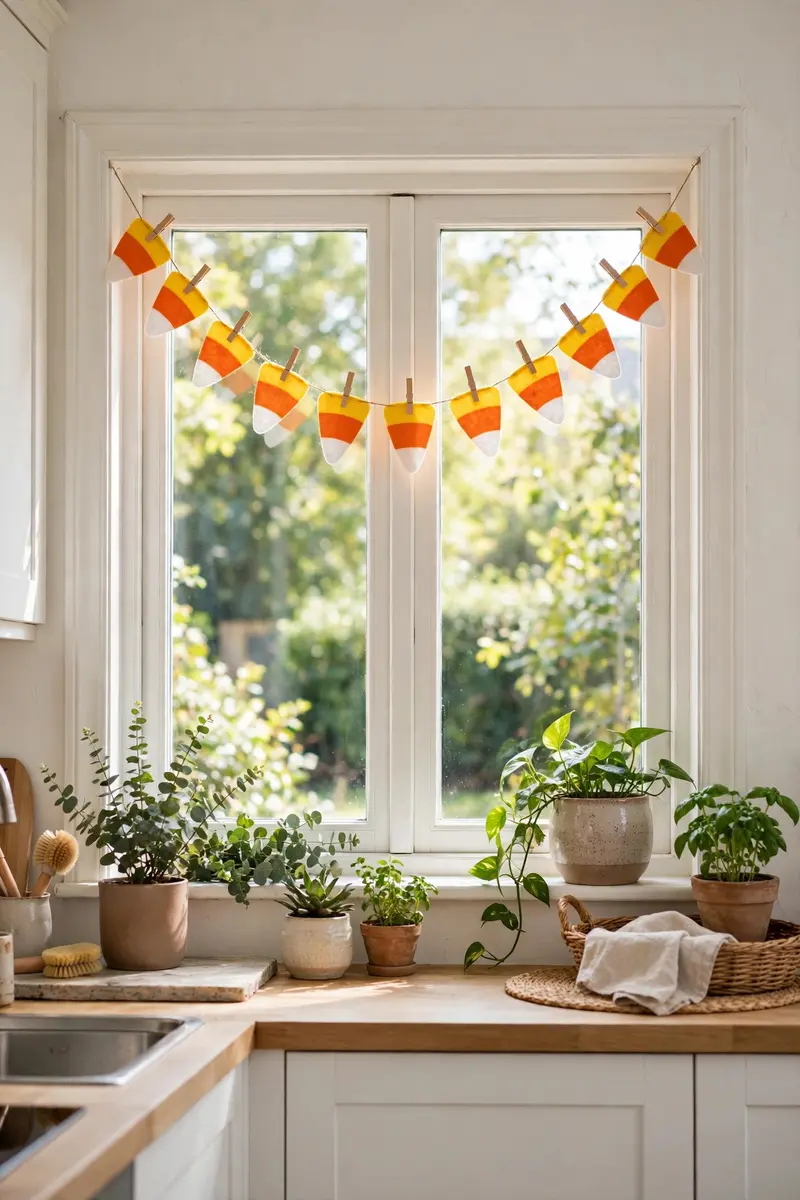
A swag of candy corn triangles strung across the top of the window is cheerful, colorful, and unmistakably Halloween. It’s the sweetest window treatment here — literally — and a great pick for kitchens and kids’ rooms.
Materials + cost: Felt sheets in orange, yellow, white ($6), string ($2), mini clothespins ($3). Total: about $11.
Cut felt into candy corn triangles (white tip, orange middle, yellow base — glue the layers), clip them along a length of string, and swag it across the window top. It looks great backlit because felt glows softly.
Practical tip: Make the middle triangle of the swag hang lower than the rest — a gentle smile curve looks far better than a straight line.
Variation: Alternate candy corn with felt ghosts or pumpkins for a mixed Halloween bunting.
21. Mini Pumpkin Window Ledge Row
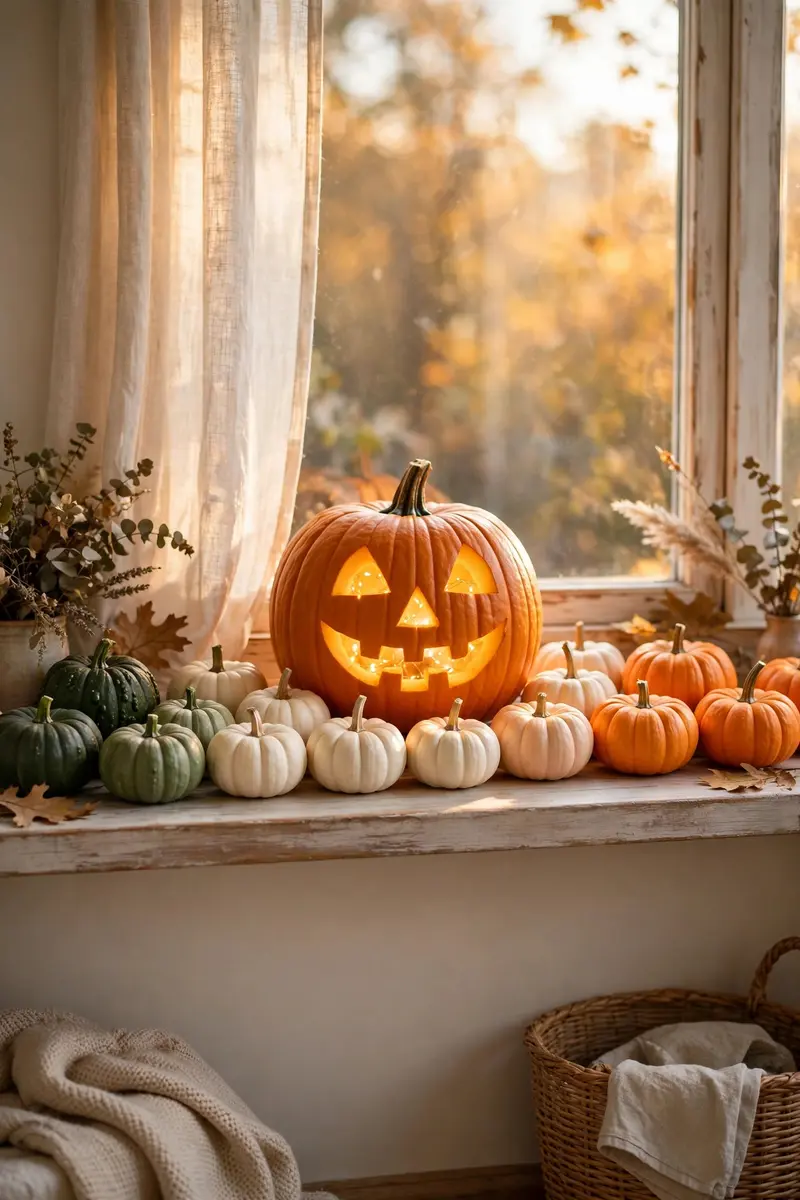
A parade of mini pumpkins — real, faux, painted, glittered — lined along the outside ledge or inside sill turns any window into a harvest display. Simple, classic, and it transitions straight into Thanksgiving if you skip the spooky faces.
Materials + cost: Bag of mini pumpkins ($6) or faux set ($10), optional acrylic paint ($5). Total: about $6–15.
Line them up smallest-to-largest or in a color gradient (white to orange to green). Paint a few with faces, polka dots, or metallic gold for variety. If they’re outside, bring real ones in before a hard frost.
Practical tip: Odd numbers look best — groups of 5 or 7 pumpkins photograph far better than 6.
Variation: Hollow one large pumpkin, drop in a string of fairy lights, and flank it with minis for a glowing centerpiece window.
22. Creepy Portrait Gallery
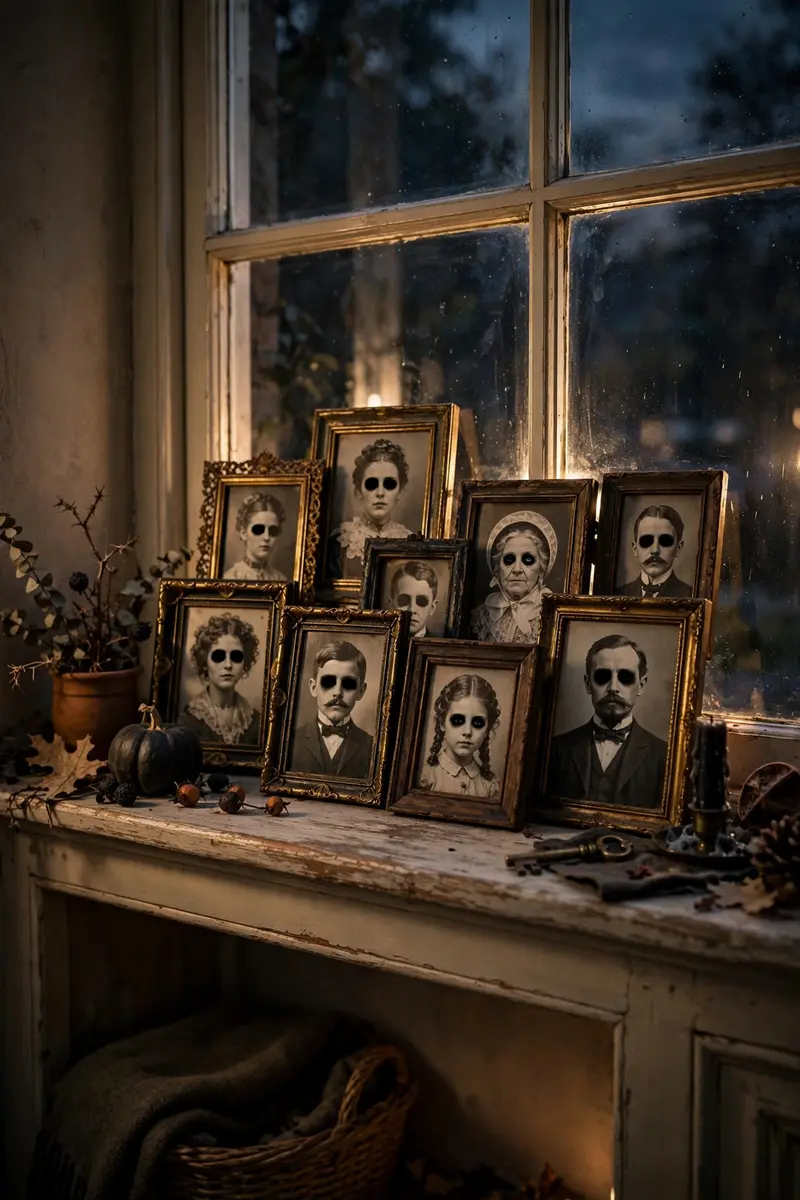
Print vintage-style portraits with hollow black eyes, frame them cheaply, and lean them in the window — the “haunted gallery” stares down everyone on the sidewalk. It’s sophisticated-spooky, perfect for entryways and living rooms.
Materials + cost: Free printable vintage portraits online ($0), black marker for eyes ($2), dollar-store frames ($8 for 4). Total: about $10.
Print the portraits, blacken the eyes with marker (or cut eye holes and back them with black paper), frame, and arrange leaning on the sill facing out. Backlight softly — glowing frames at night are wonderfully eerie.
Practical tip: Mix portrait orientations and frame sizes — a salon-wall arrangement looks like a real (haunted) collection, not a craft project.
Variation: Use family photos with vampire fangs drawn on for a hilarious personalized gallery.
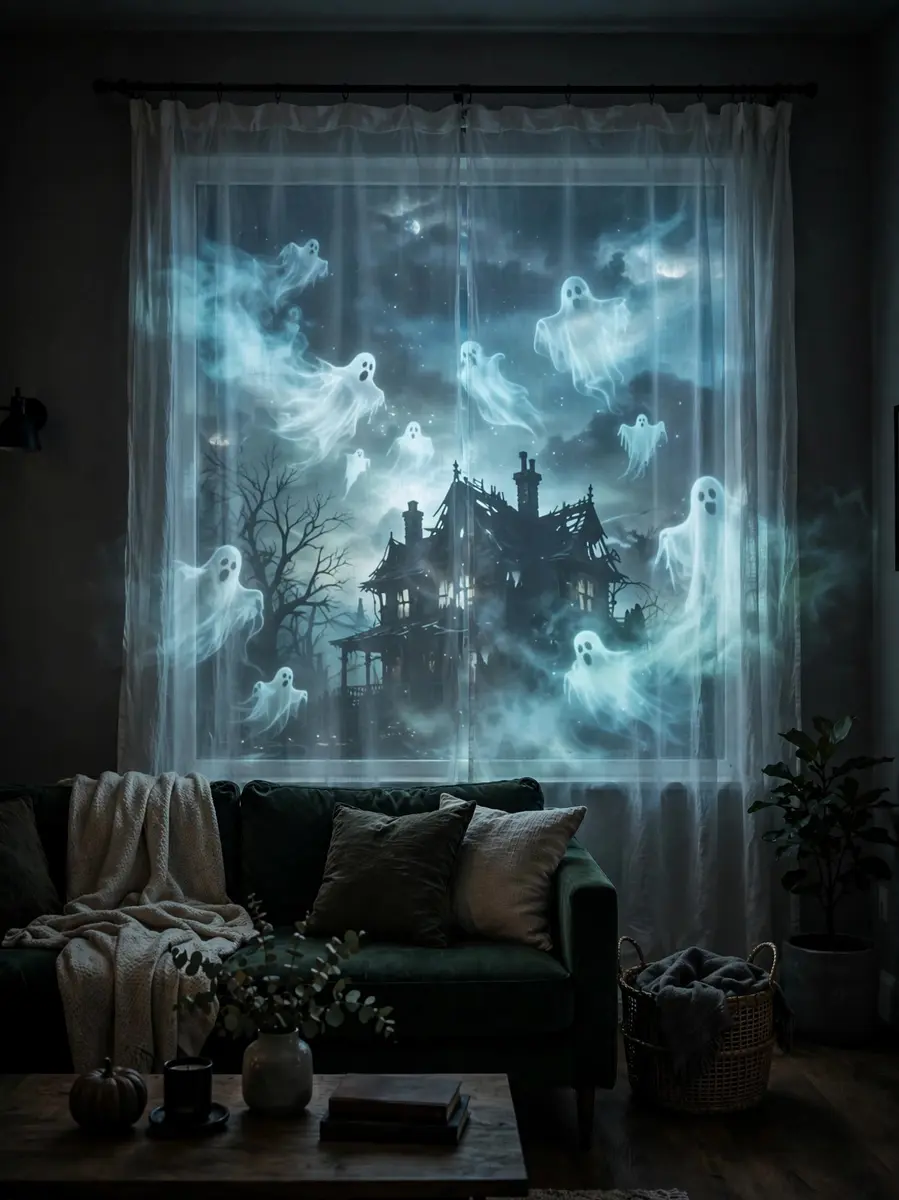
23. Halloween Window Projector Show
A mini projector casting looping ghosts, witches, or a haunted scene onto a sheer white curtain turns your window into a drive-by movie screen. It’s the highest-wow Halloween window projector trick there is — neighbors will slow their cars to watch.
Materials + cost: Mini LED projector ($40–60), sheer white curtain or shower liner ($6), free Halloween loop videos online ($0). Total: about $50–65.
Hang the sheer curtain inside the window, set the projector 6–10 feet back, and loop a ghost or haunted-house video. Keep the room behind the curtain dark so the projection stays crisp. Run it on a timer from dusk to 10pm.
Practical tip: Project onto the curtain, not the bare glass — glass reflects the projector’s glare and washes out the image.
Variation: Loop a crackling fireplace with bats flying past for a cozy-spooky hybrid.
24. Fall-to-Halloween Transition Display
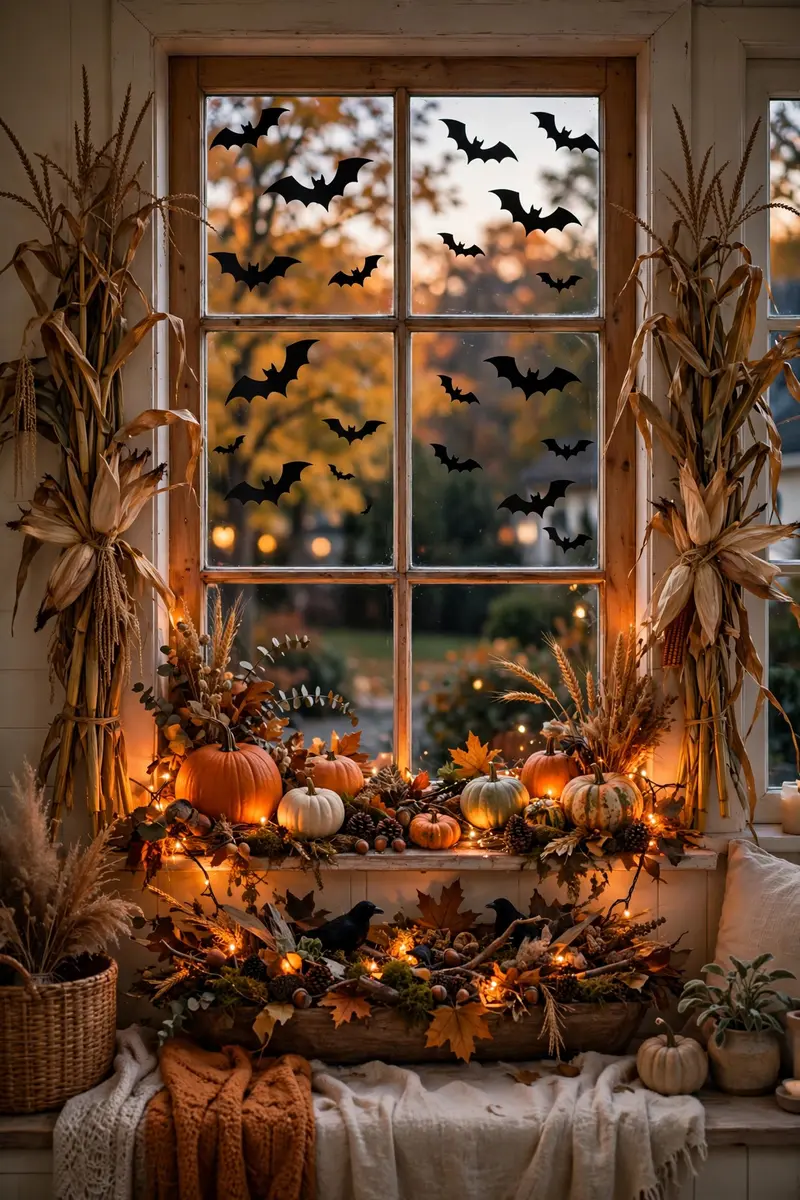
Layer fall decor with Halloween accents in one window — dried corn stalks and pumpkins outside the spooky stuff — so the display evolves all season. It’s two holidays of curb appeal from one setup, and the Pinterest crowd loves a good seasonal transition.
Materials + cost: Dried corn stalks ($8), pumpkins ($8), black bats cutouts ($3), fairy lights ($6). Total: about $25.
Start with the harvest base (stalks flanking the window, pumpkins on the sill) in late September. Add bats, a witch silhouette, and orange lights in October; the fall base keeps it grounded while Halloween layers on top. Remove the spooky layer November 1st and the fall display carries into Thanksgiving.
Practical tip: Keep the spooky elements removable (tape, not glue) so the October 31st teardown takes ten minutes.
Variation: Add a small “Happy Fall / Happy Halloween” reversible sign for the sill.
25. Kids’ Handprint Ghost Window
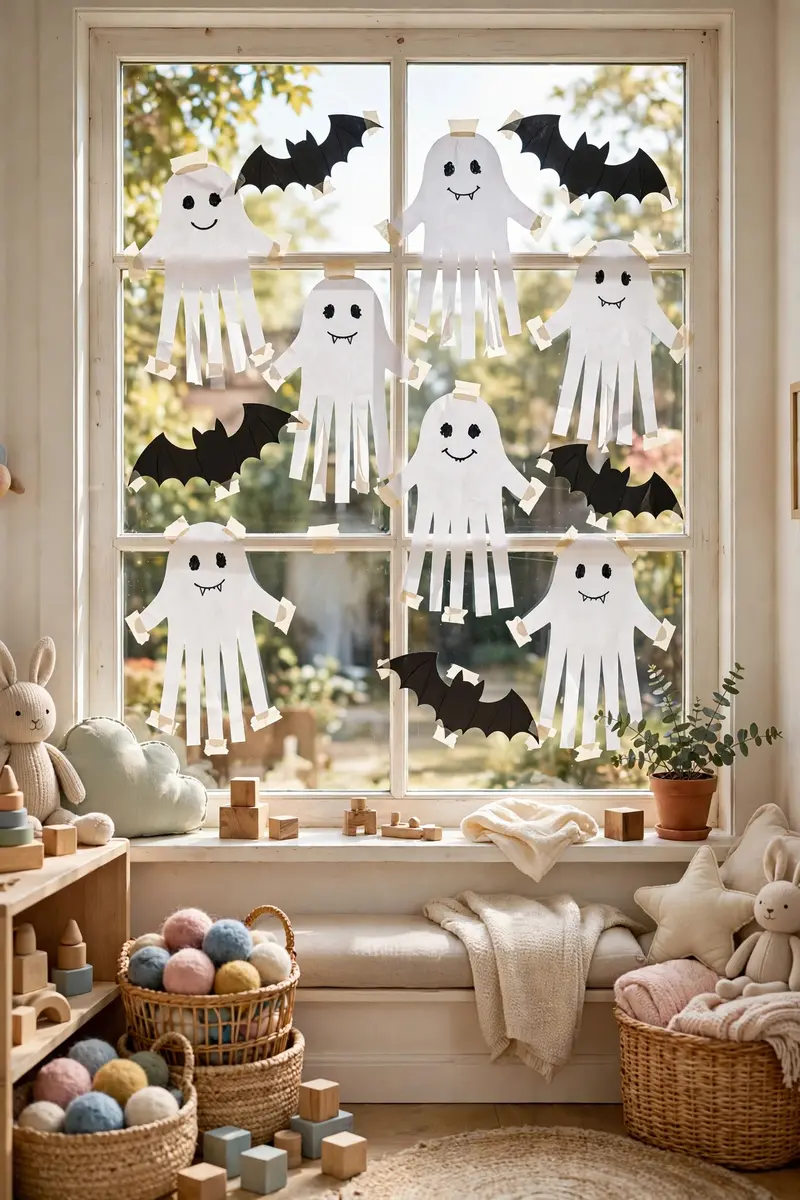
Trace your kids’ hands on white paper, cut them out, and turn each one into a little ghost with drawn-on eyes — a whole family of handprint ghosts haunting the window. It’s the sweetest keepsake craft here, and grandparents melt when they see it.
Materials + cost: White paper ($3), black marker ($2), tape ($2). Total: under $8.
Trace each hand with fingers together (the fingers become the ghost’s wavy bottom), cut out, draw two eyes and a mouth, and tape the ghosts drifting across a playroom or kitchen window. Date the back of each one — you’ll love finding them in the decoration box next year.
Practical tip: Use cardstock instead of printer paper — it lies flatter on glass and survives storage for next Halloween.
Variation: Add handprint bats (fingers spread = bat wings) on black paper for the matching spooky set.
26. Renter-Friendly No-Residue Combo
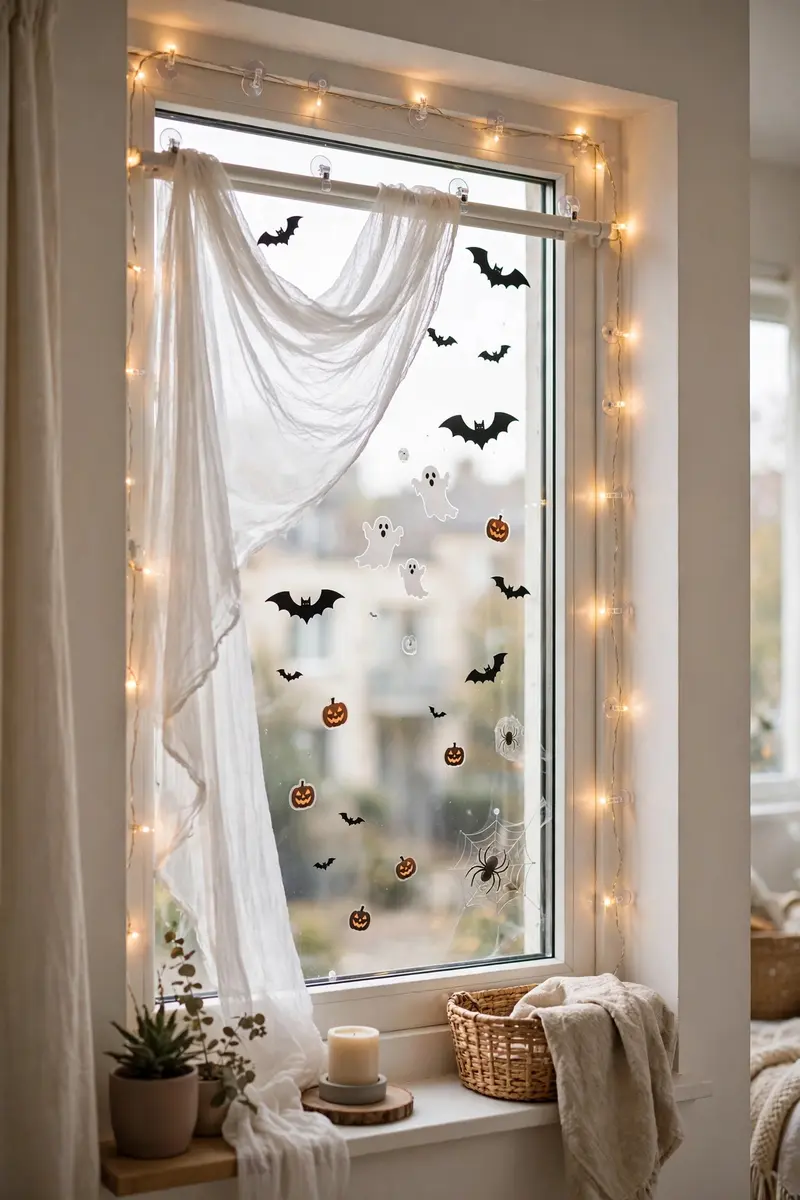
If your lease says “no damage,” combine static window clings, suction-cup fairy lights, and tension-rod gauze — a full Halloween window scene with zero tape, zero nails, zero residue. Landlords approve, deposits stay safe, and the window still looks incredible.
Materials + cost: Static clings ($8), suction-cup light clips ($6), tension rod ($7), gauze ($5). Total: about $25.
Press clings onto clean glass (mist first), hang fairy lights from suction-cup clips along the frame, and wedge a tension rod inside the frame to drape gauze. Everything lifts off in minutes on move-out day — or November 1st.
Practical tip: Test one suction cup for 24 hours before hanging the full light strand — cheap cups fail on dusty glass, so wipe the frame first.
Variation: Swap the gauze for a tension-rod curtain in Halloween print fabric for a cozier renter look.
Halloween Window Decor FAQs
How do I make Halloween window silhouettes?
Cut classic shapes — bats, witches, ghosts, a haunted house — from black construction paper or cardstock, and tape them to the inside of the glass with painter’s tape or adhesive putty. Place orange or purple string lights, a lamp, or an LED strip behind them to backlight the scene so it glows from the street after dark. Step outside at night to check the effect before you call it done.
How do I decorate my windows for Halloween without damaging the glass?
Use static-cling decals, painter’s tape, or removable adhesive dots — all release cleanly with no residue. Avoid hot glue and duct tape on glass, and never scrape coated, tinted, or filmed glass with a blade. When in doubt, decorate from the inside with suction cups and tension rods instead of adhesives.
Should Halloween window decorations go inside or outside?
Almost everything can go inside only — that’s the safest placement for paper cutouts, lights, and clings, and it keeps them dry and visible through the glass. Outdoor pieces need weather-rated materials and fixings. Either way, never block window locks, ventilation, or emergency escape routes with your display.
How do I make Halloween window decorations visible at night?
Backlight everything. Dark silhouettes need a brighter background behind them, while translucent panels and gauze need light shining through them — a dark window with decorations just looks empty from the curb. Check from the sidewalk after dark, since indoor reflections change the effect dramatically.
When should I put up Halloween window decorations?
Early to mid-October is ideal — put up paper silhouettes and light displays first since they last all month, and save anything with real pumpkins or perishables for the second half of October so everything still looks fresh on the 31st.
Make Your Windows the Talk of the Street
Your windows do more Halloween heavy lifting than any other spot on your house — they’re visible day and night, they frame every glowing scene like a picture, and most of these ideas cost less than a pizza. Start with one statement window (the big front one everyone sees), get the backlighting right, and expand from there. Pair your finished windows with your Halloween porch decor for full curb-appeal magic, steal a few tricks from your Halloween living room decor, and if you’re hosting, carry the theme inside with your Halloween party decorations.
Found a favorite? Save this post to your Halloween board on Pinterest so you have every idea (and every how-to) ready when decorating weekend arrives — your future self will thank you. Happy haunting!