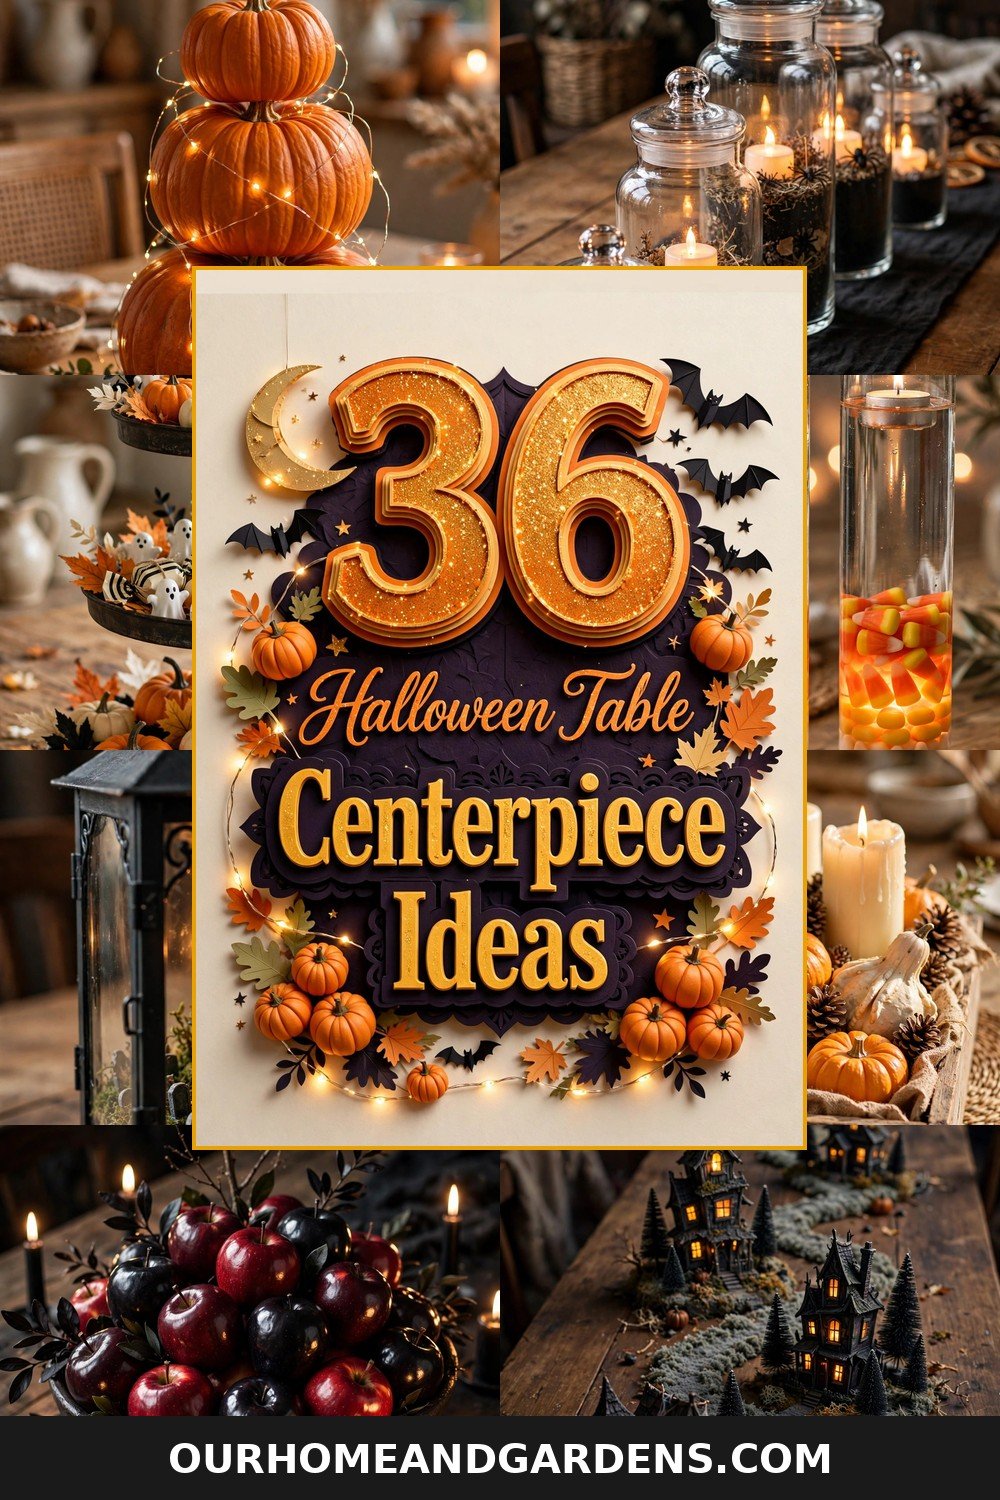
Halloween Table Centerpiece Ideas: 36 Spooky Stunners
Nothing sets the mood for a Halloween gathering like a showstopping table. Whether you’re hosting a full costume dinner party, a casual movie night, or just want your dining table to feel festive all October, these halloween table centerpiece ideas will get you there — from gothic glam to kid-friendly cute. Every idea below is designed for real tables and real budgets, with easy DIY options, clever Dollar Tree finds, and styling tricks that look straight out of a magazine. So clear the center of your table, grab your pumpkins, and let’s build something hauntingly beautiful.
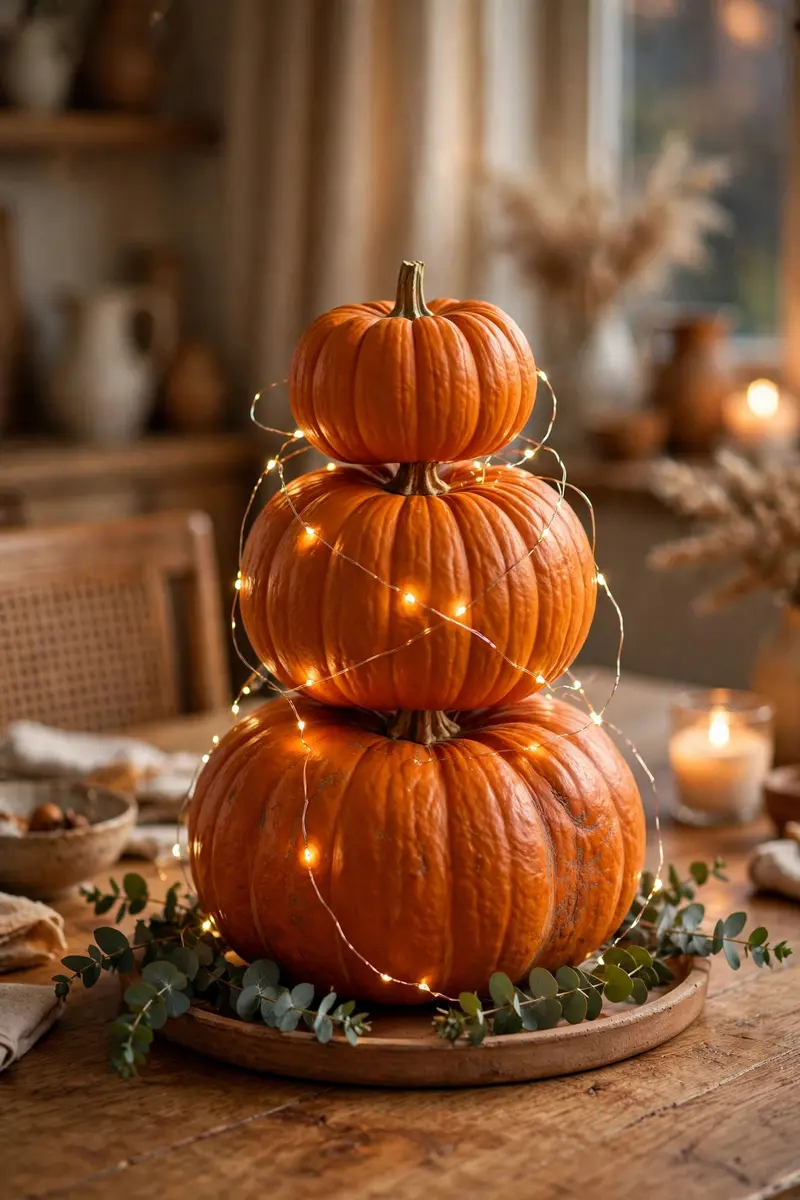
1. Stacked Pumpkin Tower with Fairy Lights
A pumpkin tower is the fastest way to add height and drama to your table without spending much. Stack three pumpkins — large, medium, small — in a tapering column, then weave a strand of warm-white fairy lights through the stack so it glows softly from within. The lights make the whole tower look magical after dark, and the vertical shape draws the eye without hogging table space.
What you need: 3 faux or real pumpkins in graduated sizes, 1 strand of battery fairy lights (20-30 LEDs). Cost: about $18-$30 if you buy pumpkins new, or under $10 with pumpkins you already have.
Place the largest pumpkin on a low tray or charger plate for stability, then stack the rest, slightly off-center for a natural look. Wrap the fairy lights loosely around the tower, tucking the battery pack behind the base pumpkin. Add a few sprigs of eucalyptus or dried wheat at the base to hide the mechanics.
Pro tip: Use faux pumpkins for the tower — they’re lighter, stack more safely, and you can reuse the whole display next year.
Variation: Paint the pumpkins matte black, cream, or blush pink first for a modern twist on the classic orange tower.
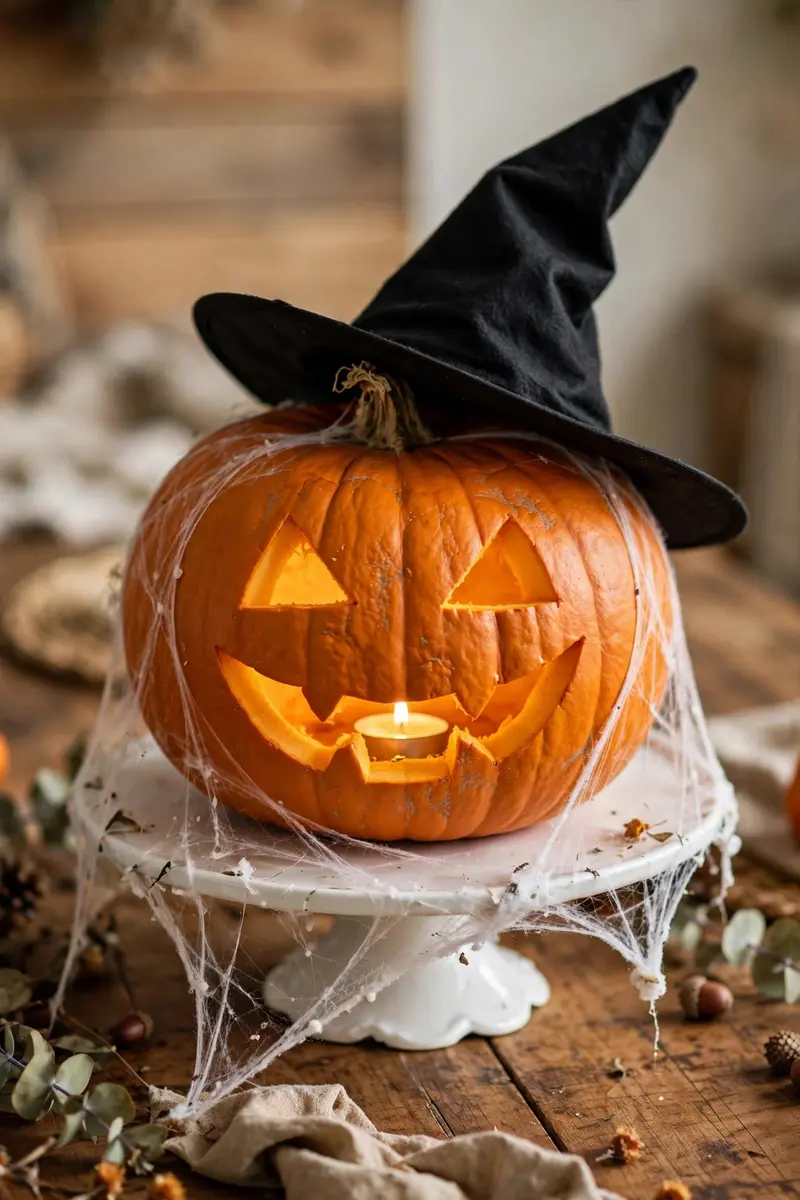
2. Witch Hat Pumpkin on a Cake Stand
Take one classic jack-o’-lantern and give it a personality upgrade: pop a pointy witch hat on top. The hat adds height and instant character, turning a plain pumpkin into a charming witch that anchors your whole table. Display it on a cake stand draped with faux spider webs for extra drama and elevation.
What you need: 1 pumpkin (real or faux), a witch hat (Dollar Tree, ~$1.25), a cake stand, a bag of stretchable spider web. Cost: $5-$12.
Carve or paint a simple jack-o’-lantern face — a playful grin reads friendlier than a scary snarl for this look. Set the pumpkin on the cake stand, perch the hat at a jaunty angle, and stretch the webbing loosely over the stand’s base. Tuck a battery tea light inside the pumpkin so the face glows.
Pro tip: Secure the hat with a dab of hot glue or a pin so it doesn’t topple when guests bump the table.
Variation: Surround the stand with moss, pinecones, and mini pumpkins for a rustic woodland-witch vibe.
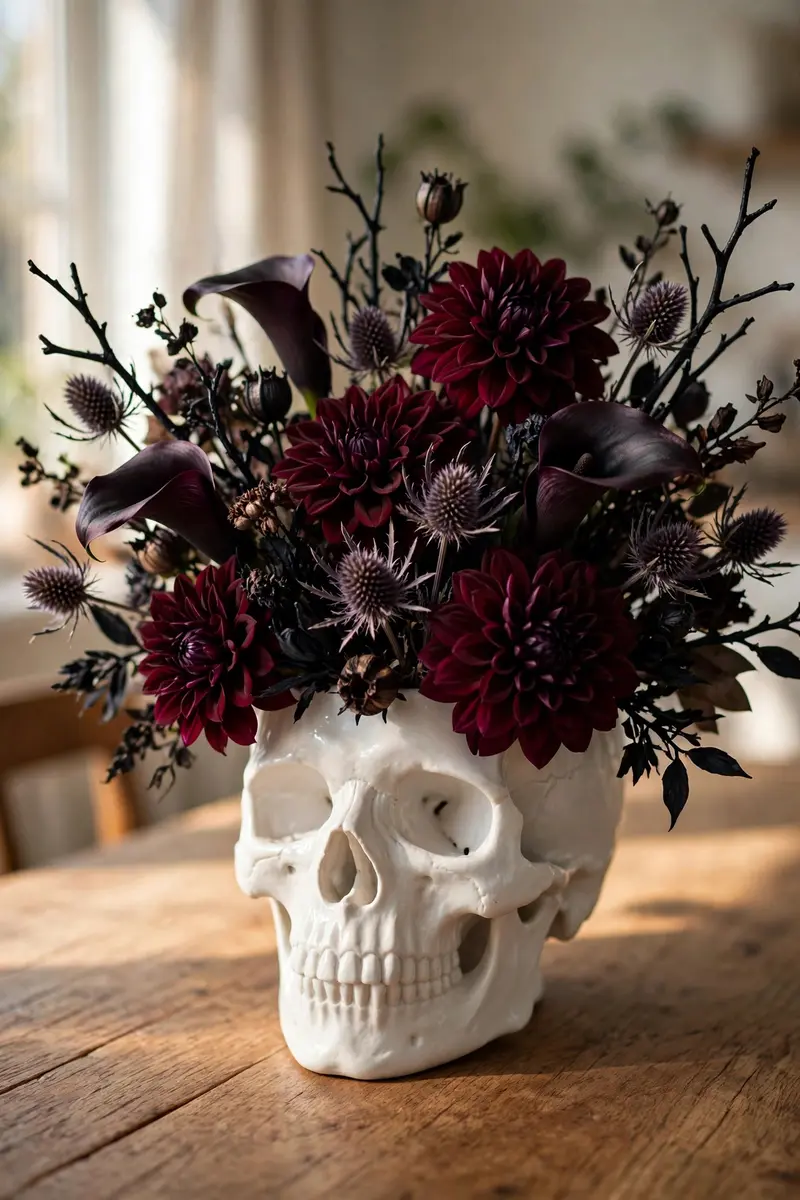
3. Skull Vase with Dark Moody Florals
Nothing says gothic Halloween quite like a skull vase filled with deep, dramatic blooms. A white or metallic skull planter holding burgundy dahlias, black calla lilies, or dark red roses creates a romantic-haunted look that designers are loving for 2026 — it’s the centerpiece version of the gothic Halloween aesthetic taking over Pinterest right now.
What you need: 1 skull vase or planter ($8-$20), a bunch of dark florals (real or faux), floral foam or a jar insert. Cost: $15-$35.
If you use real flowers, drop a water-filled jar inside the skull so the foam doesn’t leak. Arrange the tallest stems first, then fill in with dark foliage and dried grasses for texture. Keep the arrangement low and full rather than tall and sparse — lush reads more expensive.
Pro tip: Mix one unexpected texture — dried thistle, pampas grass, or black-dyed branches — to make the arrangement look designer-made.
Variation: Go monochrome with an all-black skull and all-white blooms for a striking high-contrast look.
4. Black Taper Candle Cluster in Brass Holders
Sometimes the most elegant Halloween table centerpiece ideas are the simplest: a cluster of black taper candles in mismatched brass or gold holders. The flickering candlelight against dark tapers creates instant haunted-manor atmosphere, and the warm metal keeps it from feeling cold. It takes five minutes to assemble and looks like you hired a stylist.
What you need: 5-7 black taper candles, assorted brass or gold candlesticks (thrift stores are perfect). Cost: $10-$25.
Group the holders in odd numbers, varying the heights from 6 to 12 inches. Place the cluster on a round mirror or dark tray to catch the light and protect the table from wax. Light them just before guests arrive — candlelight is the whole effect here.
Pro tip: Drip a little melted wax into each holder first so the tapers stand perfectly straight and don’t wobble.
Variation: Swap black tapers for deep burgundy or forest green for a jewel-toned twist that works into November.

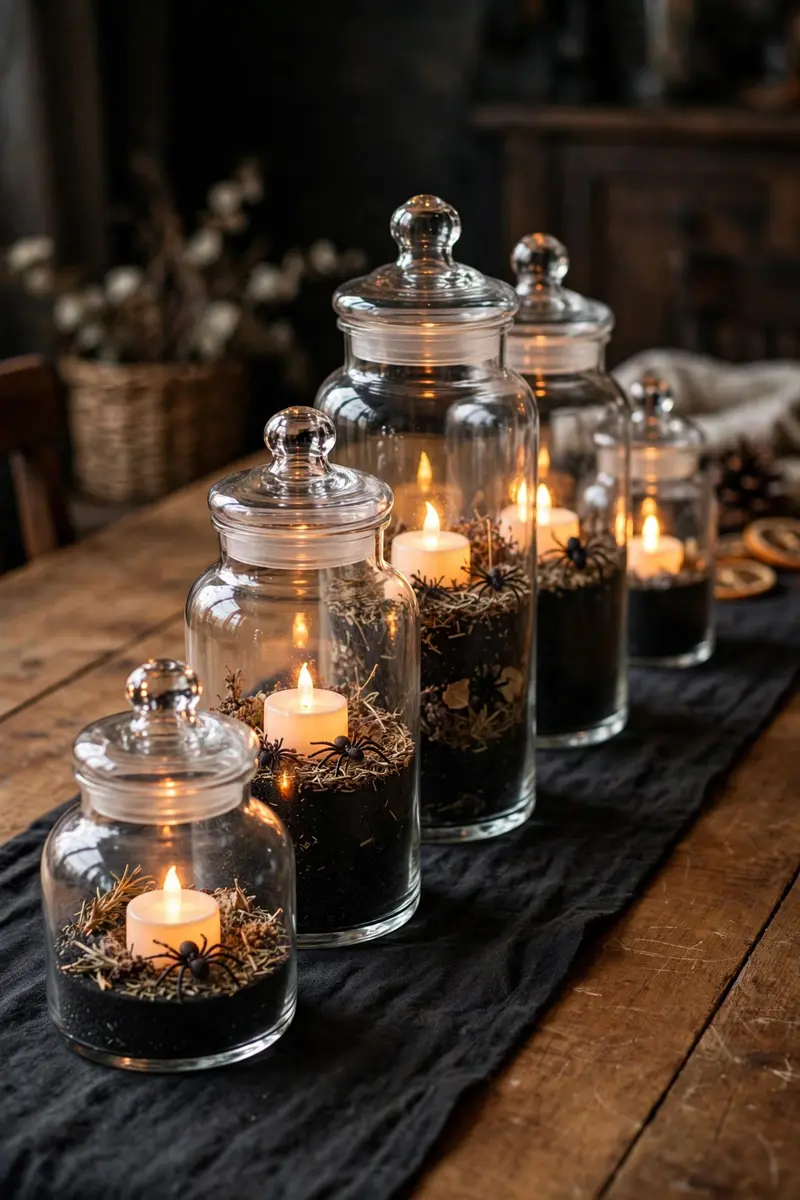
5. Apothecary Jar Lanterns with Flickering LEDs
Channel your inner potion master with a row of glass apothecary jars, each holding a flickering LED candle and a few spooky fillers — plastic spiders, dried herbs, or black sand. The glass catches and multiplies the light beautifully, and the whole row feels like a mad scientist’s shelf plunked right onto your dining table.
What you need: 3-5 glass jars or canisters in varied heights, LED tea lights or votives, fillers (spiders, moss, beans). Cost: $12-$25, less if you raid your pantry for jars.
Fill each jar about a third full with your chosen filler, nestle the LED candle on top, and line the jars down the center of a dark runner. Vary the heights and keep about six inches between jars so the table still feels usable. A few drops of essential oil on the filler (not near flames — these are LEDs, so it’s safe) adds a subtle scent layer.
Pro tip: Use the flicker-mode setting on your LED candles — steady-glow LEDs look flat, but flicker mode genuinely mimics real flame.
Variation: Tie small kraft-paper ‘potion labels’ around each jar neck with twine for an authentic apothecary look.
6. Bat Branch Vase
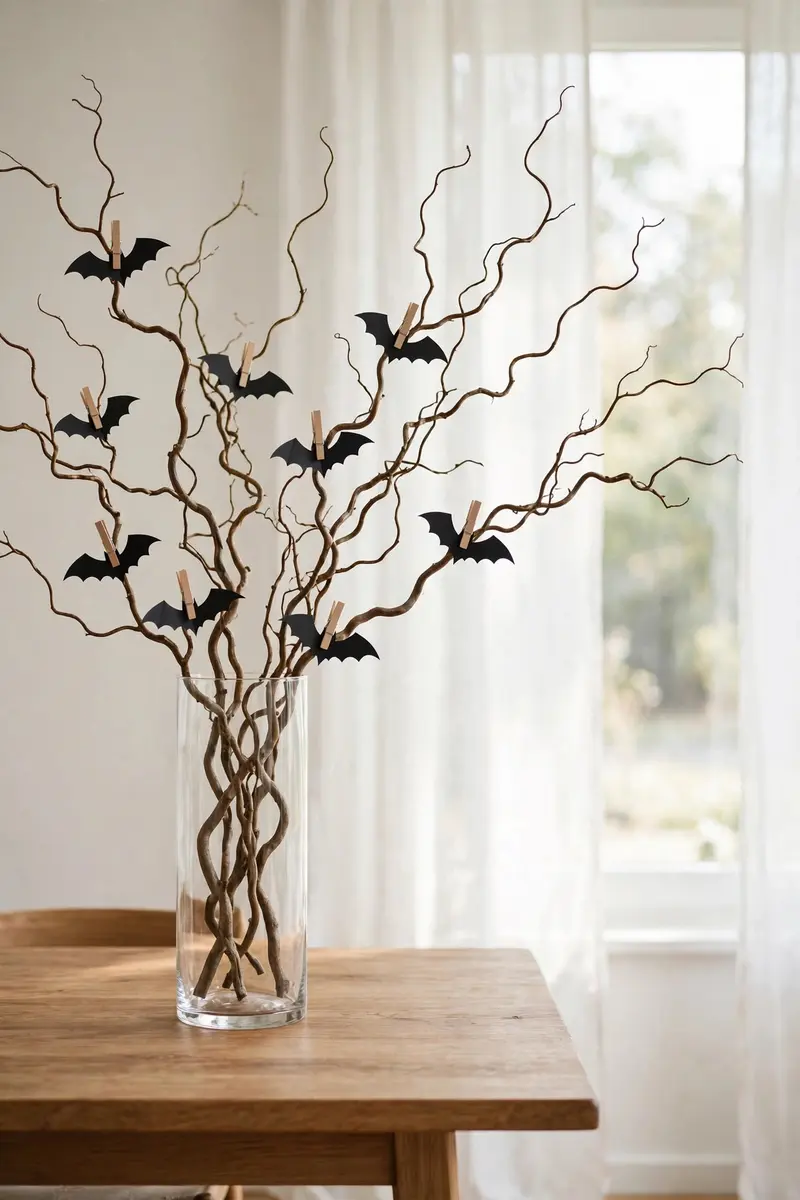
A vase of bare branches covered in tiny black bats is minimal, modern, and unmistakably Halloween. It’s one of those halloween table centerpiece ideas that costs almost nothing — branches are free from your yard — but looks sculptural and intentional, especially against a light wall or window.
What you need: 1 tall vase, 5-8 bare branches, black cardstock bat cutouts, mini clothespins or string. Cost: $3-$10.
Trim the branches to varied heights and arrange them loosely in the vase, fanning outward. Cut simple bat silhouettes from black cardstock (fold the paper to cut symmetrical wings) and clip or hang them on the branches at different heights. Keep the vase off-center on the table so it doesn’t block sightlines.
Pro tip: Spray the branches matte black if your natural branches look too ‘fall’ and not enough ‘Halloween.’
Variation: Add a string of tiny orange fairy lights through the branches for an after-dark version that glows.
7. Skeleton Feast Tablescape
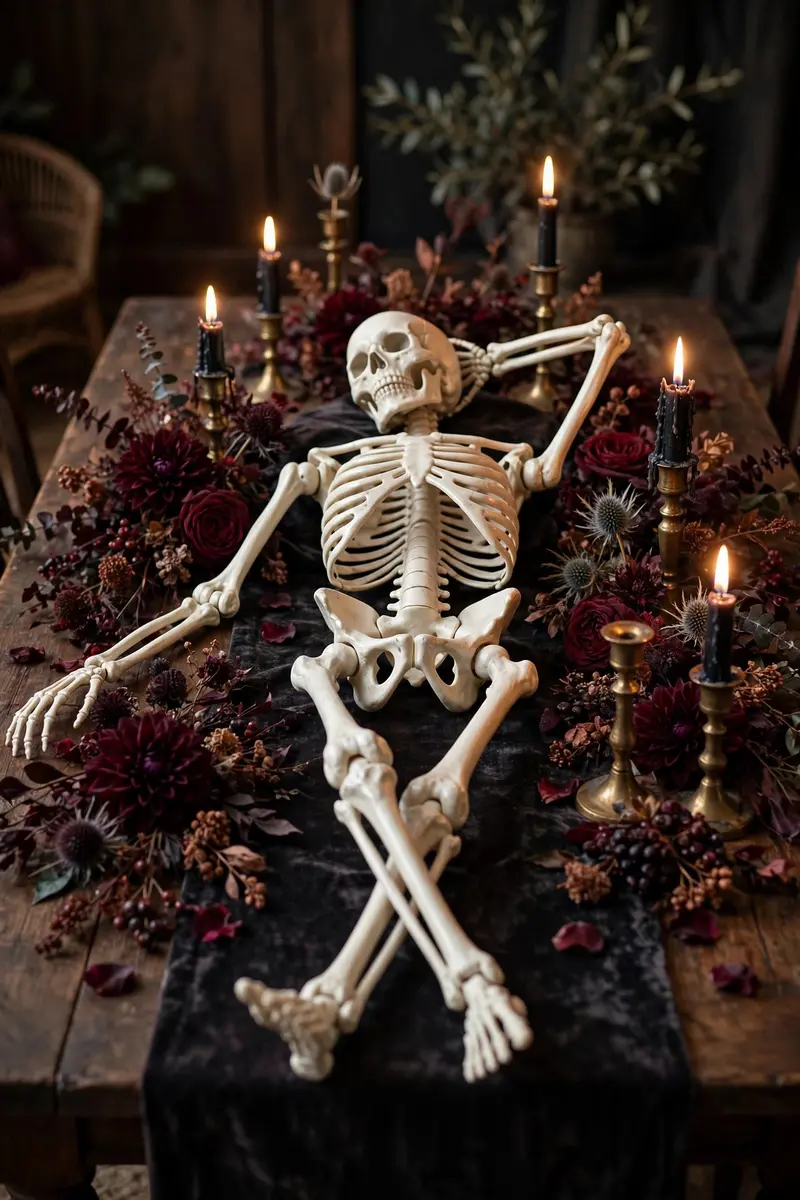
For hosts who love to go all out, lay a posable skeleton right down the center of the table like a macabre guest of honor. Surround it with dark florals, black candles, and vintage-style brass candlesticks for a ‘skeleton feast’ that will have everyone reaching for their phones. It’s dramatic, hilarious, and unforgettable.
What you need: 1 posable skeleton (5 ft, ~$25-$40), dark florals, candles, a dark runner. Cost: $40-$70.
Pose the skeleton lounging — one arm propped behind its head, legs crossed — rather than lying flat like a crime scene. Drape the runner underneath, then build the florals and candles around its body, keeping the skeleton’s ‘face’ clear as the focal point. Keep food on sideboards, not the main table, for this one — it’s a display table.
Pro tip: Pose the skeleton holding a wine glass or wearing a party hat — the humor keeps it fun instead of genuinely creepy.
Variation: Use a skeleton torso or skull collection instead of a full skeleton for a subtler take on the same idea.
8. Smoking Cauldron Punch Bowl
Make your drink the centerpiece: a black cauldron filled with punch, wreathed in ‘smoke’ from dry ice or an LED mist maker. It’s the ultimate Halloween party centerpiece because it’s decor and refreshments in one — guests gather around it all night, and it photographs incredibly well.
What you need: 1 large black cauldron or punch bowl, punch ingredients, dry ice (or a small mist maker, ~$15). Cost: $25-$45.
If using dry ice, place it in a smaller container inside the cauldron so it never touches the punch directly, and add hot water to activate the smoke just before serving. An LED mist maker is the safer, reusable alternative — it floats in the punch and creates continuous fog with zero handling risk. Surround the base with faux webs and plastic spiders.
Pro tip: Never let guests handle dry ice — assign one person to refresh it, and keep tongs nearby.
Variation: Fill the cauldron with wrapped candies instead of punch for a kid-party version that still looks amazing.

9. Tiered Tray Halloween Display
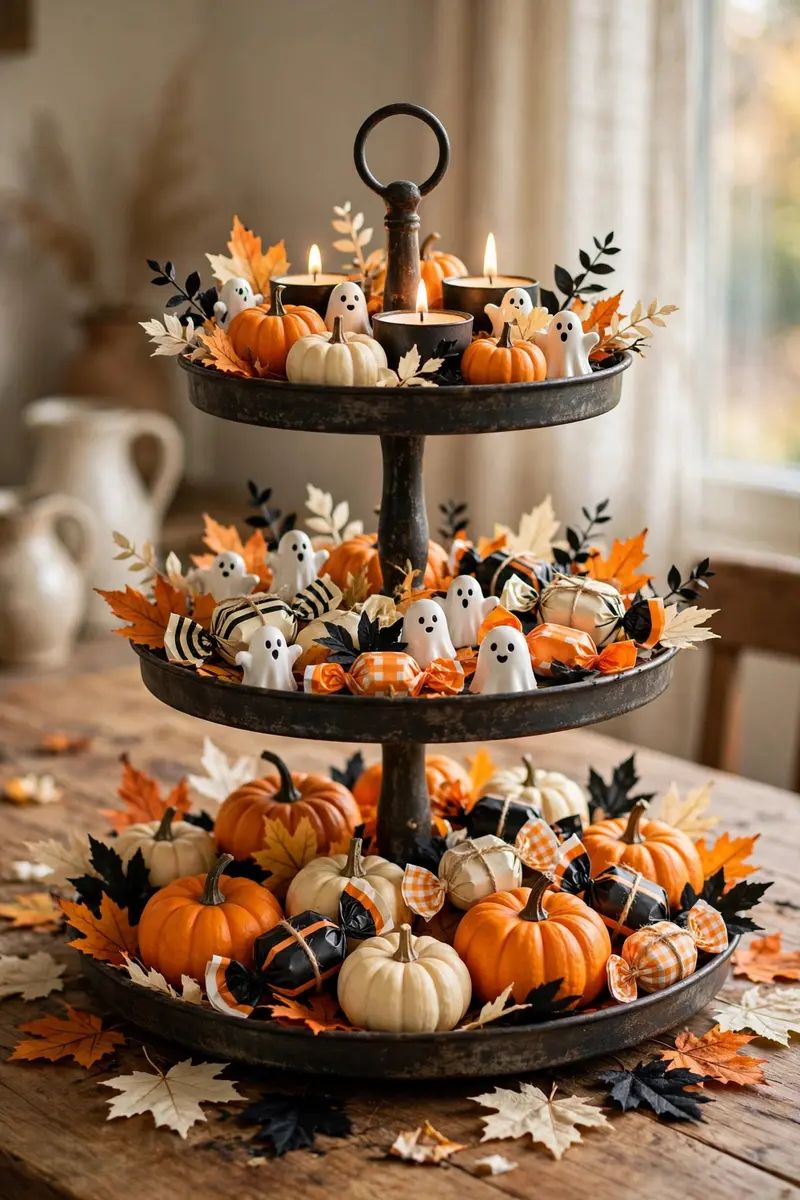
A two- or three-tiered tray corrals a whole Halloween scene into one tidy footprint — perfect for smaller tables or kitchen islands. Layer mini pumpkins, tiny ghosts, candy, candles, and fall foliage across the tiers for a curated look that you can assemble in minutes and move in one lift.
What you need: 3 glass cylinders, 2-3 bags of candy corn, floating candles, water. Cost: $15-$25.
Start with the largest items on the bottom tier and work up, keeping the tallest piece under 12 inches so it doesn’t dominate. Stick to a tight color palette — orange, black, and cream, for example — so the small pieces read as one cohesive display instead of clutter. Tuck battery tea lights between items for evening glow.
Pro tip: Shop your own decor bins first — tiered trays look best with a mix of pieces you already own plus one or two new finds.
Variation: Theme each tier: top for ghosts, middle for pumpkins, bottom for candy — a story in three levels.
10. Pumpkin Vase with Moody Branches
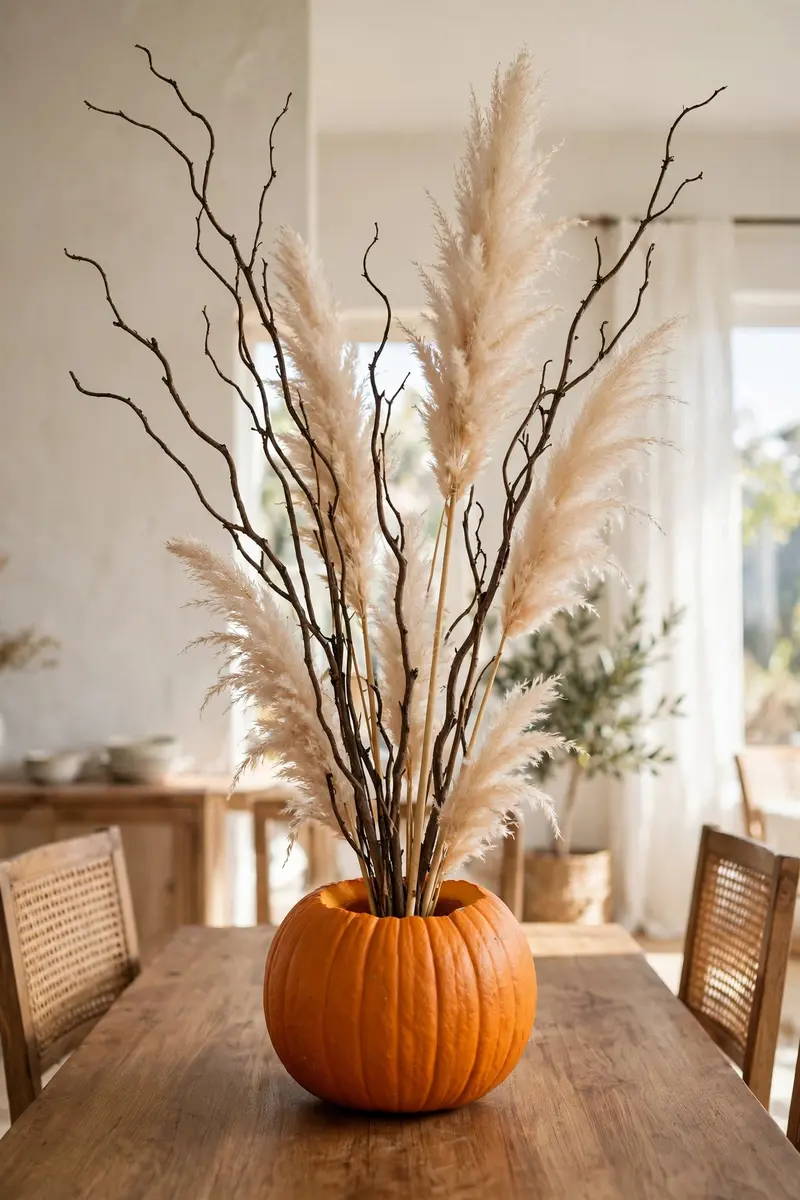
Carve out a medium pumpkin and use it as a vase for dried branches, pampas grass, or dark fall stems. The contrast between the round orange pumpkin and the wild, architectural branches is pure designer catnip — it’s one of the most-pinned halloween table centerpiece ideas for a reason. And it transitions seamlessly into Thanksgiving.
What you need: 1 medium pumpkin, dried branches or pampas grass, a jar or cup to fit inside. Cost: $8-$18.
Cut the top off the pumpkin and scoop it clean, then drop in a jar of water (for fresh stems) or leave it dry for dried branches. Arrange the branches tall and dramatic — they should be the star, with the pumpkin as the base. This one works beautifully in the center of a dining table because the arrangement is narrow at the table level.
Pro tip: Rub the cut edges of the pumpkin with petroleum jelly to slow browning and extend its life by several days.
Variation: Use a white or ‘ghost’ pumpkin with eucalyptus for an elegant neutral version.
11. Black-and-Gold Gothic Glam Runner
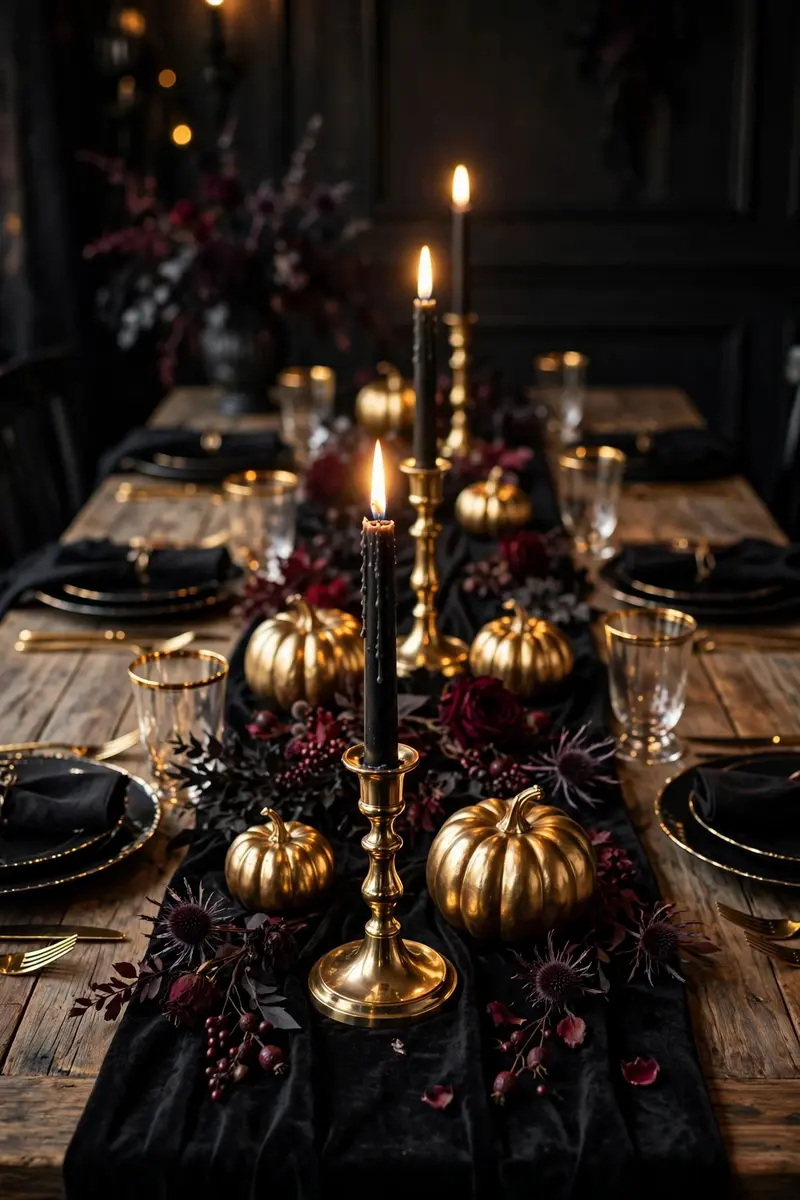
Lean all the way into the 2026 gothic Halloween trend: a black table runner layered with gold accents — brass candlesticks, gold-rimmed glasses, metallic pumpkins, and black taper candles. The strict black-and-gold palette (with maybe a whisper of deep burgundy) looks expensive, moody, and incredibly chic. One stray orange pumpkin would break the spell, so keep the color discipline tight.
What you need: Black runner, gold/brass candlesticks, metallic pumpkins, black candles. Cost: $30-$60.
Build from the center out: runner first, then the tallest pieces (candlesticks) in the middle third, then lower fillers (pumpkins, votives) fanning outward. The key to glam is repetition — three brass candlesticks read as intentional; one reads as an accident. Polish the metals before guests arrive so they catch the light.
Pro tip: Spray-paint thrifted candlesticks metallic gold — a $2 thrift find looks like a $30 boutique piece with one coat.
Variation: Add deep purple velvet ribbon woven through the display for a jewel-toned gothic twist.
12. Ghostly Cheesecloth Runner with Tea Lights
Drape white cheesecloth down the center of a dark table and dot it with LED tea lights for a centerpiece that’s equal parts spooky and dreamy. The gauzy fabric reads as ghostly mist, and the scattered lights glow through it like will-o’-the-wisps. It’s ridiculously cheap and takes about ten minutes.
What you need: 2-3 yards of white cheesecloth, 8-12 LED tea lights, a dark tablecloth or runner underneath. Cost: $8-$15.
Lay the dark base first for contrast, then loosely drape the cheesecloth down the center, letting it puddle and fold naturally — don’t smooth it flat. Tuck the tea lights under and between the folds so the light diffuses through the fabric. Add a few small white pumpkins or ghost figurines peeking out of the ‘mist.’
Pro tip: Cut the cheesecloth edges into jagged strips for a tattered, haunted look instead of clean hems.
Variation: Use gray or black cheesecloth over a white table for an inverted, smokier version.

13. Candy Corn Vase Fillers with Floating Candles
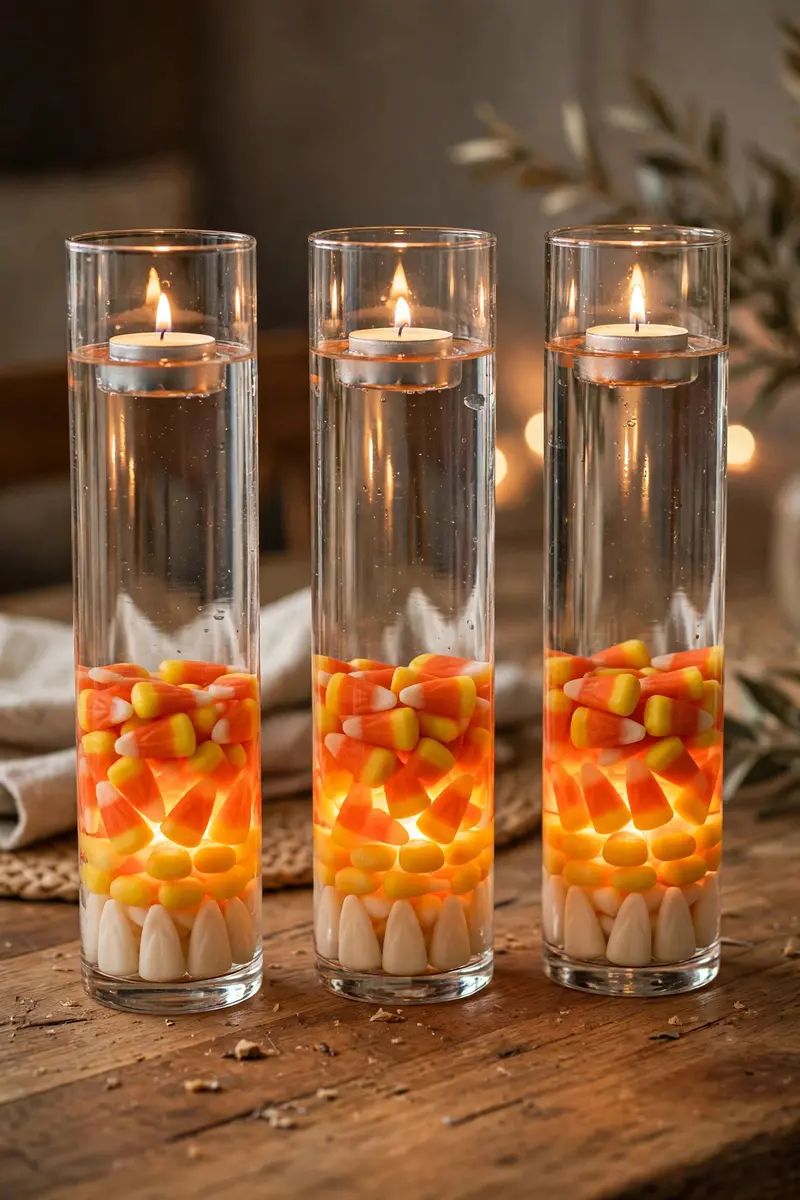
Fill tall glass cylinders a third full with candy corn, add water, and float a candle on top. The layered orange-yellow-white candy looks like edible stained glass, and the floating flame on top is mesmerizing. It’s festive, cheap, and uses the most iconic Halloween candy as decor.
What you need: 3 glass cylinders, 2-3 bags of candy corn, floating candles, water. Cost: $15-$25.
Pour the candy corn in first, then add water slowly so the candy doesn’t float up and cloud the water. Set the floating candle on top — it’ll drift gently, which is part of the charm. Line the three cylinders down the table at staggered heights. After the party, the candy corn is still perfectly good for snacking (it never touched the flame).
Pro tip: Use real glass, not plastic — the clarity of glass makes the candy colors pop; plastic looks cloudy.
Variation: Layer black, orange, and purple Sixlets or M&Ms instead of candy corn for a custom color story.
14. Mini Pumpkin Place-Card Holders
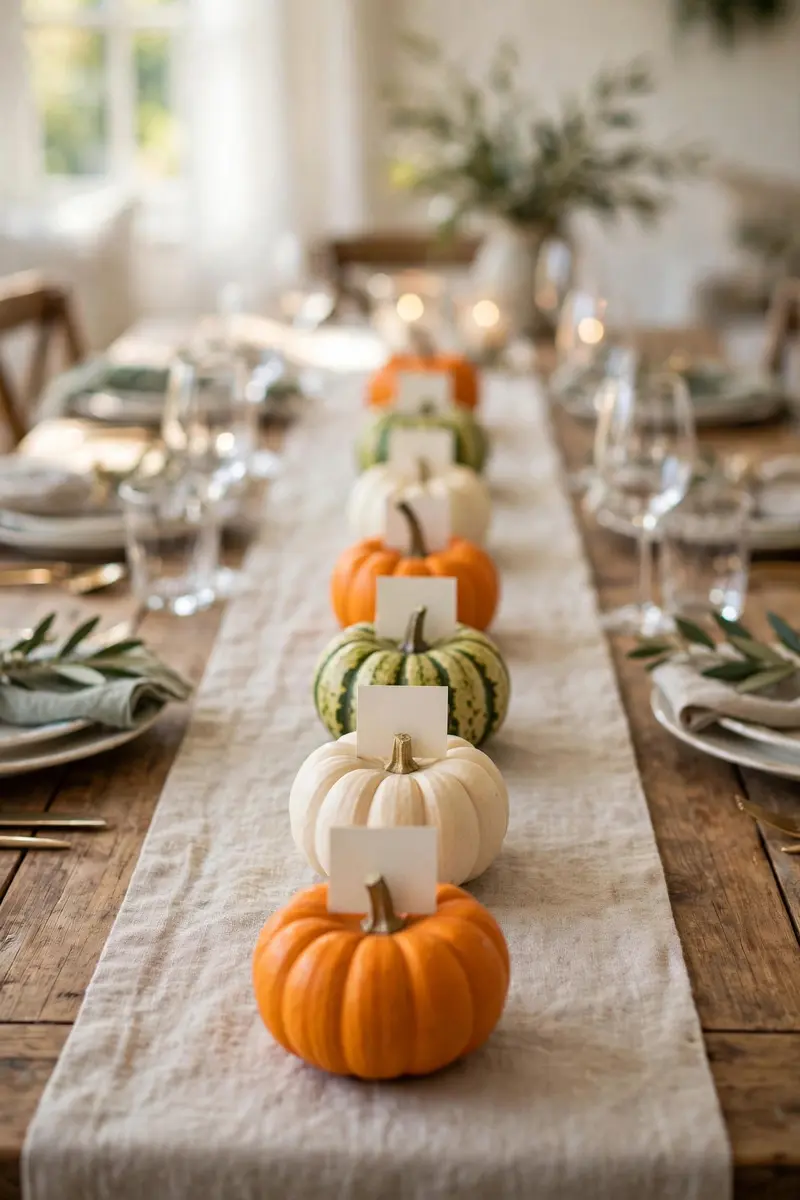
Turn your centerpiece into a functional detail: a row of mini pumpkins down the table, each holding a handwritten place card. Guests find their seats, admire the pumpkins, and take them home as favors. It’s personal, practical, and adorable — especially for Thanksgiving-adjacent Halloween dinners.
What you need: 1 mini pumpkin per guest, place cards or cardstock, a marker or pen. Cost: $1-$2 per guest.
Write names in your best handwriting (or print them in a spooky font) on tent-folded cards. Make a small slit in the top of each mini pumpkin with a craft knife and slide the card in. Line them down the center runner, alternating pumpkin colors — orange, white, green-striped — for visual rhythm.
Pro tip: Make the slit just deep enough to grip the card — too shallow and cards topple; too deep and they disappear inside.
Variation: Use small gourds or apples instead of pumpkins for a harvest-dinner version.
15. Spiderweb Runner with Creepy Crawlers
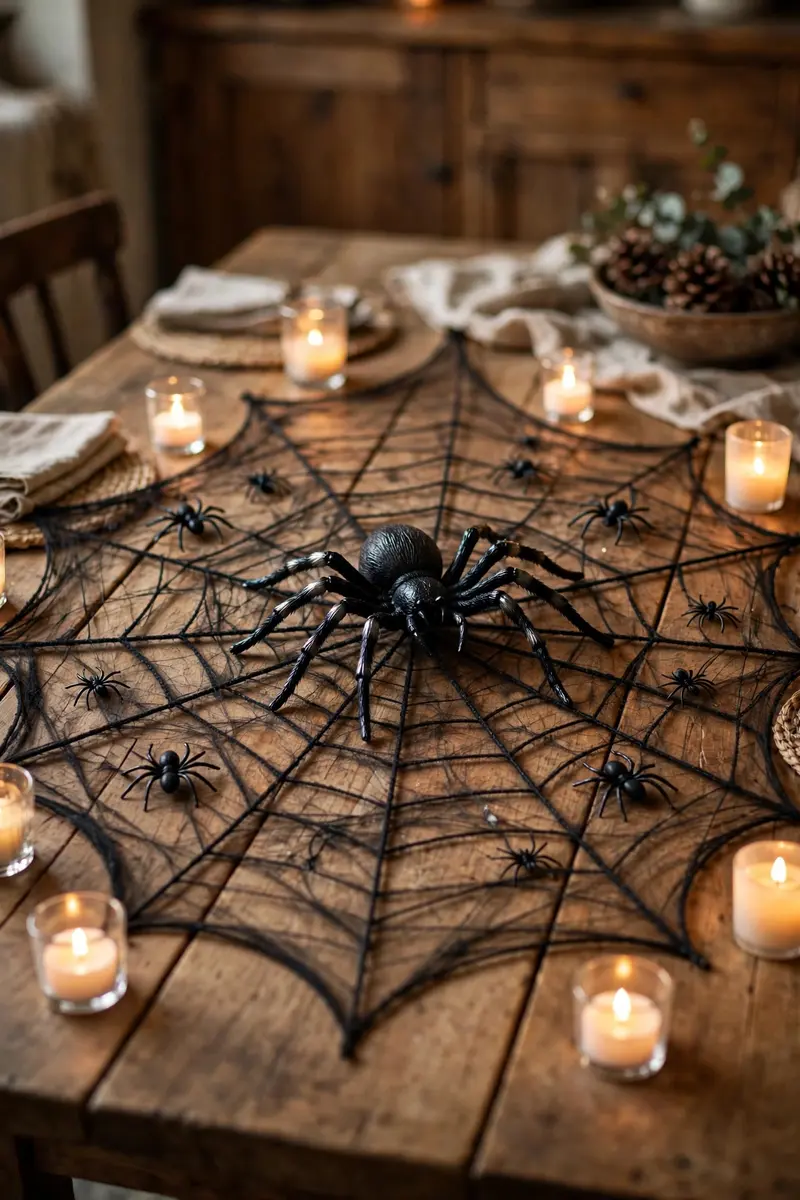
Stretch a round spiderweb decoration across the table as your runner, then scatter oversized plastic spiders across it and the surrounding table. It’s a classic for a reason: webs instantly say Halloween, the 3D spiders add a delicious shiver factor, and the whole thing costs less than a pizza.
What you need: 1 large round spiderweb (or a web tablecloth), 6-10 plastic spiders in varied sizes. Cost: $5-$12.
Center the web on the table and stretch it slightly so the strands stay taut and visible. Place the biggest spider right in the middle as the ‘queen,’ then scatter smaller ones heading outward like they’re colonizing the table. Add a few LED tea lights around the edges — spiders look ten times creepier in flickering light.
Pro tip: Hang one spider from the chandelier above on fishing line so it dangles over the table — guests will lose it (in a good way).
Variation: Layer the web over a black velvet runner for extra texture and contrast.
16. Spell Book Stack with Potion Bottles
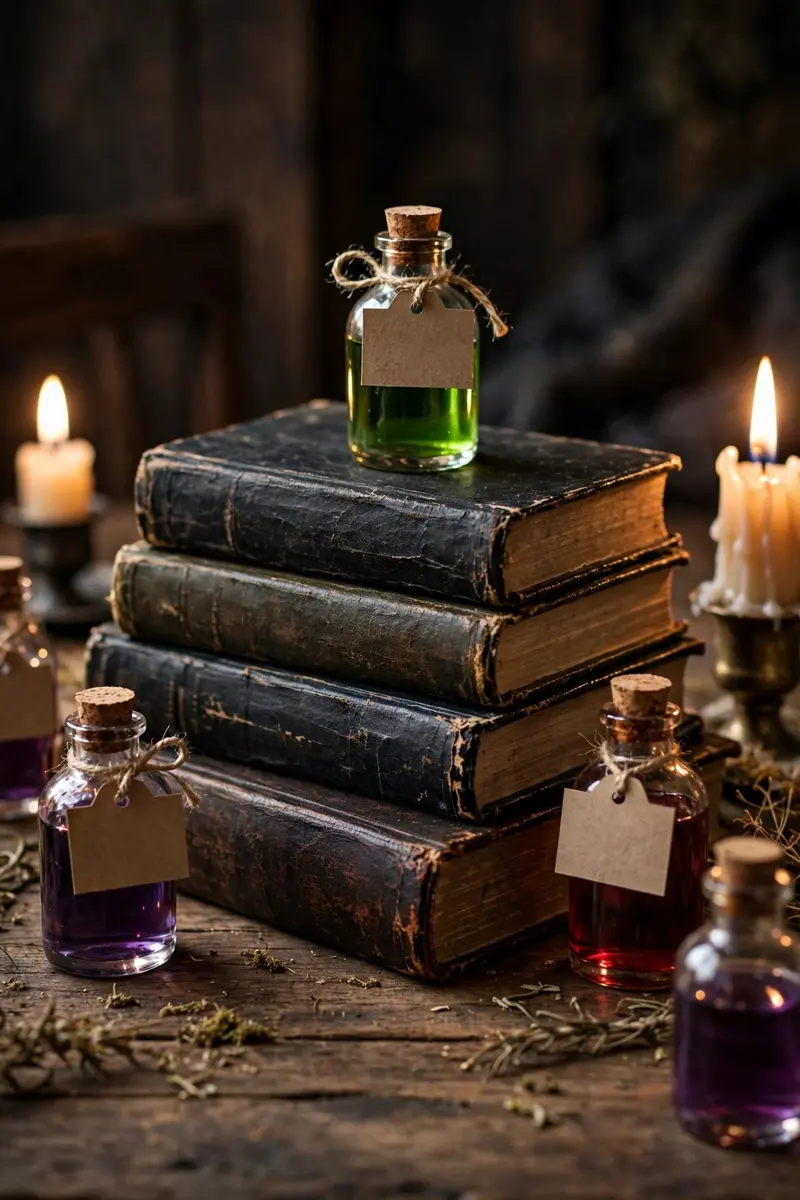
Stack a few old hardcover books (the spookier the titles, the better) and top them with small glass potion bottles filled with colored water, glitter, and tiny labels. It’s a witch’s library in miniature — perfect for the dark-academia Halloween lover and endlessly customizable with what you have on hand.
What you need: 3-5 old hardcover books, small glass bottles, food coloring, tiny labels, twine. Cost: $8-$20.
Stack the books slightly askew for an organic, ‘just pulled from the shelf’ feel. Fill bottles with water tinted in eerie greens, purples, and reds; add a pinch of glitter for shimmer. Handwrite labels like ‘Eye of Newt’ or ‘Moonwater’ on kraft paper and tie them on with twine. Cluster the bottles on and around the book stack.
Pro tip: Age the book covers with a wash of watered-down brown paint for instant vintage grimoire vibes.
Variation: Add a small cauldron, a wand, and a pair of round spectacles to complete the wizard’s-desk scene.
17. Haunted Lantern Terrarium
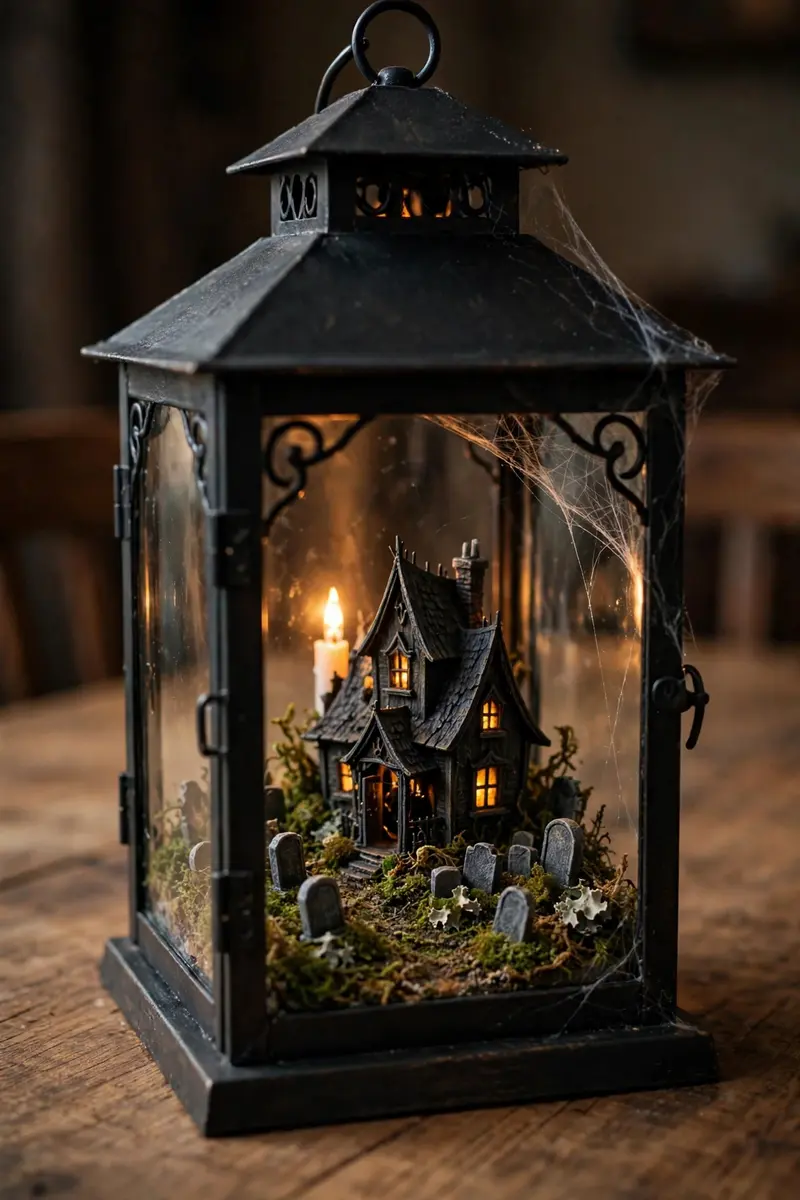
Turn a glass lantern into a tiny haunted scene: moss on the bottom, a miniature haunted house or tombstones inside, a wisp of faux web, and a flickering LED candle for moonlight. It’s a whole Halloween diorama under glass — guests will lean in close to inspect every detail.
What you need: 1 glass lantern, faux moss, miniature haunted-house figurines, LED candle. Cost: $15-$30.
Open the lantern and layer moss on the base, then arrange the miniatures like a tiny graveyard scene — house at the back, tombstones in front. Drape a whisper of webbing over one corner and set the LED candle behind the house so it glows through the windows. Keep the lantern door slightly ajar for a ‘lived-in’ haunted feel.
Pro tip: Choose a lantern with clear glass on all four sides so the scene reads from every seat at the table.
Variation: Fill the lantern with layered sand, tiny pumpkins, and fairy lights for a non-spooky autumn terrarium.
18. Raven on a Branch with Moss
A single black raven or crow figurine perched on a mossy branch is the definition of understated Halloween elegance. It’s dark, literary, a little Edgar Allan Poe — and it works on any table without screaming ‘costume shop.’ Pair it with a few black candles and let the simplicity do the talking.
What you need: 1 raven/crow figurine ($8-$18), a sturdy branch, faux moss, a low tray or wood slice. Cost: $12-$25.
Mount the branch horizontally on the wood slice with hot glue or floral wire, tuck moss around the base, and perch the bird on top. Keep everything else minimal — two black taper candles and maybe a small pumpkin are plenty. This centerpiece shines on a neutral or wood table where the black silhouette pops.
Pro tip: Position the raven facing slightly toward the room’s entrance — it feels like it’s watching guests arrive, which is deliciously eerie.
Variation: Swap the raven for an owl figurine and add tiny books for a dark-academia library look.

19. Bloody Drip Taper Candles
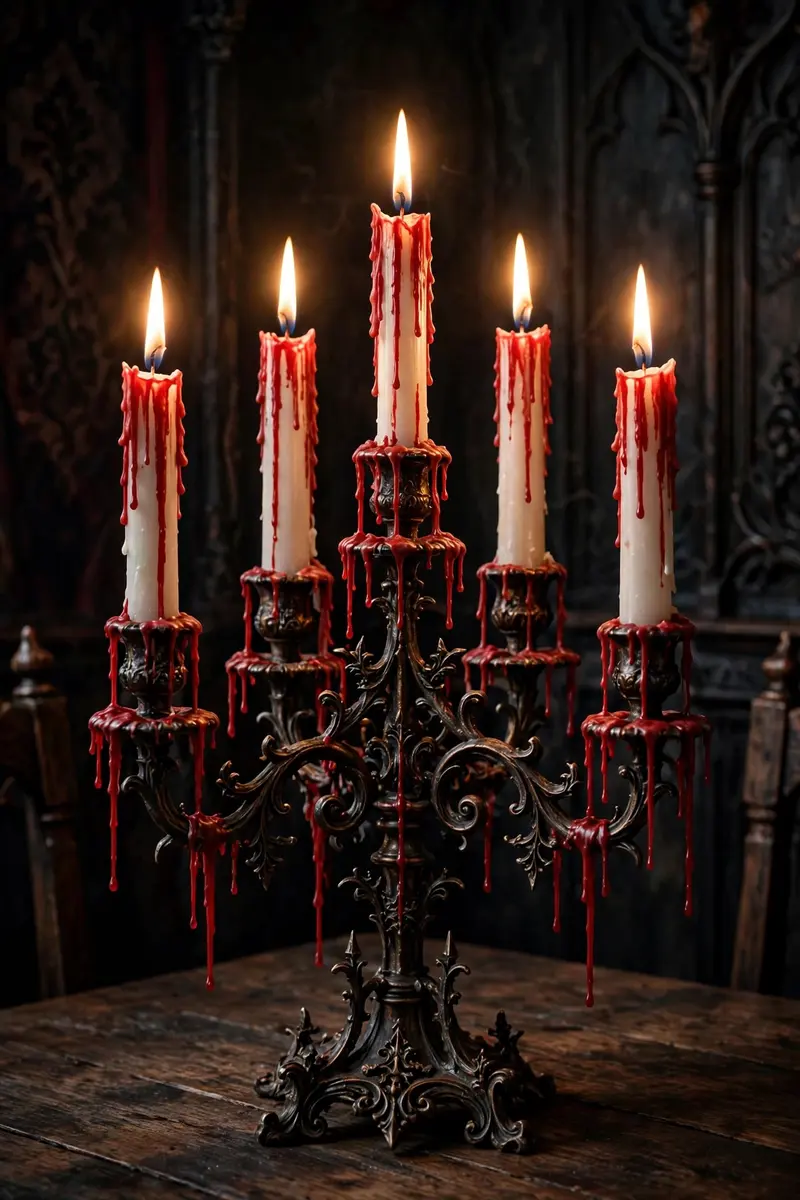
White taper candles with red wax ‘dripping’ down the sides look straight out of a vampire’s dining room. The effect is easy to DIY with red wax, the result is genuinely gory-glamorous, and a cluster of them in a dark candelabra is one of the most dramatic halloween table centerpiece ideas for a grown-up party.
What you need: White taper candles, red tea lights or red wax melts, a dark candelabra. Cost: $12-$22.
Melt the red wax carefully (a double boiler or a tin can in simmering water), then spoon or pour it over the top of each white taper, letting it drip naturally down the sides. Work over newspaper — this gets messy. Let the wax harden fully before placing the candles in the candelabra. Burn them only with supervision, as the extra wax can drip.
Pro tip: Pour the red wax in two thin layers rather than one thick one — it looks more like real dripping blood and less like a red candle.
Variation: Use black wax drips on orange tapers for a less gory, more graphic version.
20. Pastel Pumpkin Centerpiece
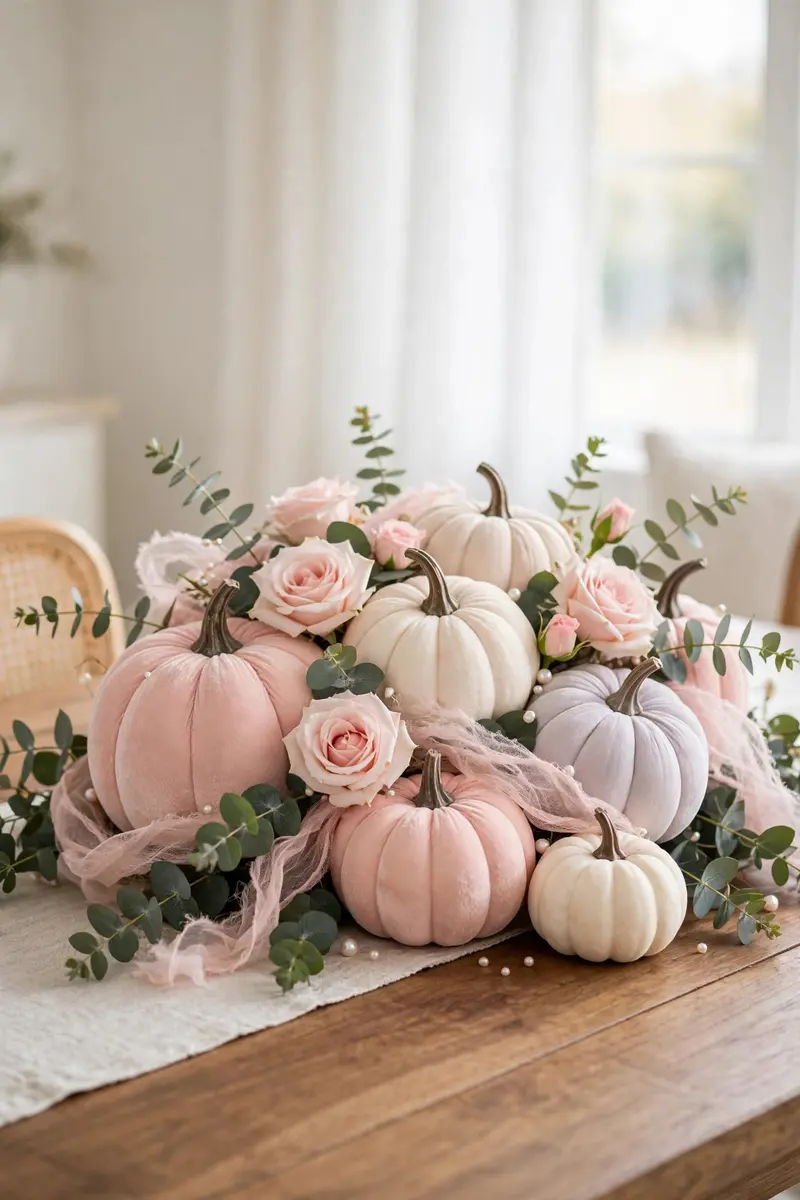
Who says Halloween has to be orange and black? Blush pink, ivory, and pale lavender pumpkins with soft florals and gauzy ribbon make a pastel Halloween centerpiece that’s all over Pinterest right now — perfect for a girls’ night, a baby shower in October, or anyone whose style runs more sweet than spooky.
What you need: Faux pumpkins in pastel shades, soft florals (roses, ranunculus), gauzy ribbon. Cost: $20-$40.
Cluster the pumpkins in the center in varied sizes, tucking soft florals and eucalyptus between them. Drape the gauzy ribbon loosely through the arrangement and add a few pearl or crystal accents for shimmer. Keep the palette tight — three pastels max — so it reads intentional, not random.
Pro tip: Spray-paint inexpensive orange pumpkins with pastel chalk paint — it’s the cheapest way to get the look, and chalk paint needs no primer.
Variation: Add tiny ghost figurines in white and blush for a ‘cute Halloween’ version kids will love too.
21. Rustic Wooden Box with Gourds and Candles
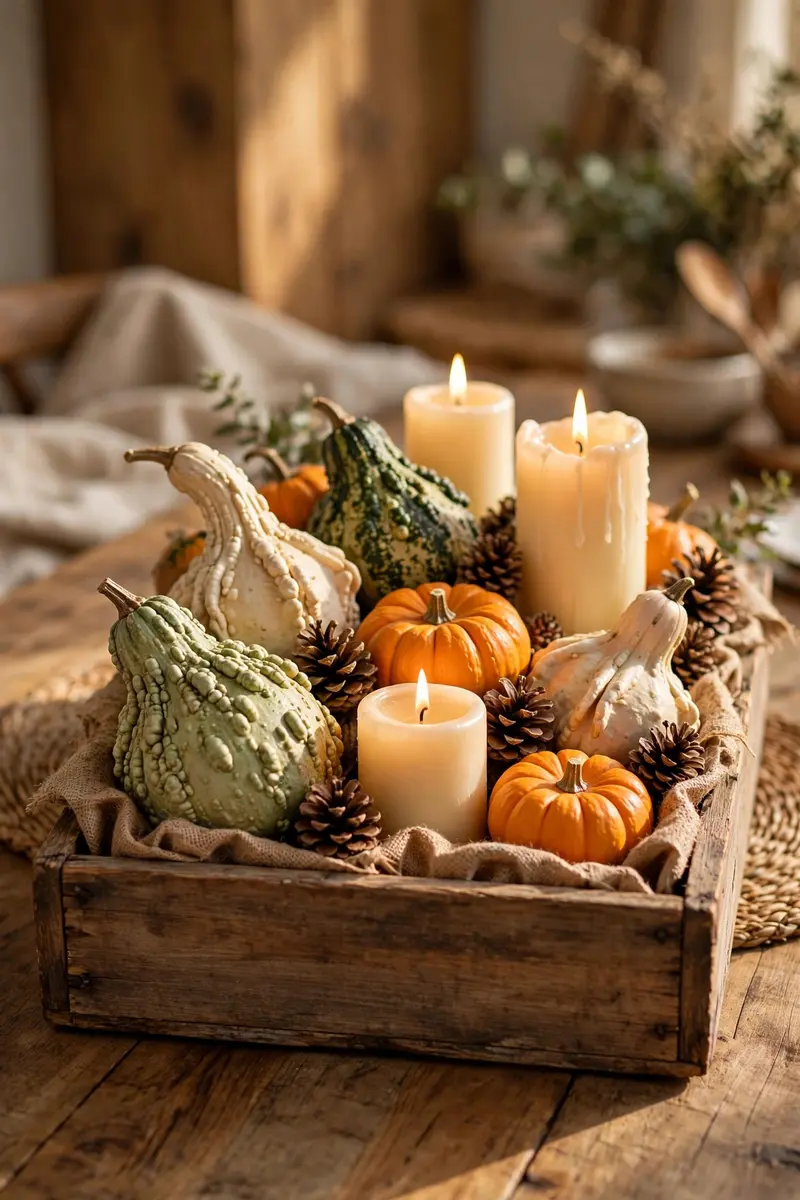
A low wooden box or crate filled with gourds, mini pumpkins, pinecones, and pillar candles is harvest-table perfection. It’s the centerpiece equivalent of a cozy sweater — warm, textural, and welcoming — and it works from early October straight through Thanksgiving with zero changes.
What you need: 1 wooden box or low crate, assorted gourds and mini pumpkins, 3 pillar candles, pinecones. Cost: $15-$30.
Line the box with a bit of burlap or fall leaves, then arrange the gourds and pumpkins in a loose row, tucking candles between them at varied heights. Scatter pinecones and acorns in the gaps. Because everything sits low, conversation flows right over it — no sightline issues at all.
Pro tip: Choose gourds in odd, sculptural shapes — the weirder the gourd, the more interesting the arrangement.
Variation: Add a string of fairy lights woven through the box for an evening glow-up.
22. Mummy-Wrapped Mason Jar Candles
Wrap mason jars in strips of white gauze to make mummy lanterns, add googly eyes, and drop in LED tea lights. They’re goofy, charming, and a fantastic craft to do with kids — and lined up down the table, a row of glowing mummies is genuinely adorable.
What you need: Mason jars, white gauze or crepe-paper streamers, googly eyes, LED tea lights, glue. Cost: $8-$15 for a set of five.
Wrap the gauze loosely around each jar, leaving small gaps so the light peeks through, and secure with a dab of glue. Stick on two googly eyes near the top — slightly crooked eyes are funnier. Drop in the tea lights and line the mummies down a runner, mixing jar sizes for variety.
Pro tip: Use warm-white LEDs, not cool-white — cool light makes mummies look clinical; warm light makes them cozy-spooky.
Variation: Wrap some jars in orange streamers for ‘pumpkin’ lanterns and alternate them with the mummies.

23. Black Lace Runner Over a Candelabra
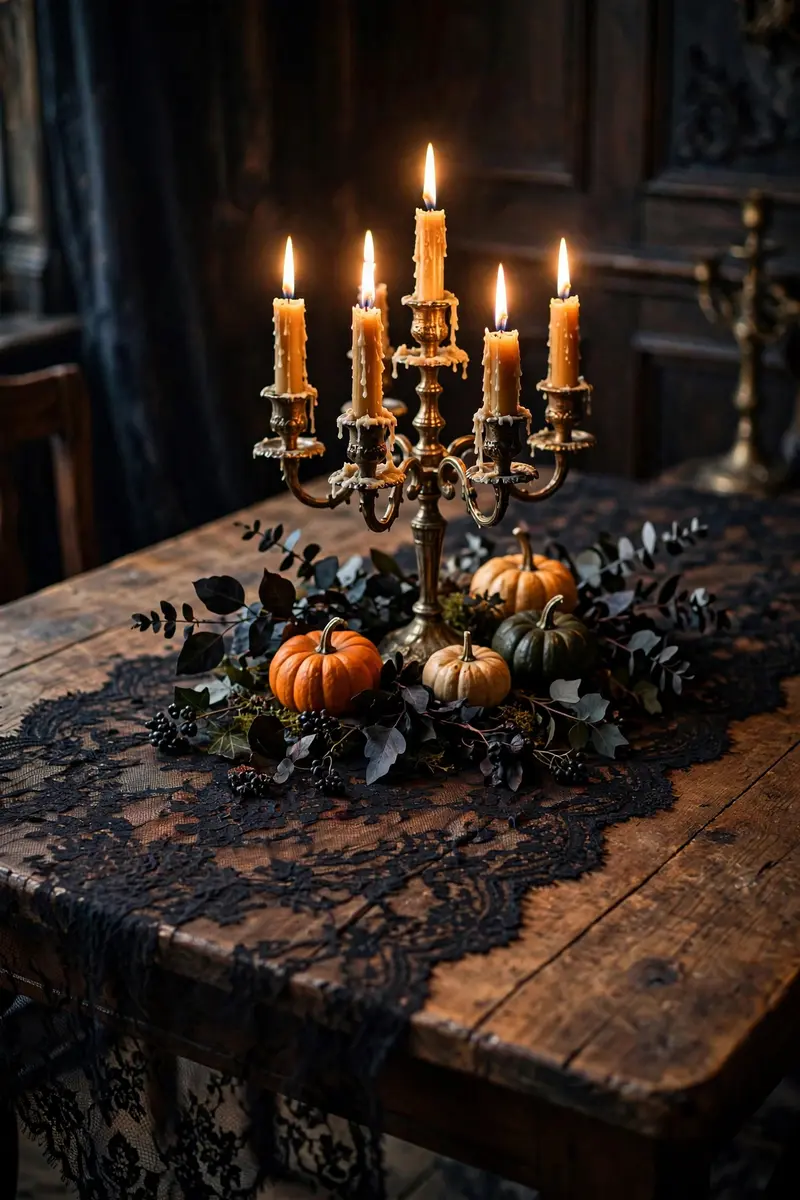
Layer a black lace table runner over your everyday tablecloth, then set a classic candelabra in the middle. The lace adds instant Victorian-gothic texture, the candles add flicker, and together they transform a plain table into something moody and romantic in under five minutes. Proof that Halloween table decor doesn’t have to be complicated to be effective.
What you need: 1 black lace runner or lace fabric yardage, 1 candelabra with candles. Cost: $15-$35.
Lay the lace slightly off-center so the pattern catches the eye, letting the ends drape over the table edges. Center the candelabra and surround its base with a few small pumpkins or dark leaves. If your lace is thin, layer it over a solid black or deep purple runner so the pattern shows up.
Pro tip: Iron the lace on low heat before laying it — wrinkles flatten the delicate pattern and dull the effect.
Variation: Use deep red lace instead of black for a vampire-romance tablescape.
24. Pumpkin Succulent Planter Centerpiece
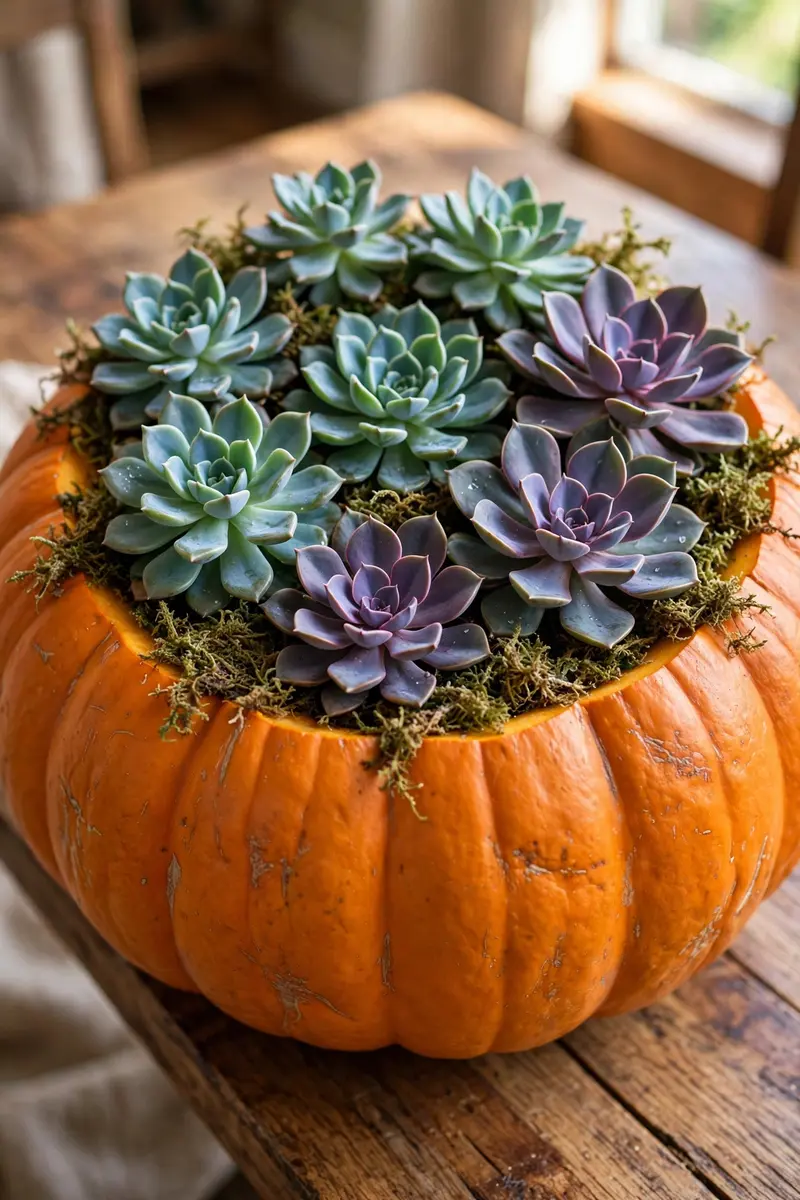
Hollow out a pumpkin, fill it with soil, and plant a cluster of succulents inside for a centerpiece that’s equal parts Halloween and houseplant-chic. The dusty greens and blues of the succulents against the orange pumpkin are a gorgeous color contrast, and the whole thing lasts for weeks.
What you need: 1 medium pumpkin, 5-7 small succulents, potting soil, a plastic liner. Cost: $15-$28.
Cut the top off the pumpkin and scoop it out, then line it with plastic (a cut-up grocery bag works) to protect the flesh from moisture. Add soil and arrange the succulents with the largest in the center, tucking sphagnum moss around the edges to hide the soil. Mist lightly — succulents hate being soggy.
Pro tip: Choose succulents in blue-green and purple tones (like echeveria) — they echo Halloween colors without a single plastic spider.
Variation: After Halloween, move the succulents to a regular pot and compost the pumpkin — zero waste.
25. Antique Mirror Tray with Candlelight
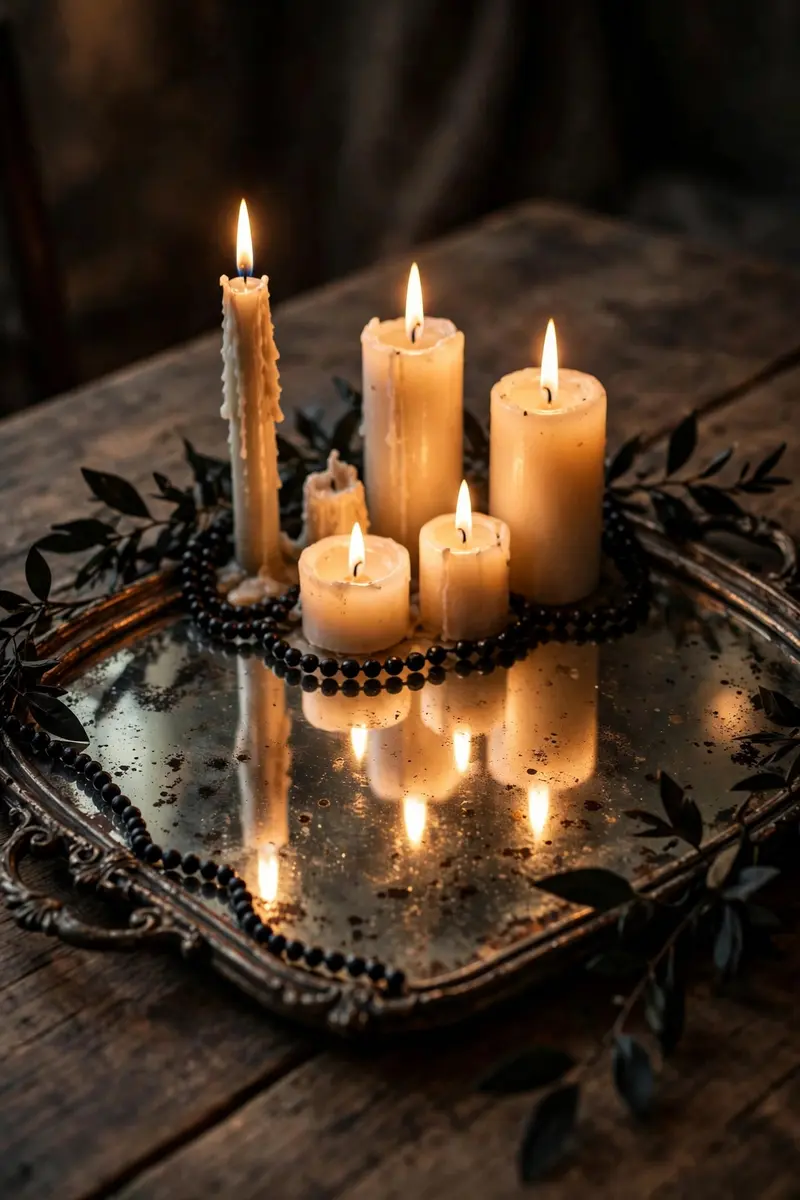
An antique-style mirrored tray reflecting a cluster of candles doubles your candlelight and adds vintage glamour to the table. The aged, foxed mirror surface feels perfectly haunted — like something from a Victorian séance — while the multiplied flames make the whole table glow.
What you need: 1 mirrored tray (thrift or new, $10-$25), an assortment of candles in varied heights. Cost: $15-$35.
Arrange the candles in a loose cluster on the tray, tallest in the middle, and light them all — the mirror does the visual heavy lifting. Add a few dark leaves or a strand of black beads around the tray’s edge to ground it. This works beautifully as one of several low centerpieces down a long table.
Pro tip: Mix real and LED candles on the tray — use real flames for the tall tapers and LEDs for the low votives near the mirror’s edge.
Variation: Swap candles for a collection of perfume bottles and a skull for a haunted-vanity vignette.
26. Harvest Sheaf with Black Ribbon
Tie a sheaf of dried wheat, corn stalks, or pampas grass with a wide black satin ribbon and lay it down the center of the table. It’s harvest-season elegance with a Halloween wink — the black ribbon is the only ‘costume’ it needs. Simple, sculptural, and it smells amazing.
What you need: 1 bundle of dried wheat or pampas grass, wide black satin ribbon. Cost: $8-$18.
Fan the stems out slightly and bind them tightly about a third of the way down with the ribbon, tied in a full bow. Lay the sheaf diagonally across the table or stand it upright in a tall vase. Tuck a few mini pumpkins or black candles at its base to anchor it visually.
Pro tip: Spray dried wheat lightly with hairspray to keep it from shedding all over your tablecloth.
Variation: Weave a few black-painted branches through the sheaf for a more Halloween-forward look.

27. Owl and Books Dark Academia Display
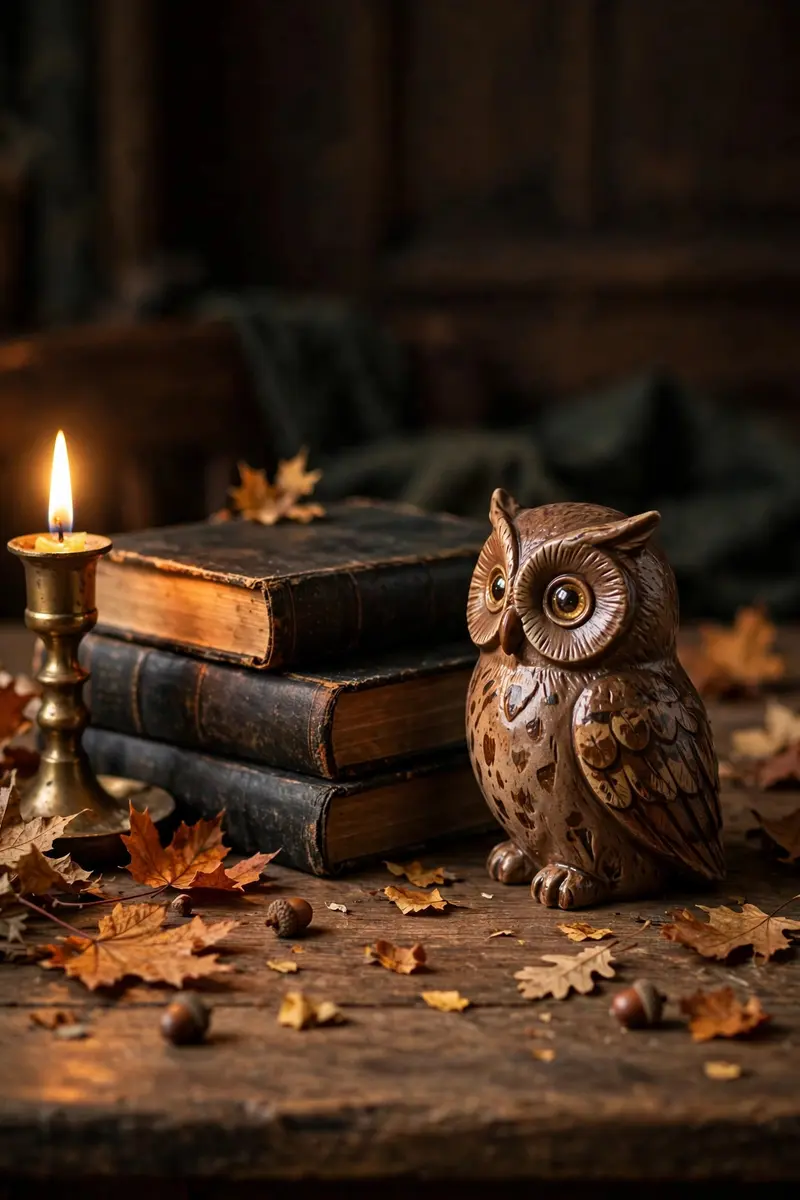
For the bookish Halloween lover: a wise owl figurine perched beside a stack of vintage-looking books, with a brass candle and a few dried leaves. It’s dark academia meets Halloween — scholarly, moody, and sophisticated. No plastic skeletons required.
What you need: 1 owl figurine, 3-4 old books, 1-2 candles, dried leaves. Cost: $12-$25.
Stack the books with the largest on the bottom, slightly rotated for a casual look. Perch the owl on top or beside the stack, and place the candle where its light will rake across the book spines. Scatter a few dried leaves and maybe a pair of round spectacles for storytelling detail.
Pro tip: Choose books with dark or cloth bindings — bright modern covers break the vintage spell.
Variation: Add a small potion bottle and a quill for a full wizard’s-study scene.
28. Edible Ghost Dessert Centerpiece
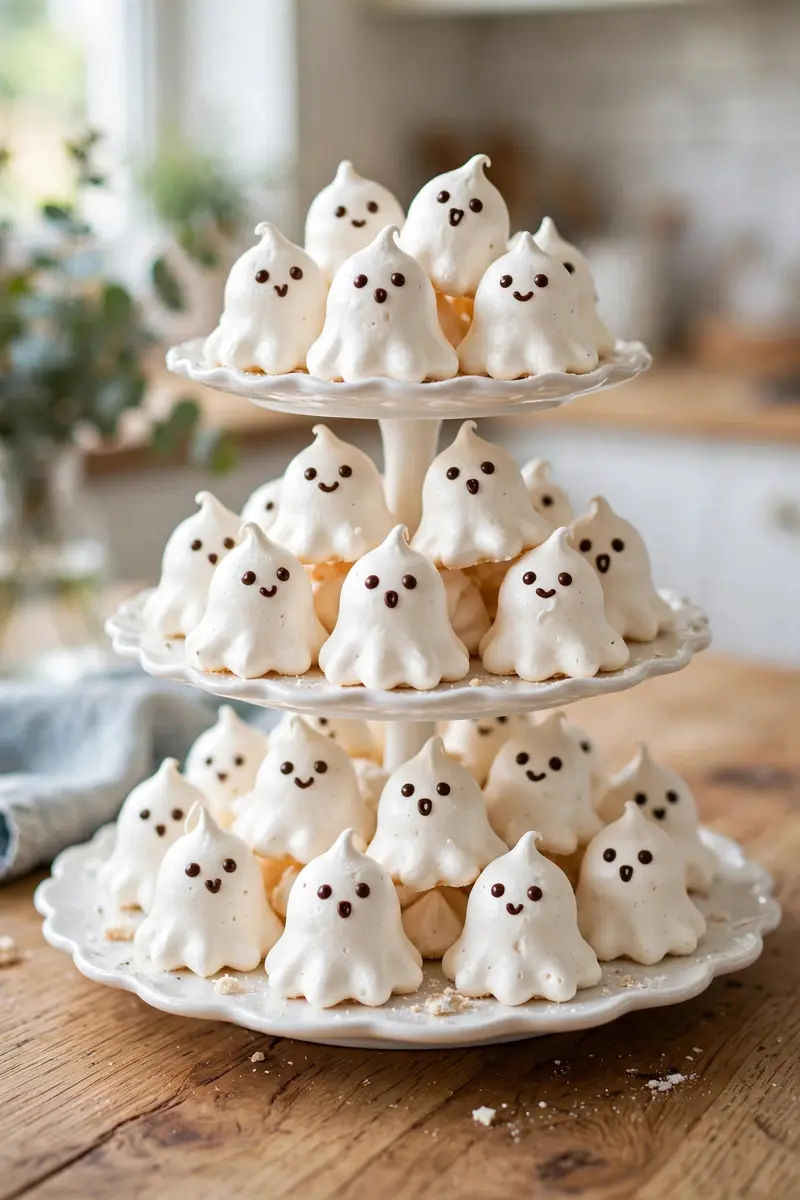
Bake a batch of ghost-shaped meringues or cupcakes and display them on a tiered stand as the centerpiece — then let guests eat the decor for dessert. It’s the ultimate two-for-one: a adorable spooky display that disappears by the end of the night. Kids go absolutely wild for this one.
What you need: Meringue or cupcake ingredients, a tiered stand, black food-safe marker or melted chocolate for faces. Cost: $8-$15.
Pipe meringue into ghost shapes (a swirl with a pointed top), bake low and slow until crisp, then dot on eyes and mouths with the food marker. Arrange on the tiered stand with the ‘cutest’ ghosts facing out. Keep the stand away from the table’s edge — little hands will be grabbing.
Pro tip: Make a few extra ghosts — they disappear fast, and a half-empty stand looks sad by dessert time.
Variation: Use white-chocolate-dipped strawberries with ghost faces for a no-bake version.
29. Poison Apple Bowl
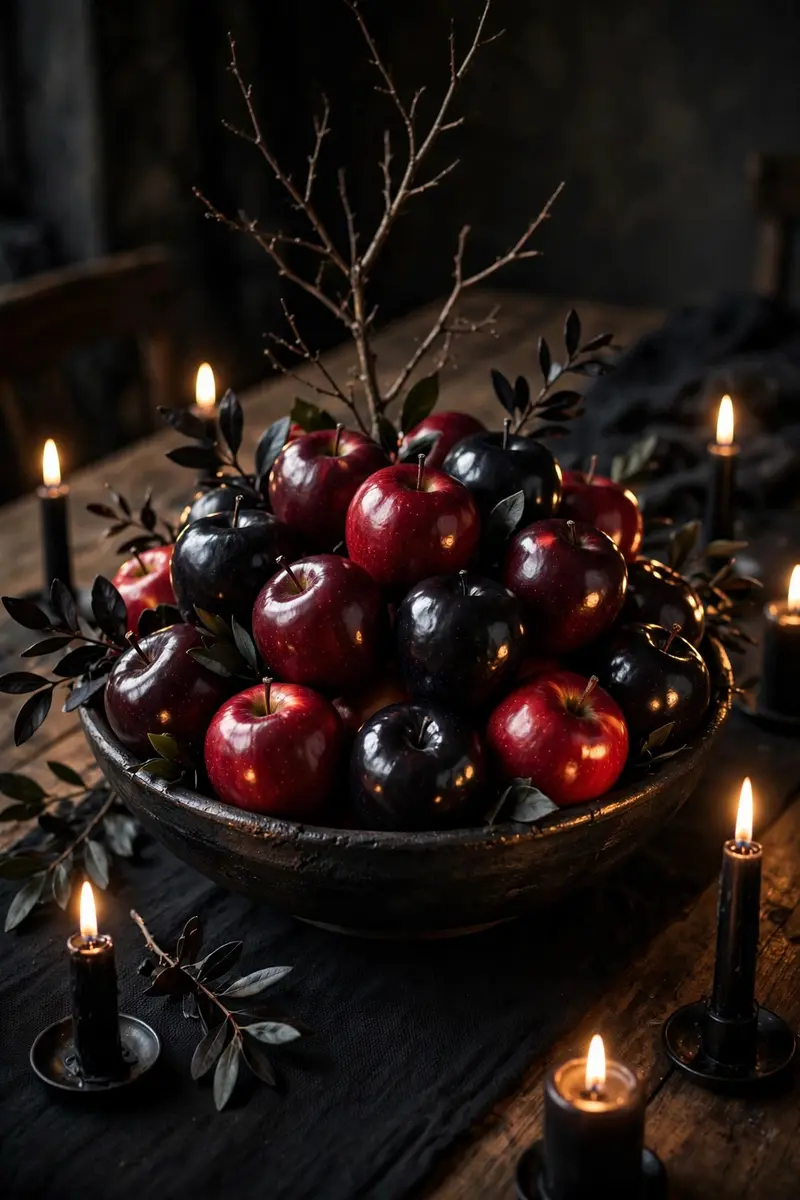
Fill a dark bowl with glossy black and deep-red apples — some real, some faux — for a Snow-White-worthy poison apple display. The high-gloss finish catches the light beautifully, and the fairy-tale reference is instantly recognizable. It’s simple, striking, and a little bit wicked.
What you need: 1 dark bowl, 8-12 apples (real or faux), optional black spray paint for faux apples. Cost: $8-$18.
Pile the apples in the bowl, mixing real glossy reds with a few spray-painted black ones for contrast. Tuck in a few dark leaves or a bare branch for height. Place the bowl on a black runner with candles around it — the apples will gleam in the candlelight.
Pro tip: Rub real apples with a tiny bit of coconut oil for an extra glossy, just-poisoned shine.
Variation: Add a small crown or a ‘one bite’ tag for a playful Snow White storytelling touch.
30. Celestial Moon-and-Stars Runner
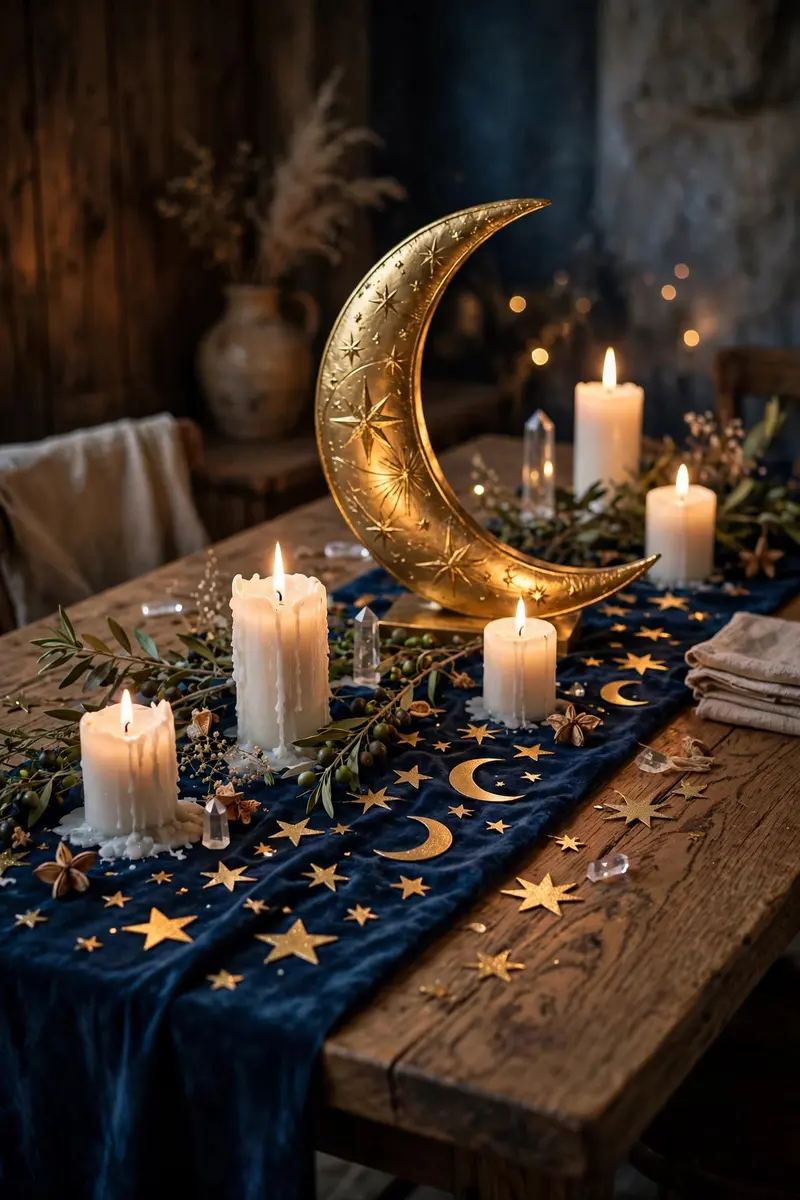
Halloween isn’t all ghosts and gore — a celestial tablescape with crescent moons, stars, and deep midnight blues feels magical and mysterious. Scatter gold star confetti and moon cutouts down a navy runner, add white candles, and you’ve got a centerpiece that’s enchanting rather than frightening.
What you need: Navy or black runner, gold star/moon cutouts or confetti, white candles. Cost: $10-$20.
Lay the runner and scatter the celestial shapes loosely down the center — denser in the middle, sparser at the ends. Add white pillar candles at intervals and a large crescent moon decoration as the anchor piece. The gold-on-navy contrast does all the work here.
Pro tip: Use metallic gold cutouts, not yellow paper — the metallic finish catches candlelight and looks far more expensive.
Variation: Hang a few stars from the chandelier on fishing line for a full night-sky effect above the table.
31. Vintage Brass and Amber Glass Grouping
Gather vintage brass candlesticks, amber glass bottles, and small amber votives into a warm, glowing cluster. The amber glass throws honey-colored light, the brass adds old-world richness, and the whole grouping feels like a Victorian apothecary shelf. It’s Halloween-adjacent elegance that works all autumn long.
What you need: Assorted brass candlesticks, amber glass bottles/votives, candles. Cost: $20-$40 (thrift stores are goldmines for these).
Group pieces in odd numbers on a wood slice or dark tray, varying heights from 4 to 14 inches. Light everything — amber glass needs backlight to show its color. Keep the arrangement tight and overlapping rather than spread out; density is what makes it feel curated.
Pro tip: Fill clear bottles with water tinted amber using food coloring if you can’t find enough genuine amber glass.
Variation: Add dried orange slices and cinnamon sticks for a scented, spiced version.

32. Floating Candle and Petal Bowl
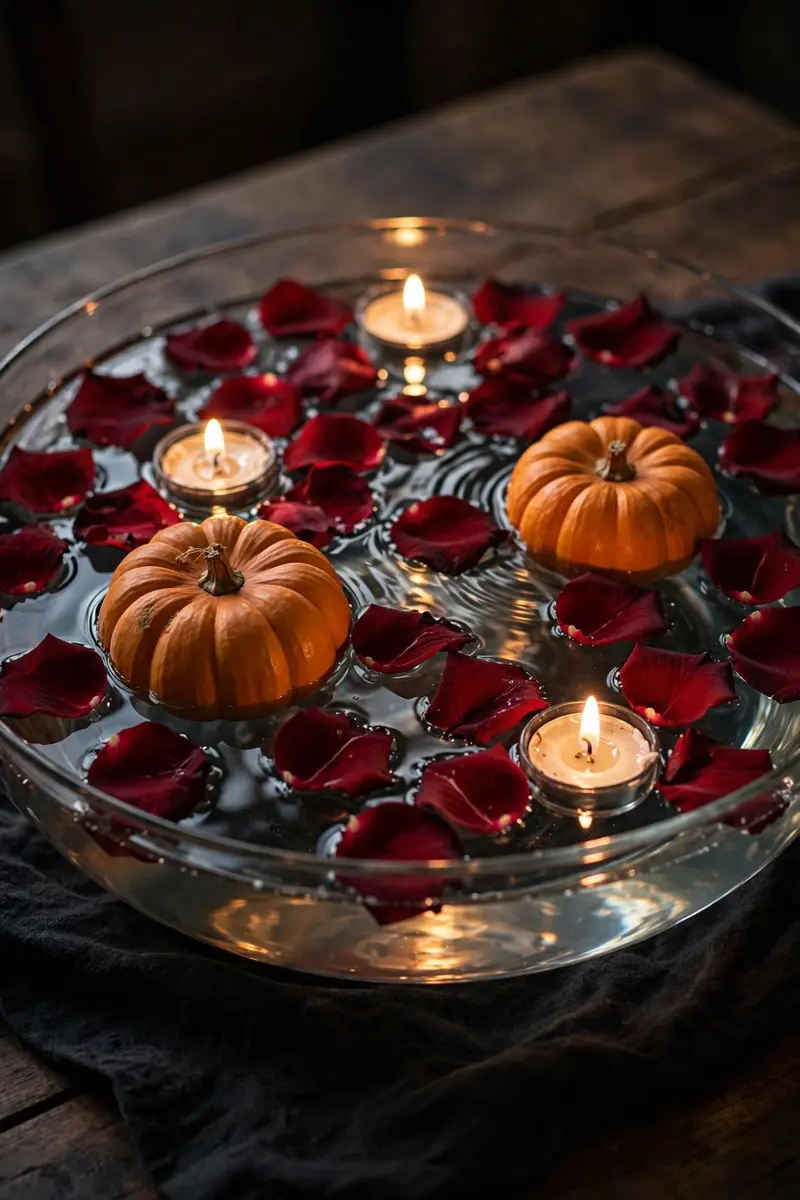
Fill a wide, shallow bowl with water, scatter dark red rose petals and a few mini pumpkins on the surface, and float candles among them. The reflections on the water double the visual impact, and the whole thing feels luxurious and a little bit gothic-romantic. It takes five minutes and looks like a spa ritual gone Halloween.
What you need: 1 wide shallow bowl, floating candles, faux rose petals, 2-3 mini pumpkins. Cost: $10-$20.
Fill the bowl about three-quarters full, scatter the petals, and gently set the floating candles on the surface. Tuck the mini pumpkins in so they bob slightly — the movement is part of the charm. Place the bowl on a dark cloth to make the water’s reflections pop.
Pro tip: Use distilled water if your tap water is cloudy — crystal-clear water makes the petals and reflections look far better.
Variation: Add a drop of black food coloring to the water for a murky, swampy version.
33. Tiny Haunted House Village
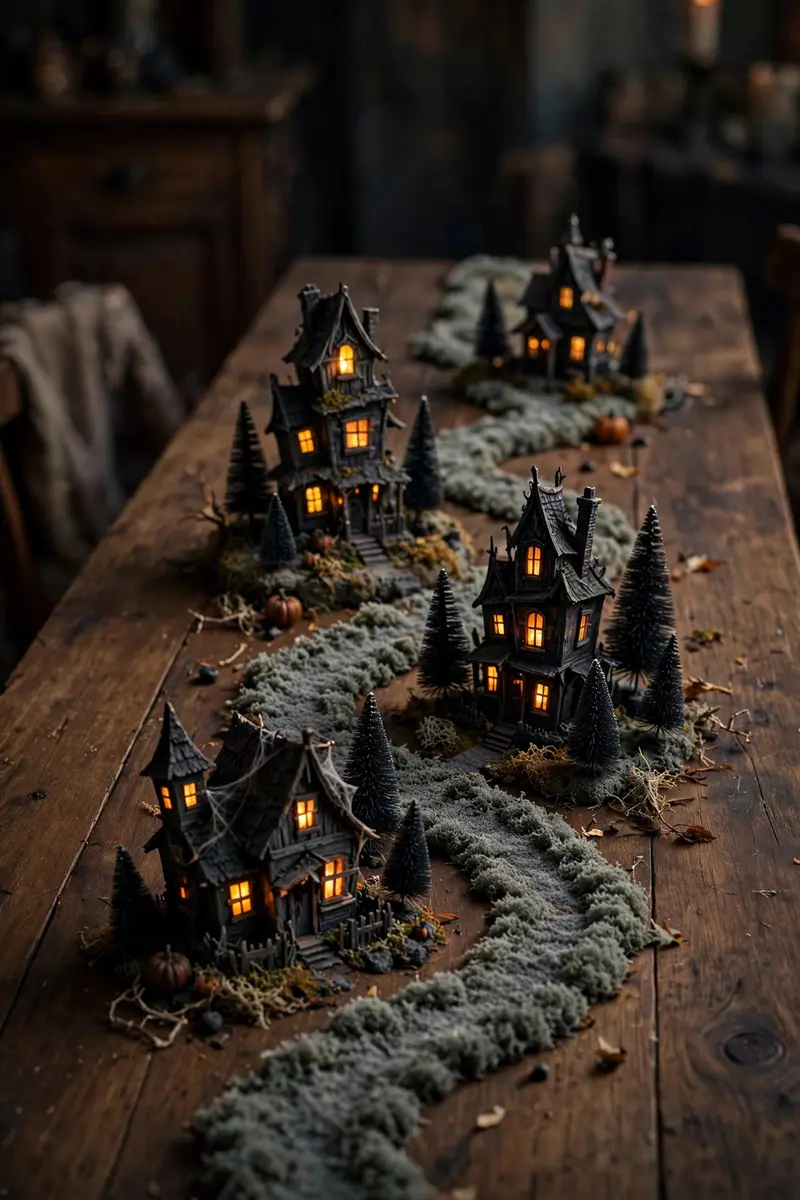
Line up a row of miniature haunted houses, cottages, and tiny lit trees down the center of the table to create a whole spooky village. Each little house with its glowing windows tells a story, and the collective effect is utterly charming — like a Halloween version of a Christmas village.
What you need: 4-6 miniature haunted houses or Halloween village pieces, bottle-brush trees, faux snow or moss for ‘ground.’ Cost: $25-$50.
Lay a strip of white faux snow or gray moss down the table as the village ‘street,’ then arrange the houses with small gaps between them. Tuck bottle-brush trees (spray-painted black or left snowy) between the houses. Turn on all the little lights — a darkened room makes the village glow like magic.
Pro tip: Vary the house heights and angles — a perfectly straight row looks stiff; a slightly winding village looks alive.
Variation: Add tiny figurines — trick-or-treaters, a witch, a black cat — for storytelling detail.
34. Low Bowl of Black Dahlias and Burgundy Blooms
A low, lush bowl of black dahlias, burgundy ranunculus, and dark foliage is the florist-grade Halloween centerpiece. It reads as sophisticated fall rather than costume-party, which makes it perfect for hosts who want a nod to Halloween without the kitsch. And because it sits low, dinner conversation flows right over it.
What you need: 1 low wide bowl, 8-12 stems of dark flowers, floral foam. Cost: $20-$35.
Soak the floral foam and cut it to fit the bowl, then build a low dome: shortest stems at the edges, slightly taller in the center, keeping the whole thing under 10 inches. Mix flower types and add dark foliage for depth. This is the arrangement to splurge on if you’re only splurging on one thing.
Pro tip: Add the flowers in groups of three per variety — odd-numbered groupings look natural and professional.
Variation: Tuck in a few small black feathers for unexpected texture.

35. Glowing Pumpkin Lantern Path
Instead of one big centerpiece, line the table with a path of small glowing pumpkin lanterns — hollowed mini pumpkins or ceramic pumpkin tea-light holders marching down the runner. The repetition is mesmerizing, the glow is warm and even, and the low profile keeps every sightline open.
What you need: 7-9 mini pumpkins or ceramic pumpkin holders, LED tea lights. Cost: $10-$20.
Space the lanterns evenly down the center runner, about 6 inches apart. If using real mini pumpkins, cut a small lid and scoop them, then drop in the LED lights. Alternate orange and white pumpkins for rhythm. Dim the overhead lights and let the pumpkin path be the star.
Pro tip: Use a ruler for spacing — the magic of this look is in the even, deliberate rhythm.
Variation: Carve a different simple face on each pumpkin so guests can ‘meet’ them all down the table.

36. Friendly Ghost and Pumpkin Patch Tray
End on a sweet note: a tray styled as a mini pumpkin patch with smiling ghost figurines peeking out among the pumpkins. It’s the perfect kid-friendly finale — cheerful, colorful, and completely scare-free. Little ones will want to play with it, and that’s exactly the point.
What you need: 1 tray, 5-8 mini pumpkins, 3-4 friendly ghost figurines, faux moss. Cost: $10-$18.
Spread moss on the tray as the ‘patch,’ nestle the pumpkins in groups, and tuck the ghosts in so they’re peeking out from behind pumpkins. Add a tiny ‘pumpkin patch’ sign if you like. Keep it on a side table or the kids’ table where small hands can reach it safely.
Pro tip: Choose ghosts with happy faces, not spooky ones — the whole point is friendly, so check expressions before buying.
Variation: Let kids paint their own mini pumpkins and add them to the patch — instant personalized decor.

Halloween Table Centerpiece FAQs
How do I make a Halloween table centerpiece on a budget?
Start with what you own — candles, jars, books, and branches are all free centerpiece foundations. Then add one or two Dollar Tree finds per display: spider webs, plastic spiders, mini pumpkins, and LED tea lights all cost about a dollar each. Our Dollar Tree Halloween crafts round up dozens of ideas that cost less than a coffee. Spray paint is your secret weapon: a $5 can of matte black transforms thrifted candlesticks, old frames, and tired pumpkins into cohesive Halloween decor.
What can I use as a Halloween centerpiece without pumpkins?
Plenty! A cluster of black taper candles, a vase of bat-covered branches, a skull with dark florals, a raven figurine on moss, or a stack of spell books with potion bottles all scream Halloween with zero pumpkins involved. Dried branches, dark florals, candles, and moody glassware carry the theme on their own — pumpkins are traditional, not mandatory.
How do you keep a tall centerpiece from blocking conversation?
Follow the ’12-inch rule’: keep the widest part of your centerpiece below 12 inches, or push the height above 18 inches so guests can see under it. Narrow vases with tall branches work because they’re thin at eye level. For round tables, one tall narrow piece in the center is fine; for long tables, use a series of low arrangements instead of one tall one. When in doubt, sit in a chair and check the sightline yourself before guests arrive.
What flowers work best in a Halloween centerpiece?
Dark, moody blooms: black dahlias, burgundy ranunculus, deep red roses, black calla lilies, and dark purple lisianthus. Dried elements — thistle, pampas grass, wheat, black-painted branches — add texture and last all season. For a softer look, blush and ivory pumpkins pair beautifully with cream roses and eucalyptus. Avoid bright spring colors; they fight the Halloween mood.
How do I make my Halloween table look elegant instead of cheesy?
Discipline is everything: pick a tight color palette (black + gold, or orange + black + cream) and stick to it ruthlessly. Choose natural textures — velvet, brass, dried florals, beeswax candles — over shiny plastic. Use candlelight generously; it flatters everything. And follow the 2026 trend toward gothic, dramatic tablescapes with moody branches and sculptural pumpkins rather than cartoonish characters. For more inspiration, see these Halloween party decor ideas and our Halloween living room styling guide.
Conclusion
From a five-minute candle cluster to a full skeleton feast, these 36 halloween table centerpiece ideas prove that a stunning Halloween table doesn’t require a big budget or professional skills — just a little creativity and the willingness to play. Pick your favorite, raid your decor bins, and make this year’s table the one everyone talks about.
Loved these ideas? Save this post to your Halloween board on Pinterest so you can find it when party-planning season hits — and follow along for more seasonal decor inspiration all year long.
For even more Halloween centerpiece inspiration, check out Wayfair’s roundup of 31 Halloween centerpiece ideas and the 2026 Halloween decorating trends from Better Homes & Gardens.



4 Comments