
16 Halloween Wall Decor Ideas That Wow
Your walls are the biggest blank canvas in your Halloween decorating plan — and the most underused one. While everyone crowds pumpkins onto the porch, the smartest halloween wall decor ideas turn plain walls into the actual haunting: a swarm of bats climbing the stairwell, a gallery of haunted portraits that makes guests do a double take, a witchcore moon-phase garland glowing softly over the mantel.
The best part? Walls are where Halloween gives you the most drama for the least money. A pack of paper bats, a few thrift-store frames, and some removable adhesive can transform a whole room in a single afternoon. And the timing couldn’t be better — the classic motifs are officially back in style this year, with hanging bats, ghost silhouettes, and dancing skeletons making a full comeback (The Spruce). If you’re planning a bigger seasonal refresh, these pair beautifully with the rest of your Halloween living room decor.
Whether you’re a renter who can’t touch the paint or a maximalist ready to go full haunted mansion, these sixteen ideas cover every wall, every budget, and every scare level. Grab your painter’s tape — let’s get those walls talking.
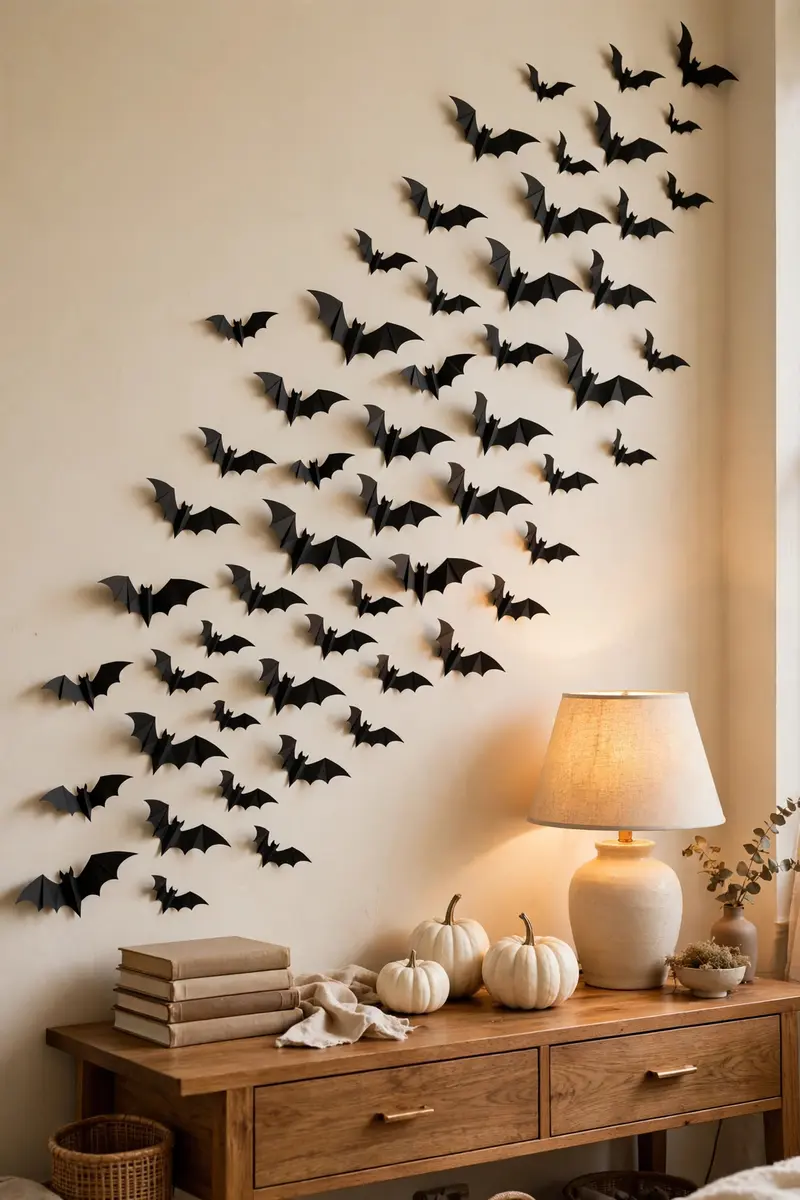
1. A 3D Bat Wall Swarm (The #1 Halloween Wall Decor Idea on Pinterest)
If there’s one wall look that owns Pinterest every October, it’s the bat wall: dozens of black paper bats with folded wings, scattered up a wall like they’re mid-flight. It’s cheap, it’s dramatic, and it photographs like a dream — which is exactly why it trends year after year.
Materials + cost: 2–3 packs of 3D bat wall stickers or black cardstock + a bat template (free printables online) ($8–15), removable mounting putty or double-sided tape ($4). Total: under $20.
Start at the bottom corner of your wall — beside the fireplace, up the staircase, or above a console table — and work upward and outward, as if the bats are streaming out of one spot. Fold each bat’s wings along the center so they pop off the wall in 3D. Use three sizes (small, medium, large) and place the largest bats near the “source” point, shrinking as they fly away — that gradient is what makes it look intentional instead of random.
Tip: Lay the whole swarm out on the floor first and photograph it — you’ll spot gaps and clumps in seconds that your eyes miss on the wall, and rearranging on the floor costs nothing.
Variation: go pastel goth with the same technique — blush-pink and lavender bats read playful-cute instead of spooky, and they’re huge with the pink-Halloween crowd.
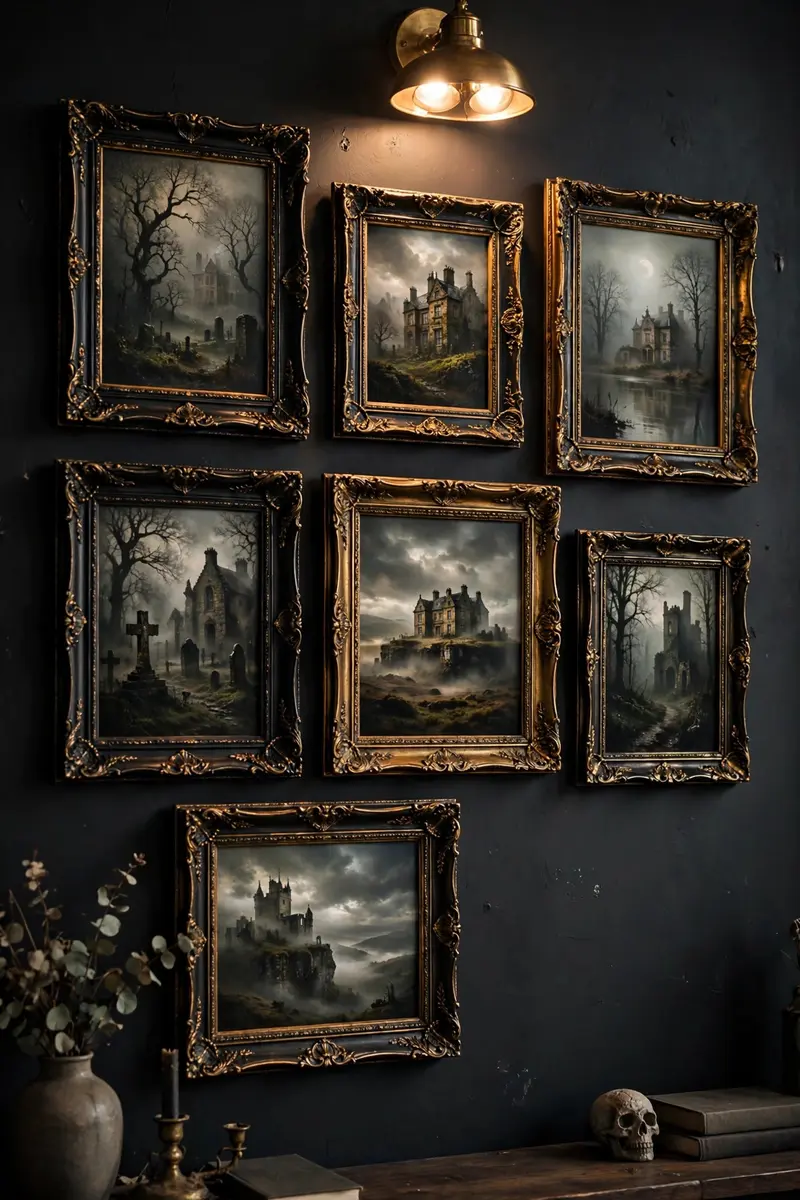
2. A Haunted Portrait Gallery Wall
This is the grown-up Halloween flex: a gallery wall of portraits that look like they came from a haunted Victorian manor. Swap your everyday family photos for spooky prints — ghostly figures, moody landscapes, vintage Halloween illustrations — in a tight cluster of mismatched ornate frames.
Materials + cost: 5–9 thrifted frames ($1–4 each), printable spooky art from free stock or printable shops ($0–10), or one set of vintage-style Halloween prints ($12–20). Total: $15–35.
Pull your existing gallery wall down for October (stack the frames carefully — they go back up November 1st). Print your spooky art to fit the frames you already own, mix black frames with one or two gold ones, and hang in a salon-style cluster with 2–3 inches between frames. A cracked antique-look frame or two sells the haunted-manor illusion. Add a thin strand of warm fairy lights woven behind the top row for an after-dark glow that makes the portraits feel alive.
Tip: Stick to a two-color palette across all the prints — black and cream, or sepia and charcoal — and the whole wall reads “curated collection” instead of “random printables.”
Variation: for a family-friendly version, frame your kids’ own Halloween drawings alongside one or two store-bought prints — guests always ask about them first.
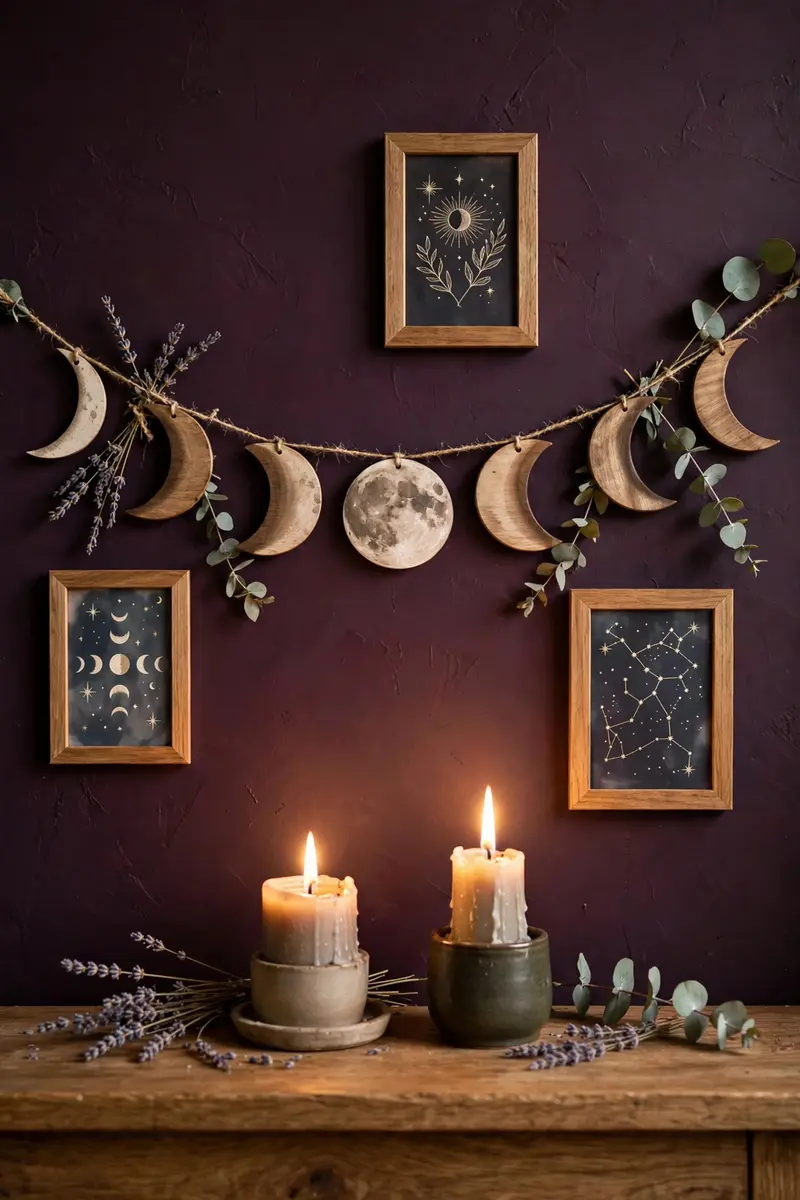
3. Witchcore Moon-Phase Wall Art
Witchcore is one of Pinterest’s fastest-growing Halloween aesthetics — searches up over 200% — and its wall decor is all about celestial symbolism: moon phases, tarot cards, crystals, and dried botanicals. A moon-phase garland strung across a dark wall is the single easiest way to nail the look.
Materials + cost: wooden or black cardstock moon-phase garland ($10–18), a few mini tarot-card art prints ($8–12), dried lavender or eucalyptus sprigs (a few dollars). Total: $20–35.
Hang the garland as a horizontal swag above the mantel, bed, or entryway console, letting the crescent ends drape slightly. Tuck 3–4 tarot prints into small clip frames and scatter them asymmetrically around the garland, then wedge dried sprigs behind the top edge so greenery peeks through. Backlight it all with a warm LED candle or two on the surface below — witchcore lives or dies by candlelight.
Tip: Hang the garland with the full moon dead-center over your mantel or console — the symmetry reads as intentional design, and everything else can be gloriously asymmetrical around it.
Variation: swap the moons for a hanging branch mobile with crystals and dried flowers if you want the vibe without any overtly “spooky” imagery — it works straight through Thanksgiving.
4. Thrifted Ghost Painting Makeover (The DIY Darling of Halloween Wall Decor Ideas)
The viral craft that broke decor TikTok and Pinterest alike: take a thrifted landscape painting and paint a little white ghost into the scene. It costs almost nothing, takes twenty minutes, and the result is genuinely charming — a haunted little secret hiding in an ordinary frame.
Materials + cost: thrifted framed landscape painting ($3–8), white acrylic paint + a small round brush ($5 if you don’t own them). Total: under $15.
Look for landscapes with dark, moody skies or empty fields — they take ghosts best. With a dry brush and a tiny bit of white paint, paint a simple ghost: an oval head, a wavy-bottomed body, two black dot eyes. Two or three small ghosts scattered at different depths look better than one big one. Keep the edges soft and a little transparent so the “ghost” melts into the original painting. Sign it with the year in the corner like the mischievous artist you are.
Tip: Paint the ghost slightly transparent by barely loading the brush — a solid opaque ghost looks like a sticker, but a wispy one looks like it belongs in the landscape.
Variation: paint a tiny witch on a broomstick crossing the moon in the painting instead — same thrift-store canvas, totally different haunting.
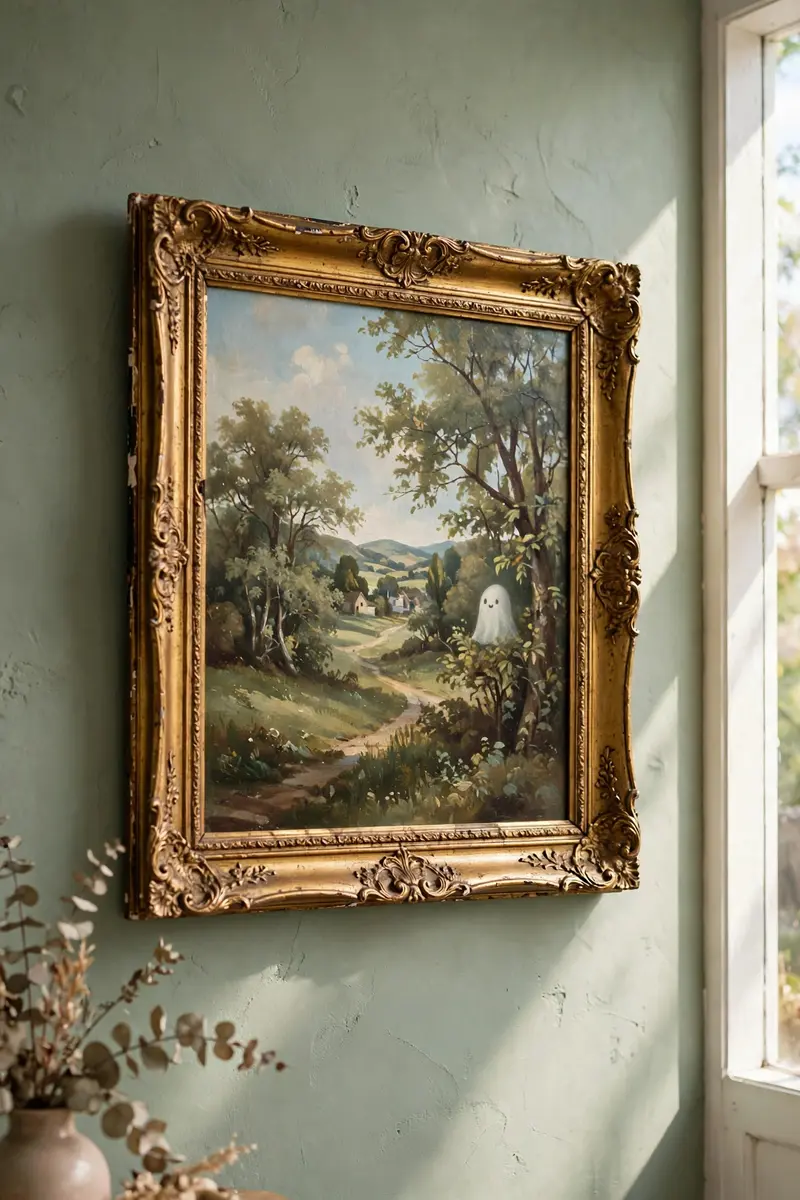
5. An Oversized Halloween Tapestry
When one wall needs maximum impact with minimum effort, a tapestry wins. A single large Halloween tapestry — vintage-style witches, a haunted forest, a celestial moon map — covers a whole blank wall in the time it takes to hang a curtain rod, and it adds the kind of texture flat posters never can.
Materials + cost: large Halloween tapestry, 60×80 inches or bigger ($18–35), a slim curtain rod or 3M hooks rated for the weight ($6–10). Total: $25–45.
Hang it like art, not like a dorm poster: center it on the wall with at least a foot of breathing room on each side, and let the bottom fall to just above your furniture — not puddling on the floor. Above a fireplace or a sofa is ideal. If the fabric arrives wrinkled, steam it while hanging; wrinkles flatten the printed scene. For a layered look, hang a skinny garland of dried orange slices or mini pumpkins across the rod in front of the tapestry.
Tip: Choose a tapestry with a dark background — deep charcoal, navy, or black — so it reads as a rich textile rather than a bright poster, even in daylight.
Variation: no tapestry? A black flat bedsheet with a projected or stenciled moon-and-bats scene painted in fabric paint gives you a custom wall hanging for under $15.
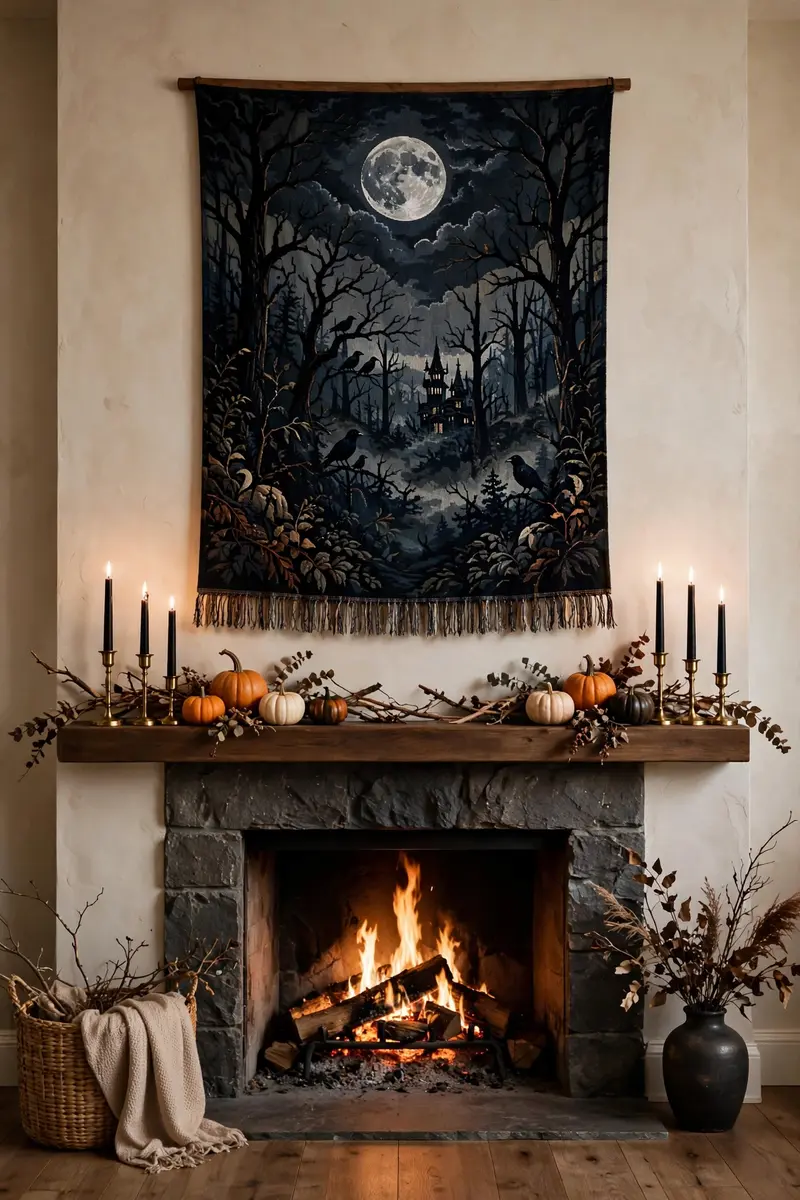
6. A Backlit Silhouette Skyline Scene
Here’s the trick professional Halloween decorators use for instant atmosphere: black paper silhouettes — a haunted house, bare trees, a witch on a broomstick — mounted on the wall with warm light glowing behind them. The silhouettes stay crisp black while the halo of light makes the whole wall feel enchanted.
Materials + cost: black poster board or cardstock ($5), an LED puck light set or a short warm-white LED strip ($10–15), painter’s tape or removable hooks. Total: $15–25.
Cut your skyline freehand or from a printable template: a row of rooftops, a crooked haunted house, spindly trees, a big moon circle. Mount the pieces on the wall with small tape loops, then place the puck lights or LED strip on the floor or shelf behind and below them, aimed up. In daylight it looks like simple paper art; flip the lights on at dusk and the wall transforms. This works beautifully in a hallway or along a staircase wall where the light rakes dramatically across the shapes.
Tip: Keep the silhouette pieces 2–3 inches off the wall on foam dots — the tiny shadow gap doubles the depth and makes the backlight glow wrap around each shape.
Variation: use orange-tinted lights behind the silhouettes for a jack-o’-lantern glow, or purple for a witchier, more electric mood.
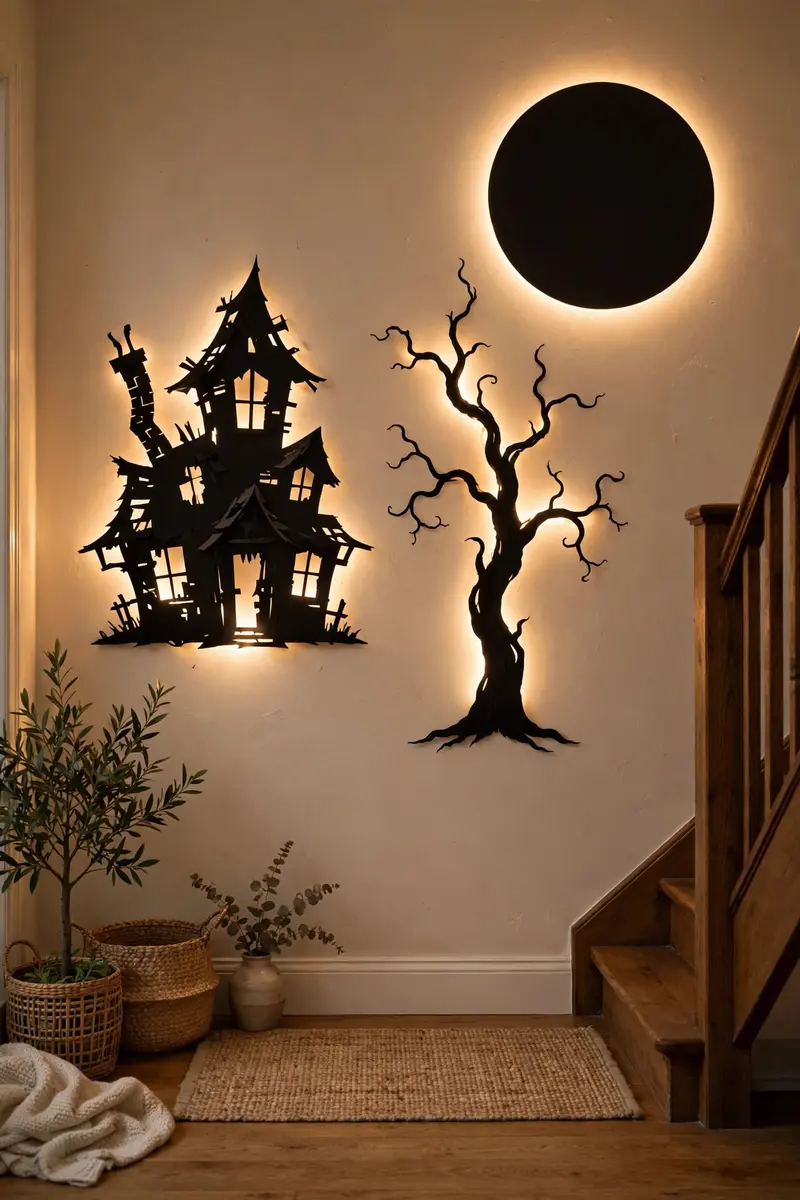
7. Removable Wall Decals for Renters
Renters, this one’s for you: removable Halloween wall decals give you a fully decorated wall with zero holes, zero paint damage, and a peel-off cleanup on November 1st. Modern decals come in genuinely stylish designs now — not just cartoon clip-art — from elegant black cats to vintage botanical pumpkins.
Materials + cost: 1–2 sheets of removable Halloween wall decals ($10–18). Total: under $20.
Clean the wall first — decals stick best to dust-free paint. Plan your layout with painter’s tape outlines before peeling anything; a cluster above a bed or desk reads intentional, while one lonely decal in the middle of a wall reads forgotten. Smooth each decal from the center outward with a credit card to avoid bubbles. When the season ends, warm the edge with a hair dryer for ten seconds and peel slowly — the adhesive releases cleanly.
Tip: Buy decals labeled “removable” or “repositionable,” not just “vinyl” — permanent vinyl will take your paint (and your security deposit) with it in November.
Variation: layer decals over a painted accent wall or above wainscoting for a built-in, designer look that costs nothing extra.
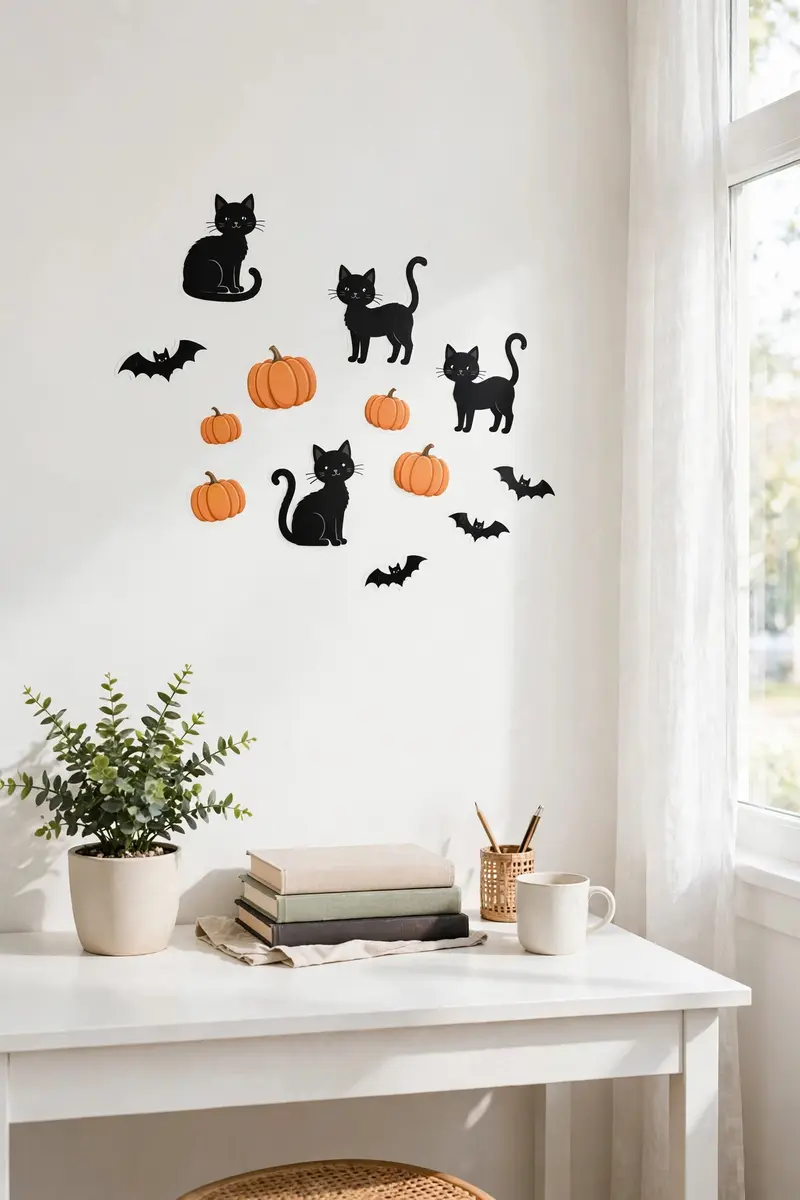
8. A Haunted Mirror Transformation
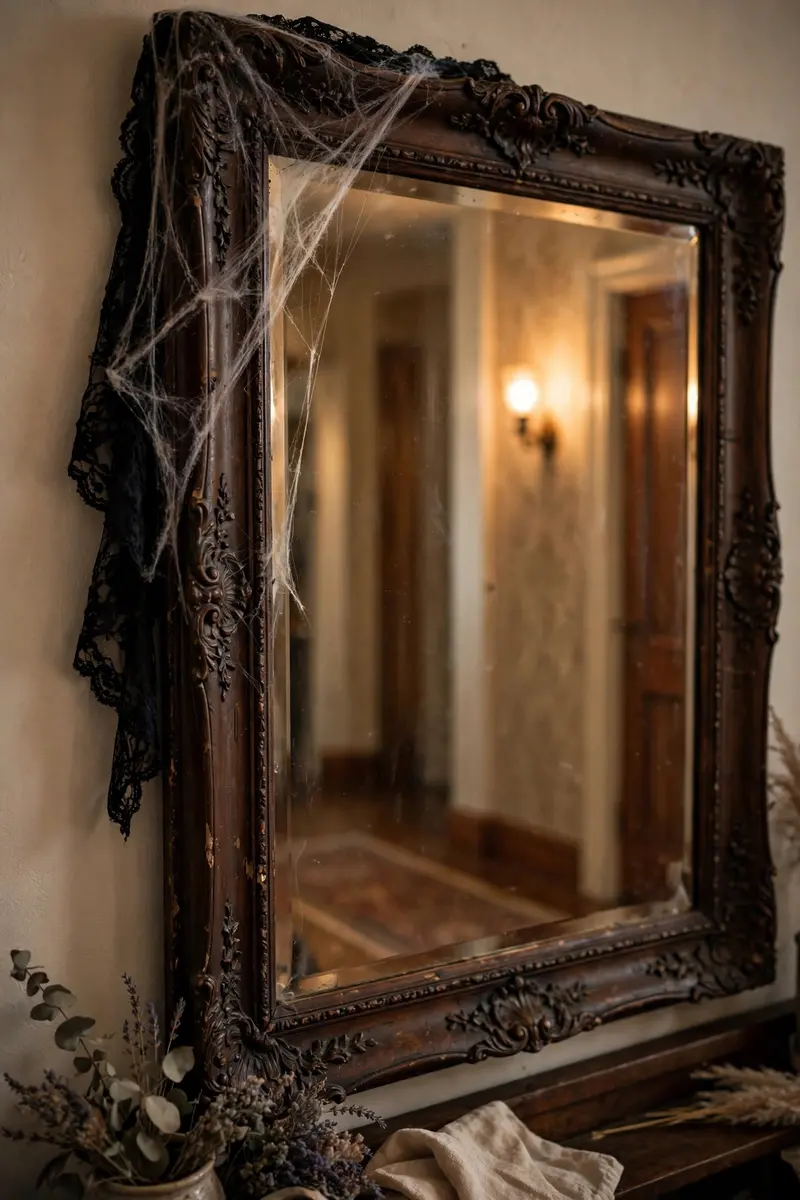
Mirrors are Halloween’s secret weapon: they double every decoration in the room, and a “haunted” mirror — draped in cobwebs, edged in black lace, with a ghostly decal staring back — becomes a conversation piece all on its own. Guests can’t resist checking their reflection for something standing behind them.
Materials + cost: a mirror you already own (thrifted ornate ones are $8–15), stretchy spider webbing ($4), black lace trim or ribbon ($5), optional ghost or cracked-glass window cling ($6). Total: $10–25.
Drape the webbing loosely across one top corner of the mirror — never the whole surface, or nobody can see the effect. Hot-glue black lace along the frame’s inner edge for a Victorian mourning look, and press a ghostly window cling low in one corner so it “appears” in reflections. Hang it where a lamp or candle will catch it at an angle; the flicker across webbed glass is what sells the haunting. This is a natural companion to your Halloween porch setup if your entryway mirror is the first thing guests see.
Tip: Keep the center of the mirror clear — the scare comes from catching the webs and lace in your peripheral vision, not from blocking the reflection entirely.
Variation: write a spooky message on the mirror in red dry-erase marker (“BEHIND YOU”) for party night — it wipes off in seconds.
9. A Skeleton Climbing Your Wall
Posable plastic skeletons aren’t just for the porch anymore. Mount one climbing up your living room or hallway wall — arms reaching, legs braced — and you’ve got a 3D wall sculpture that makes everyone laugh and jump in equal measure. Kids are obsessed with this one.
Materials + cost: one 3-foot posable skeleton ($12–20), 3–4 small removable adhesive hooks rated for 1 lb ($6). Total: under $30.
Pose the skeleton first on the floor: one arm up grasping, one leg bent as if stepping. Hang it with hooks looped through the ribcage and hip joints — the joints hold the climbing pose surprisingly well. Place it “emerging” from behind a bookshelf or climbing toward a high shelf for a story-like effect. At night, aim a small spotlight or even a phone flashlight up at it from below for a dramatic climbing shadow on the ceiling.
Tip: Tighten every joint with a tiny piece of masking tape on the back side — skeletons slowly relax into sad puddles over a week if you skip this.
Variation: hang two smaller skeletons “chasing” each other up a staircase wall for a full haunted-house narrative.

10. A Giant Spider Web Wall Corner
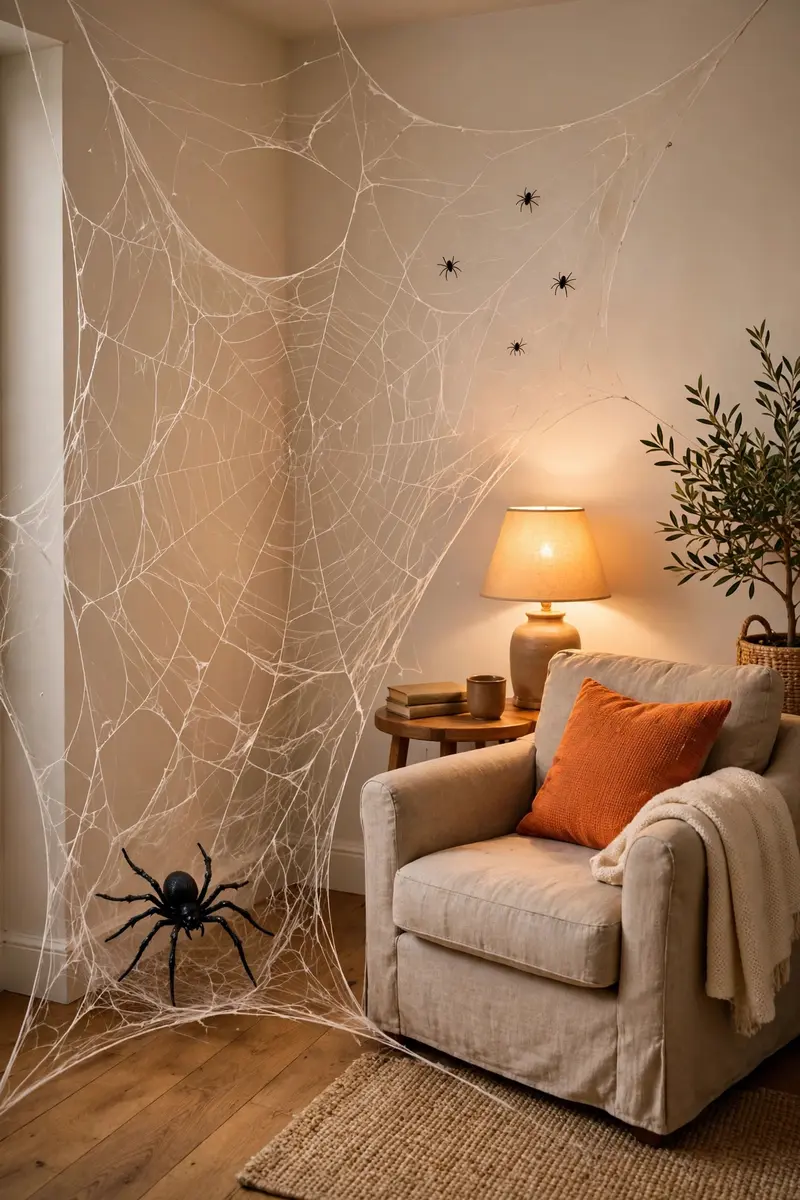
Nothing fills an empty wall corner faster than an oversized spider web. Stretch white or black webbing from floor to ceiling across a corner, add one comically large spider, and a dead zone becomes the most photographed spot in the house.
Materials + cost: 1–2 bags of stretchy spider webbing ($4–8), one large posable spider ($6–12), a few small spiders for the web ($4). Total: $10–25.
Anchor the web at three points — two high on the adjoining walls, one low near the floor — and stretch it taut between them, then tease the strands apart with your fingers for that lacy, organic look. (The number-one mistake is leaving it in a clump.) Perch the big spider off-center, low in the web, and scatter 3–4 small spiders at different heights. A web over a reading chair or beside the front door gets the most reactions; pair it with a dim warm lamp nearby so the strands catch the light.
Tip: Stretch the webbing to about three times its packaged size — under-stretched webbing looks like cotton balls, properly stretched webbing looks like the real thing.
Variation: spray the finished web lightly with glow-in-the-dark fabric paint for a web that reveals itself after lights-out.
11. A Dark-Academia Gothic Frame Cluster
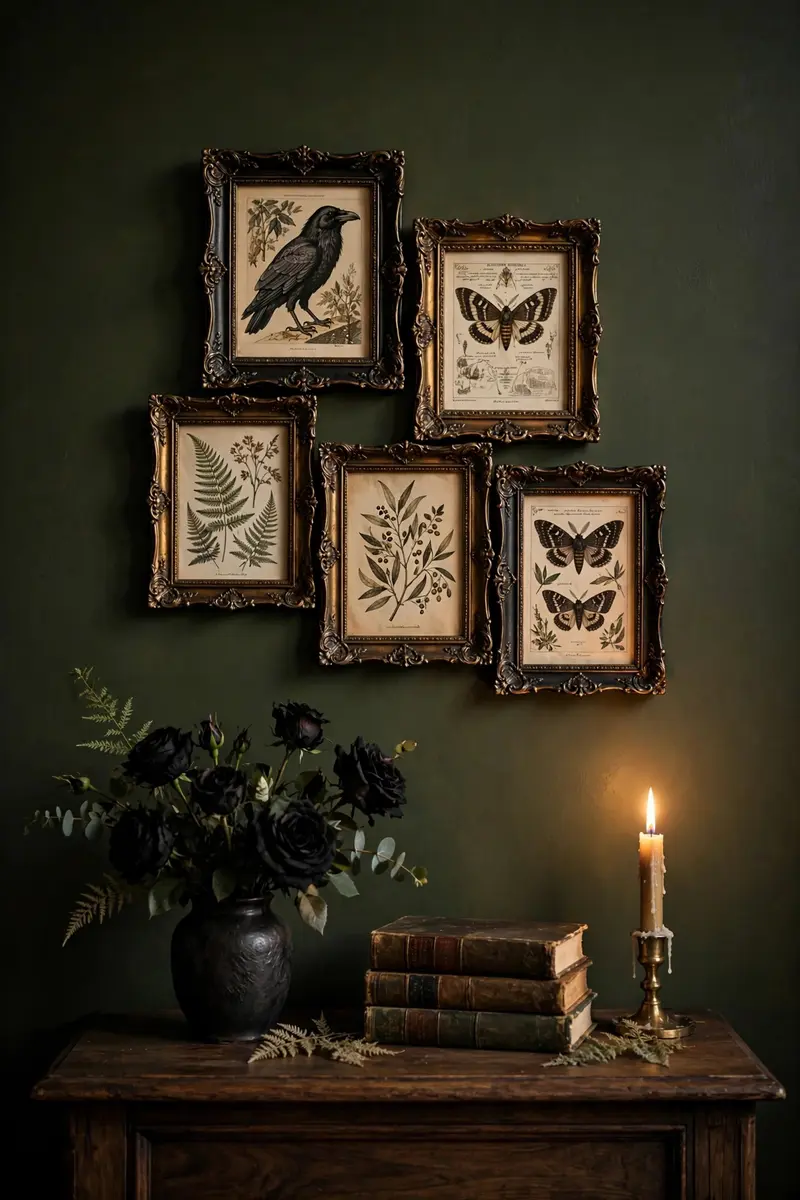
For the moody-romantic decorator, the gothic Halloween wall is pure dark academia: small ornate frames holding raven illustrations, black roses, antique keys, and Victorian-style portraits, clustered tight over a console or desk. It looks expensive, it uses pieces you’ll reuse every October, and it photographs like a film still.
Materials + cost: 4–6 small ornate frames — thrifted or craft-store ($2–5 each), printable raven/botanical art ($0–8), a small vase of faux black roses ($8–12) for the surface below. Total: $20–40.
The secret is density: hang the frames close together, 1–2 inches apart, in an organic cluster rather than a grid — dark academia is collected, not symmetrical. Mix gold and black frames freely; the contrast is the point. Tuck one unexpected object in — an antique-looking key, a pocket watch print, a wax-seal stamp — for that “curiosity cabinet” feel. Finish the vignette with the black roses and a stack of old books on the console beneath.
Tip: Trace each frame on kraft paper, tape the paper shapes to the wall, and live with the arrangement for a day before hammering a single nail — gothic clusters are unforgiving to rearrange.
Variation: swap the ravens for moth and beetle illustrations in the same ornate frames and you’ve got a natural-history-museum wall that works year-round.
12. Pumpkin String Lights With a Shadow Wall
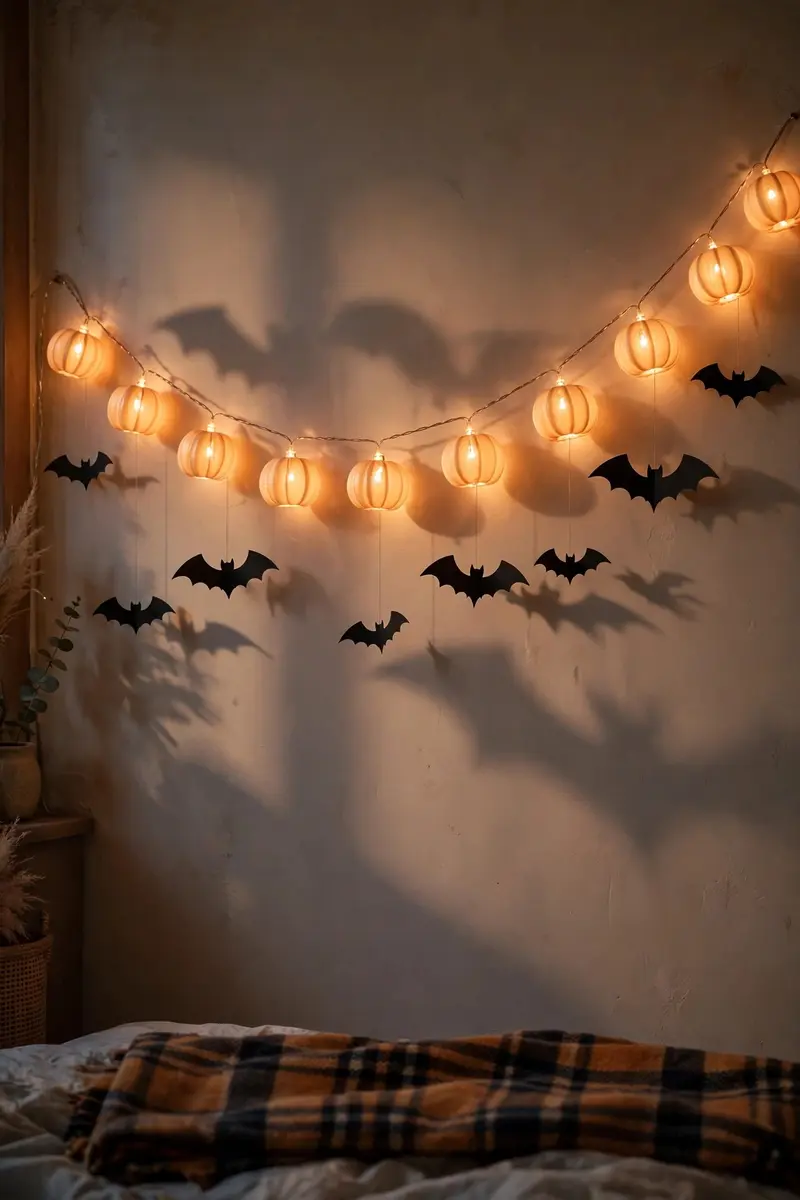
String lights do double duty on Halloween walls: the lights themselves are decor, and the shadows they throw become decor too. A strand of pumpkin or ghost lights along a wall, with paper bats hung just in front of it, casts giant dancing bat shadows that move with the slightest air current.
Materials + cost: one strand of Halloween string lights — pumpkin, ghost, or bat shapes ($10–16), a dozen small paper bats ($4), removable hooks ($4). Total: under $25.
Run the light strand in a loose swag along the top of the wall, then hang the paper bats from the same hooks on short threads so they dangle 4–6 inches in front of the bulbs. When the lights are on, each bat throws an oversized shadow onto the wall behind it. This is magical in a bedroom or along a hallway — anywhere the lights become the evening’s main illumination. Keep the rest of the room’s lighting low so the shadows stay crisp.
Tip: Use warm-white bulbs, not multicolor — colored lights wash out the shadows, while warm white makes them sharp and cinematic.
Variation: replace the bats with hanging paper ghosts for a softer, kid-friendly version that still throws gorgeous shadows.
13. A Floating Witch Hat Installation
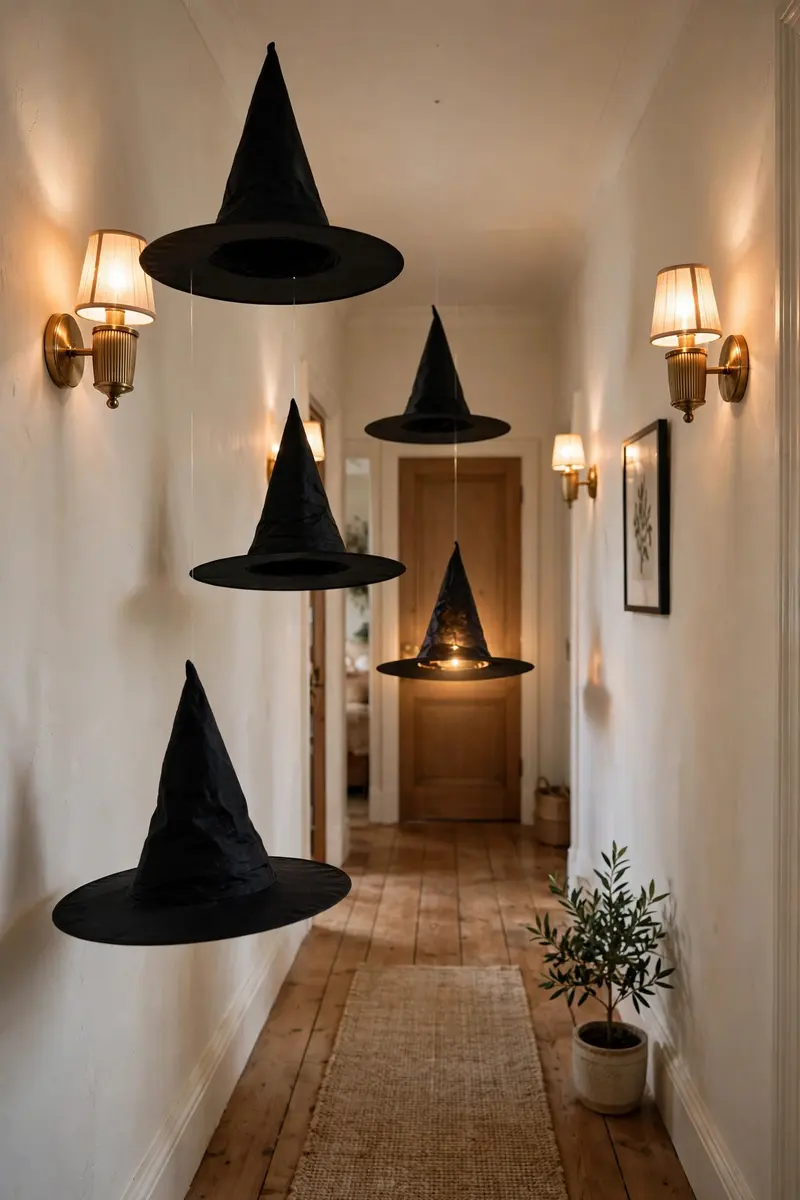
One of Pinterest’s most-saved Halloween wall looks: black witch hats suspended at different heights along a hallway or stairwell wall, as if a coven just flew through. It’s whimsical, it’s cheap, and it takes up zero floor space — perfect for narrow hallways that can’t fit a console table.
Materials + cost: 5–8 inexpensive witch hats ($1–3 each at party or dollar stores), clear fishing line ($4), removable ceiling/wall hooks ($5), optional battery tea lights ($6). Total: $15–35.
Tie fishing line to each hat’s tip, hang them at staggered heights — some high, some at eye level — in a loose diagonal drifting up the wall. The line disappears against the wall, so the hats genuinely look like they’re floating. Tuck a battery tea light inside one or two hats for a soft glow spilling from underneath. This looks incredible photographed from the end of a hallway, with the hats receding into the distance.
Tip: Vary the hat sizes, not just the heights — two large hats among smaller ones creates the depth that makes the “flying coven” illusion work.
Variation: swap witch hats for floating candles (paper towel rolls + LED tea lights + fishing line) for a wizard-school hallway that Harry Potter fans will lose their minds over.
14. A Statement Skull Wreath as Wall Art
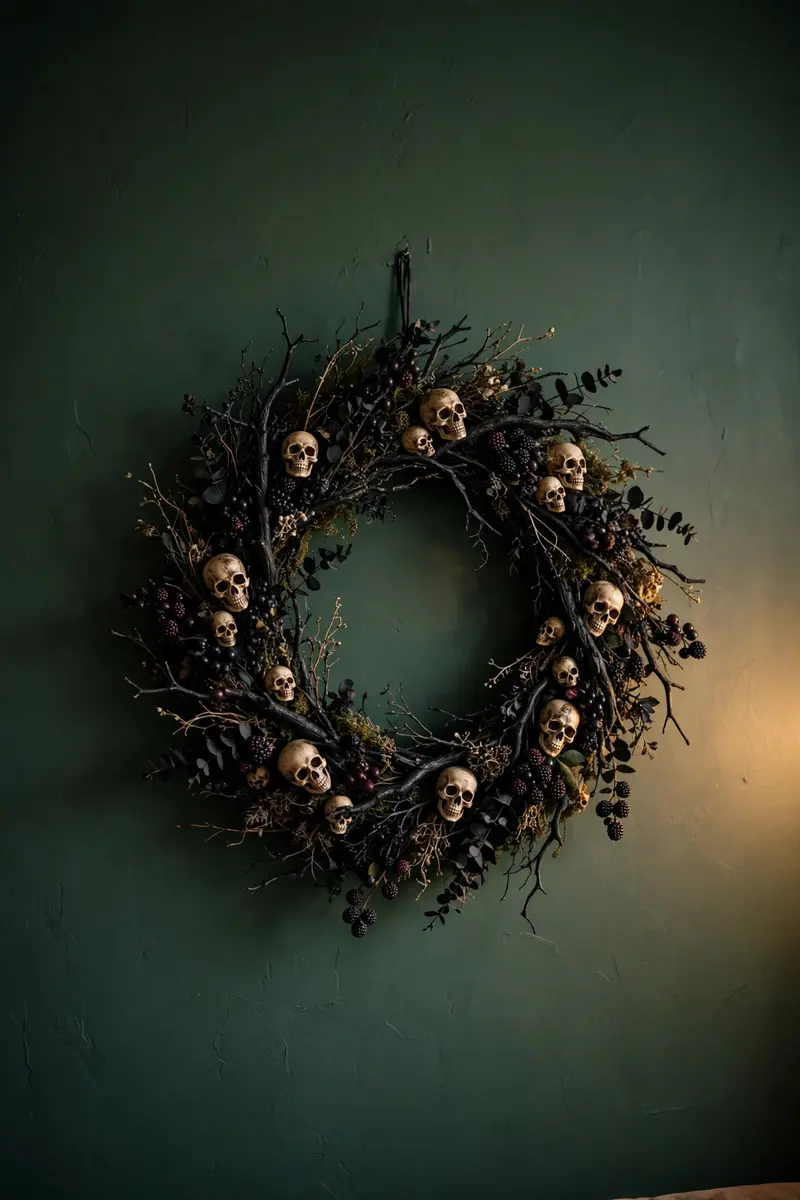
Wreaths aren’t just for doors. A dramatic wreath — black branches, mini skulls, dark berries — hung on an interior wall reads as bold, sculptural art, and it brings Halloween into rooms where you don’t want a full decorating scheme. One great wreath can carry a whole hallway.
Materials + cost: grapevine wreath base ($8–12), 6–8 mini skull picks ($8–12), black spray paint if needed ($6), dark faux berries or black roses ($6–10). Total: $25–40.
Build from the outside in: wrap the grapevine base with black-painted branches or dark ribbon first, then hot-glue the skulls in a tight cluster on one side (asymmetrical placement looks designer; centered looks craft-fair). Fill gaps with berries and tuck in one trailing element — black ribbon, dried amaranthus, a strand of small black beads — that drips below the wreath’s bottom edge. Hang it on a simple nail or over-the-mirror hook at eye level, with empty wall space around it so the silhouette does the talking. HGTV’s roundup of almost-free Halloween DIYs has a great creepy-crawly wreath variation if you want a second one for the front door.
Tip: Hang the wreath 4–6 inches lower than you think — wreaths hung at “art height” (center at 57 inches) look intentional; higher reads like you ran out of wall.
Variation: make a second, smaller matching wreath in all-white (white skulls, white berries) for a ghostly pair flanking a mirror or window.
15. A Typography Sign Gallery
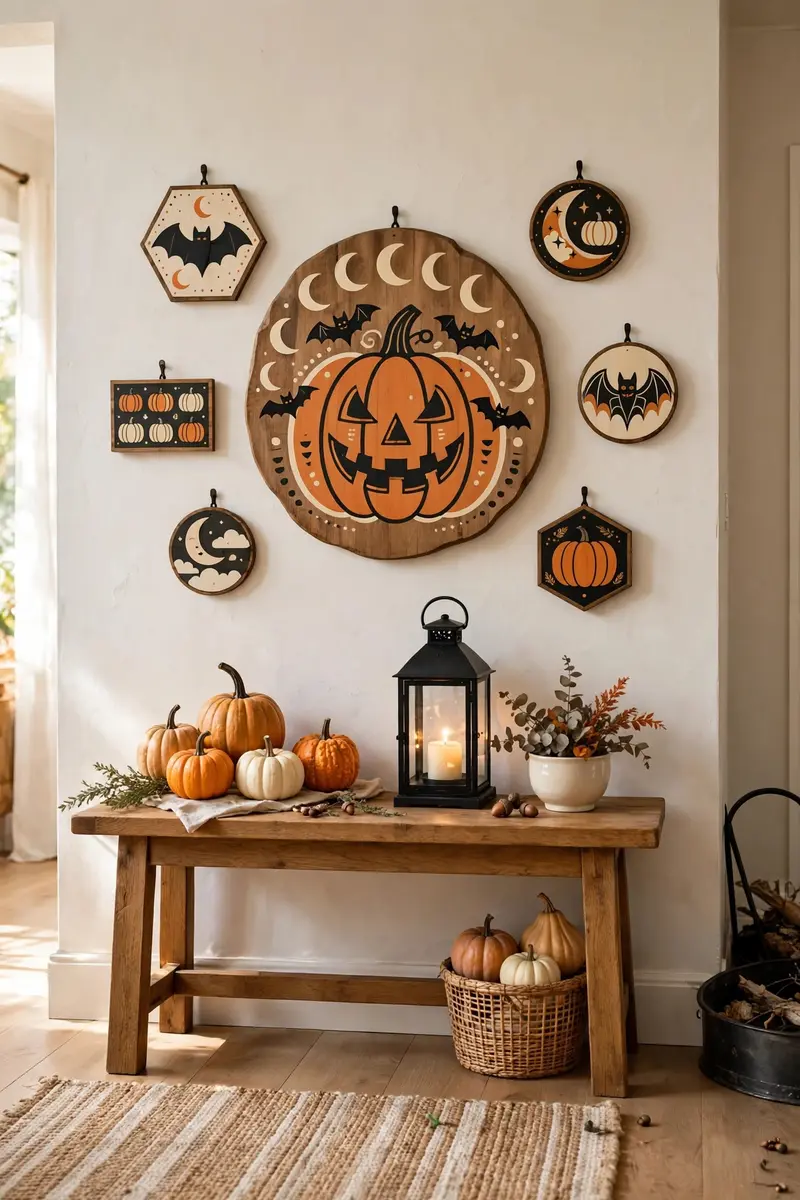
Words are decor too. A gallery of Halloween typography — wooden “BOO” letters, a “Trick or Treat” sign, a framed “Something Wicked This Way Comes” print — gives your wall personality and humor without a single plastic spider. It’s also the easiest style to DIY with a steady hand and some craft paint.
Materials + cost: 2–3 wooden or MDF Halloween signs ($8–15 each at craft stores), or blank wood plaques + stencils for DIY ($10–15 total), 1–2 framed quote prints ($5–10). Total: $20–40.
Mix sizes and orientations: one large statement sign (“BOO” in big letters) anchored center, smaller signs and framed quotes orbiting around it. Stick to two fonts maximum — one bold display font, one simple serif — or the wall gets noisy. Black lettering on natural wood is the timeless combo; white lettering on black boards is moodier. This style shines in kitchens and entryways, where a little humor greets people at eye level.
Tip: Read every sign out loud before you hang it — if it makes you smile on the third read, it earns the wall; Halloween humor goes stale fast, so pick the keepers.
Variation: chalkboard signs with hand-lettered quotes let you change the message weekly through October — one sign, four different walls’ worth of content.
16. A Halloween Photo-Backdrop Wall (Party-Ready Halloween Wall Decor Ideas)
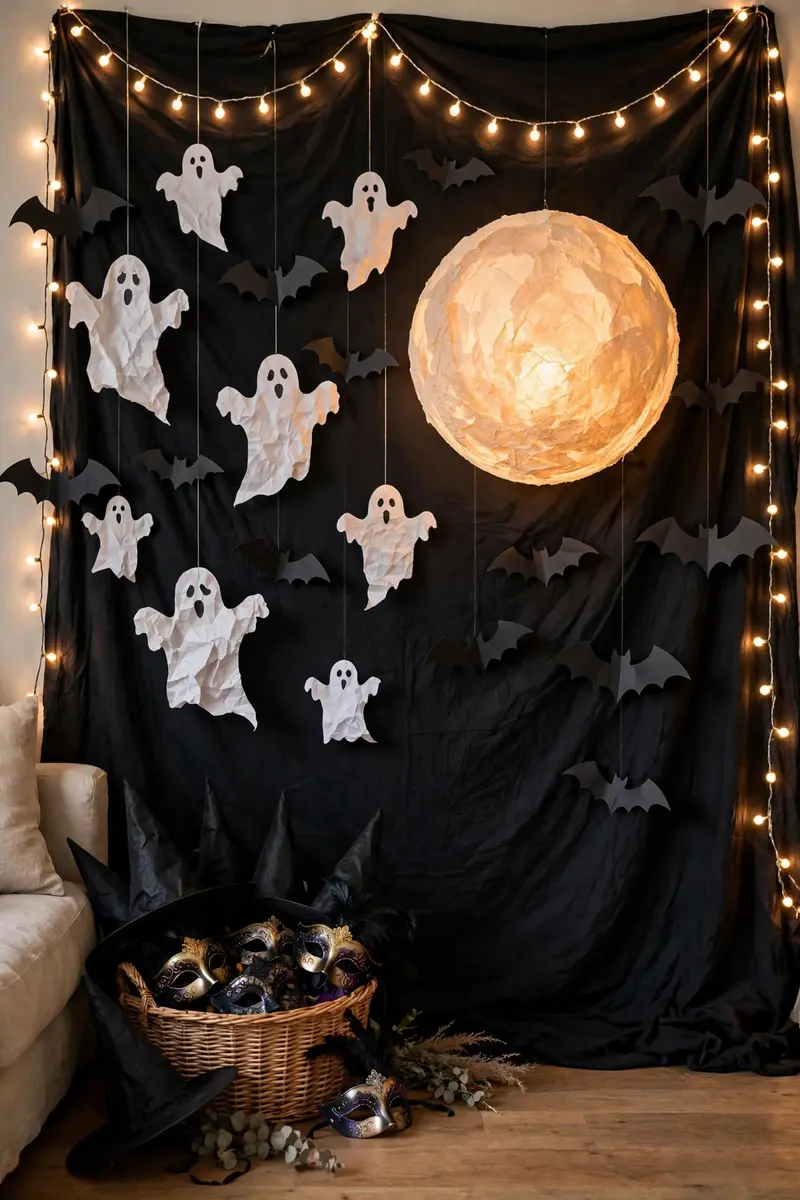
If you’re hosting, dedicate one wall to the camera. A photo-backdrop wall — black fabric, a glowing moon, hanging bats and ghosts, a “Happy Halloween” banner — gives your party an instant photo station, and it doubles as the room’s main wall decor all month. Your guests’ photos become your decorations’ best advertising.
Materials + cost: 4–6 small ornate frames — thrifted or craft-store ($2–5 each), printable raven/botanical art ($0–8), a small vase of faux black roses ($8–12) for the surface below. Total: $30–45.
Cover the wall floor-to-almost-ceiling with the black fabric, taped flat at the top and weighted at the bottom so it doesn’t billow in photos. Layer the moon slightly off-center, scatter bats radiating outward, hang 3–5 ghosts at varying depths on fishing line, and run the string lights in a frame around the whole scene. Leave 4–5 feet of clear floor in front — that’s your photo zone. Add a basket of silly props (witch hats, vampire teeth, a “BOO!” speech-bubble sign) beside it and watch it become the party’s headquarters.
Tip: Put the brightest light source facing the backdrop, not the guests — a lit backdrop with softly lit faces beats a dark wall with flashed-out faces every time.
Variation: after the party, keep the backdrop up through October as the room’s feature wall — it earns its keep far beyond one night.
Halloween Wall Decor FAQs
How do you decorate a wall for Halloween without damaging it?
Use damage-free hanging methods: removable adhesive strips and hooks, painter’s tape loops, mounting putty, and tension rods. Paper and cardstock decorations weigh almost nothing, so putty or tape is plenty. Avoid nails, screws, and permanent vinyl decals on rental walls — and always test any adhesive on a hidden spot first, since flat/matte paints grip harder than eggshell or satin.
What is a bat wall, and how do you make one?
A bat wall is a swarm of 3D paper or plastic bats arranged on a wall as if in flight — one of Pinterest’s most popular Halloween wall decor ideas. Cut bat shapes from black cardstock (free templates are everywhere), fold the wings for dimension, and stick them up with removable putty, starting dense at one point and scattering outward. Three sizes of bats and a diagonal “flight path” are what make it look professional.
How do I make a Halloween gallery wall look classy instead of cheap?
Three rules: limit your palette to two or three colors (black, cream, and one accent like gold or deep orange), use real frames instead of taping up loose printables, and leave breathing room between pieces. A tight, intentional arrangement of cohesive prints in proper frames reads “curated collection” — a random scatter of clashing colors reads “dorm room.”
What are some easy DIY Halloween wall decorations for beginners?
Start with paper: bat swarms, silhouette cutouts, and paper garlands need only cardstock, scissors, and tape. Thrifted ghost paintings take one brush and twenty minutes. Removable wall decals need zero skill at all. Every one of these costs under $20 and forgives mistakes — crooked bats just look like they’re flying.
When should I put up Halloween wall decorations?
Most decorators put wall decor up in the last week of September or first week of October — early enough to enjoy it, late enough that paper pieces don’t fade or collect a month of dust. If you’re hosting a Halloween party, finish the main walls at least three days before so you have time to adjust lighting and fill any gaps you only notice in the evening.
Final Thoughts
Blank walls are a missed opportunity every October — and as you’ve seen, they’re also the cheapest square footage in your house to haunt. Whether you go for one dramatic bat wall or layer three or four of these ideas through the house, the formula is the same: pick a focal wall, commit to a color story, and let the lighting do half the work.
Start this weekend with the idea that made you grin — you know the one — and build from there. And when your wall is looking properly spooky, save this post to your Halloween Pinterest board so you can find every idea again next October (and so your future self remembers exactly which adhesive didn’t eat the paint).
Looking for the rest of the house? Your Halloween mantel deserves the same treatment — and it pairs perfectly with idea #3 above.



2 Comments