
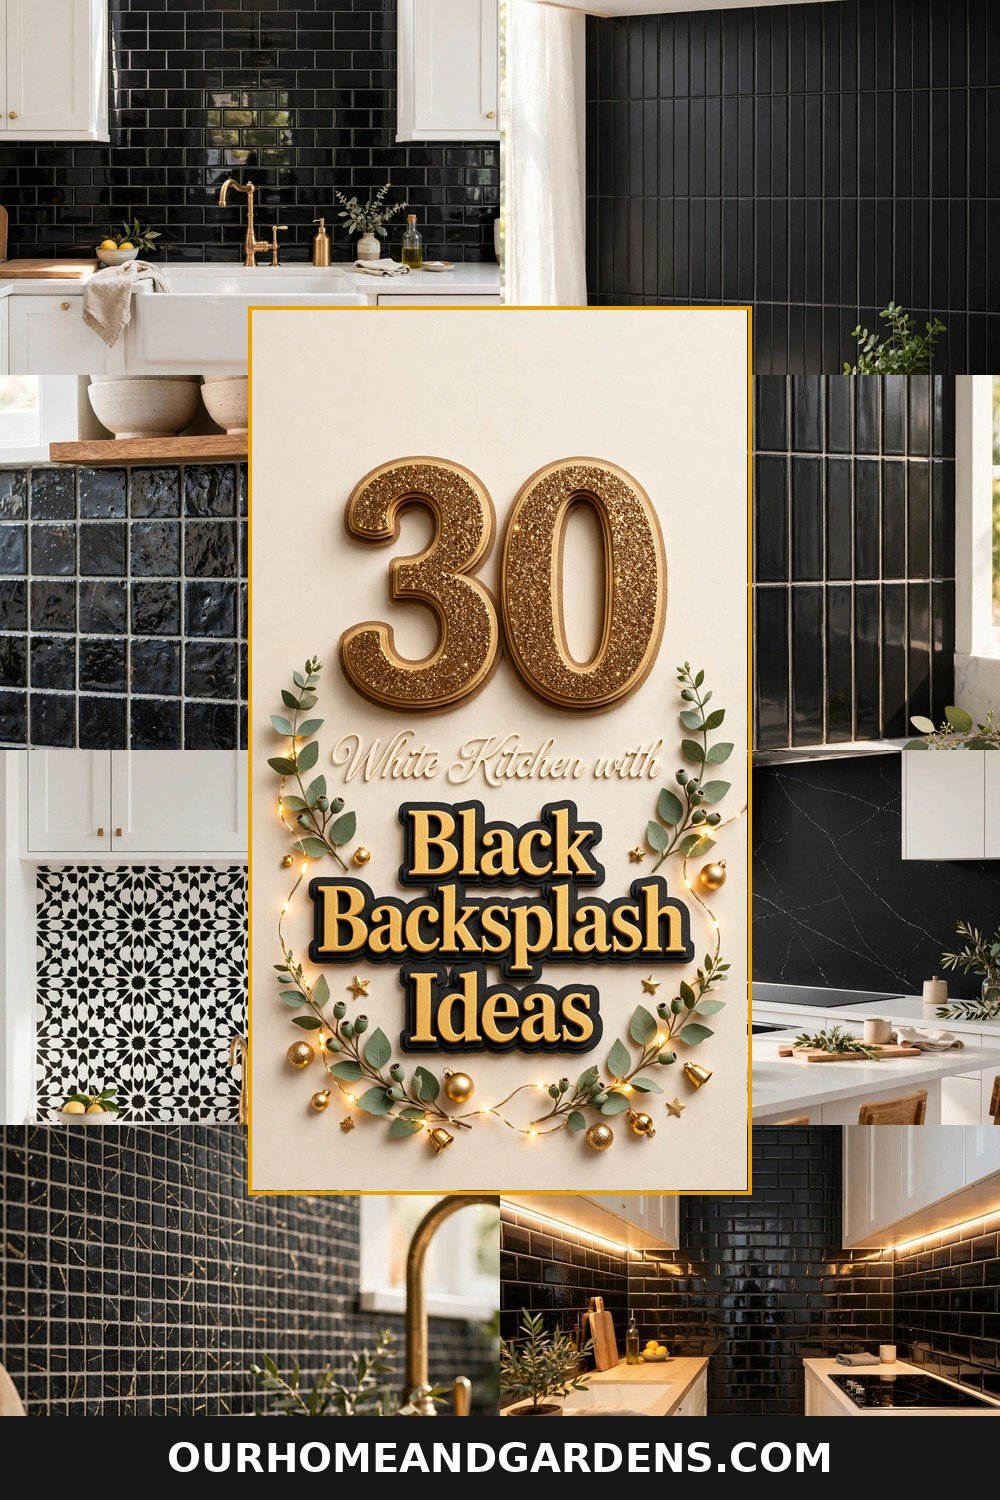
White Kitchen with Black Backsplash Ideas: 30 Stunning Looks
White kitchen with black backsplash ideas are the easiest way to give a bright, classic kitchen some real drama. White cabinets keep the room feeling open and airy, while a black backsplash adds depth, definition, and a focal point that pulls the whole design together. It is the classic tuxedo look of kitchens — crisp, timeless, and surprisingly forgiving — and it works in everything from a tiny galley to a wide-open farmhouse kitchen. Here are 30 distinct ideas, each with realistic costs and practical guidance, to help you pick the one that fits your budget and style.
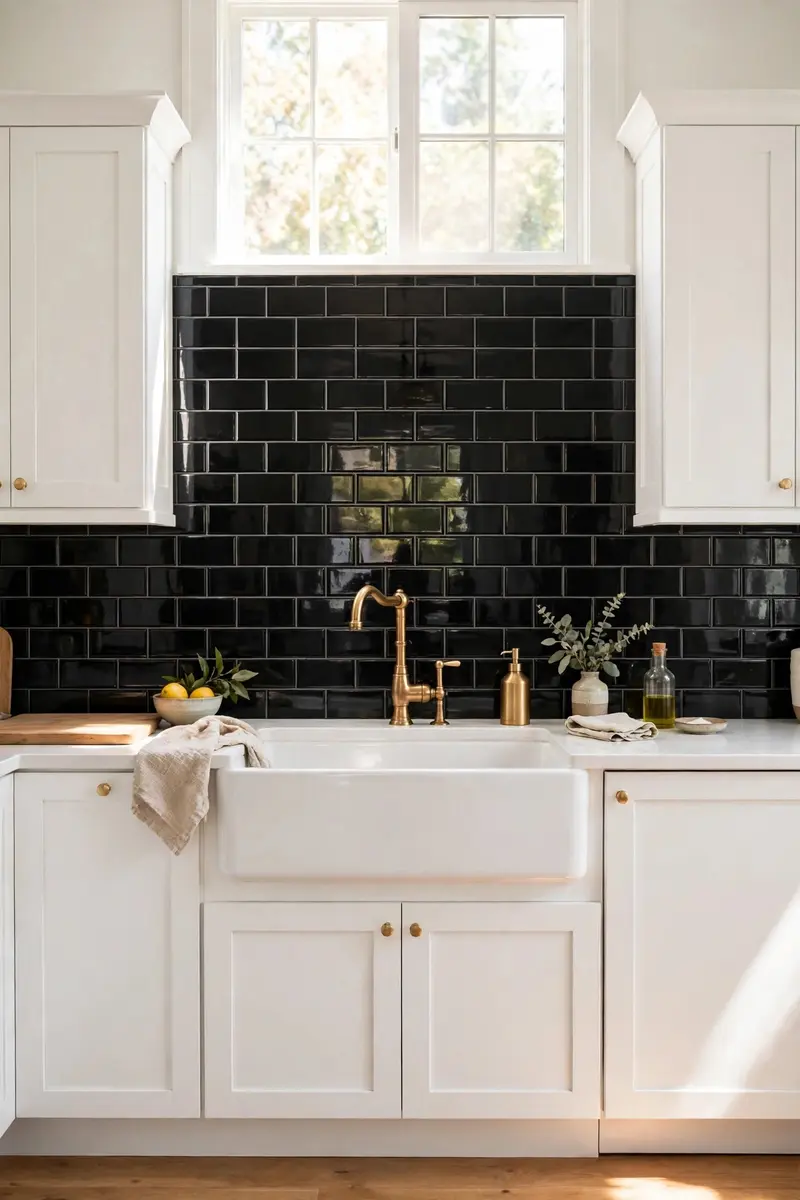
1. Glossy Black Subway Tile in a Classic Brick Pattern
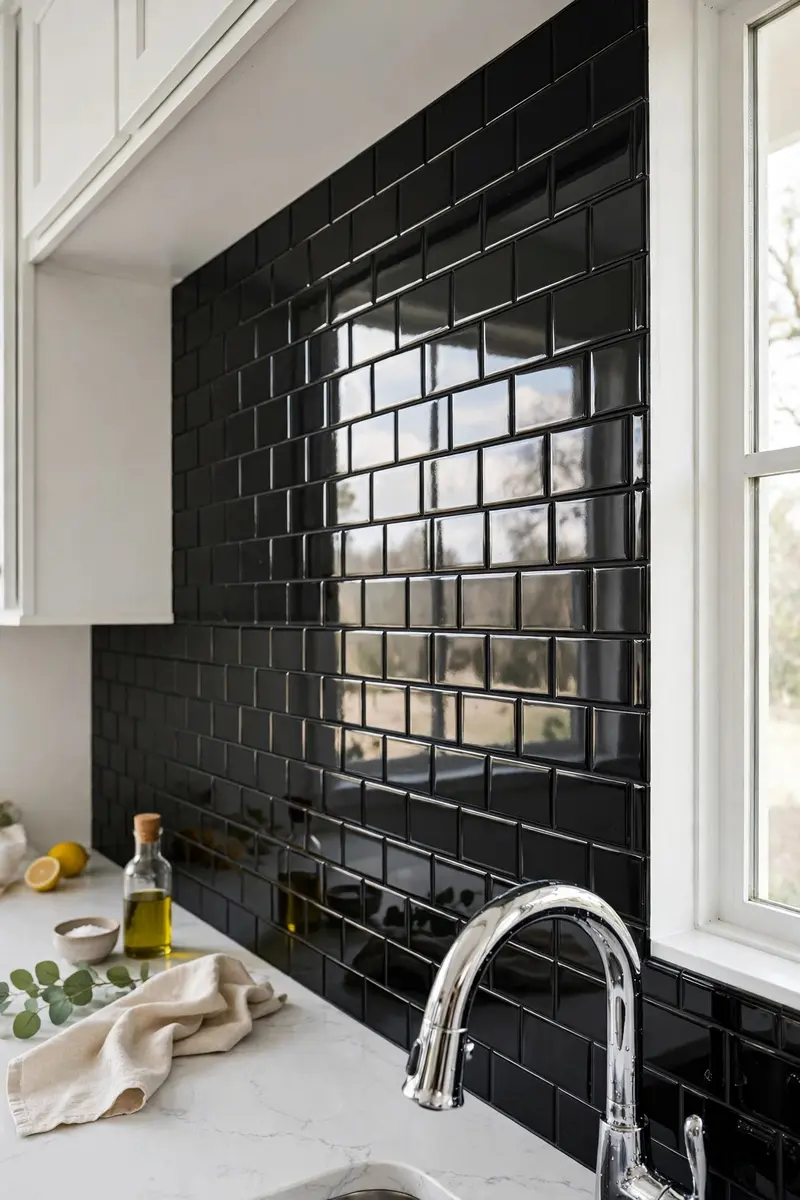
Glossy black subway tile is the safest first step into this look, and it rarely disappoints. The familiar brick pattern keeps the design grounded and timeless, while the glossy finish bounces light around the room so the black never feels heavy. Against white Shaker cabinets, it reads polished and intentional rather than stark.
Materials and cost: 3×6-inch glossy black ceramic subway tile, thinset, and grout; roughly $4–$9 per square foot for tile, plus $200–$500 in setting materials for a standard 30-square-foot backsplash. A pro install typically adds $400–$900.
Start with a level ledger line above the countertop, then lay the first row in a running bond, offsetting each tile by half. Keep spacers consistent at 1/16 or 1/8 inch, and seal the grout once it cures so cooking splashes wipe off easily. Work from the center of the range outward so cut tiles land symmetrically at the edges.
Practical tip: Choose a glossy glaze, not matte, if your kitchen has little natural light — the shine does real work brightening the wall.
Variation: Run the same tile in a brick pattern but swap in one row of white subway tile as a chair-rail-style accent stripe.
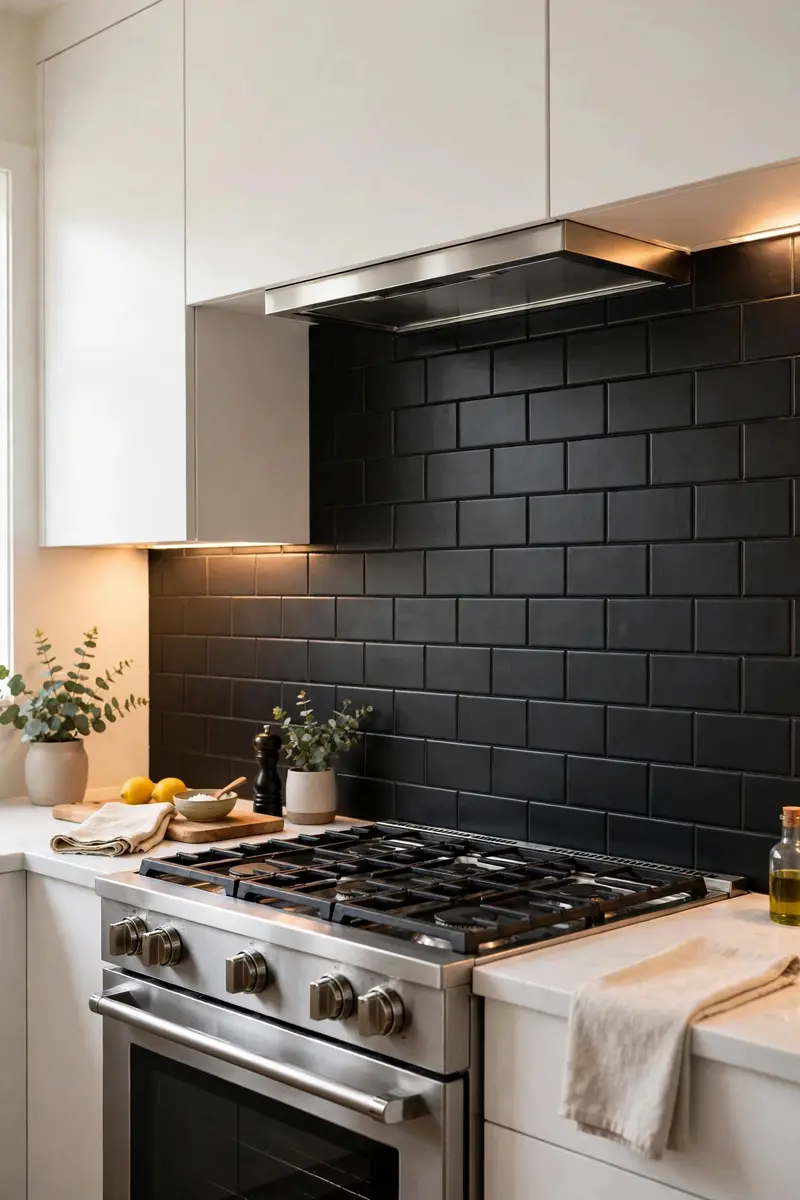
2. Matte Black Subway Tile with Matching Black Grout
If glossy feels too flashy for you, matte black subway tile with matching grout gives the same shape a softer, more modern mood. The tone-on-tone grout makes the wall read as one continuous panel of black, which looks especially sleek with flat-front white cabinets and stainless steel appliances.
Materials and cost: Matte black ceramic subway tile at $5–$11 per square foot, plus black grout and sealer; budget $350–$800 for materials on a typical backsplash.
The trick here is lighting: matte tile absorbs light, so add under-cabinet LED strips before you tile, not after. Lay tiles with tight 1/16-inch joints so the grout lines nearly disappear, and wipe tiles as you go — black grout can stain unglazed edges if it dries on the face.
Practical tip: Seal matte tile before grouting; unglazed matte surfaces grab grout pigment fast, and dried haze is hard to remove.
Variation: Pair the matte wall with brushed brass hardware to warm up the monochrome palette instantly.
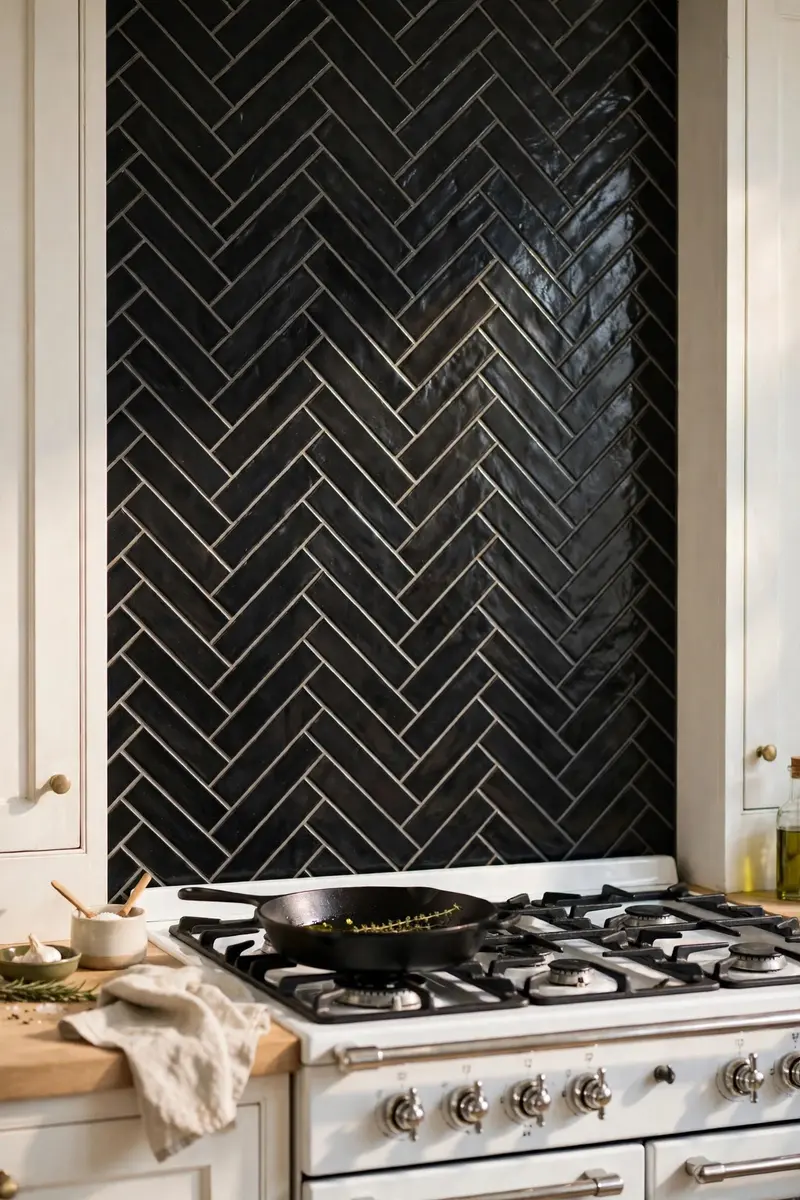
3. Black Herringbone Backsplash
A black herringbone pattern turns a simple tile into a showpiece. The zigzag layout catches the eye and adds movement, which is exactly what a plain white kitchen needs. It costs more in labor because every cut is angled, but the payoff is a backsplash that looks custom and expensive.
Materials and cost: Black subway or rectangular tile, $5–$12 per square foot; expect labor to run 30–50% higher than a straight brick pattern because of the angled cuts.
Dry-lay the herringbone on the floor first to find your center line, then transfer that line to the wall with a laser level. Start at the focal point — usually the range — and work outward, keeping the 45-degree angles consistent. A wet saw is essential for clean mitered edges.
Practical tip: Buy 15% extra tile instead of the usual 10% — herringbone wastes more on cuts than any straight layout.
Variation: Use a charcoal-grey grout instead of black to make the zigzag pattern pop without lightening the overall look.
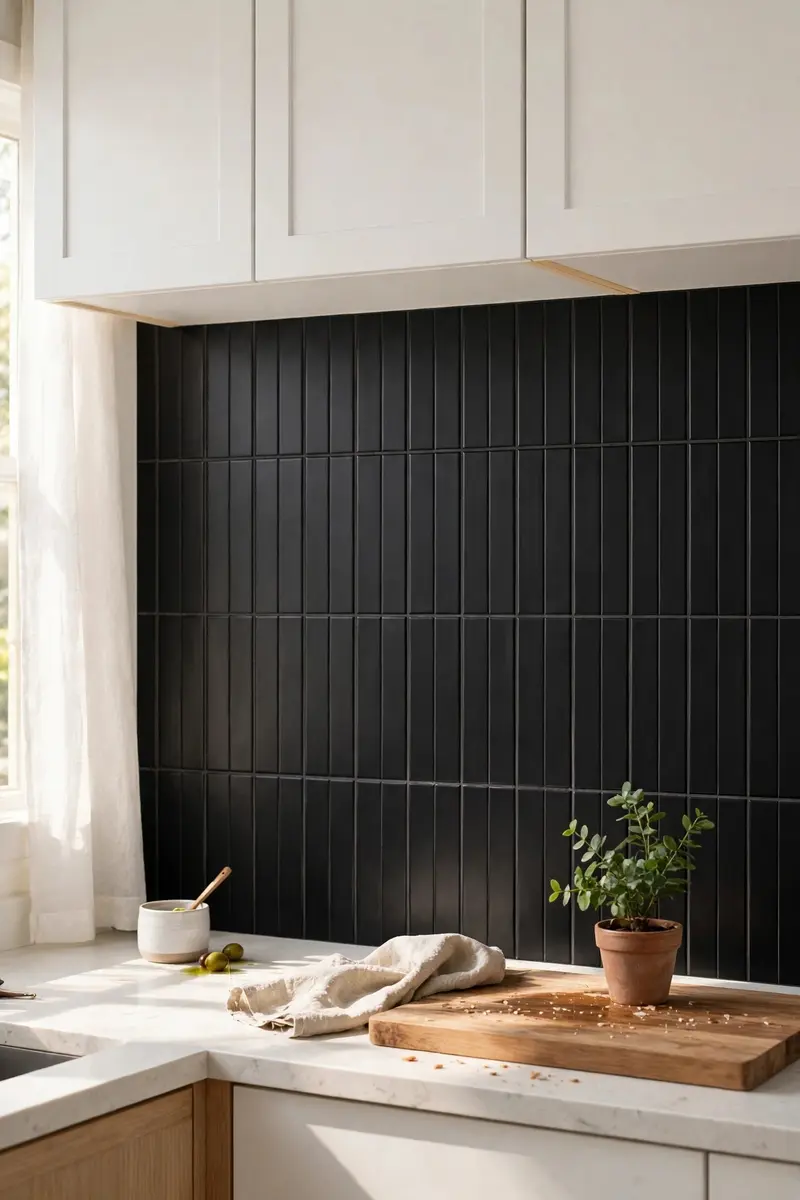
4. Vertical Stack Black Subway Tile
Vertical stacking is one of the biggest 2026 backsplash trends, and it suits white kitchens beautifully. Tiles lined up in straight columns draw the eye upward, making ceilings feel taller and the whole kitchen feel more contemporary. It is also one of the easiest patterns for a confident DIYer.
Materials and cost: Black 3×6 or 2×8 ceramic tile, $4–$10 per square foot; total materials $300–$700 for a standard run.
Snap vertical chalk lines every tile width across the wall and check them with a level — any drift shows immediately in a stack pattern. Set full tiles from the bottom up, and keep a consistent 1/8-inch joint. Finish the top edge with a matching bullnose tile or a slim metal trim for a clean line under the cabinets.
Practical tip: Use tile leveling clips on your first vertical-stack job; they keep tall columns from drifting as the thinset sets.
Variation: Stack the tile vertically only behind the range as a feature panel, and use a plain brick pattern on the side walls.
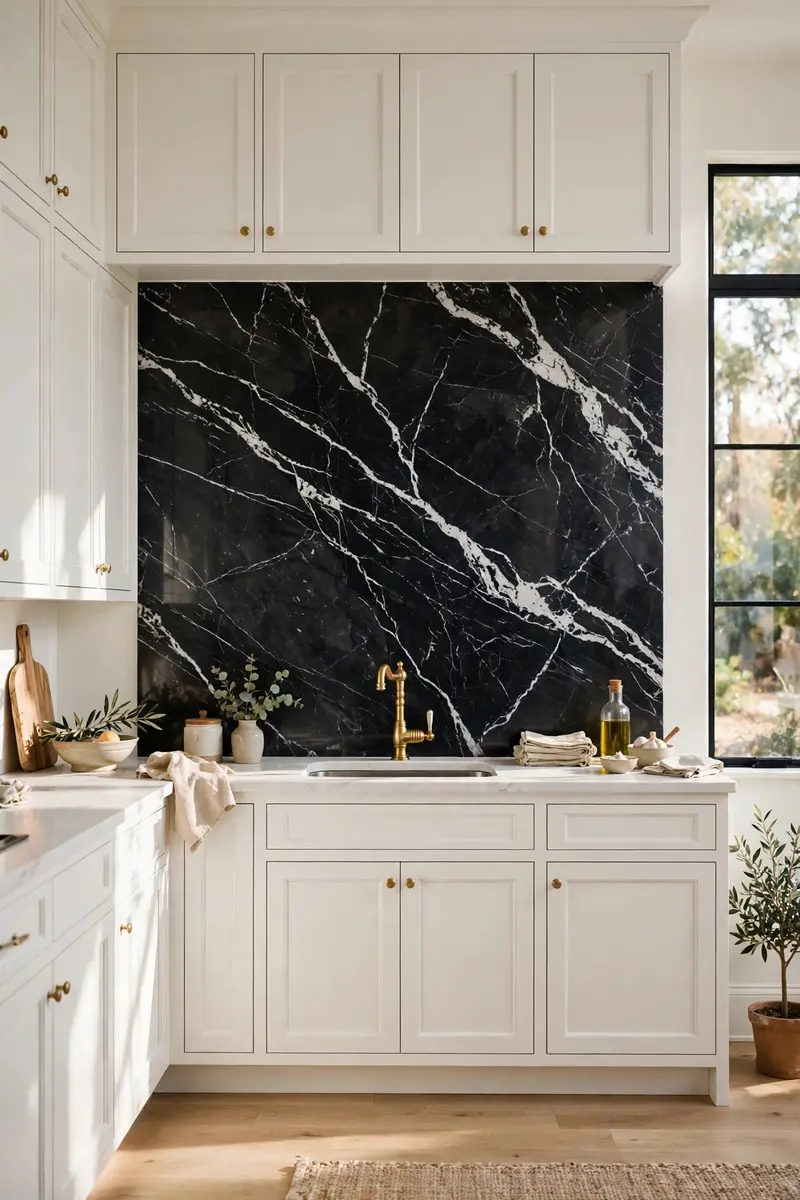
5. Dramatic Black Marble Slab Backsplash
Nothing says luxury like a full slab of black marble running from countertop to cabinet. The natural white veining softens the black, ties into white cabinets, and eliminates grout lines entirely — which also means almost nothing to scrub. It is a splurge, but it transforms the kitchen in one move.
Materials and cost: Black marble slab (such as Nero Marquina), $60–$120 per square foot installed; a full backsplash run typically costs $2,000–$5,000.
This is a professional-only job: slabs are heavy, fragile, and need precise templating around outlets and the range. Ask the fabricator to book-match the veining across seams if your run needs two slabs, and seal the marble twice — once before install and once after — since marble stains more easily than granite or quartz.
Practical tip: Keep a marble-specific sealer on hand and reseal every 6–12 months; tomato sauce and red wine are marble’s worst enemies.
Variation: Use the same black marble for a short 4-inch upstand plus a full slab only behind the range, cutting the cost nearly in half.
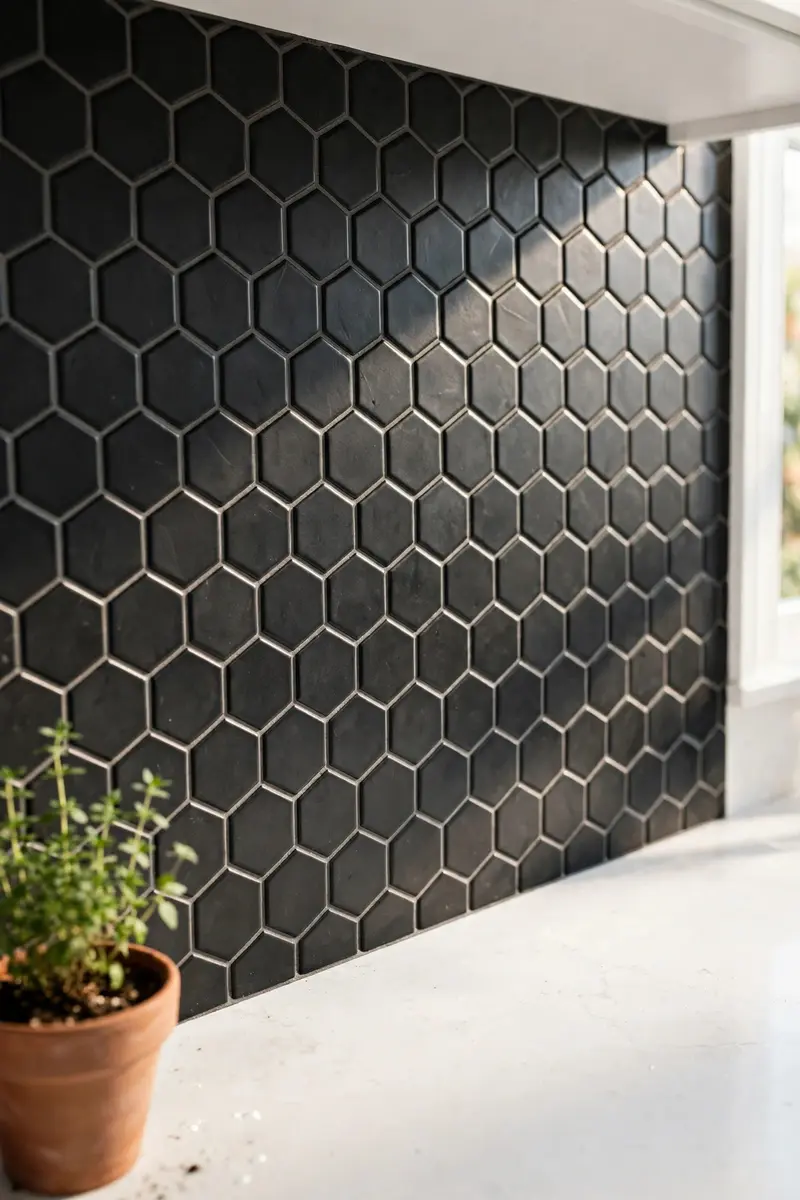
6. Matte Black Hexagon Tile
Hexagon tiles add geometry without color, which is perfect for a white kitchen that needs texture more than another hue. Matte black hexagons feel modern and a little playful, and the honeycomb shape breaks up long runs of cabinetry beautifully.
Materials and cost: Black hexagon mosaic sheets, $8–$15 per square foot; materials $450–$900 for a standard backsplash.
Hexagons come on mesh sheets, so installation is faster than it looks — but alignment matters. Set each sheet with a rubber float, pressing evenly so no tile sits proud of its neighbors, and check the honeycomb lines every few sheets. Dark grout keeps the pattern subtle; light grout turns it graphic.
Practical tip: Order one extra sheet beyond your waste calculation — a single damaged hexagon is much easier to replace from a spare sheet than from a new dye lot.
Variation: Mix in a few white hexagon tiles at random for a confetti effect, or fade from black at the range to white at the edges.
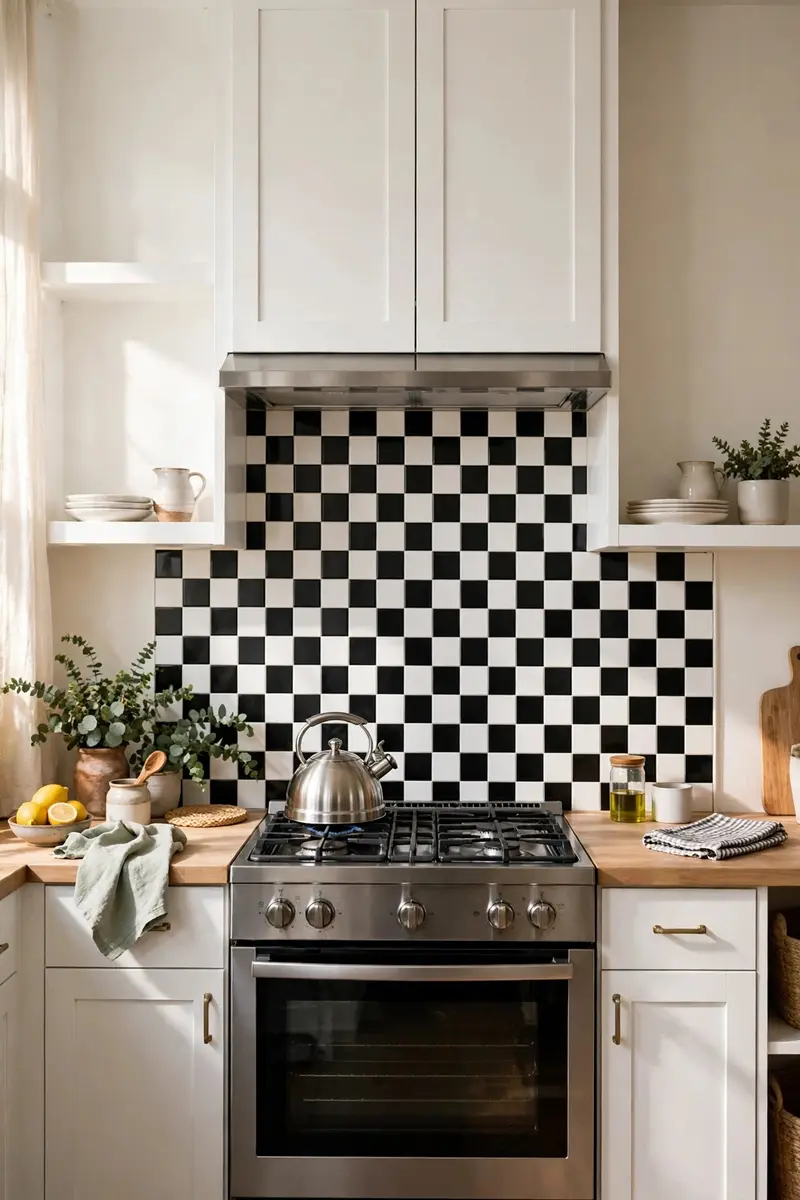
7. Black and White Checkerboard Subway Tile
A checkerboard of black and white subway tiles is playful, graphic, and unmistakably intentional. It brings a retro diner energy into a modern white kitchen, and because both colors already live in the room, it never clashes. It works best as a feature wall rather than on every surface.
Materials and cost: Black and white 3×6 ceramic tiles, $4–$9 per square foot each; materials $350–$800 total.
Plan the checkerboard on graph paper first, deciding whether the pattern starts with black or white at the center of the range. Lay tiles in a straight stack (not brick pattern) so the checkerboard reads clearly, and use spacers religiously — one crooked tile breaks the whole optical effect. A medium-grey grout softens the contrast slightly.
Practical tip: Dry-lay two full rows on the countertop before mixing any thinset; catching a pattern mistake dry costs nothing.
Variation: Use larger 4×8 tiles for a bolder, more modern checkerboard, or mini 2×4 tiles for a finer, almost textile-like pattern.
8. Handmade Black Zellige Tile
Zellige tiles are handmade, glazed, and gloriously imperfect — each one varies slightly in tone and surface, so the wall shimmers instead of looking flat. In a white kitchen, black zellige adds artisan warmth that factory tile cannot match, and it pairs beautifully with wood and brass.
Materials and cost: Black zellige tile, $15–$30 per square foot; a standard backsplash runs $900–$2,000 in tile alone.
Because zellige varies in thickness, use a thicker bed of thinset and back-butter each tile, pressing firmly to level the faces. Embrace the variation rather than fighting it — sort tiles into light, medium, and dark piles first, then blend piles as you lay so no patch looks accidentally darker. Seal the grout well, since zellige edges are porous.
Practical tip: Never grout zellige with bright white grout on your first try — it highlights every uneven edge; a soft grey or black grout is far more forgiving.
Variation: Use black zellige only as a range feature panel, framed by simple white subway tile on either side, to get the artisan look at half the cost.
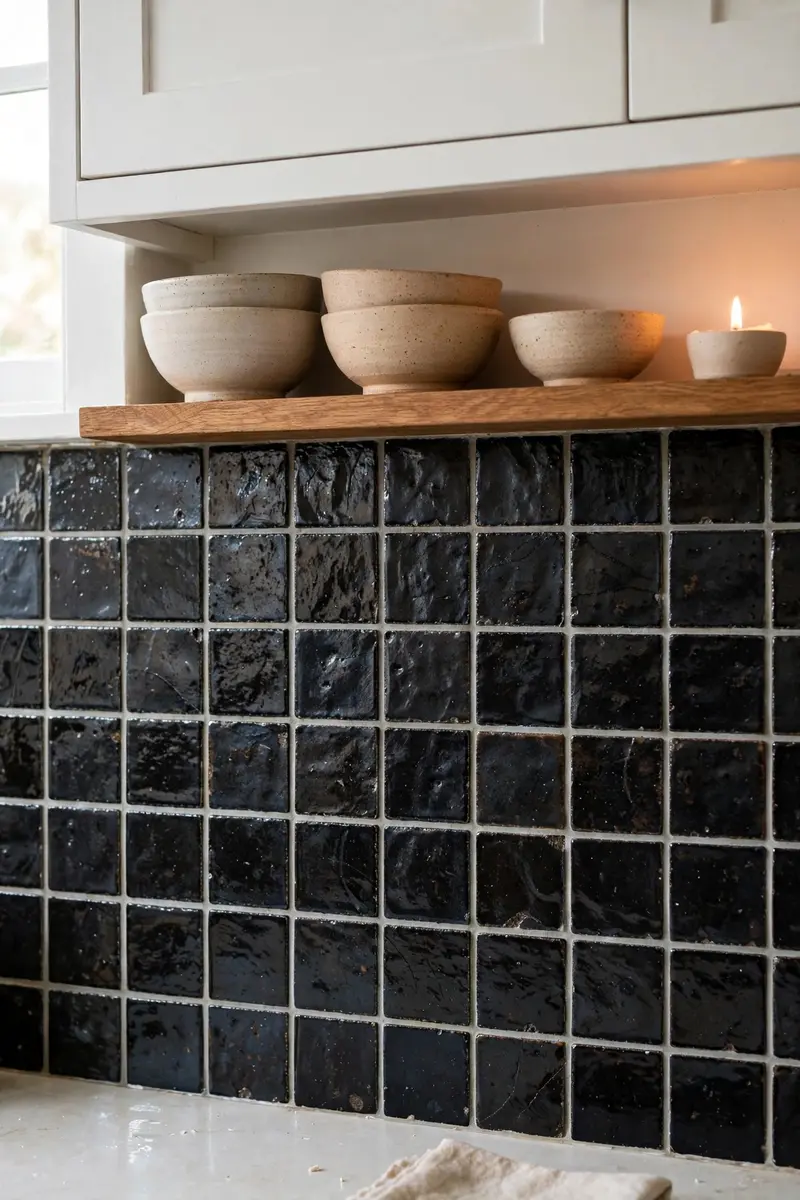
9. Black Brick Backsplash for a Farmhouse Feel
Black brick — real thin brick veneer — gives a white farmhouse kitchen texture, warmth, and a hint of industrial edge. The rough surface contrasts beautifully with smooth white cabinets, and it looks like it has always been part of the house.
Materials and cost: Thin black brick veneer, $8–$15 per square foot; materials $500–$1,100, plus mortar and sealer.
Brick veneer is heavier than tile, so check that your wall can hold it and use a polymer-modified mortar rated for veneer. Butter the back of each brick, press it into a notched mortar bed, and keep joints around 3/8 inch for an authentic look. Seal the finished wall with a matte masonry sealer so grease does not soak into the porous surface.
Practical tip: Wipe bricks with a damp sponge as you work — dried mortar haze on dark brick is stubborn and dulls the color.
Variation: Whitewash a few bricks at random before installing for a weathered, reclaimed-brick effect.
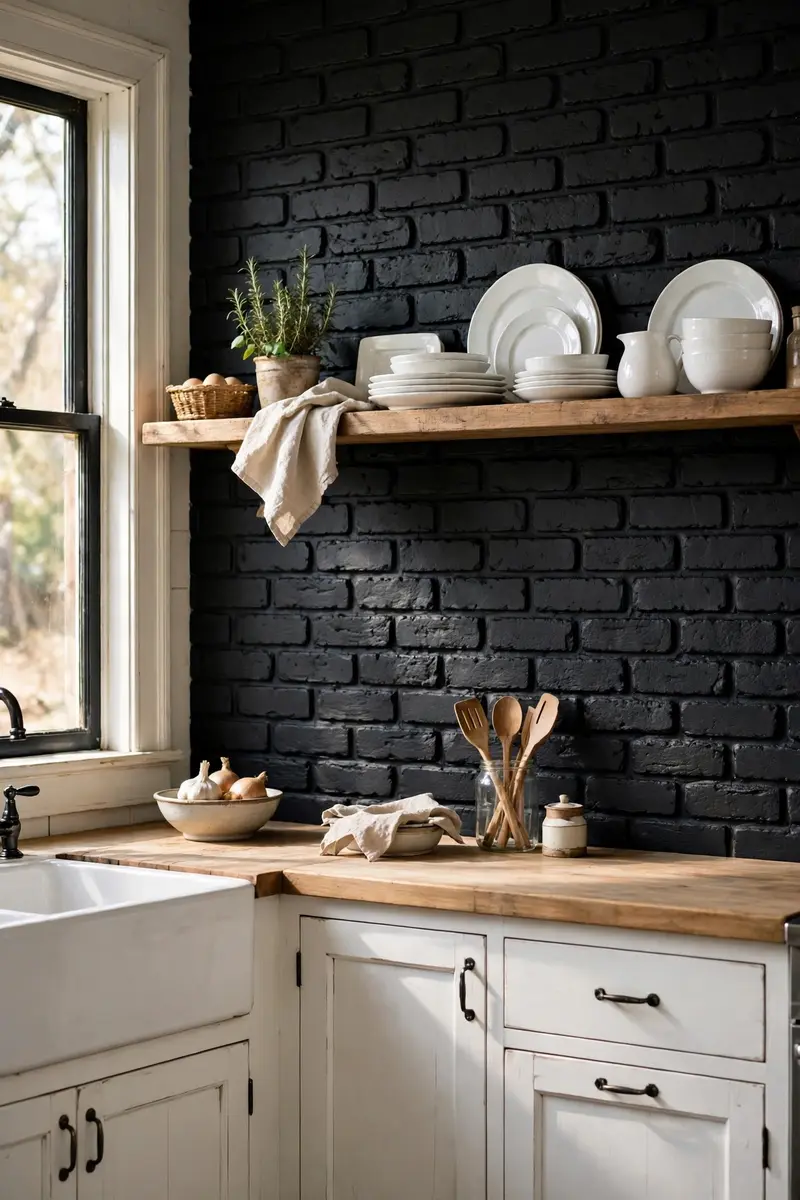
10. Black Penny Round Mosaic Tile
Penny round mosaics are small, round, and full of charm. In black, they read as a soft, dotted texture rather than a hard wall of color, which makes them ideal if you love the black backsplash idea but worry about it feeling too severe. They also curve gracefully around outlets and edges.
Materials and cost: Black penny round mosaic sheets, $7–$14 per square foot; materials $400–$850 for a typical backsplash.
Penny rounds come on mesh, so set sheets with even pressure and check that grout joints stay uniform — the round shape makes uneven joints obvious. Use unsanded grout for the small joints, and consider a dark grout so the circles read as texture rather than polka dots. A grout float at a low angle fills the tiny gaps without dislodging tiles.
Practical tip: Seal penny tile before grouting if the glaze is matte; the tiny crevices between rounds trap grout haze.
Variation: Alternate rows of black and white penny rounds for a subtle striped texture that still reads mostly black from across the room.
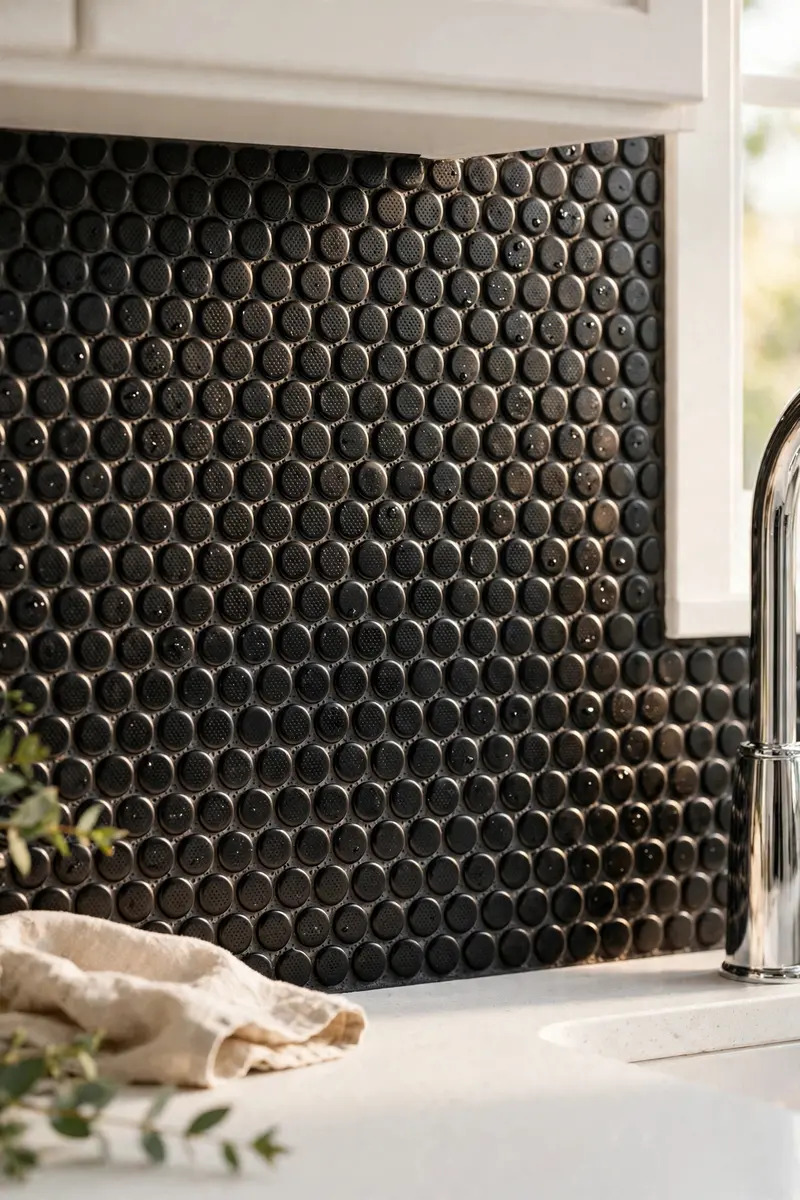
11. Black Fish Scale (Scallop) Tile
Scallop tiles, also called fish scales, bring a soft, almost coastal rhythm to a black backsplash. The curved edges catch light differently from every angle, so the wall feels alive rather than flat. In a white kitchen, they add personality without needing any color at all.
Materials and cost: Black scallop mosaic sheets, $9–$16 per square foot; materials $500–$950 for a standard backsplash.
Set scallop sheets carefully, keeping the scale rows level — a wavy row is very noticeable with this shape. Use a dark grout to keep the scales reading as one textured surface, and seal well around the range where grease splashes. Trim sheets with a wet saw rather than nippers for clean curved cuts at the edges.
Practical tip: Order a spare sheet and practice cutting one scale curve before you start on the wall; scallops punish rushed cuts.
Variation: Run scallop tile only up to the bottom of the upper cabinets, then paint the wall above in a soft warm white for a two-tone effect.
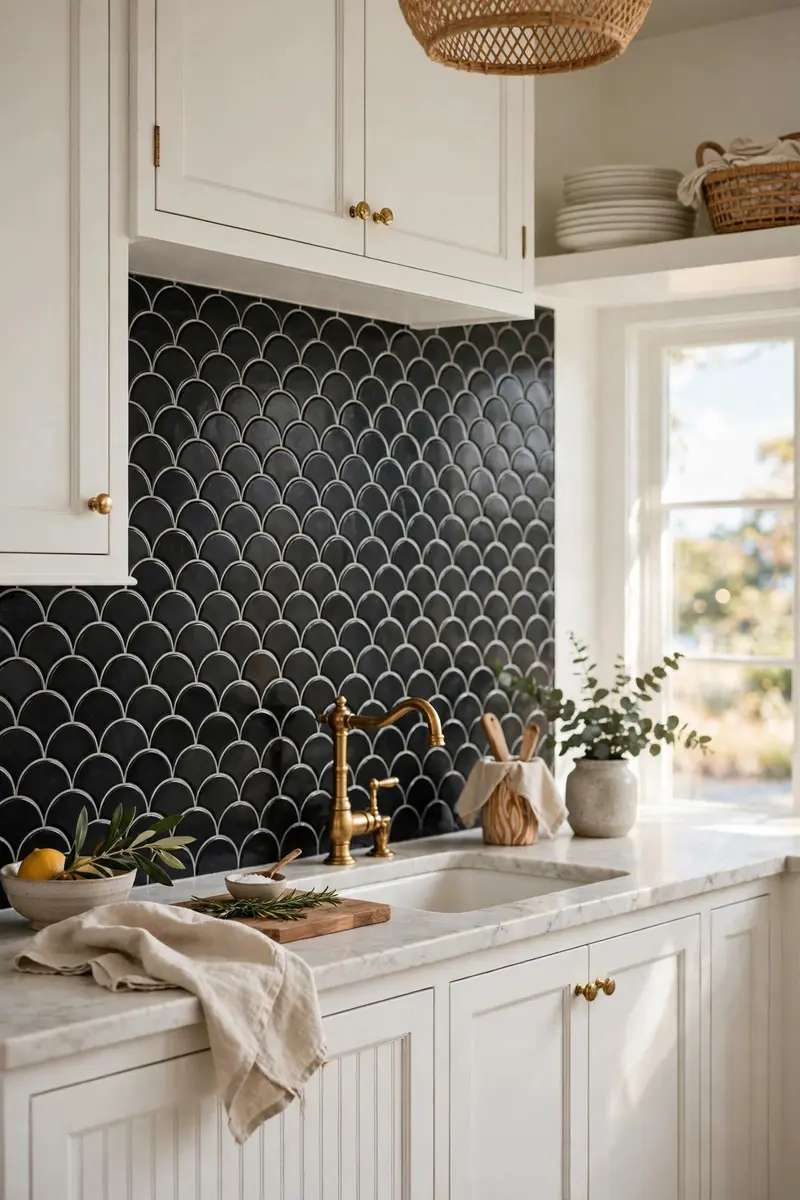
12. Black Picket Tile
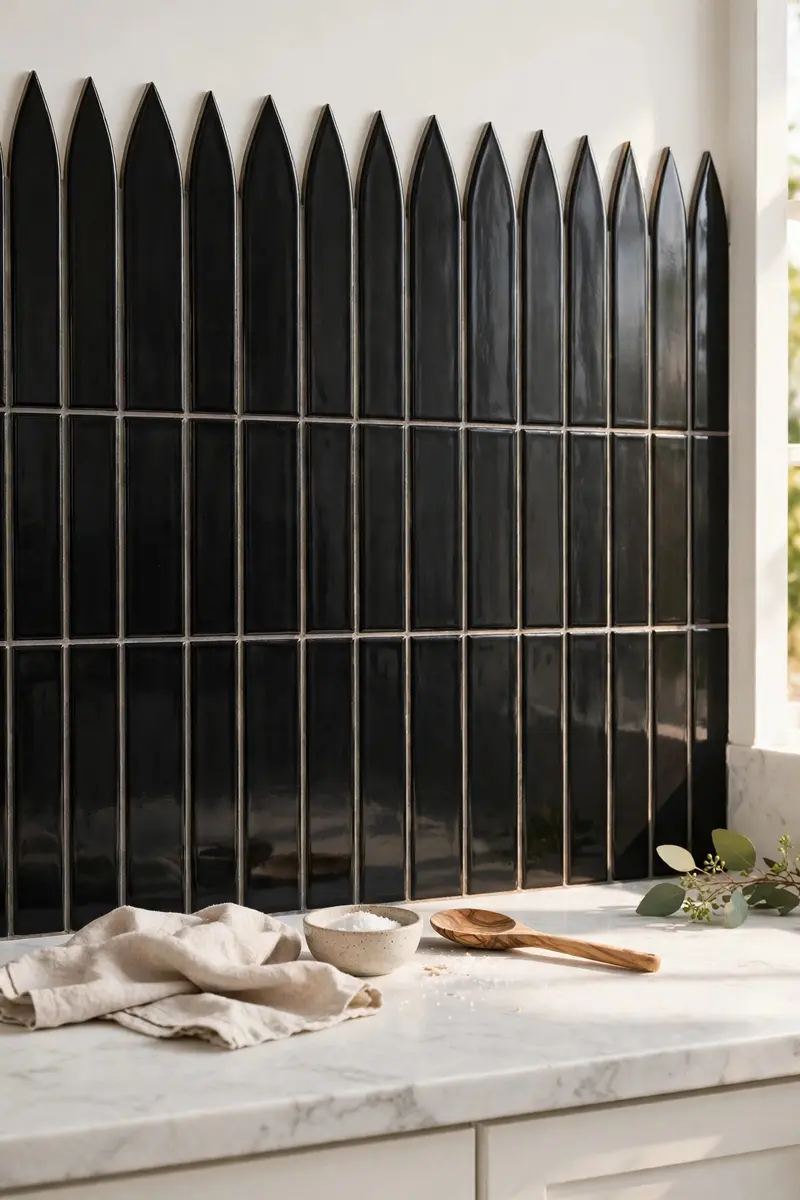
Picket tiles — long, pointed rectangles like a fence picket — are a fresh alternative to subway tile. In black, they feel modern and a little unexpected, and their vertical shape adds height to the wall. They suit contemporary white kitchens especially well.
Materials and cost: Black picket mosaic sheets, $9–$15 per square foot; materials $500–$900.
Picket sheets usually come in an interlocking pattern, so stagger the sheets correctly to hide the seams. Keep the points aligned vertically with a level, and use spacers at the sheet edges. A charcoal grout keeps the picket outline visible without shouting.
Practical tip: Check the sheet layout before you buy — some picket sheets interlock only in one direction, which matters at corners.
Variation: Lay picket tiles horizontally instead of vertically for a wider, more relaxed feel in a long galley kitchen.
13. Black Terrazzo Backsplash
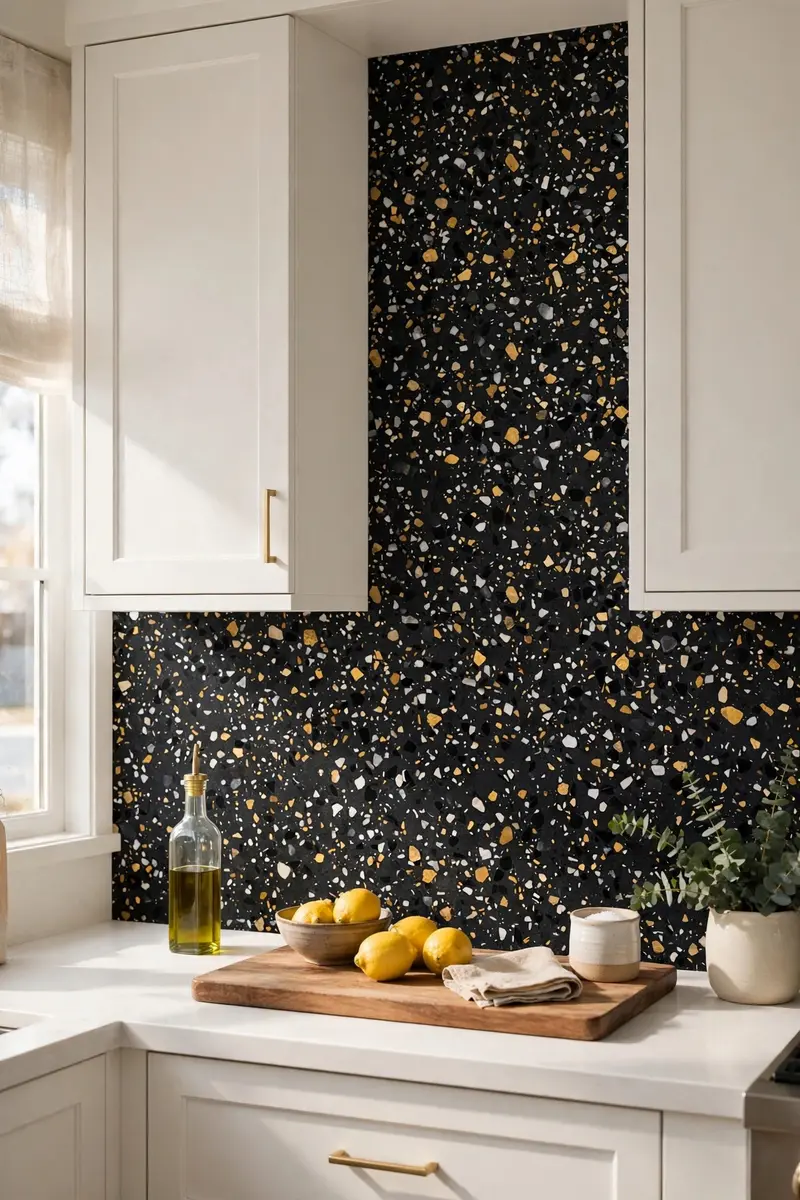
Terrazzo — chips of marble, quartz, and glass set in a dark base — gives a black backsplash a speckled, almost confetti-like depth. No two slabs or tiles are alike, so the wall feels custom. It is also extremely hard-wearing, which matters behind a busy range.
Materials and cost: Black terrazzo tile, $15–$30 per square foot; materials $900–$1,800, or $2,500+ for a full slab.
Terrazzo tiles are heavy and need a flat, well-prepared wall; use a large-notch trowel and back-butter each tile. Grout with a dark epoxy grout for stain resistance, and seal the finished surface — terrazzo’s cement base can stain if left unsealed. Keep a spare tile or two, since dye lots vary noticeably.
Practical tip: View a full box of terrazzo before committing; the chip mix varies, and you want to love the overall speckle density, not just one sample tile.
Variation: Choose a terrazzo with white and gold chips to echo white cabinets and brass hardware in one material.
14. High-Gloss Black Glass Tile
Glass tile is the brightest black backsplash you can buy. Its mirror-like surface reflects windows, pendants, and white cabinets, so the kitchen actually feels larger and lighter — the opposite of what most people expect from black tile. It is also nonporous, so cleanup is a quick wipe.
Materials and cost: Black glass mosaic or subway tile, $10–$20 per square foot; materials $600–$1,200.
Glass needs a white thinset (grey thinset can show through translucent glass and muddy the color) and a non-sag formula so tiles do not slide on the wall. Cut glass tile with a diamond blade and light pressure to avoid chipping, and use unsanded grout to protect the glossy face from scratches.
Practical tip: Always use white thinset behind glass tile — grey thinset dulls black glass to a murky grey-green.
Variation: Mix black glass tiles with a few mirrored glass tiles for extra sparkle around the range.
15. Black Slate and Natural Stone Tile
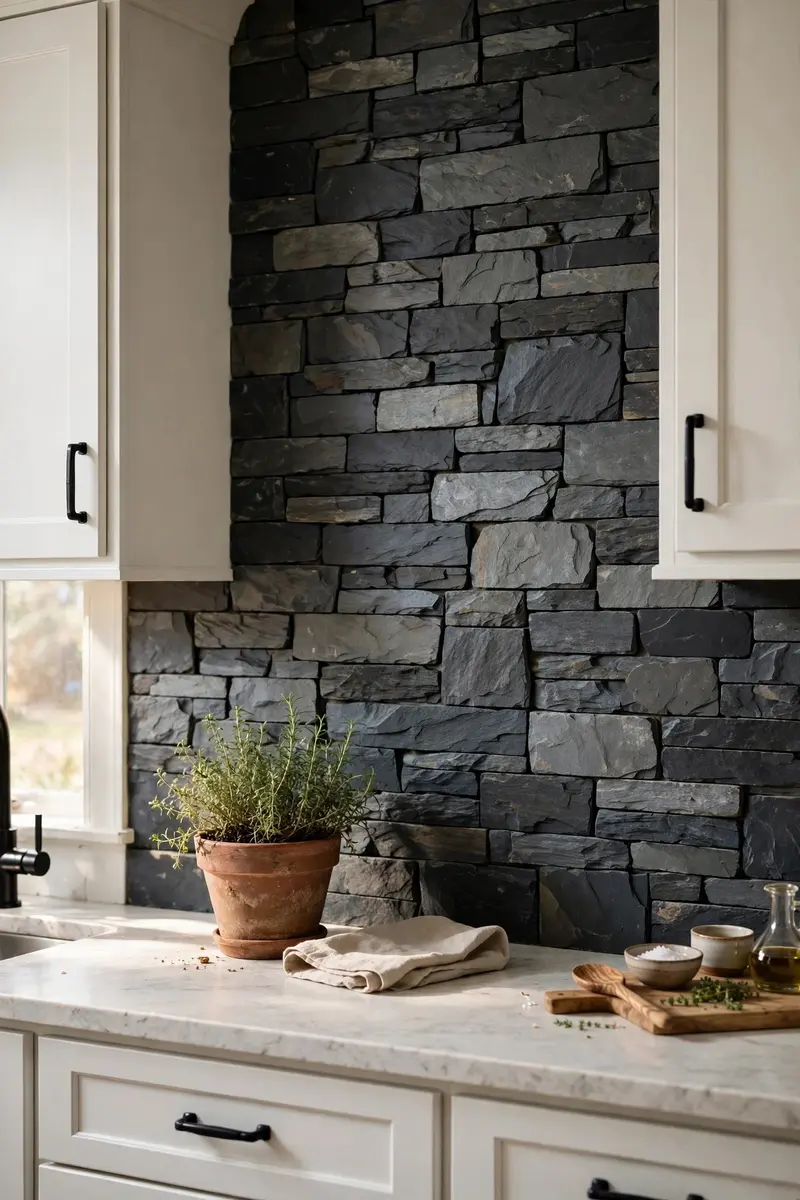
Slate brings a rugged, earthy texture to the black backsplash family. Its cleft surface has natural variation — greys, charcoals, and hints of rust — so the wall feels organic rather than manufactured. It suits rustic and transitional white kitchens beautifully.
Materials and cost: Black slate tile, $8–$16 per square foot; materials $500–$1,000, plus stone sealer.
Slate thickness varies, so sort tiles by thickness before laying and build up thinset under thinner pieces to keep the face level. Seal slate before grouting and again after, since natural stone absorbs grout pigment and cooking grease. A matte stone sealer keeps the rustic look; a gloss enhancer deepens the black dramatically.
Practical tip: Seal slate twice before grouting — the first coat soaks in fast, and the second actually protects the face.
Variation: Use slate in a stacked-stone ledger panel behind the range for a fireplace-like focal point, with plain tile elsewhere.
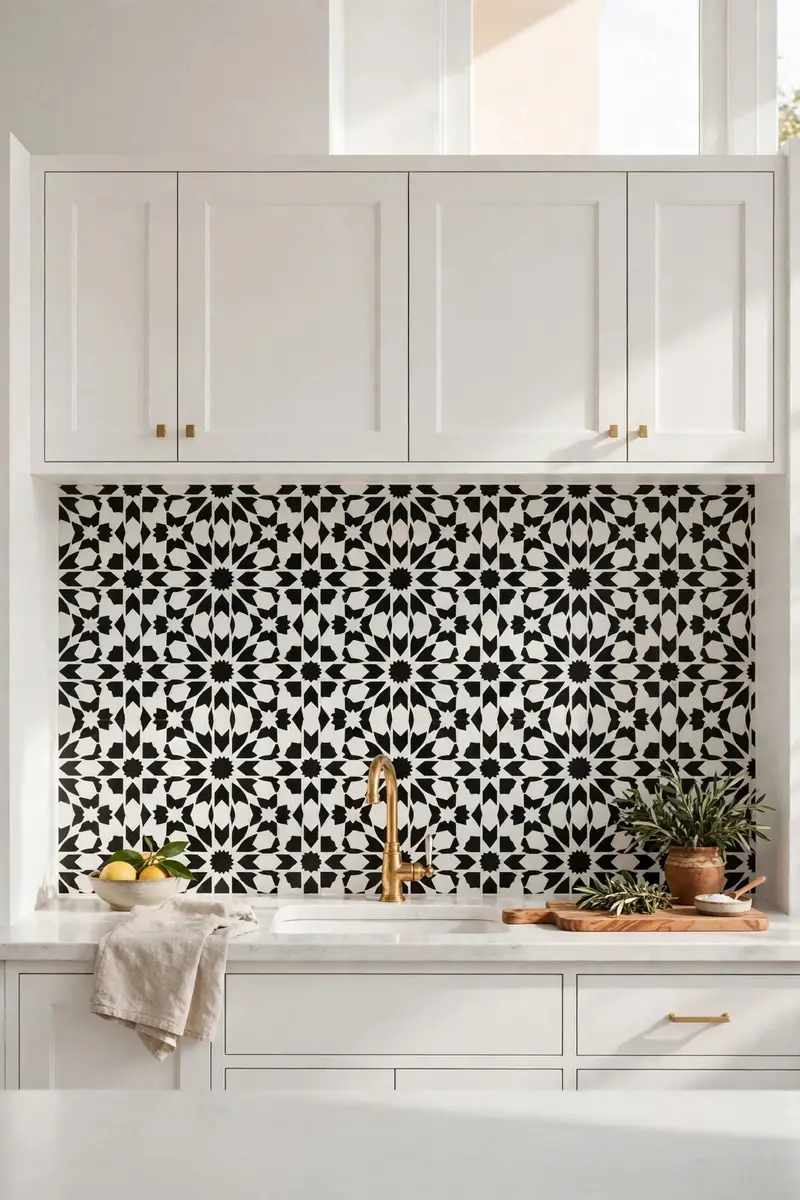
16. Black and White Patterned Cement Tile
Patterned cement tiles let you bring a bold graphic print into the kitchen while staying strictly black and white. Moroccan, star, or geometric prints turn the backsplash into artwork, and because the palette is limited, the pattern never fights the white cabinets.
Materials and cost: Patterned cement tile, $12–$25 per square foot; materials $700–$1,500 for a standard run.
Cement tiles are porous and must be sealed before grouting and after — skip this and grout pigment will stain the pattern permanently. Lay out the full pattern dry first, since one rotated tile ruins the repeat. Use a neutral grey grout that matches the pattern’s mid-tone so grout lines disappear into the design.
Practical tip: Seal cement tiles the day before you plan to grout, not the same morning — the sealer needs a full cure to resist grout stains.
Variation: Use patterned cement tile only as a framed panel behind the range, with plain black subway tile on the side walls, to keep the look from feeling busy.
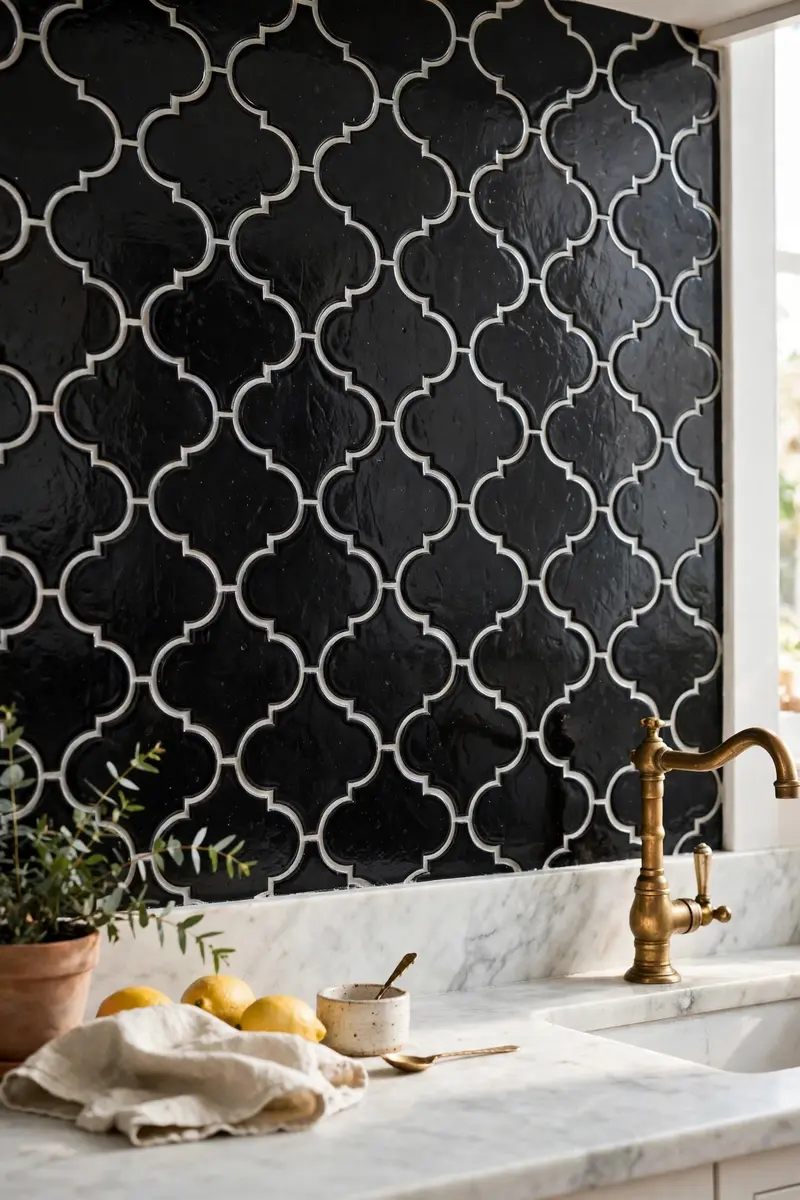
17. Black Arabesque (Moroccan Lantern) Tile
Arabesque tiles — the curved lantern shape borrowed from Moroccan design — add elegance and exotic flair to a white kitchen. The interlocking curves create a continuous flowing pattern that feels both historic and fresh, especially in black with a soft grey grout.
Materials and cost: Black arabesque mosaic sheets, $10–$18 per square foot; materials $600–$1,100.
Arabesque sheets interlock, so plan your starting point carefully at the range center and work outward to keep the pattern symmetrical. Press sheets evenly with a grout float to avoid lippage on the curved edges, and use unsanded grout for the narrow joints. Dark grout makes the shape subtle; light grout makes it graphic.
Practical tip: Buy from a single dye lot — arabesque curves make even slight color differences between lots very visible.
Variation: Pair a black arabesque backsplash with white marble counters so the curves echo the marble’s veining.
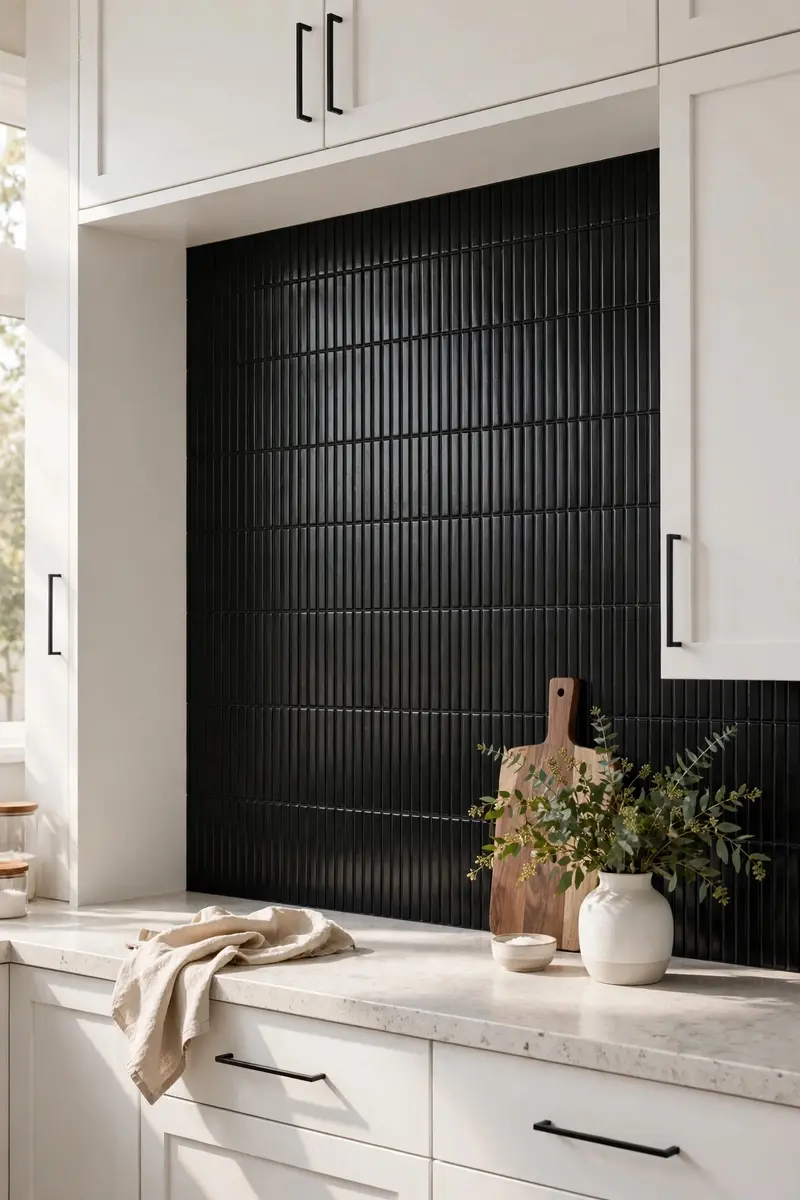
18. Black Kit-Kat (Finger) Tile, Vertical
Kit-Kat tiles — slim finger-width bars — are a 2026 favorite, and vertical black kit-kat tiles give a white kitchen a chic, boutique-hotel feel. The narrow bars create fine vertical lines that elongate the wall, and the texture reads beautifully in both matte and gloss finishes.
Materials and cost: Black kit-kat mosaic sheets, $9–$16 per square foot; materials $500–$950.
Kit-kat sheets are usually mounted on mesh in vertical bars; keep the bars perfectly plumb with a level every two sheets, since any lean is obvious in such fine lines. Use a dark grout to blend the bars into a ribbed texture, or a contrasting grout to emphasize each finger. Seal matte versions before grouting.
Practical tip: Use tile leveling clips at sheet corners — kit-kat bars are thin and love to tilt while thinset is wet.
Variation: Run kit-kat tiles horizontally behind a low windowsill or shelf ledge for a contrasting band in an otherwise vertical kitchen.
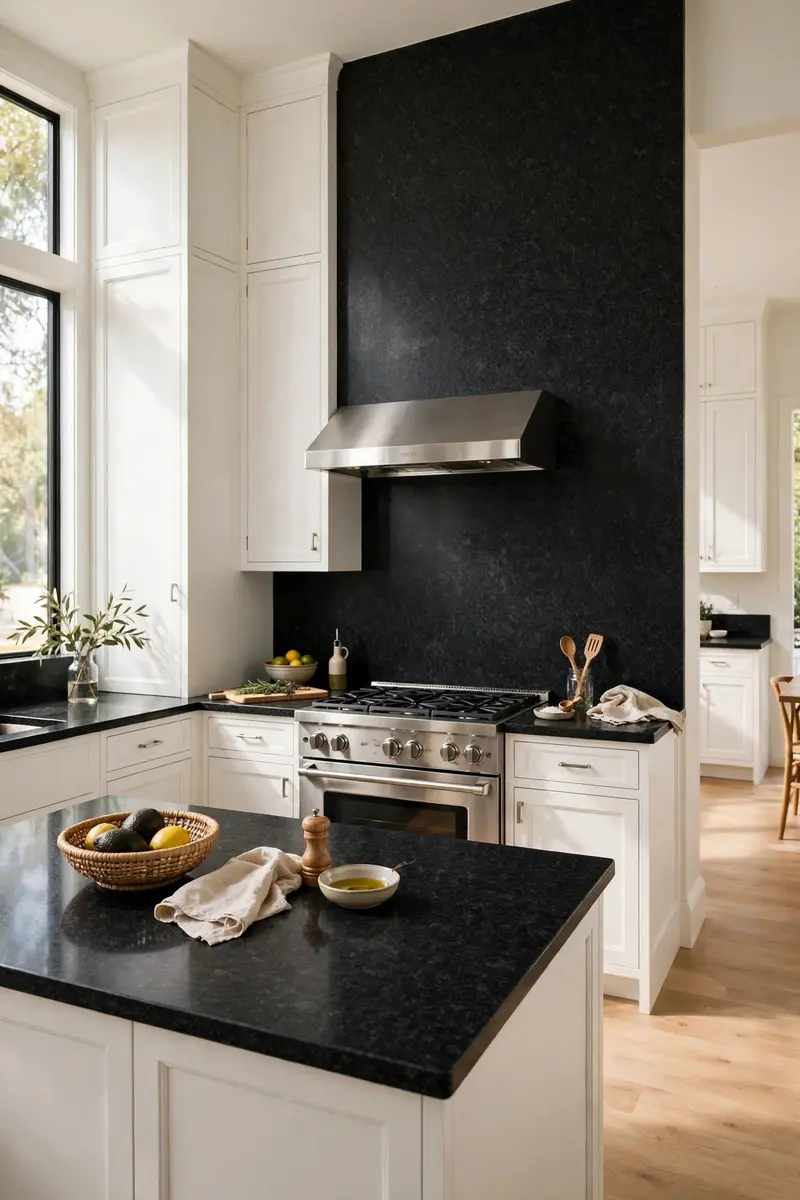
19. Black Granite Slab Matched to the Countertop
Running your black granite countertop straight up the wall as the backsplash creates a seamless, monolithic look. With white cabinets, the effect is pure tuxedo: crisp white boxes, one continuous sweep of black stone. It is also the easiest backsplash to clean — there are no grout lines at all.
Materials and cost: Black granite slab, $40–$80 per square foot installed; a backsplash run typically adds $1,200–$3,000 to a countertop order.
Order the backsplash from the same granite lot as your counters so the pattern matches, and ask the fabricator to template the wall after the counters are installed. Seal granite once a year with an impregnating sealer, and keep the seam between counter and backsplash caulked with color-matched silicone rather than grout.
Practical tip: Ask for a polished edge on the top of the slab backsplash — a raw sawn edge looks unfinished where it meets the wall.
Variation: Use a leathered (textured) granite finish on the backsplash while keeping counters polished, for a subtle two-texture effect in one stone.
20. Black Quartz Slab Backsplash
Quartz slabs give you the drama of black stone without marble’s staining worries or granite’s sealing routine. Modern black quartz comes in veined, speckled, and solid versions, and it is nonporous, so red wine and tomato sauce wipe right off. For busy family kitchens, it is the practical luxury choice.
Materials and cost: Black quartz slab, $50–$100 per square foot installed; a full backsplash run typically costs $1,800–$4,500.
Quartz is fabricated like stone, so this is a pro job with templating and seam placement to plan. Choose your veining carefully — bold white veining reads dramatic, while fine speckling reads quieter and hides splashes better. Quartz cannot take extreme heat, so keep a clear gap behind the range or use a stainless steel range splash guard.
Practical tip: If you cook with high heat, leave a 2-inch gap between a quartz backsplash and the range, covered by a metal trim — quartz discolors under sustained heat.
Variation: Use black quartz for the backsplash and white quartz for the counters for a reversed tuxedo look that still reads black-and-white.
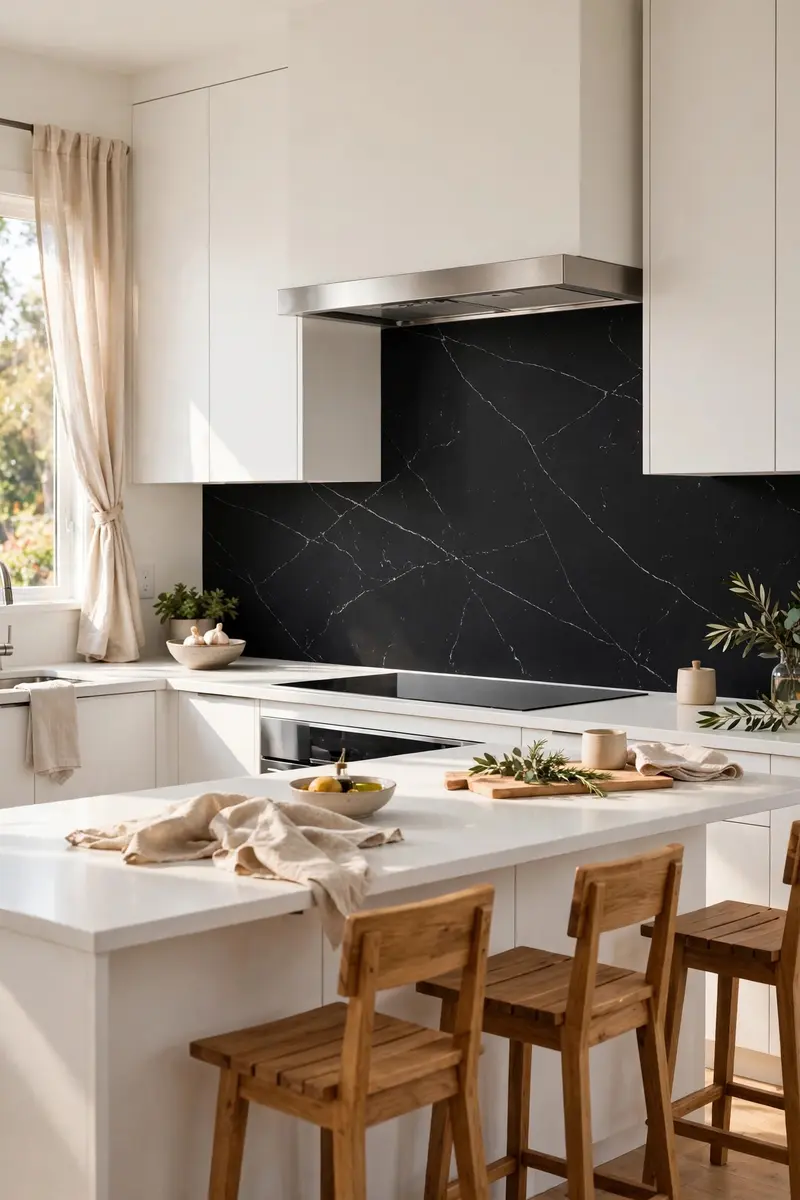
21. Matte Black Large-Format Porcelain Slab
Large-format porcelain slabs give you the seamless look of stone at a lower price and with almost no maintenance. A matte black slab with faint veining reads as a quiet, gallery-like backdrop — perfect if your white kitchen leans minimalist and you want the backsplash to whisper rather than shout.
Materials and cost: Black large-format porcelain slab, $25–$60 per square foot installed; a standard run costs $1,000–$2,500.
Porcelain slabs are thin and large, so handling and cutting need a pro with suction cups and a bridge saw. Plan seams carefully — ideally one seam hidden behind the range hood or at a corner. Porcelain is stain-proof and heat-resistant, so it is one of the few backsplash materials that truly asks nothing of you afterward.
Practical tip: Ask the installer to use a color-matched epoxy at seams, not white silicone — white lines across a black slab ruin the seamless effect.
Variation: Choose a porcelain slab with a soft marble veining print for the look of black marble without the sealing routine.
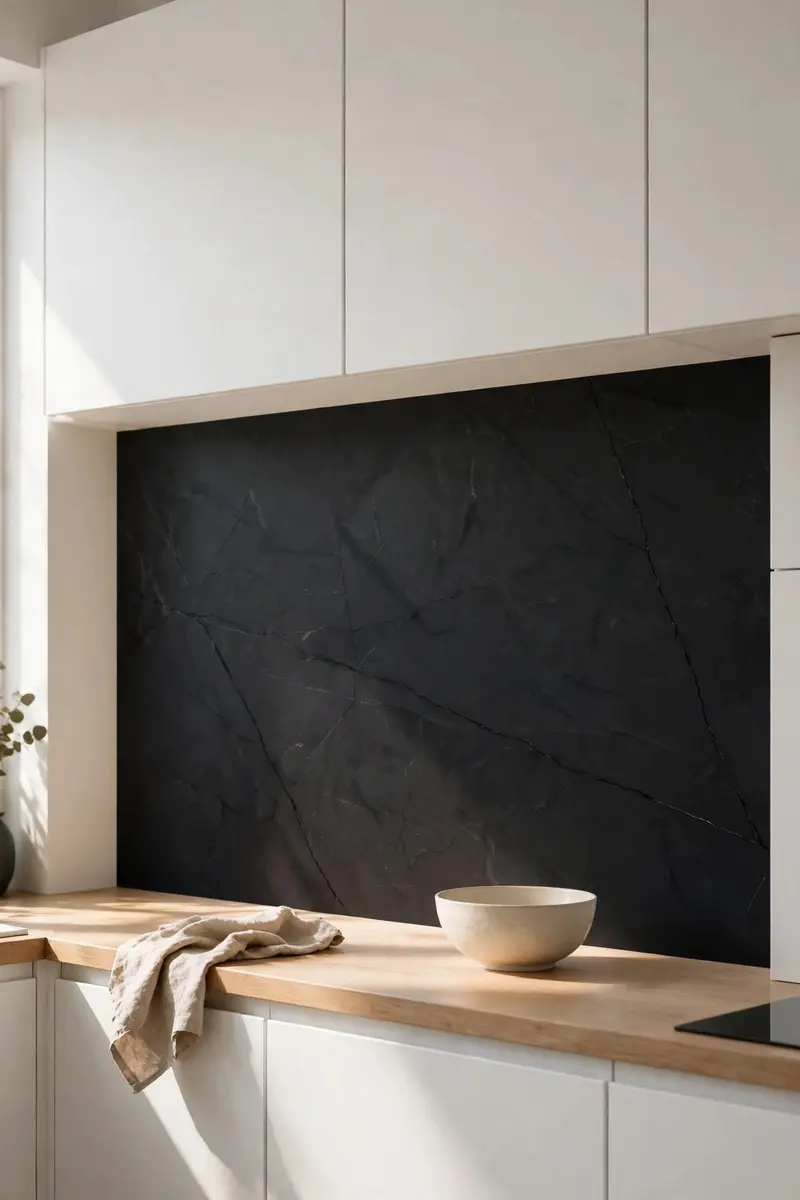
22. Black Pressed-Metal (Tin) Backsplash
Pressed-metal panels bring vintage charm and a subtle shine to a white kitchen. The embossed patterns — florals, geometrics, or simple grids — catch light beautifully, and the panels are lightweight, affordable, and easy to install over an existing wall. They suit farmhouse and vintage kitchens especially well.
Materials and cost: Black powder-coated tin panels, $10–$20 per square foot; materials $350–$700, plus adhesive and trim.
Metal panels cut with tin snips and glue directly to the wall with construction adhesive, so this is one of the most DIY-friendly options on the list. Seal the panel edges with matching metal trim, and wipe the surface with a damp cloth — avoid abrasive pads that can scratch the powder coating. Keep panels away from direct high heat behind the range, or back them with a cement board.
Practical tip: Paint the wall behind the panels black first — any tiny gap between panels will read as shadow, not as a white flash.
Variation: Use unpainted tin panels and let them age naturally for an industrial patina, or clear-coat them to freeze the look.
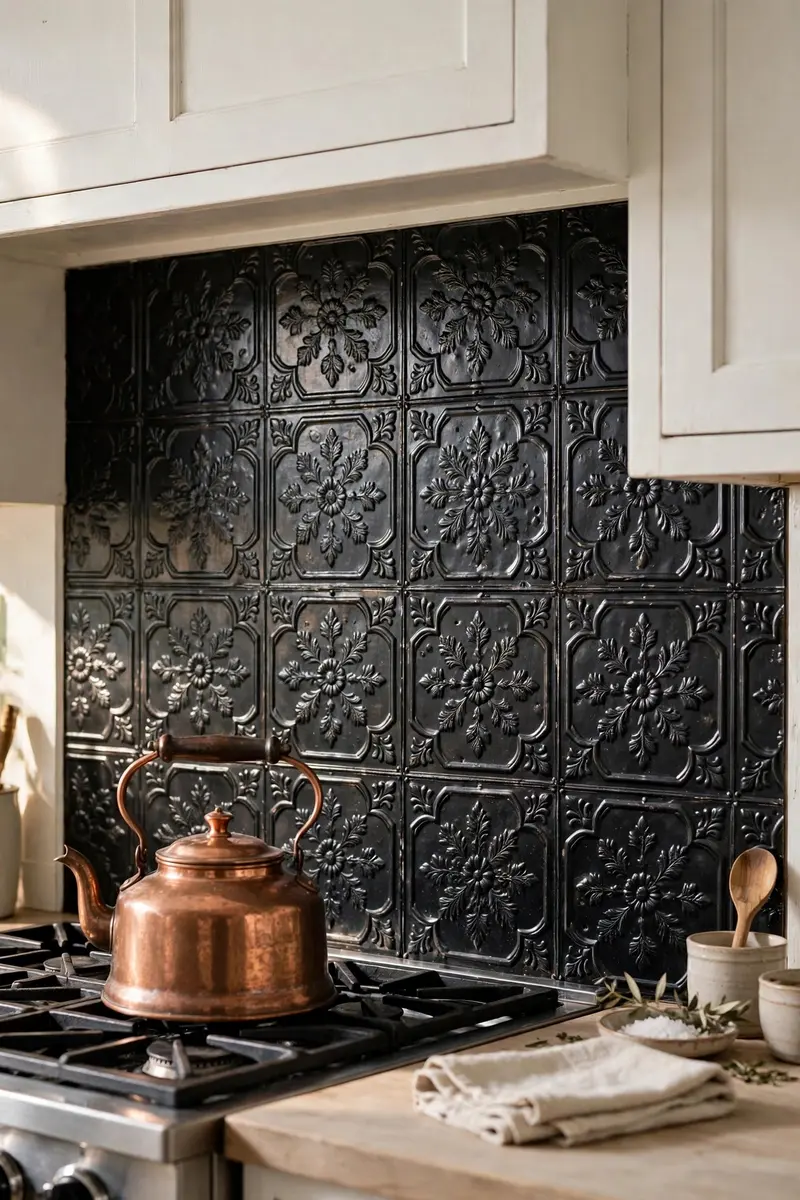
23. Black Subway Tile with Crisp White Grout
Flip the usual formula: black tiles, white grout. The white grout lines turn each tile into a crisp graphic unit, so the wall reads as a bold pattern rather than a solid block of black. It is a confident, modern look that photographs beautifully and suits contemporary white kitchens.
Materials and cost: Black ceramic subway tile, $4–$9 per square foot, plus white grout; materials $300–$700.
White grout on black tile shows every smudge during installation, so wipe tiles constantly as you grout and do a second clean pass once the grout hazes. Seal white grout lines with a penetrating grout sealer to slow staining from cooking grease — white grout behind a range works hard and needs that protection.
Practical tip: Use a grout release or sealer on the black tiles before grouting; white grout haze on black tile is far more visible than the reverse.
Variation: Use white grout only on the feature panel behind the range, and black grout on the side walls, for a framed artwork effect.
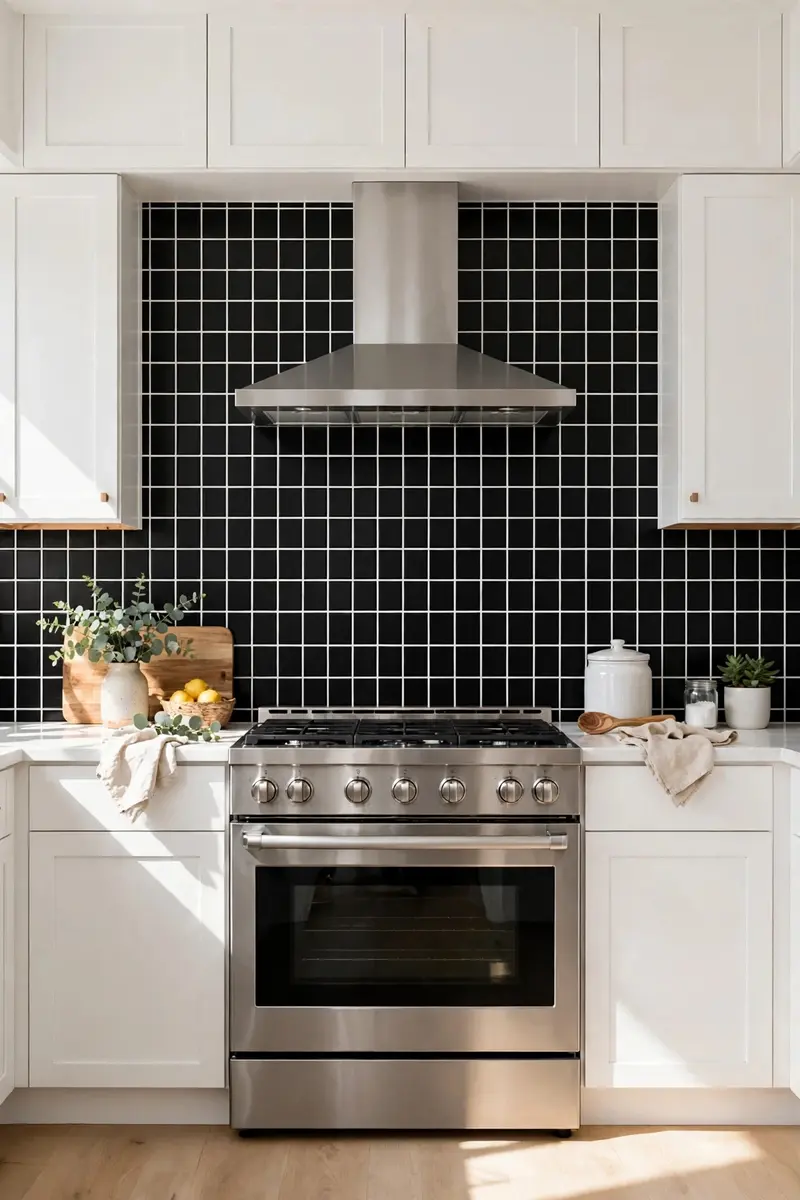
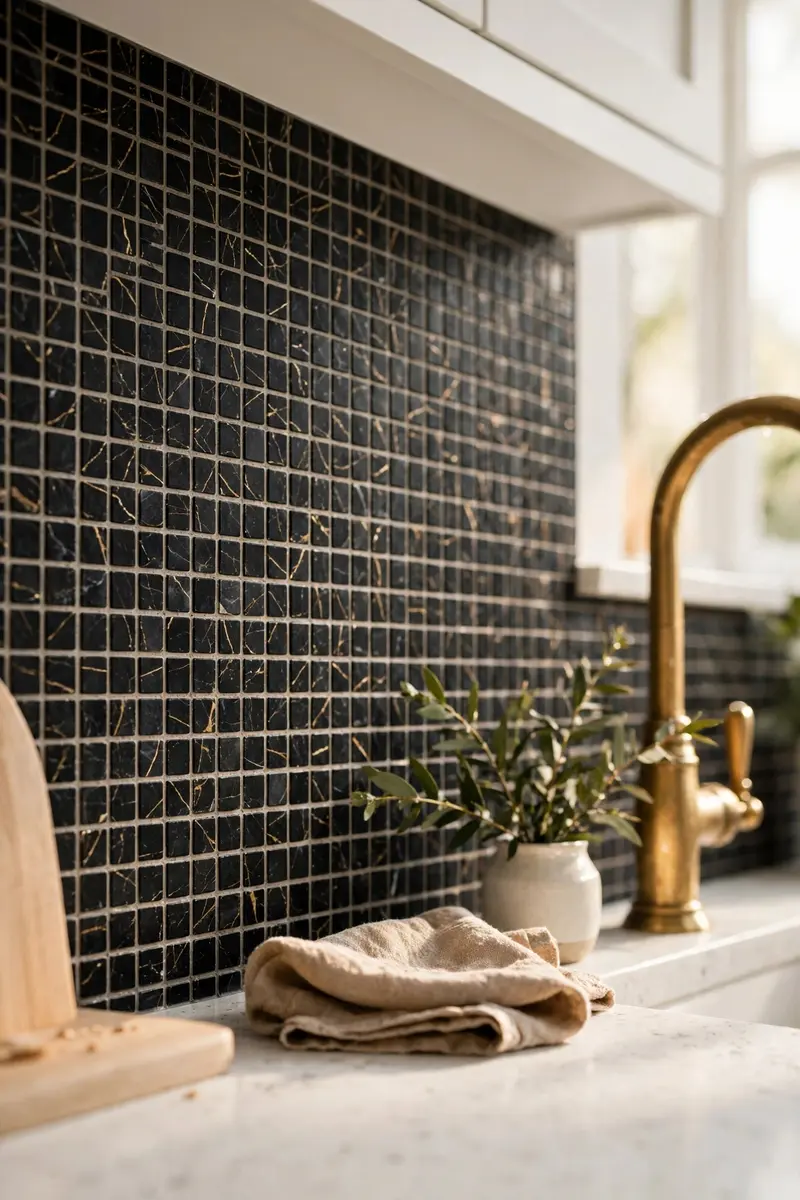
24. Black Marble Mosaic with Gold Veining
If plain black marble feels too severe, look for black marble mosaic with fine gold veining. The gold threads warm the whole wall and tie directly into brass fixtures, gold hardware, and warm wood tones — turning a monochrome kitchen into something that feels genuinely luxurious.
Materials and cost: Black-and-gold marble mosaic sheets, $15–$30 per square foot; materials $900–$1,800.
Marble mosaic needs the same care as marble slab: seal before grouting, grout with a non-staining grout, and seal again after. Keep the mosaic sheets aligned so the veining flows across sheet joints rather than breaking abruptly. Warm metallic fixtures nearby will pick up the gold veining and make the whole kitchen feel coordinated.
Practical tip: Test your sealer on a spare mosaic sheet first — some sealers slightly darken black marble, which is fine, but you want to see it before the whole wall changes.
Variation: Use the gold-veined mosaic only as a narrow accent strip between two rows of plain black tile for a jewelry-like detail.
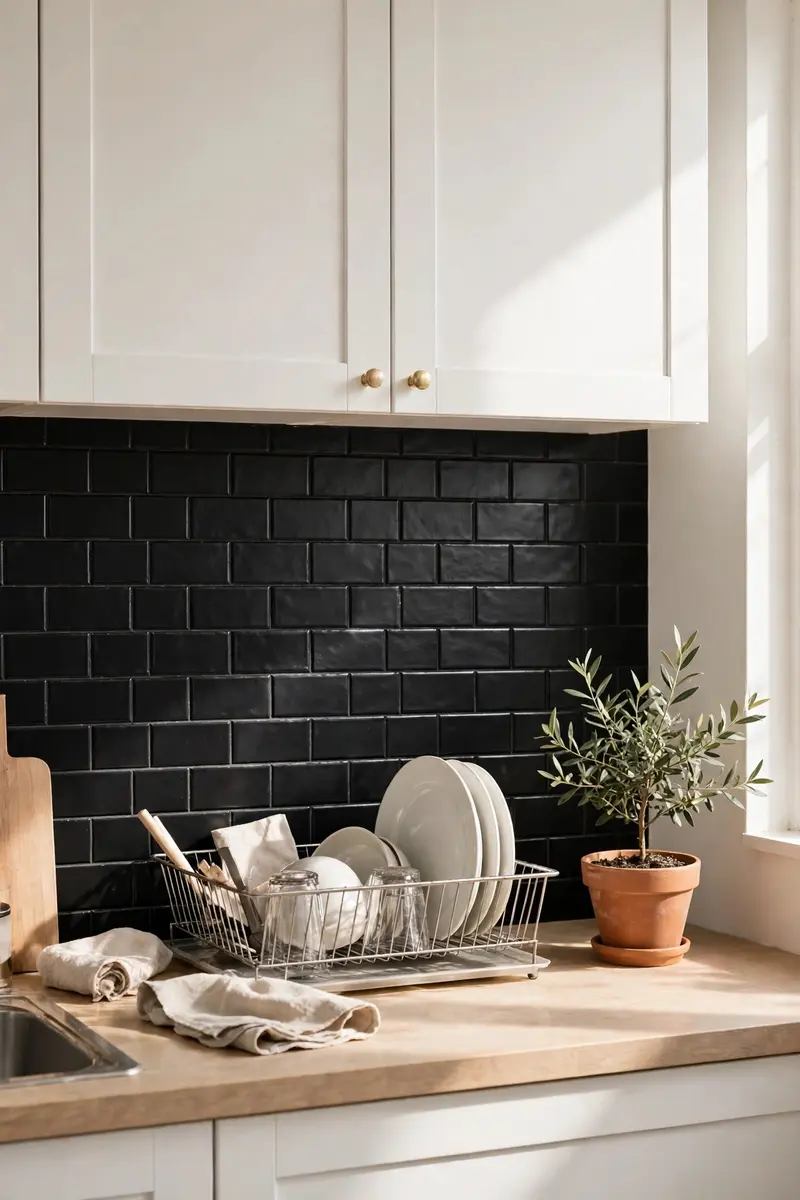
25. Renter-Friendly Black Peel-and-Stick Tile
Not ready to commit — or not allowed to tile? Peel-and-stick black tiles give renters and commitment-phobes the whole look for a fraction of the cost and effort, and they come off cleanly when you move. Modern peel-and-stick tiles look surprisingly convincing from normal viewing distance.
Materials and cost: Peel-and-stick black tile sheets, $3–$8 per square foot; a full backsplash costs $100–$300 total.
Clean and dry the wall thoroughly, then peel and press tiles on one at a time, smoothing from the center outward to push out air bubbles. A hair dryer softens the adhesive around outlets and corners for a tighter fit. When you remove them, warm each tile with the dryer first and peel slowly to protect the paint underneath.
Practical tip: Buy one extra pack and test a single tile behind the fridge for a week — if it holds through cooking steam, the rest will too.
Variation: Use peel-and-stick black tiles as a trial run for a pattern you are considering in real tile, like herringbone or checkerboard.
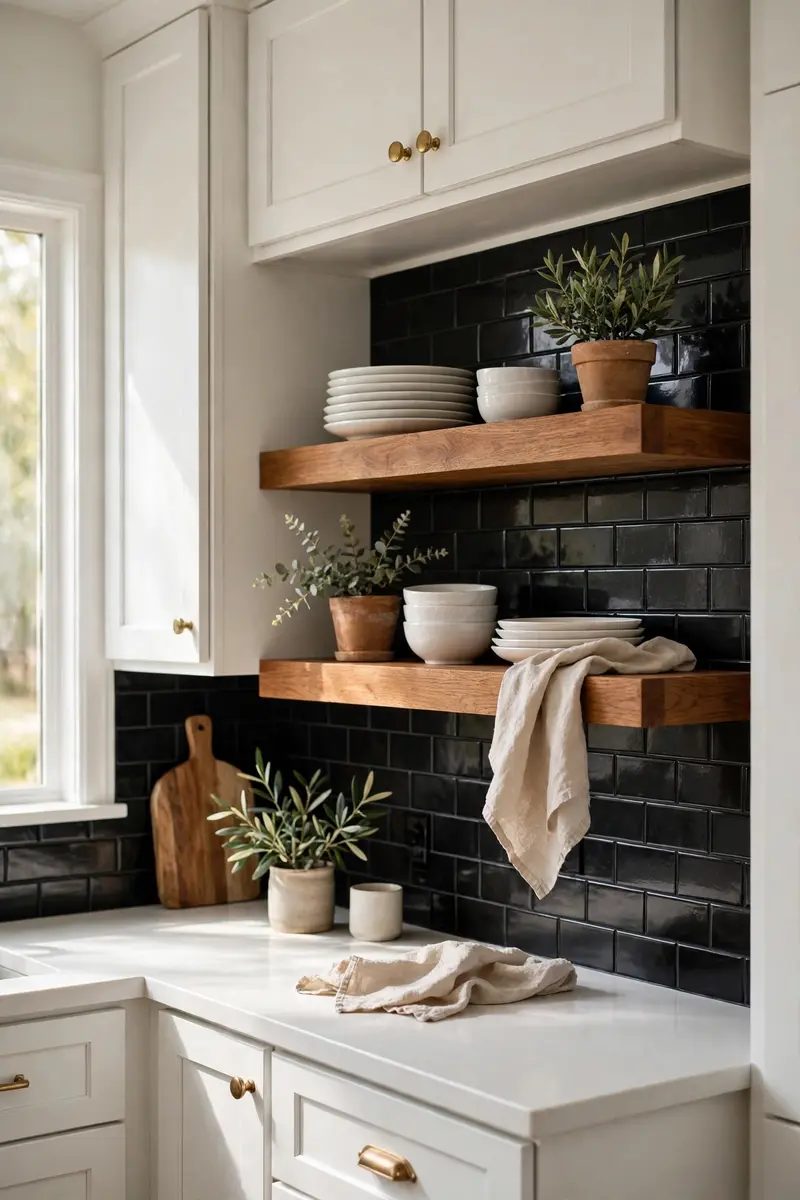
26. Black Backsplash with Open Wood Shelving
Open wood shelving softens a black backsplash instantly. The warm timber breaks up the dark wall, gives you a place for everyday dishes and plants, and stops the kitchen from feeling too stark. This pairing is a favorite in modern farmhouse and Scandinavian-inspired white kitchens.
Materials and cost: Black tile of your choice, plus 2–3 floating wood shelves at $40–$120 each with brackets; add $150–$400 to your tile budget.
Tile the full wall first, then mount shelves through the tile with masonry drill bits and heavy-duty anchors rated for the shelf load. Style shelves lightly — a few stacks of white dishes, a small plant, and one or two wooden boards — so the black tile still shows between objects. Leave breathing room; crowded shelves hide the backsplash you just paid for.
Practical tip: Drill tile with a diamond bit at low speed and no hammer action, or the tile will crack — practice on a spare tile first.
Variation: Use reclaimed wood shelves for a rustic feel, or pale oak for a lighter Scandinavian mood against the black wall.
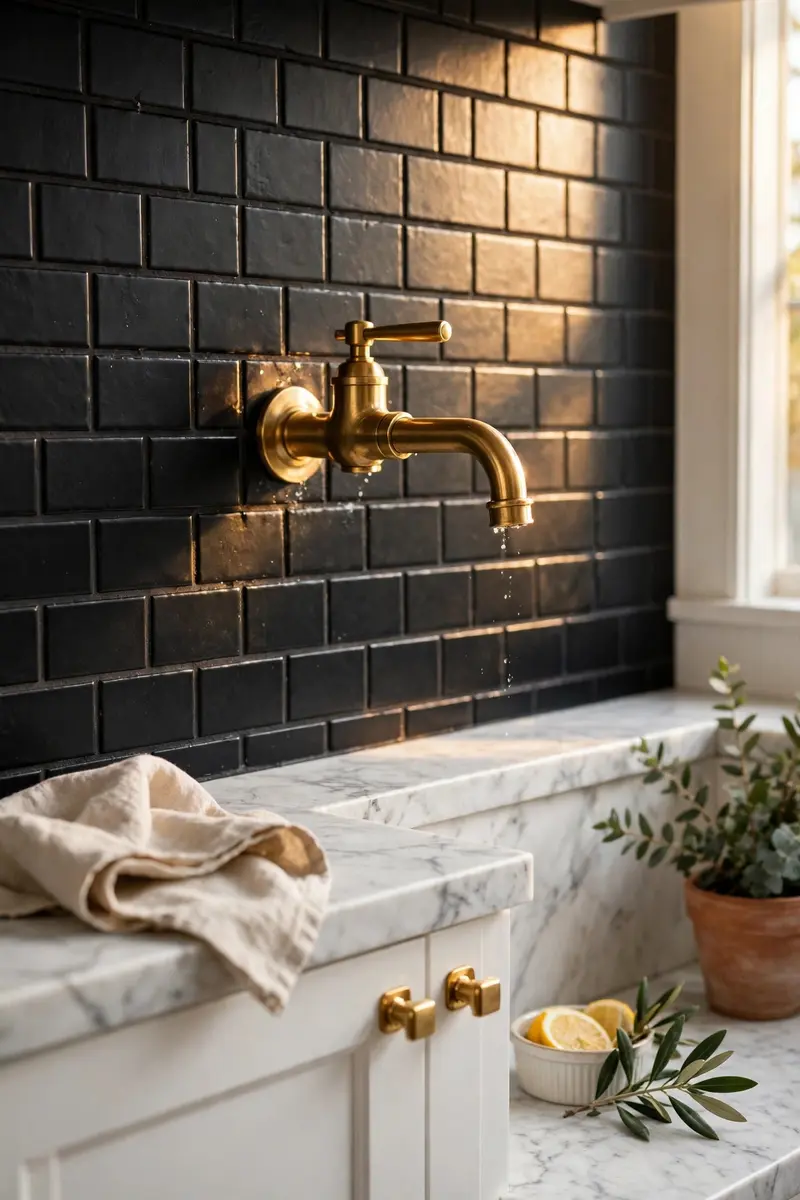
27. Black Backsplash with Brass Fixtures and Hardware
Brass is black tile’s best friend. Warm brass faucets, cabinet pulls, and pendant lights break up the monochrome palette and add a jewelry-like glow that makes the whole kitchen feel expensive. This is the easiest upgrade on the list if your black backsplash already exists and just needs warming up.
Materials and cost: Brass faucet, $150–$400; brass cabinet pulls, $3–$10 each; brass pendants, $80–$250 each.
You do not need to replace everything at once — start with cabinet pulls, since they are cheap and touch every cabinet door. Match the brass tone across fixtures (unlacquered brass patinas over time; lacquered brass stays bright) so the metals look intentional rather than mixed. Keep other metals to a minimum so brass stays the accent.
Practical tip: If your brass is unlacquered, embrace the patina — it deepens beautifully against black tile and looks more expensive over time, not less.
Variation: Try aged bronze instead of brass for a softer, more rustic warmth that still lifts the black wall.
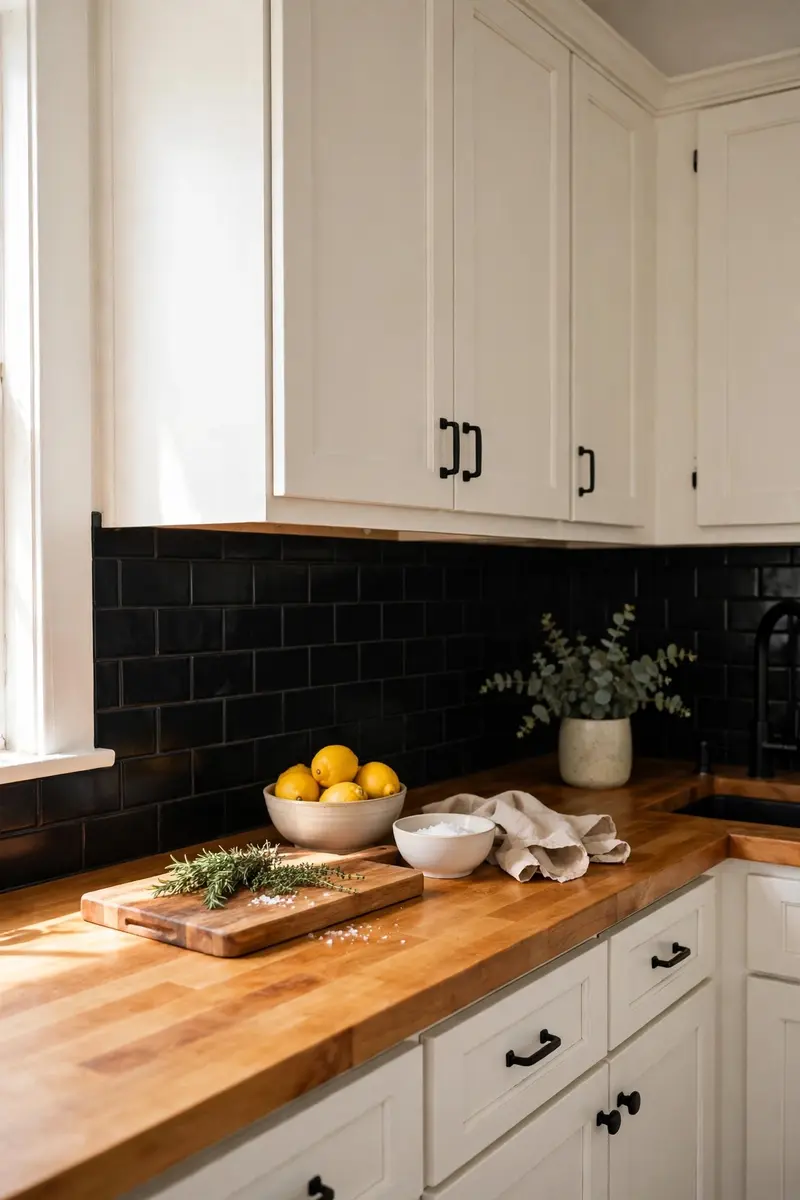
28. Black Backsplash with Butcher Block Counters
Butcher block counters are the warm counterweight a black backsplash needs. The honey-toned wood softens the contrast, adds organic texture, and keeps a white-and-black kitchen from feeling cold or formal. It is also one of the most affordable countertop materials you can buy.
Materials and cost: Butcher block countertops, $30–$60 per square foot; a standard kitchen runs $800–$2,000, plus food-safe oil finish.
Oil butcher block before first use and re-oil monthly in the first year, then every few months after — it takes ten minutes and keeps the wood from drying out. Keep the wood sealed near the sink with extra coats, and use cutting boards for raw meat rather than cutting directly on the counter. The wood will develop small marks over time; most owners consider that part of the charm.
Practical tip: Sand out stains and knife marks with 220-grit sandpaper and re-oil — unlike stone, butcher block is fully repairable at home.
Variation: Use butcher block only on the island and keep white quartz on the perimeter for a two-material kitchen that is both warm and practical.
29. Black Backsplash in a Small Galley Kitchen
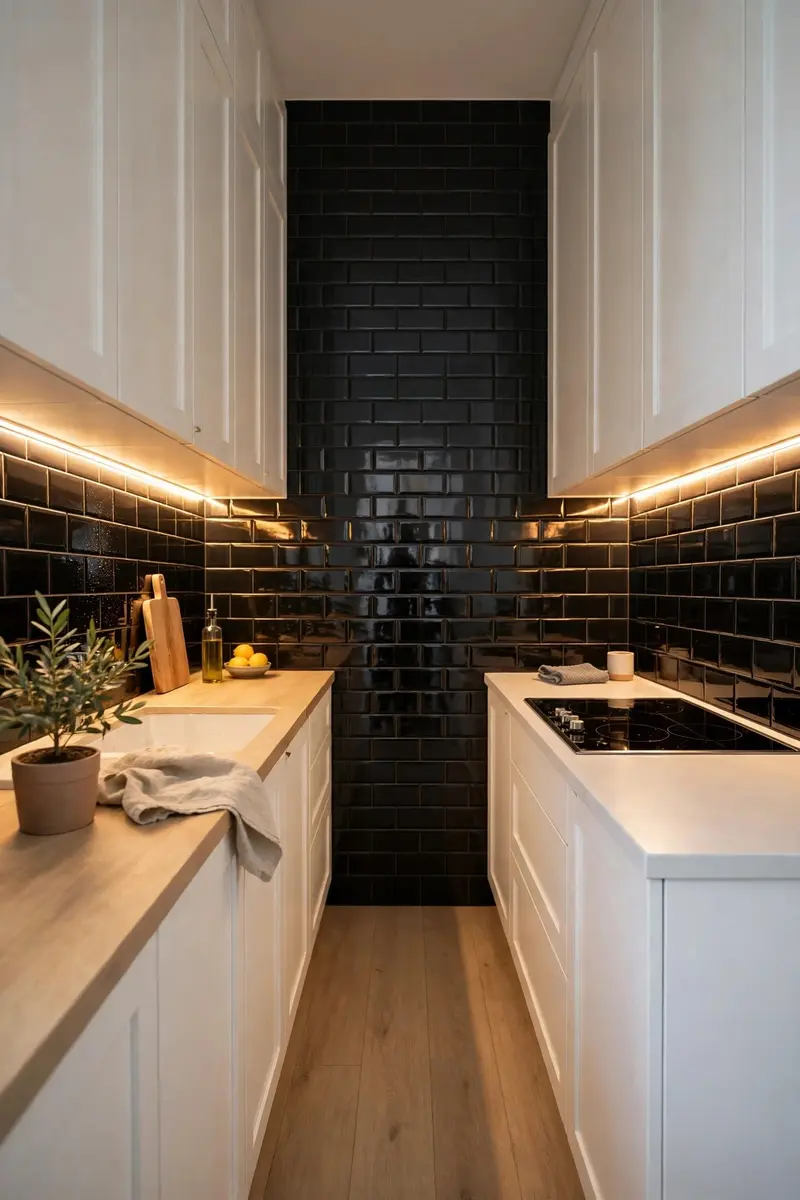
Small kitchens benefit from black backsplashes more than people expect — if you handle the light correctly. A glossy black tile with under-cabinet lighting, a mirrored or glass element, and white uppers creates depth rather than darkness, and the dark wall actually makes the white cabinets pop forward.
Materials and cost: Glossy black tile, $4–$10 per square foot, plus LED under-cabinet strips at $20–$60 per strip; materials $350–$800.
In a galley, run the tile the full height to the underside of the cabinets with no visual breaks, and add LED strips under every upper cabinet — this is non-negotiable in a small dark-walled kitchen. Keep counters light and clutter-free, and choose a glossy or glass tile so the wall reflects light instead of absorbing it. A large mirror or glass-front cabinet door on one wall doubles the sense of space.
Practical tip: In a galley, always choose glossy over matte black tile — matte absorbs the little light you have, glossy returns it.
Variation: Tile only the range wall in black and keep the sink wall white for a balanced look that still delivers the drama. For more small-space thinking, see our small apartment decor ideas — many of the same light-and-scale tricks apply.
30. Full-Height Black Backsplash to the Ceiling
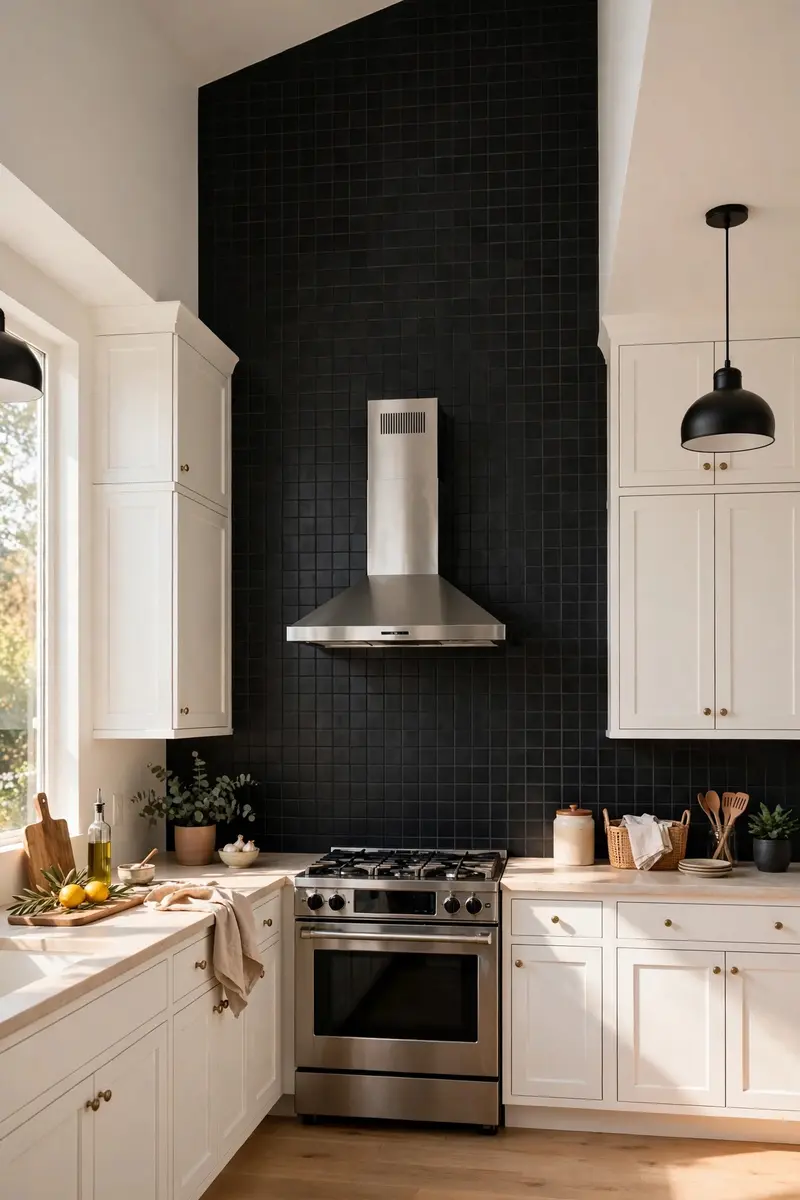
For maximum drama, take the black tile all the way from the countertop to the ceiling. Full-height tiling turns the backsplash into a feature wall, makes ceilings feel taller, and looks especially striking around a range hood or in a kitchen with open shelving instead of upper cabinets.
Materials and cost: Black tile of your choice; full-height tiling roughly doubles the tile area versus a standard 18-inch backsplash, so budget $700–$1,800 in materials for most kitchens.
Plan the layout so a full tile — not a sliver — lands at the ceiling line, adjusting the starting row if needed. Use a tile leveling system on tall runs, since any unevenness compounds over height. If you have a range hood, tile behind it fully rather than stopping at the hood line; the continuous wall looks far more intentional.
Practical tip: Start full-height tiling from a perfectly level line at the countertop, not from the ceiling — ceilings are rarely level, and the eye forgives a cut at the top more than a crooked bottom row.
Variation: Run full-height black tile on the range wall only, and keep standard-height tile elsewhere, so the drama has a clear focal point. If you are renovating on a tight budget overall, our DIY home decor ideas on a budget can help you save elsewhere to fund the tile.
Frequently Asked Questions
Does a black backsplash make a white kitchen look smaller?
It can, but only if the kitchen is already dark. In a white kitchen with good lighting — a window, under-cabinet LEDs, or both — a black backsplash adds depth that actually makes the room feel more designed, not smaller. Glossy and glass tiles reflect light and are the safest choice for small or windowless kitchens.
What grout color works best with black backsplash tiles?
Black grout makes the wall read as one seamless panel and hides stains, which is why it is the most popular choice. Dark grey grout softens the look slightly and still hides dirt well. White grout turns the tile pattern into a graphic feature but needs sealing and more cleaning, especially behind the range.
Is a black backsplash hard to keep clean?
Not really — and in some ways it is easier than white tile, since it hides cooking splashes and stains. Glossy and glass tiles wipe clean in seconds. Matte and natural stone tiles need sealing, and they show dust and water spots more, so wipe them with a damp cloth once a week to keep them looking sharp.
What countertop pairs best with a white kitchen and black backsplash?
White quartz or marble keeps the tuxedo look crisp and bright, while butcher block adds warmth and softens the contrast. Black granite or quartz matched to the backsplash creates a dramatic monochrome sweep. Avoid a busy patterned countertop with a busy patterned tile — pick one star and let the other play a supporting role.
Will a black backsplash go out of style?
Black and white is one of the oldest pairings in interior design, and it has survived every trend cycle from Art Deco to modern farmhouse. Tile shapes and finishes trend in and out — herringbone and kit-kat tiles are popular in 2026 — but the core combination of white cabinets and a black backsplash stays timeless, especially in classic shapes like subway and hexagon tile.
Conclusion
A white kitchen with black backsplash ideas gives you the best of both worlds: the brightness and timelessness of white cabinets plus the drama and definition of black tile. Whether you go for a budget-friendly peel-and-stick trial, a classic glossy subway tile, or a full black marble slab, the formula works because the contrast is built in — you just choose how bold, how textured, and how warm you want it to feel. For more black-and-white inspiration, browse HGTV’s black and white room ideas before you order samples, and remember to test your top two or three tiles in your own kitchen light before committing. Found a favorite? Save this post to Pinterest so you have it handy on tile-shopping day.