
40 DIY Halloween Doormat Ideas: Spooky Ways to Wow
Your front door sets the tone for everything behind it, and nothing greets trick-or-treaters quite like a hand-painted mat. These DIY Halloween doormat ideas turn a plain $5–$12 coir mat into the star of your porch — no artistic talent required, just acrylic paint, a stencil, and an hour on a sunny afternoon. Below you’ll find 40 genuinely different designs: spooky sayings, cute ghosts, layered-rug looks, and technique tricks that keep the paint from bleeding. Every single one costs under $15 in supplies, most under $10. And once your mat is done, style the rest of your entry with our Halloween porch decor ideas for a doorstep that stops traffic.
1. Pounced Ghost Parade Mat
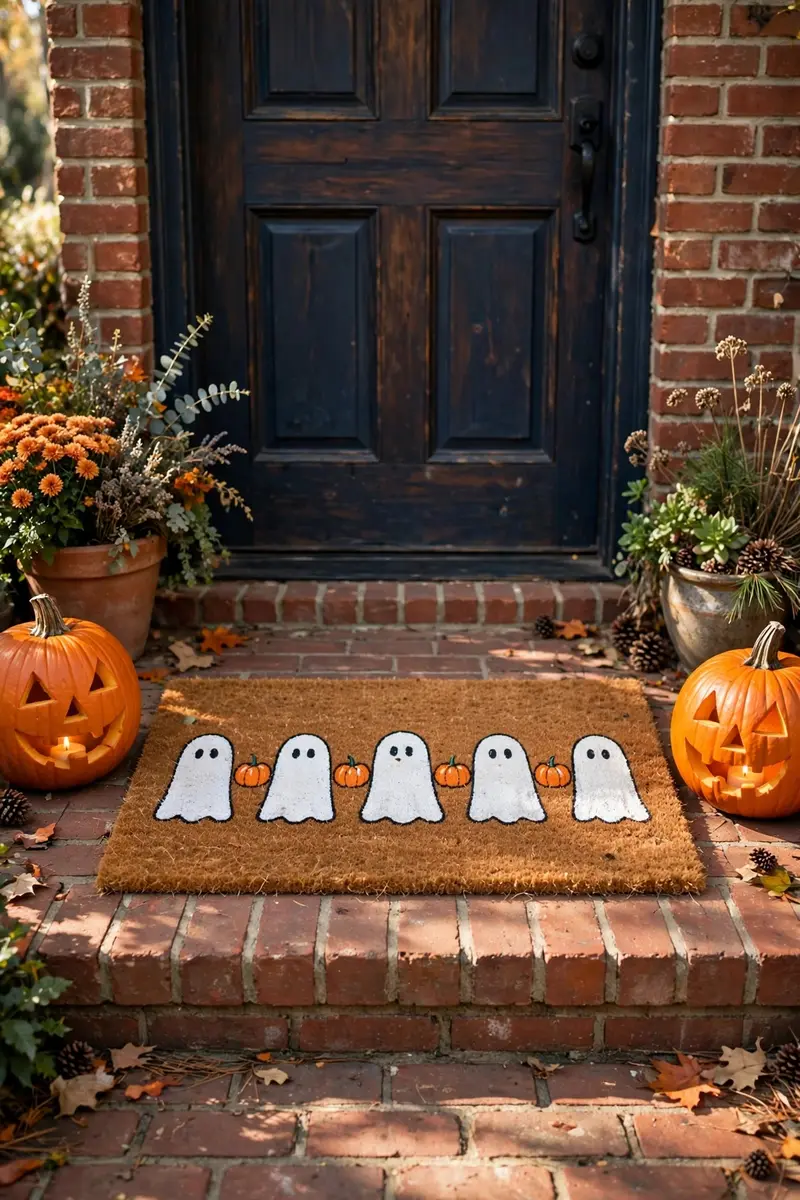
A row of chubby hand-painted ghosts marching across a natural coir mat is the friendliest way to say “happy haunting.” This painted Halloween doormat works because ghosts are forgiving shapes — wobbly edges read as charm, not mistakes. Materials: blank coir doormat ($8–$12), white and black outdoor acrylic paint, one stencil brush, chalk for sketching. Sketch rounded ghost shapes with chalk first, then pounce the white paint straight up and down so it sinks into the fibers; two thin coats beat one gloopy coat. Once dry, dot on black eyes and tiny mouths. Tip: load less paint than you think — dabbing off the excess on cardboard first is what stops bleed on coir. Variation: add orange mini pumpkins between the ghosts for a parade-with-pumpkins look.
2. Crescent Moon and Bat Spray-Stencil Mat
Nothing says Halloween night like a glowing moon ringed with bats, and spray paint makes this design almost effortless. This DIY Halloween doormat idea suits beginners because stencils do the hard work — you just mist light coats. Materials: blank doormat, cardstock for stencils, black and white spray paint, craft knife, painter’s tape. Cut a large circle (the moon) and bat silhouettes from cardstock, tape them down, and spray several whisper-light coats, letting each dry. Remove the stencils to reveal a crisp moon-and-bats scene. Tip: tape the stencil edges firmly and spray from 8–10 inches away — the number-one cause of blurry edges is spraying too close. Variation: add tiny star dots with a toothpick dipped in white paint around the moon.

3. Witch Better Have My Candy Mat
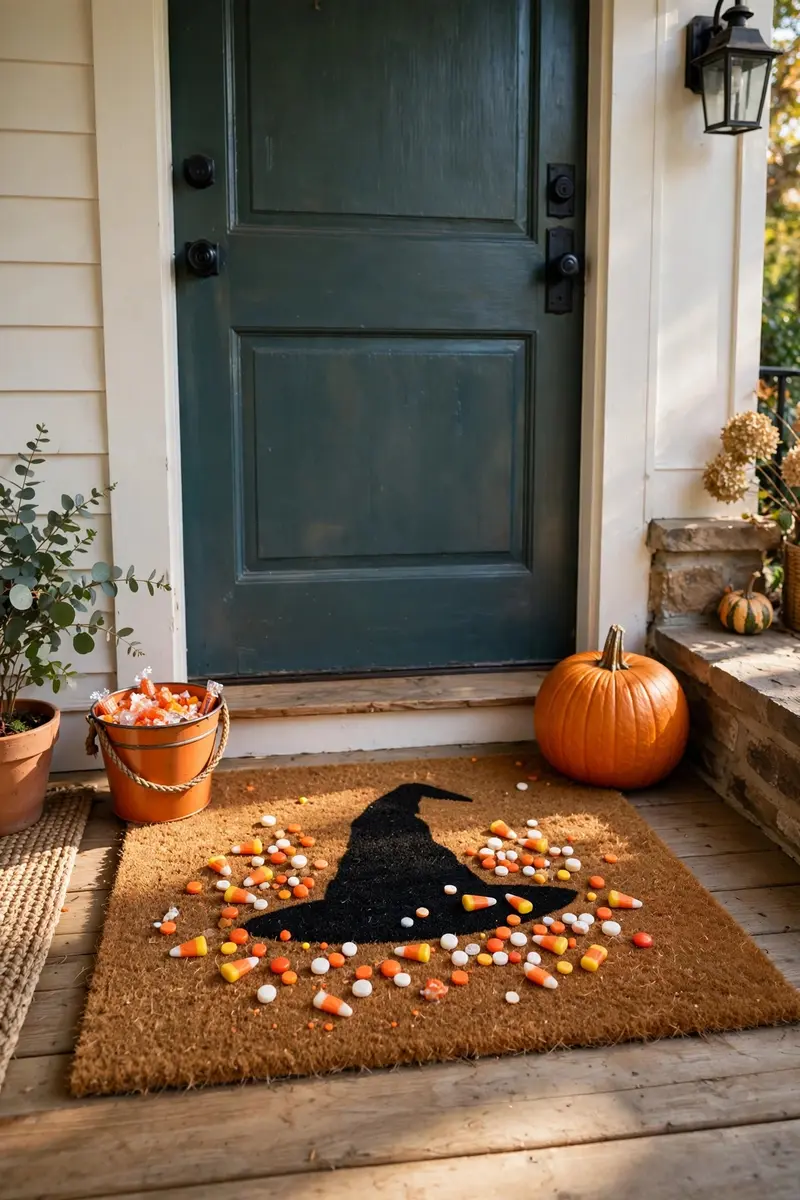
This cheeky saying mat is pure porch personality — guests will be laughing before they knock. Lettering doormats are the easiest entry point because the words ARE the decoration; no drawing skills needed. Materials: blank mat, alphabet stencils or printed lettering, black craft paint, sponge stamper, small detail brush. Position your letters with tape guides (work bottom-up so spacing stays even), stamp lightly with the sponge, then sharpen edges with the detail brush once dry. Tip: choose letters at least 3 inches tall — small letters disappear on rough coir and are much harder to fill cleanly. Variation: add a candy-corn border along the bottom edge for extra sweetness.
4. Creep It Real Gothic Mat
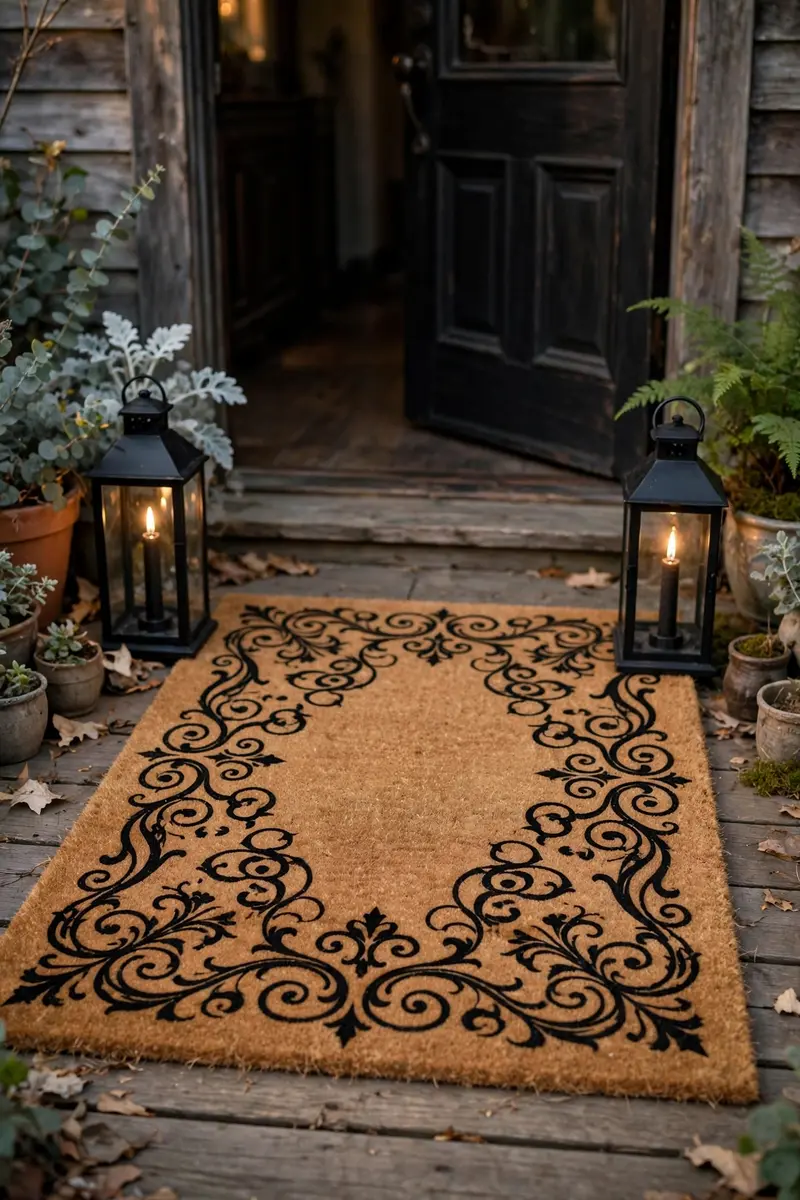
Channel haunted-house typography with tall gothic letters and a flourish or two. This Halloween doormat saying works on elegant porches too — the fancy script makes the pun feel sophisticated. Materials: blank mat, printed gothic-font lettering (chalk-transfer method), white chalk, chalk markers or acrylic paint, painter’s tape. Print your wording in a bold gothic font, scribble chalk on the back of the paper, tape it to the mat, and trace firmly over the letters; the chalk transfers as your guide. Fill in with paint or chalk markers. Tip: outline each letter before filling — an outline hides wobbles and makes the text readable from the sidewalk. Variation: curve the text in an arch instead of a straight line.
5. Here for the Boos Mat
A wine-pun mat is perfect for your October dinner parties and adult Halloween gatherings. This design pairs a cute ghost with an unmistakable message, and guests always photograph it. Materials: blank mat, white and black paint, stenciled or freehand ghost, painter’s tape for lettering guides. Paint a simple ghost holding a wine glass (two shapes: ghost body + triangle glass), then add the saying in casual script beneath. Keep the ghost’s face friendly — this mat is playful, not scary. Tip: paint your lettering first, then position the ghost art around it so the composition stays balanced. Variation: swap the wine glass for a candy bucket to make it kid-friendly.

6. Stay Spooky Layered Mat
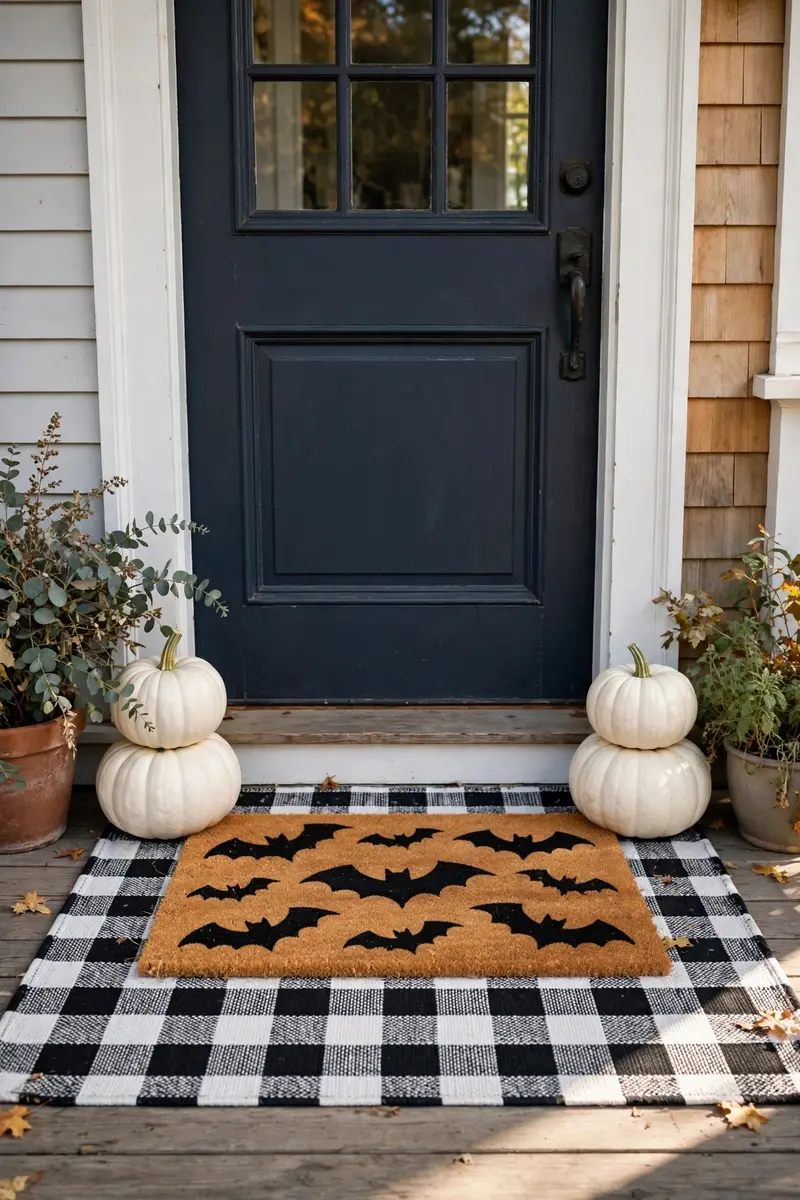
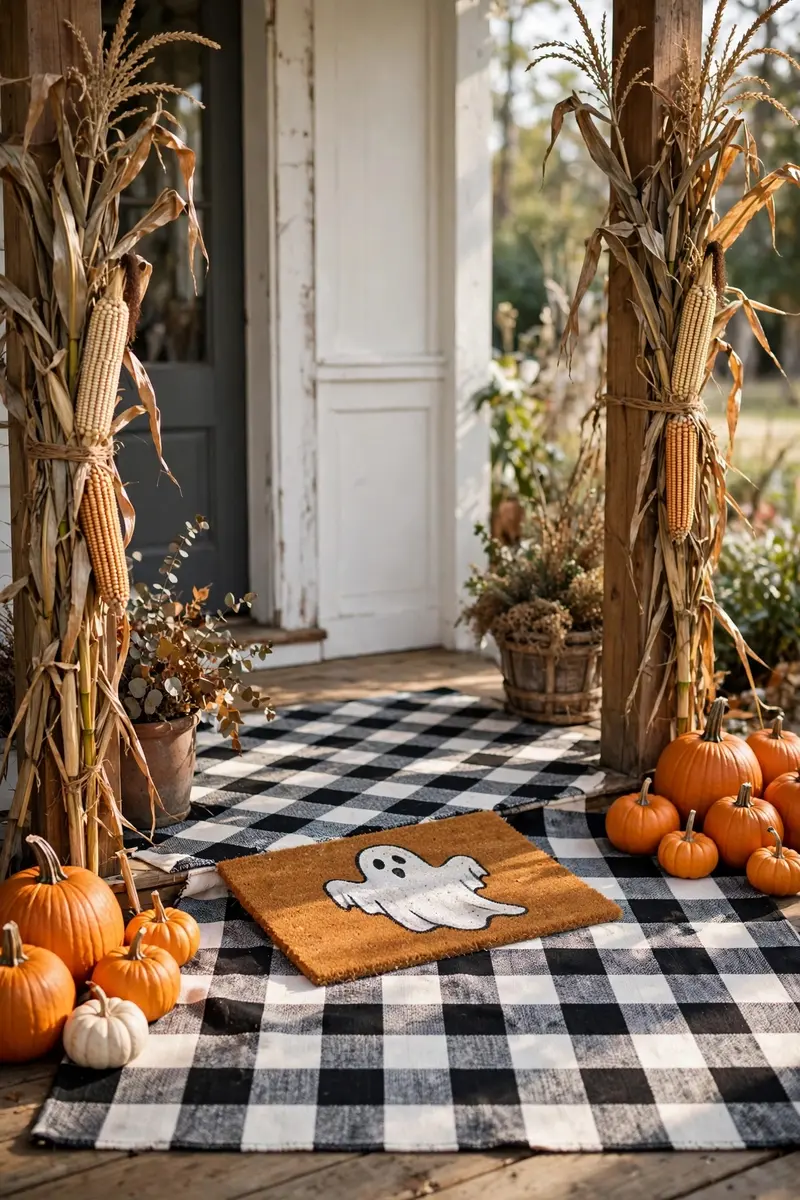
Layering is the Pinterest trick that makes a $10 mat look like a $60 styled entry: a smaller Halloween mat centered over a larger patterned rug. This layered Halloween doormat look adds depth and color your porch was missing — see how it pairs with the wreath-and-lantern combos in our Halloween door decor ideas. Materials: Halloween doormat (painted or store-bought), larger outdoor rug in black-white check or orange plaid ($15–$25), lanterns. Center the mat exactly with your door handle and let 4–6 inches of the base rug show on every side. Swap the base rug’s pattern for instant seasonal refreshes. Tip: put double-sided outdoor tape under the corners of the top mat — layered mats slide on smooth concrete. Variation: use a buffalo-check base in October and a solid orange one for late fall.
7. Enter If You Dare Mat
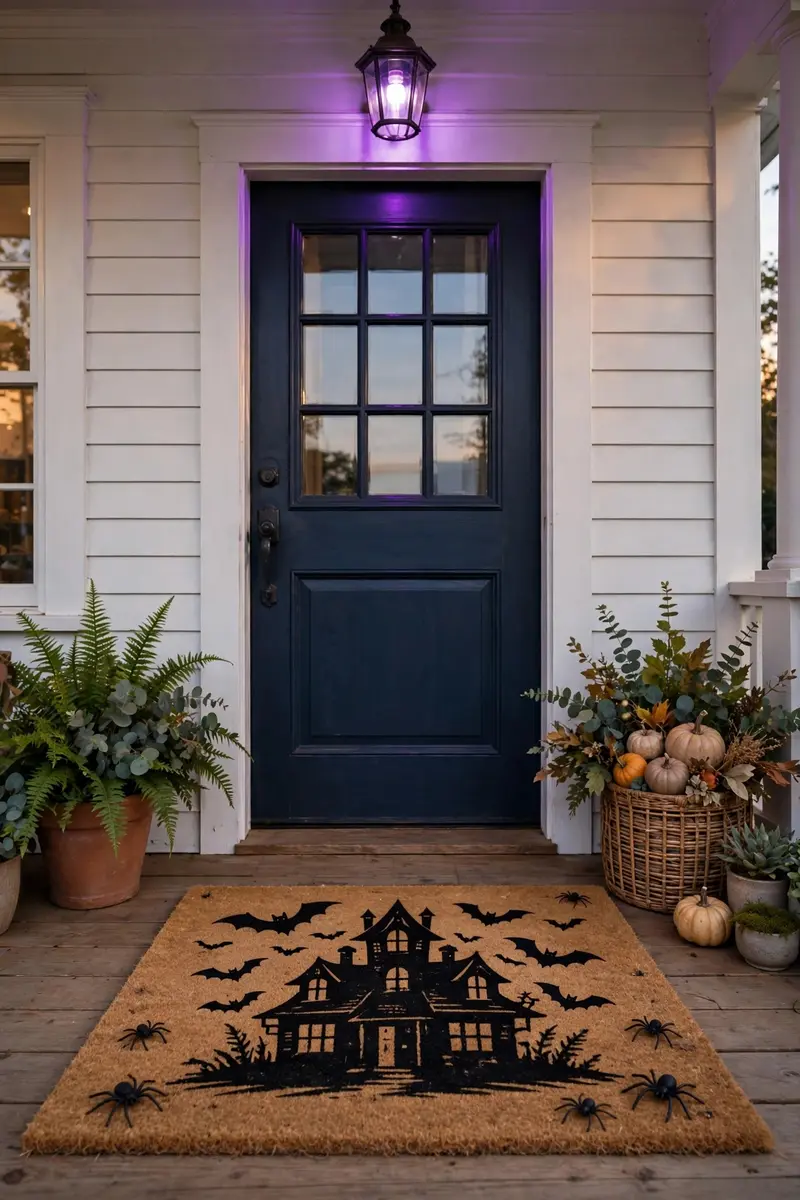
Turn your doorway into a haunted-house entrance with this bold warning mat. It works because it plays with expectations — a forbidding message on the most welcoming object in your home. Materials: blank mat, black paint, bat stencils, haunted-house silhouette stencil or freehand outline. Paint “ENTER IF YOU DARE” in bold capitals across the center, then stencil bats flying up from the corners and a tiny haunted house on one side. Tip: purple or amber porch bulbs at night make this mat look genuinely eerie after dark — swap one bulb for October. Variation: scatter a few plastic spiders near the mat’s edge so the warning feels interactive.
8. Unwelcome Script Mat
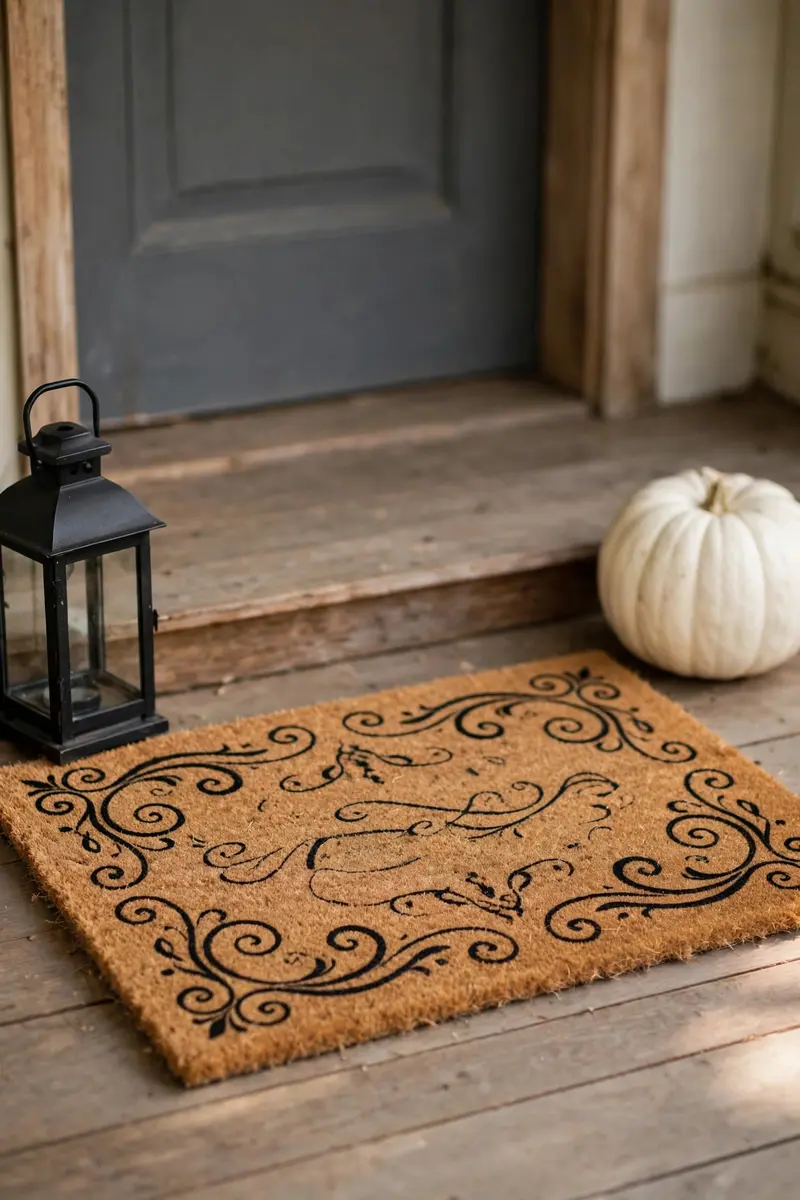
Replace “welcome” with “unwelcome” in an elegant formal script and watch guests do a double-take. The joke lands because the fancy lettering contradicts the grumpy message — it’s sophisticated sarcasm at your door. Materials: blank mat, black paint, script-font lettering template, detail brush. A high-density coir mat holds fine script lines crisply; cheap loose-weave mats blur them. Paint the single word large and centered, then keep surrounding decor minimal — one white pumpkin, one lantern. Tip: check your door clearance before buying a thick coir mat — a mat that catches the door ruins the joke fast. Variation: add “go away” in tiny letters in the corner for extra grump.
9. Resting Witch Face Mat
Sassy, modern, and endlessly quotable — this mat is made for the witchy friend in every group. The attitude is the whole design, so the painting stays simple. Materials: blank mat, black and purple paint, witch-hat silhouette stencil, lettering template. Stencil a witch hat in one corner, then letter the saying in bold mixed-case across the center. A pop of purple on the hat band keeps it from looking flat. Tip: seal just the lettering with clear outdoor sealer — black script is the first thing to fade in afternoon sun. Variation: pair it with a pair of striped witch socks draped over a nearby pumpkin for a full sassy vignette.

10. Trick or Treat Yo Self Mat
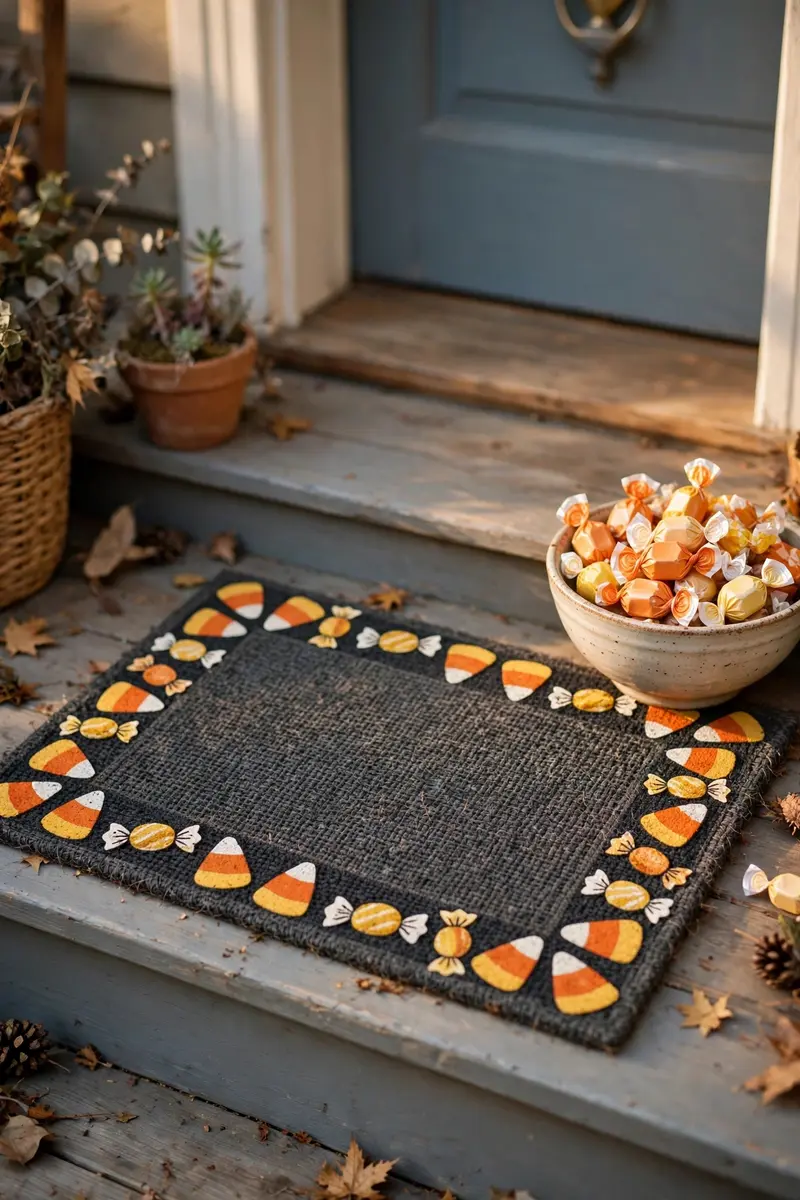
Borrow the internet’s favorite self-care phrase and give it a candy-coated Halloween twist. This painted Halloween doormat is a guaranteed smile for every trick-or-treater — and every tired parent. Materials: blank mat, orange, black, and white paint, lettering stencils, candy-shape stamps or sponges. Letter the phrase big and centered, then stamp candy corn and wrapped-candy shapes around the border. The candy border is forgiving: stamp shapes are basically blobs with stripes. Tip: use a different sponge per color so your orange candies don’t turn muddy from leftover black paint. Variation: make it a family mat by stamping each kid’s initial inside one candy.
11. Black Cat Silhouette Mat
A sleek black cat arched across your mat is Halloween elegance — spooky without a drop of gore. Cats are also one of the easiest silhouettes to stencil: one smooth curved shape. Materials: blank mat, black paint, cat silhouette stencil (print and cut from cardstock), orange accent paint. Tape the cat stencil in a prowling pose, pounce black paint around it, then add a crescent moon in orange behind the cat for contrast. Tip: an arched-back pose reads “Halloween cat” instantly; a sitting pose can read as just-a-cat. Variation: add glowing yellow eyes with two tiny paint dots — spooky at night, subtle by day.

12. Jack-o’-Lantern Trio Mat
Three grinning pumpkin faces across your mat echo the jack-o’-lanterns on your steps — it’s a coordinated look in one project. This design is wonderfully kid-friendly; let little ones pick the face expressions. Materials: blank mat, orange, black, and green paint, circle template or bowl to trace, detail brush. Trace three big circles, paint them orange, then add triangle eyes, nose, and jagged smiles in black. Green stems and a few painted leaves finish the patch. Tip: paint the orange circles first and let them dry fully before adding faces — wet orange bleeds into black and turns brown. Variation: make each pumpkin a different “mood” — happy, silly, surprised.

13. Skeleton Hand Border Mat
Bony hands reaching in from the mat’s edges look like something is trying to escape from under your porch. Deliciously creepy, and the hands are just five-finger shapes — no anatomy degree needed. Materials: blank mat, white and gray paint, hand template (trace your own hand!), detail brush. Trace hand shapes at the mat’s edges, paint them bone-white with gray shading between the “bones,” and leave the center empty or add a simple “HELP” in the middle. Tip: trace a real hand for the stencil — it looks creepier and more realistic than any cartoon hand you could draw. Variation: paint the hands black instead of white for a shadow-monster version.

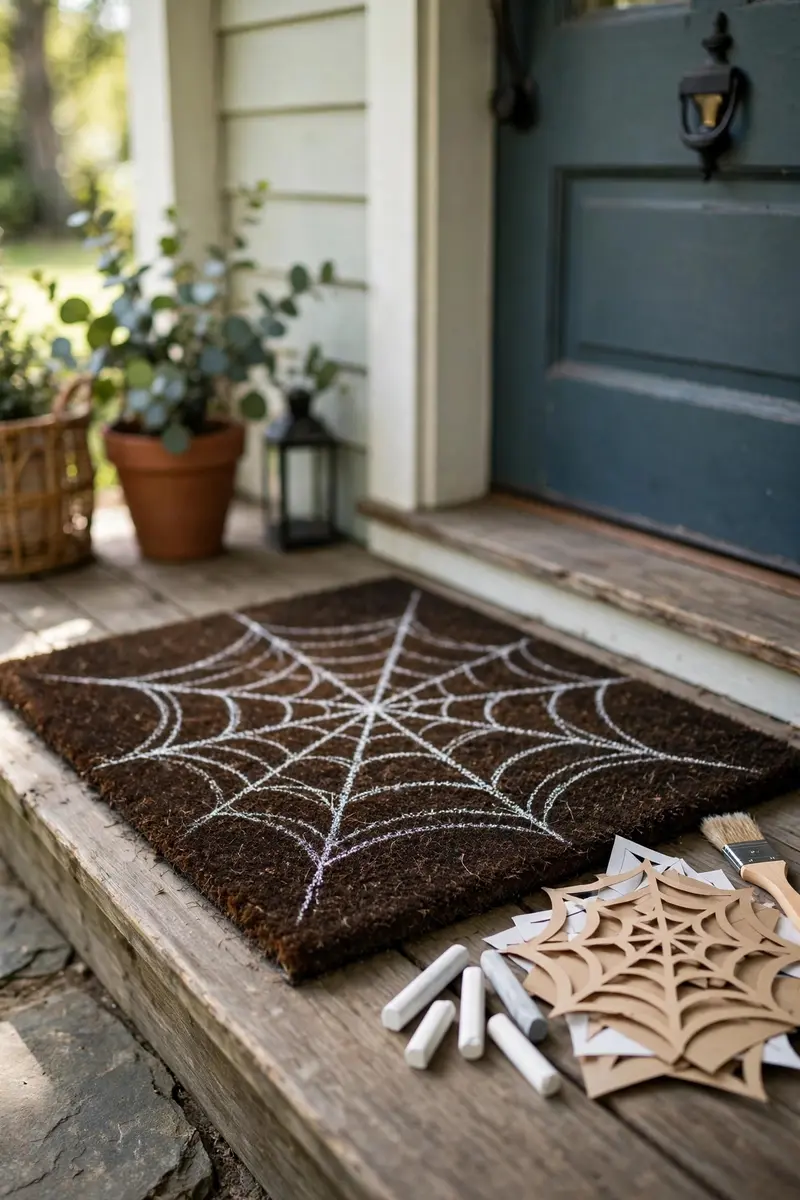
14. Spiderweb Corner Mat
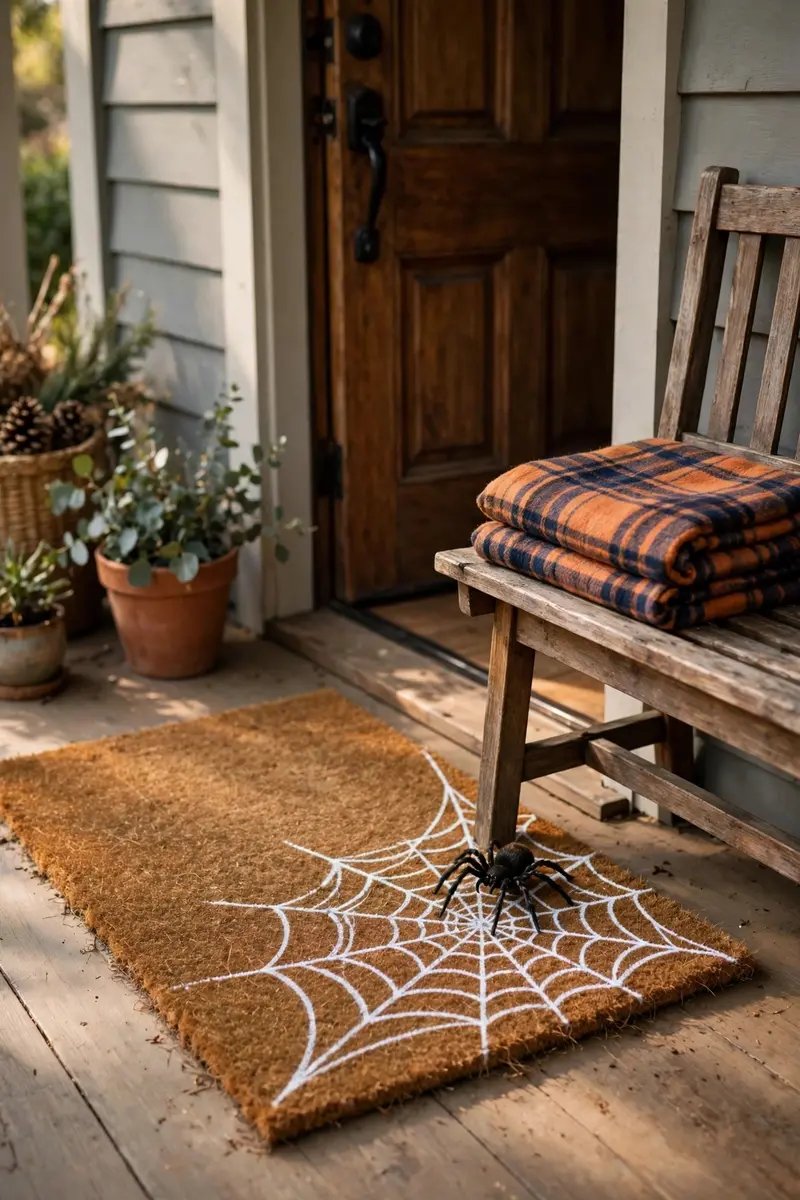
A giant web spun across one corner of your mat, with a fat spider rappelling down, is classic Halloween with almost zero painting skill required. Webs are just straight lines and arcs — ruler optional. Materials: blank mat, white paint (or black on a light mat), thin brush or paint pen, spider stencil or plastic spider glued on. Paint radiating lines from the corner, connect them with swooping arcs, and perch your spider at the end of one strand. Tip: a 3D plastic spider glued to the painted web looks ten times better than a painted one — grab a bag from the dollar store. (A viral TikTok version of this idea used a Dollar Tree mat and a paint marker — see the spider web rug DIY on Apartment Therapy for the cut-out variation.) Variation: paint the web in metallic silver paint for a shimmery moonlit effect.
15. Witch Hat Row Mat
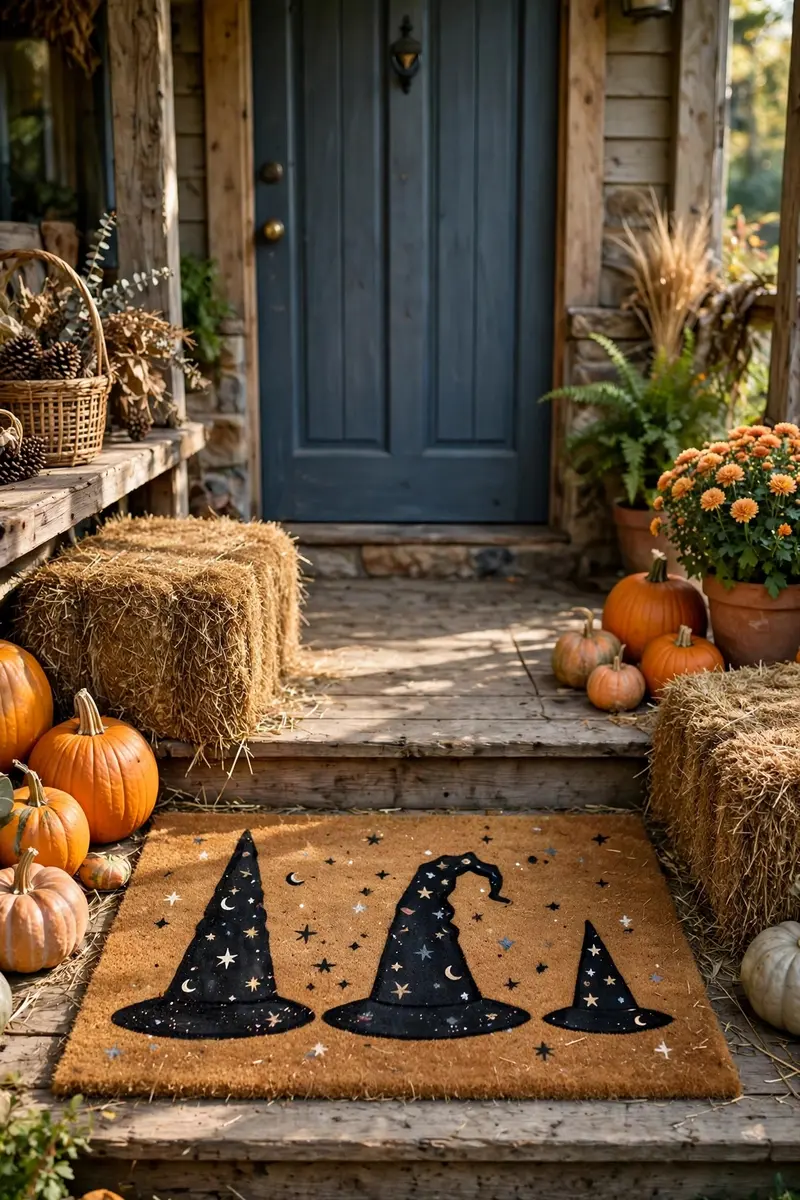
A parade of pointy witch hats marching across your mat — one bent, one tall, one tiny — is whimsical rather than wicked. This one’s great for crafters who love repetition: paint one hat, then repeat with variations. Materials: blank mat, black and purple paint, triangle/cone template, star stickers or stamps for hat decorations. Paint cone-shaped hats in a row, add bent tips to a few, and decorate each with painted stars, moons, or a buckle. Tip: vary the hat sizes — a row of identical hats looks stamped, while mixed sizes look hand-crafted and charming. Variation: tuck a real mini witch hat (party supply) behind the mat so one hat is 3D.
16. Candy Corn Stripe Mat
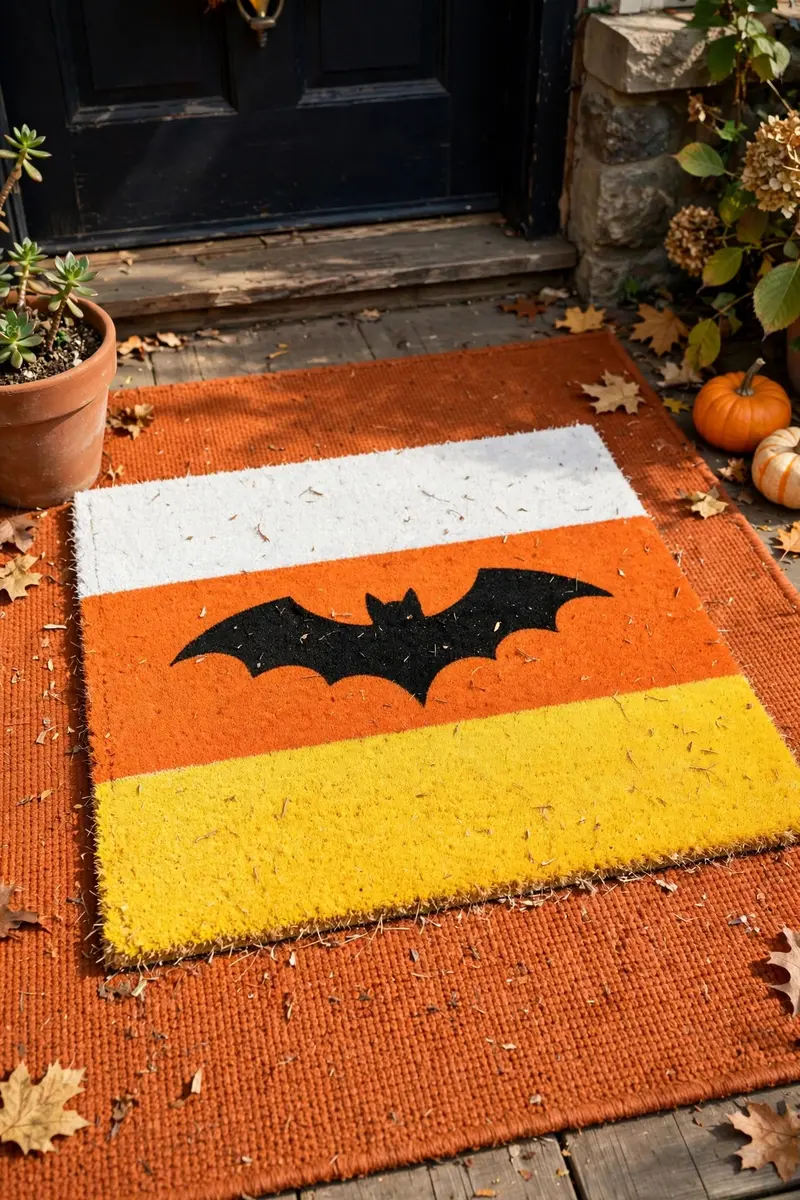
Paint your whole mat in candy corn stripes — white, orange, yellow bands — and you’ve got a mat that’s festive from every angle with zero drawing at all. It’s pure color-blocking, and the candy corn palette screams fall. Materials: blank light-colored mat, white, orange, and yellow outdoor paint, painter’s tape, wide brush. Tape off three horizontal bands, paint each band its color, peel tape while paint is slightly tacky for the crispest lines. Tip: paint lightest to darkest — white, then yellow, then orange — because darker colors cover lighter mistakes, never the reverse. Variation: add a black bat silhouette over the stripes for a Halloween-specific version.
17. Hey Boo Cute Ghost Mat
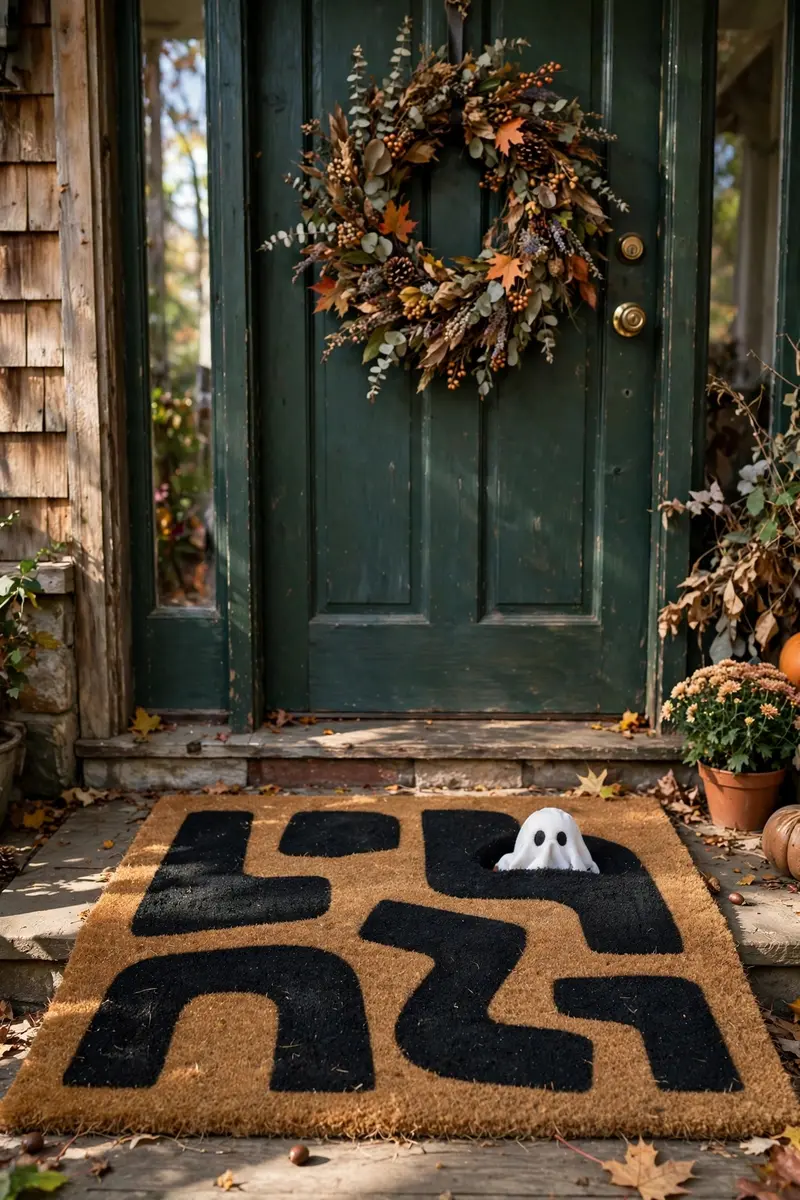
Not every Halloween mat needs to be scary — this adorable ghost with rosy cheeks is the one your kids will beg to keep out all year. Cute Halloween is a huge trend, and this design takes ten minutes. Materials: blank mat, white, black, and pink paint, round template. Paint one big friendly ghost in the center, add simple dot eyes and a smile, then dab pink cheeks with a dry brush. Keep everything round and soft — no sharp edges on a cute ghost. Tip: use the dry-brush technique for cheeks — barely any paint on the brush, swirled lightly, so it reads as blush not blobs. Variation: add a tiny party hat on the ghost for a birthday-Halloween crossover.

18. Boo Felicia Sassy Mat
Pop-culture wordplay mats get the biggest laughs on the block, and this two-word zinger needs nothing but great lettering. Short phrases are ideal for beginners because spacing is easy to control. Materials: blank mat, black paint, bold lettering stencil, detail brush. Center the two words with generous margins — white space makes short sayings punchier. Paint the letters thick and even, then touch up edges after drying. Tip: measure your mat and sketch the layout on paper first; centering “by eye” on coir almost always drifts left. Variation: add a small ghost peeking from behind one letter for personality.
19. Buffalo Check Layer Base
Here’s the stylist’s secret from a hundred viral porch photos: a black-and-white buffalo check rug as the base layer, with your Halloween mat on top. The high-contrast check makes every Halloween color pop. Materials: Halloween doormat, buffalo check outdoor rug ($18–$30), pumpkins, lantern. Lay the check rug first, center your painted mat on it, then flank with pumpkins at the corners. The check reads “farmhouse,” the mat reads “Halloween” — together they read “styled.” Tip: buffalo check rugs photograph beautifully, so this is the combo to use if your porch will be in any Halloween party photos. Variation: swap the top mat for a plain “hello fall” mat in September and add the Halloween one October 1st.
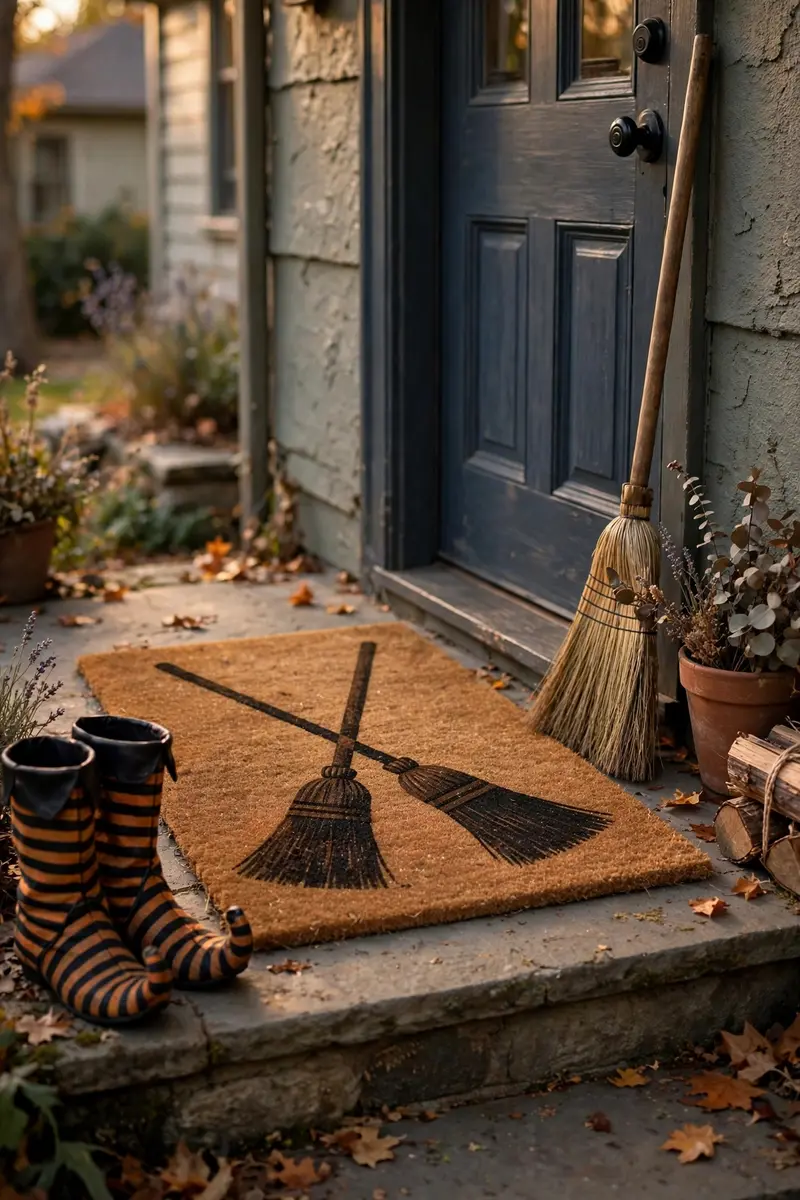
20. Leave Your Brooms at the Door Mat
Witches welcome — but park the broomsticks outside. This playful mat pairs a funny command with witchy imagery, and it’s a hit at Halloween parties. Materials: blank mat, black and brown paint, broom silhouette stencil or freehand, lettering template. Paint the saying in two lines, then stencil crossed brooms beneath it like a coat of arms. A witch hat hanging on your actual door completes the joke. Tip: paint the brooms in dark brown with black bristle strokes — two tones keep the silhouette from looking like a flat blob. Variation: lean a real decorative broom against the wall beside the door so the mat feels like part of a scene.
21. Full-Moon Haunted Scene Mat
Paint an entire spooky night sky on your mat: a huge glowing moon, bare tree branches, and a flock of bats. This is the most “artistic” of the DIY Halloween doormat ideas, but it’s really just layered shapes. Materials: blank dark mat (or paint one black first), white, gray, and yellow paint, round template, thin brush. Paint the black base, then the big moon (white circle with gray craters), branch silhouettes reaching in from the edges, and bats as simple “m” shapes. Tip: paint background to foreground — sky, then moon, then branches, then bats — so each layer overlaps correctly. Variation: add a tiny haunted house silhouette on the horizon line.

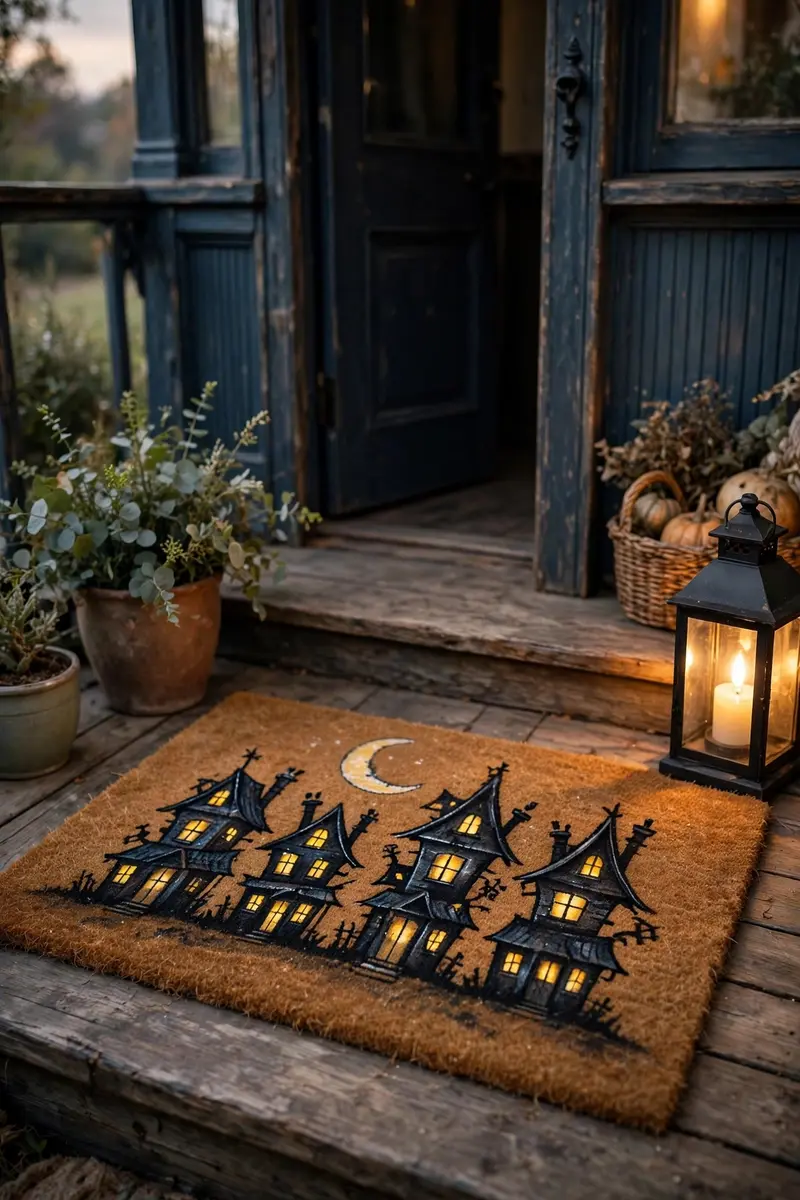
22. Haunted House Skyline Mat
A crooked haunted house with lit windows marching across your mat looks straight out of a storybook. The crookedness is the point — straight lines would look wrong here. Materials: blank mat, black, orange, and yellow paint, house template or freehand, detail brush. Paint a row of leaning houses with crooked chimneys, then dot warm yellow windows — the glowing windows are what make it magical. A crescent moon overhead finishes the scene. Tip: draw the houses with chalk first and step back to check the composition; it’s much easier to adjust chalk than paint. Variation: personalize one window per family member with their initial glowing inside.
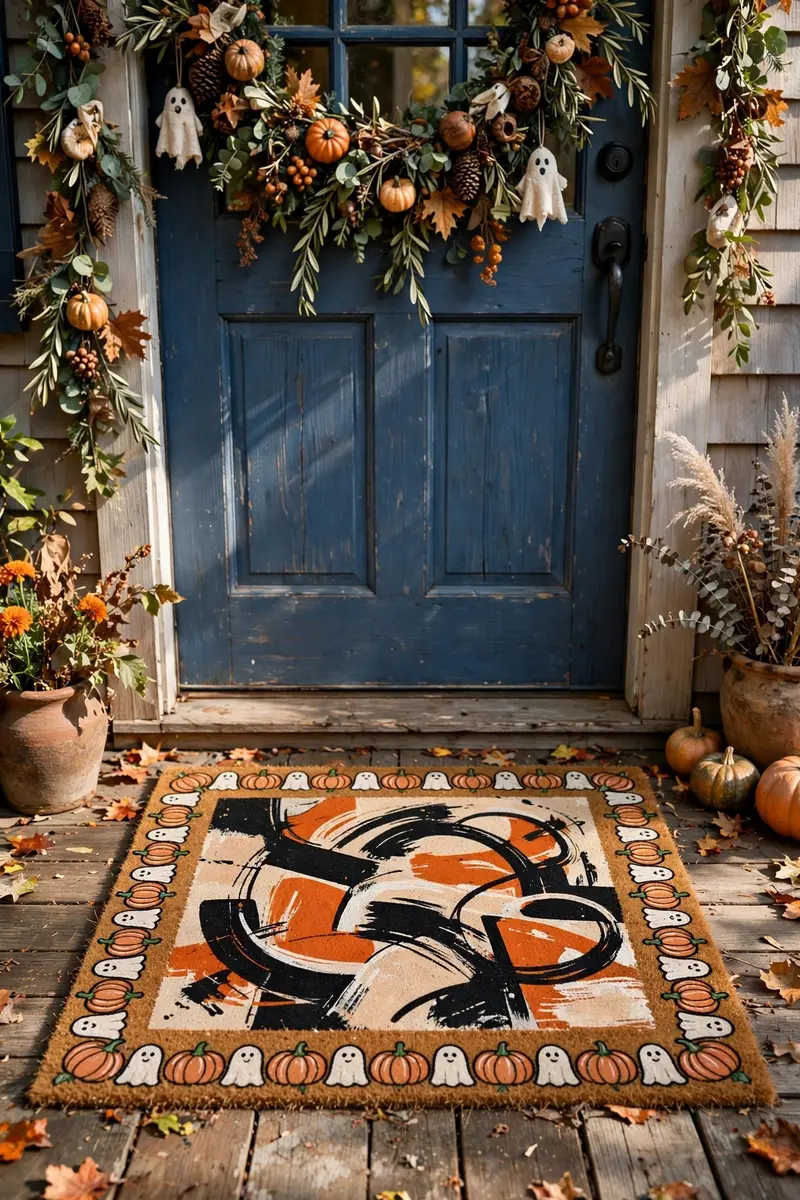
23. Eat Drink and Be Scary Mat
Your Halloween party’s official welcome mat: a festive toast to spooky season. This design bridges cute and creepy, so it suits everything from kids’ parties to cocktail nights. Materials: blank mat, black, orange, and white paint, lettering stencil, small pumpkin and ghost stamps. Letter the phrase in the center, then frame it with a border of alternating mini pumpkins and ghosts. The border does the decorating so the lettering can stay simple. Tip: keep the border shapes small — no bigger than a golf ball — so they read as a frame, not competing art. Variation: add “est. October 31” beneath in small letters for a vintage-party-poster feel.
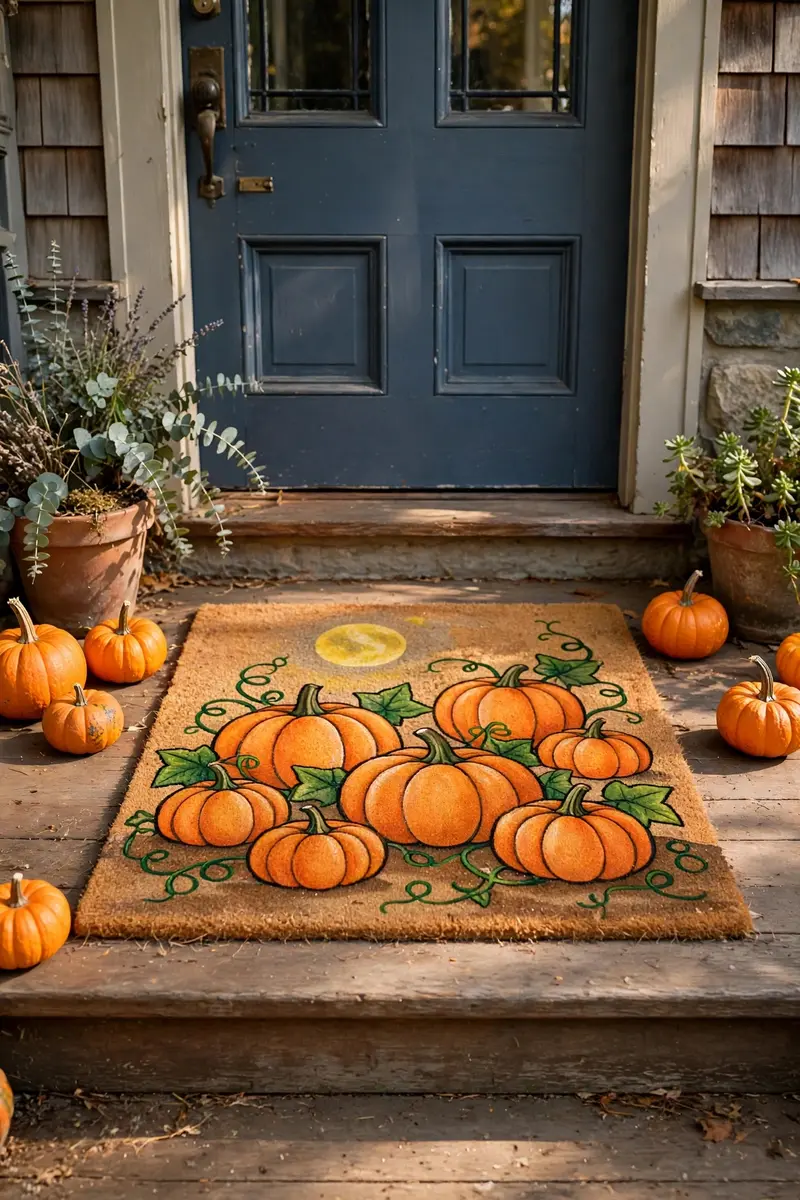
24. Pumpkin Patch Scene Mat
Turn your mat into a miniature pumpkin patch: rolling green vines, plump orange pumpkins, and a harvest moon. This one’s perfect if your style leans harvest-more-than-horror. Materials: blank mat, orange, green, brown, and yellow paint, circle templates, detail brush. Paint a ground line of brown, dot on pumpkins in varied sizes with green curly vines connecting them, and add a yellow harvest moon in the sky area. Shade one side of each pumpkin slightly darker for dimension. Tip: paint pumpkins in clusters of odd numbers — threes and fives look natural, evens look staged. Variation: add your house number painted on the biggest pumpkin for a personalized patch.
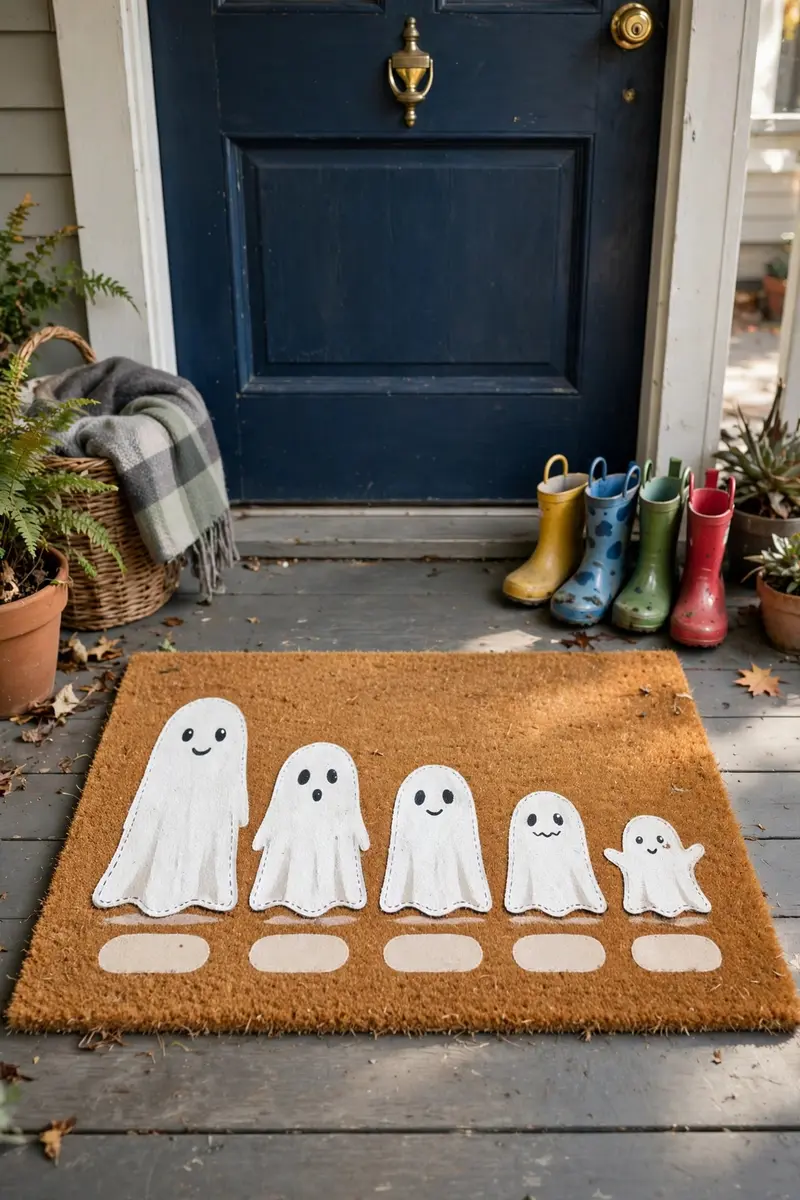
25. Ghost Family Portrait Mat
Paint a ghost for every family member — tall ghost for dad, tiny ghost for the toddler — and you’ve got the most personal mat on the street. Guests love spotting who’s who. Materials: blank mat, white and black paint, lettering for names, detail brush. Paint a row of ghosts in descending heights, add simple faces with distinct expressions, and letter each person’s name (or initial) beneath their ghost. Tip: paint the ghosts first and add names last — you’ll inevitably adjust ghost sizes, and names painted early end up misaligned. Variation: add a ghost pet — a tiny ghost dog or cat at the end of the row.
26. Personalized Family Name Mat
A monogram or family name in spooky lettering, framed by bats and cobwebs, looks custom-ordered but costs a tenth of the price. Personalized Halloween decor is trending hard, and your porch is the perfect place to show it off. Materials: blank mat, black paint, printed family name in a Halloween font (chalk-transfer method), bat stencils. Transfer your family name large across the center, then stencil small bats flying outward from the text and a cobweb in one corner. Tip: test your font choice at full size on paper first — thin elegant fonts vanish on coir; you need bold, chunky letterforms. Variation: add “est.” with your move-in year beneath the name.

27. Dripping Boo Letters Mat
Letters that look like they’re melting or dripping blood (it’s just paint!) give your mat a horror-movie edge. The drip effect is easier than it looks — gravity does the work. Materials: blank mat, black or red paint, lettering stencil, small brush, paper towels. Paint your word in thick letters, then while the paint is still wet, drag a loaded brush downward from random letter bottoms to create drips. Blot, don’t wipe, for clean drip shapes. Tip: practice drips on cardboard first — the trick is a fully loaded brush and one confident pull, not wiggling. Variation: do the drips in glow-in-the-dark paint for a mat that haunts after sunset.

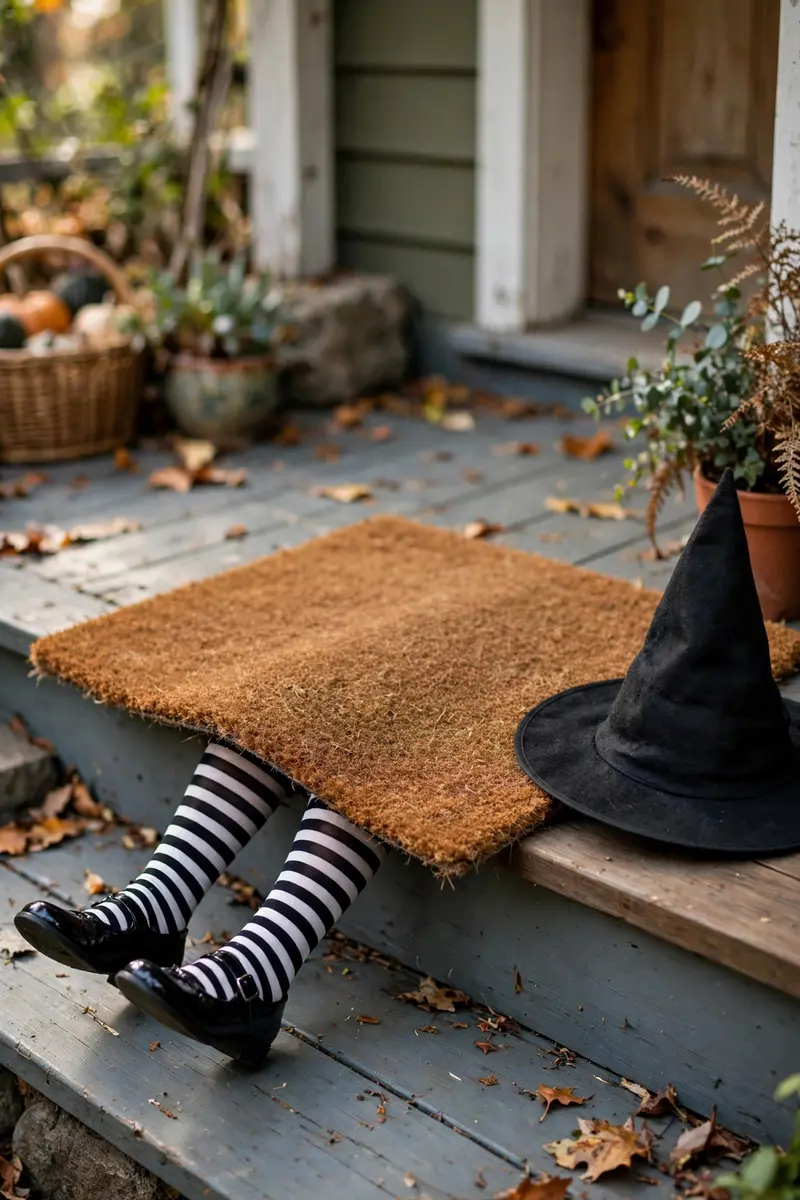
28. Crushed Witch 3D Mat
Tuck a pair of striped witch legs under your mat so it looks like a witch crash-landed on your porch — it’s the funniest 3D Halloween trick going. This gets laughs from every age group. Materials: plain or simply-lettered mat, striped tights or socks stuffed with fiberfill, black shoes (doll shoes or painted cardboard), optional broom. Stuff the striped legs, attach the shoes, and slide them under the mat’s edge so they stick out. (The legs, broom, and hat can all come from the dollar store — stock up with our dollar store Halloween decor DIY ideas.) Letter the mat “SPLAT!” or leave it plain — the legs are the joke. Tip: use outdoor-safe stuffing (polyfill, not cotton) and bring the legs in during rain — soggy witch legs are sad witch legs. Variation: add a pointed hat and broom beside the mat for the full crash scene.
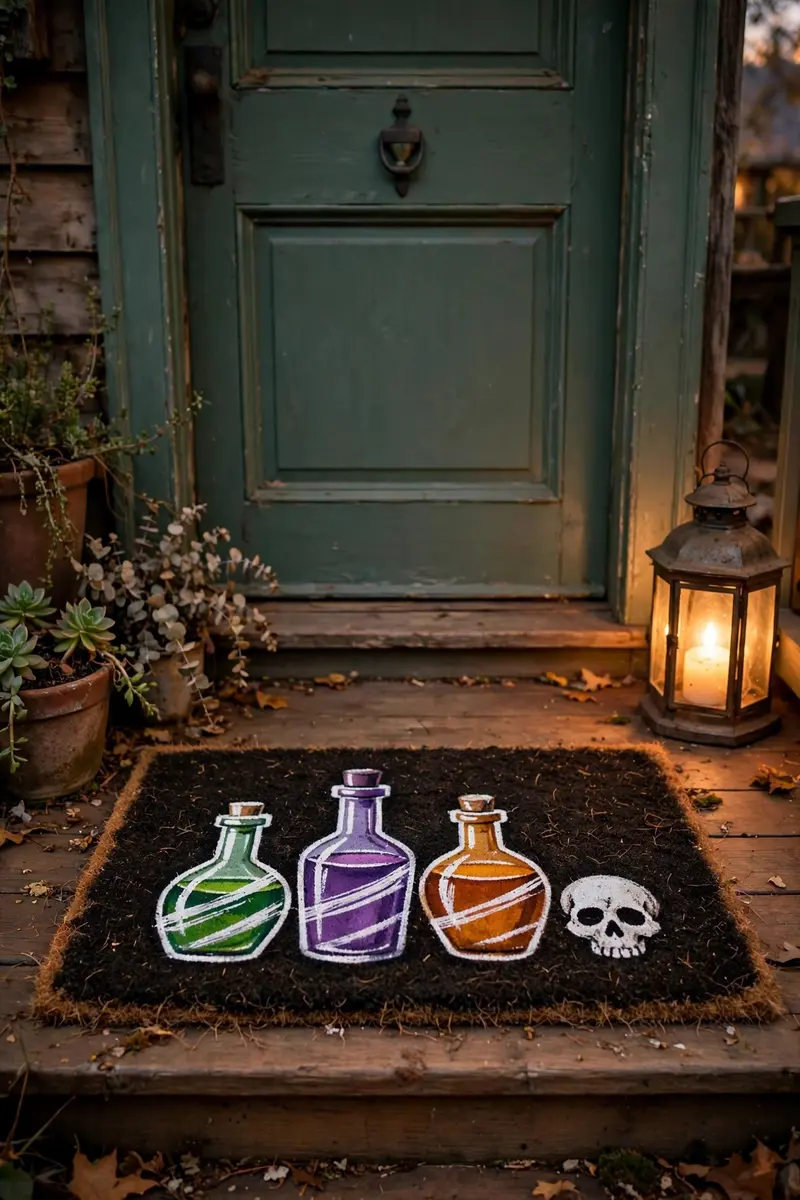
29. Pick Your Poison Mat
A mat for the Halloween party host: potion bottles, a skull, and an invitation to choose your drink. This one’s a natural for homes that go big on Halloween entertaining. Materials: blank mat, black, green, and purple paint, bottle templates, lettering stencil. Paint the saying across the top, then a row of potion bottles in jewel tones below — different shapes, different “potions.” Add tiny labels like “bat brew” on the bottles. Tip: paint bottle highlights — one white vertical stripe per bottle — and flat shapes instantly look like glass. Variation: set real (empty) potion-style bottles beside the door to echo the mat.
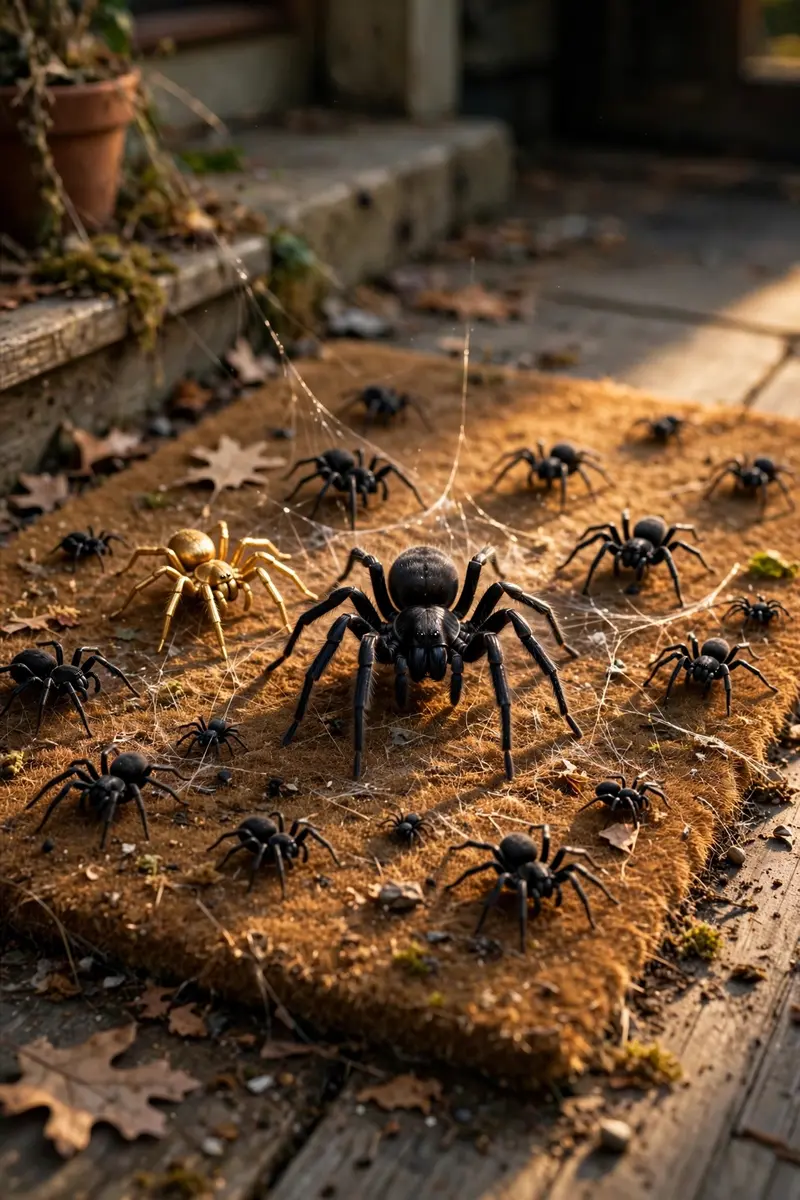
30. Spider Cluster Mat
One spider is cute; a dozen spiders swarming your mat is a statement. This design is pure Halloween drama with almost no technique — spiders are ovals with legs. Materials: blank mat, black paint, spider stencil or freehand, detail brush, optional web lines. Paint spiders in varied sizes scattered across the mat, biggest in the center, trailing smaller ones toward the edges like they’re dispersing. Connect a few with web strands. Tip: vary the leg positions on each spider — identical spiders look stamped, while different poses look like a real (terrifying) swarm. Variation: paint one spider in metallic gold as the “queen” of the swarm.
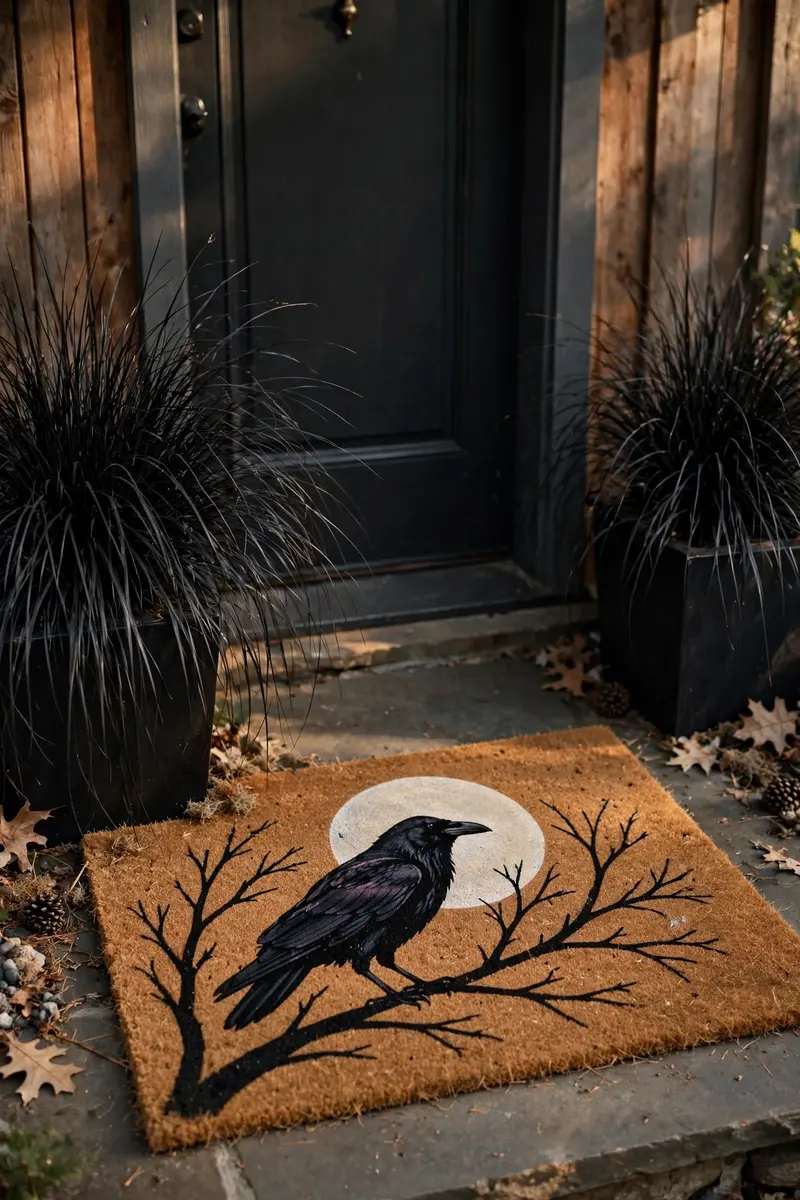
31. Raven Silhouette Mat
A perched raven — all sharp beak and attitude — brings gothic elegance to your doorstep. This design suits moody, sophisticated Halloween porches better than cartoon ghosts do. Materials: blank mat, black paint, raven silhouette stencil, bare-branch stencil, gray accent paint. Paint bare branches reaching across the mat, perch the raven silhouette on one, and add a pale moon behind it. The single-bird composition is what makes it artful — resist adding more. Tip: cut your stencil from freezer paper and iron it on (low heat) for the crispest silhouette edges on coir. Variation: add a tiny scroll in the raven’s beak painted to look like a miniature letter.
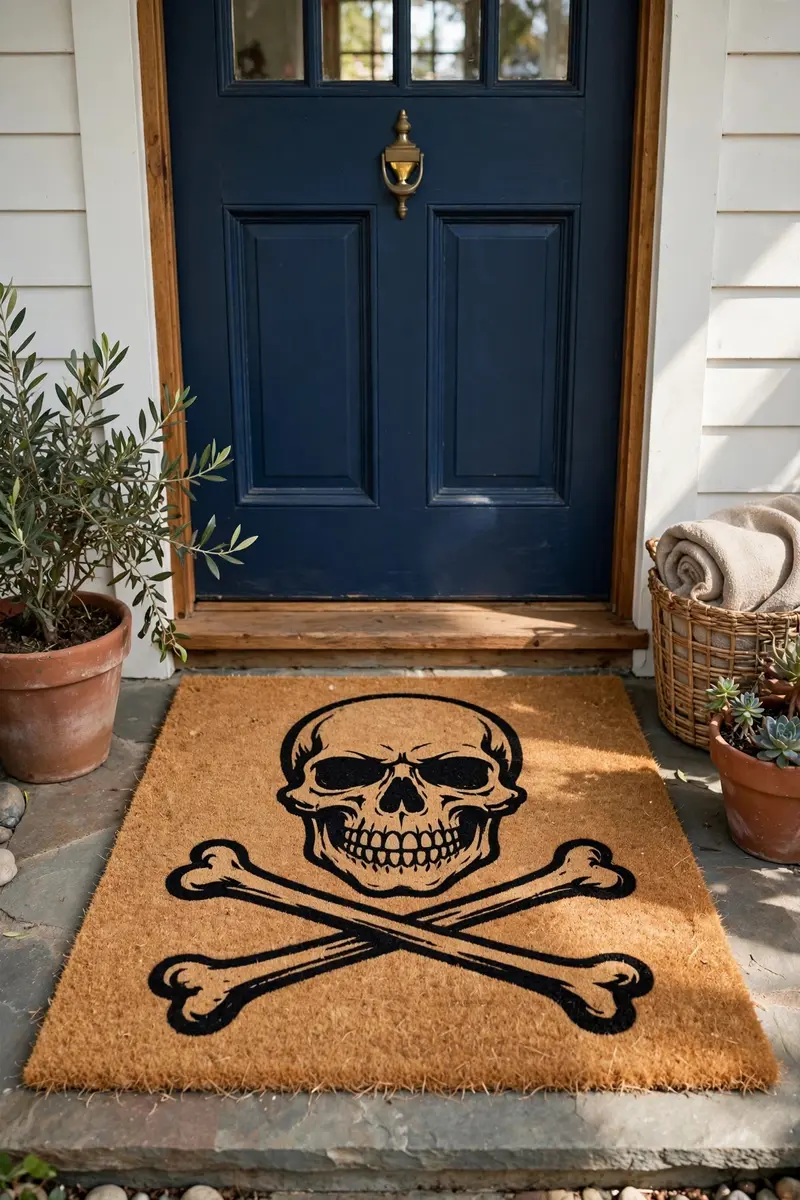
32. Skull and Crossbones Mat
Classic pirate-spooky: a grinning skull over crossed bones, and you’re done. This bold graphic design reads clearly from the street — high contrast is its superpower. Materials: blank light mat, black paint, skull template (print a simple skull shape), detail brush. Paint the skull large and centered, cross two “bones” beneath it, and keep the background clean — this design needs breathing room. Fill the skull’s eye sockets solid black for maximum impact. Tip: a light natural-coir background with black paint gives the strongest contrast; skip this design on an already-dark mat. Variation: surround the skull with a laurel wreath of painted leaves for a “pirate crest” look.
33. Mummy Wrapped Mat
Wrap your mat in “bandages” — strips of painted gauze — with two spooky eyes peeking through. It’s a mummy, it’s a mat, it’s a ten-minute project. Materials: blank mat, white and off-white paint, wide brush, black paint for eyes. Paint the whole mat off-white, then paint slightly darker diagonal strips across it to suggest wrapped bandages. Leave a horizontal gap and paint two eyes peering out. The imperfection of the strips is what sells the mummy look. Tip: paint the bandage strips at angles, not straight — diagonal wraps look like real mummy bandages, straight ones look like a barcode. Variation: tuck the ends of real gauze strips under the mat edges for a mixed-media 3D wrap.

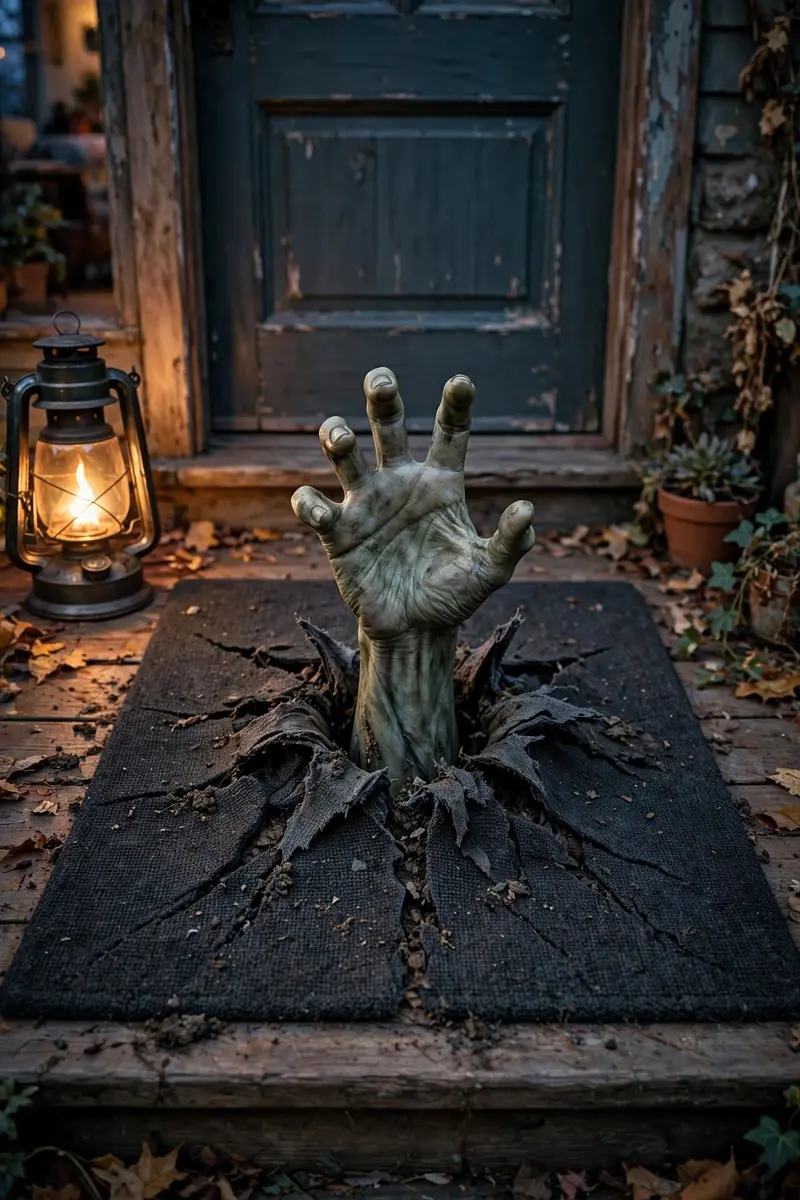
34. Zombie Hand Grab Mat
A gray-green zombie hand bursting up through the center of your mat is pure horror-movie fun. This is the mat for houses that go full haunted-house every October. Materials: blank dark mat, gray-green and black paint, hand template, detail brush. Paint cracked “ground” lines radiating from the center, then the hand reaching up — wrist at the bottom, fingers grasping. Shade the knuckles darker for a rotting effect (tasteful, we promise). Tip: paint this on a dark charcoal mat instead of natural coir — the hand pops dramatically against black. Variation: add “THEY’RE COMING” in dripping letters along the bottom edge.
35. Chalk-Transfer Lettering Mat
Here’s the technique behind half the beautiful lettered mats on Pinterest: print your saying, chalk the back, trace it onto the mat. No freehand lettering talent required, ever. Materials: blank mat, printed wording in a bold font, white chalk, chalk markers or acrylic paint, painter’s tape. Print at full size (you may need to tile multiple pages), scribble chalk thickly on the back of the paper, tape it in position, and trace each letter firmly with a pencil. Lift to reveal perfect chalk guides, then paint over them. Tip: go over the chalk lines with a dry brush first to knock off loose chalk dust — it keeps your paint from turning gray. Variation: use this method for an intricate saying you’d never attempt freehand, like a full Halloween poem.
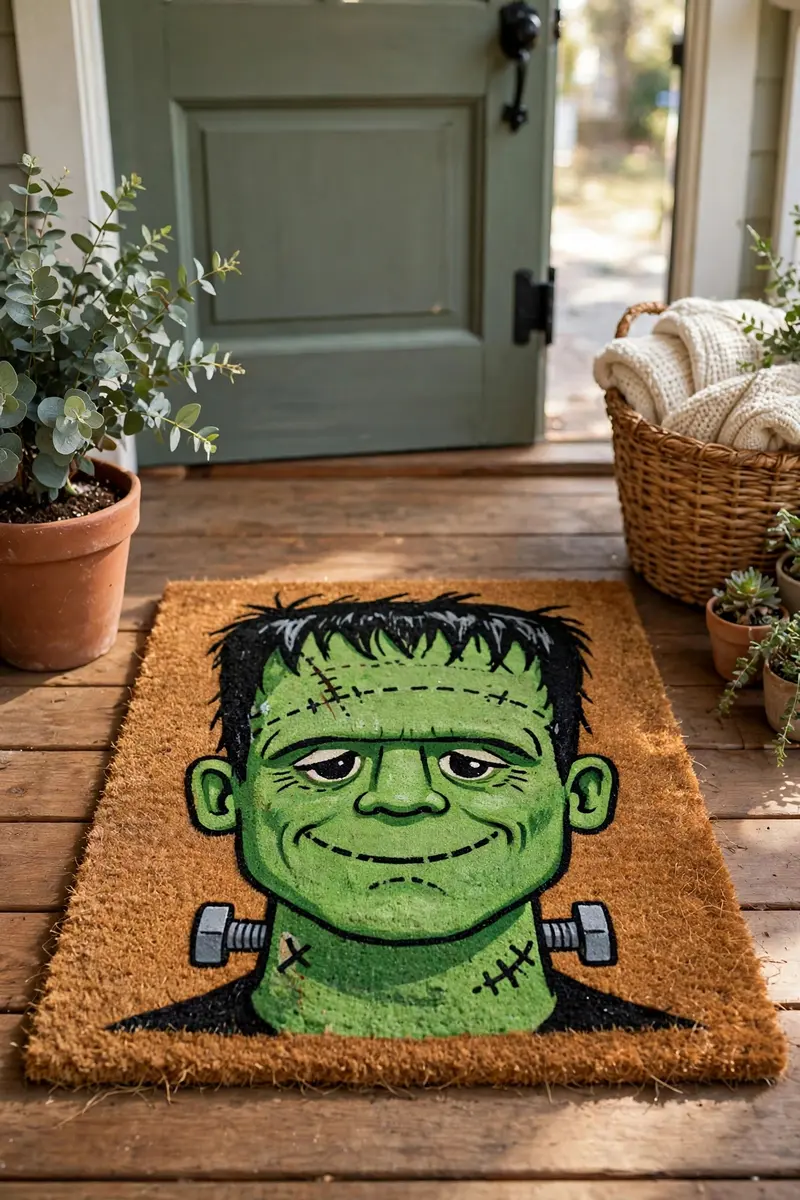
36. Frankenstein Stitch Mat
A big friendly Frankenstein face — square head, neck bolts, stitched forehead — is Halloween-iconic and wonderfully simple geometry. Squares and stitches: that’s the whole design. Materials: blank mat, green, black, and gray paint, ruler or straight edge, detail brush. Paint a big green square-ish face, add black hair, white eyes with black pupils, a stitched scar across the forehead (dashed lines), and two gray bolts at the neck. Tip: use a ruler for the head outline — Frankenstein’s charm is in his blocky geometry, so crisp straight edges matter here. Variation: make it “Bride of Frankenstein” with a black beehive hairdo and white lightning streaks.
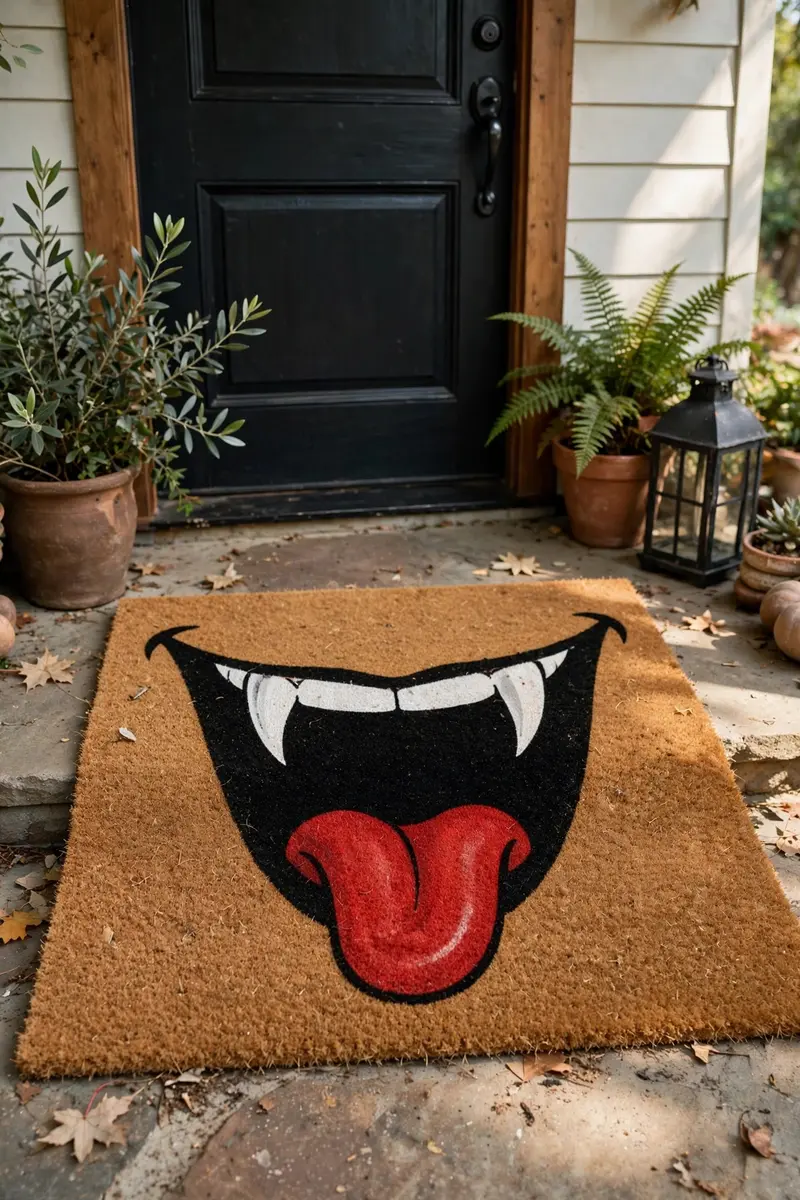
37. Vampire Fang Grin Mat
A huge grinning mouth with two sharp fangs stretched across your mat is playfully menacing — Dracula approved. This design is all about scale: the bigger the grin, the better the mat. Materials: blank mat, white, black, and red paint, detail brush. Paint an oversized smile arc, fill the mouth black, add white fangs (triangles with slight curves) and a red tongue. Keep the background mat plain so the grin dominates. Tip: curve the fangs slightly inward — straight triangles look like shark teeth, curved ones read “vampire” instantly. Variation: add two red “blood drip” dots below one fang for extra drama.
38. Ombre Sunset Stripe Mat
Paint your mat in a Halloween ombre — deep purple melting into orange melting into yellow, like a spooky sunset. No drawing at all, just beautiful blended color that looks professionally done. Materials: blank light mat, purple, orange, and yellow outdoor paint, wide brush, spray bottle with water. Paint horizontal bands of each color, then while wet, blend the borders with a damp brush using soft back-and-forth strokes. Mist with water if the paint dries too fast to blend. Tip: blend with a clean dry brush in light X-strokes at each color border — circular scrubbing makes mud, X-strokes make gradients. Variation: stencil black bats over the finished ombre for a sunset-flock silhouette scene.

39. Ghost Parade Runner Mat
Don’t stop at the doormat — paint a whole runner rug with a parade of ghosts for your hallway, entryway, or long porch. It’s the same ghost technique as idea #1, supersized for drama. Materials: plain orange or natural runner rug, white and black outdoor or fabric paint, large ghost stencil, stencil brush. Lay the runner flat, tape the ghost stencil at one end, pounce white paint through it, and repeat down the length with space between ghosts. Add faces once dry, then seal with fabric protector spray. Tip: work from one end to the other without walking on wet paint — sounds obvious, but ghost footprints are a real crafting hazard. Variation: alternate ghosts with painted candy corn for a patterned runner.

40. Erasable Chalk-Pen Mat
Commitment-phobes, this one’s for you: decorate your mat with chalk pens that wash off, so you can change the design weekly through October. New saying every weekend, zero permanence. Materials: dark mat (chalk shows best on dark), white and colored chalk markers, damp cloth. Sketch directly on the mat — sayings, doodles, webs, ghosts — and if you mess up, wipe with a damp cloth and redo. Seal nothing; rain is your eraser. Tip: use a dark charcoal or black mat — white chalk pen on natural coir looks washed out, but on dark mats it glows. Variation: let each family member “sign” the mat with their own Halloween doodle for a collaborative design.

DIY Halloween Doormat FAQs
What kind of paint do you use on a DIY Halloween doormat?
Outdoor acrylic craft paint is the standard choice — it’s flexible enough to move with coir fibers and formulated to resist sun and moisture. Look for bottles labeled “outdoor,” “patio,” or “multi-surface.” For spray-paint designs, any exterior spray paint works. Avoid regular interior wall paint; it cracks and flakes off coir within days.
How do you get paint to stick to a coir doormat?
Prep is everything: shake or vacuum the mat first so you’re painting fibers, not dust. Then use a pouncing or stippling motion — straight up and down with a stencil brush — instead of brushing side to side, which just pushes paint around on top. Two thin coats always beat one thick coat, and letting the first coat dry fully before the second is what builds real adhesion.
How do you stencil letters on a doormat without the paint bleeding?
Three rules: secure the stencil firmly with painter’s tape so it can’t shift, use barely any paint (dab most of it off on cardboard first), and apply multiple whisper-light coats rather than one heavy one. Spray-paint users should hold the can 8–10 inches away. If a little bleeding happens anyway, a detail brush and the mat’s base color will touch up edges invisibly.
Can you layer a Halloween doormat over another rug?
Absolutely — it’s one of the biggest porch trends, and it instantly makes a simple mat look styled. Place a larger flat outdoor rug (buffalo check, stripes, or solid orange) down first, then center your Halloween mat on top with a few inches of the base showing all around. Use outdoor double-sided tape under the top mat’s corners so it doesn’t slide, and make sure the combined height still clears your door swing.
How do you make a painted doormat last outdoors?
Placement matters more than anything: a covered porch can keep a painted mat looking fresh for multiple seasons, while full sun and rain wear it in weeks. For exposed porches, mist the finished mat with a clear outdoor or UV-resistant sealer and let it cure overnight before use. Shake (don’t hose) the mat to clean it, and bring it under cover during heavy storms.
Final Thoughts
Forty ideas, one blank mat, and a free afternoon — that’s genuinely all it takes to give your porch a Halloween glow-up that costs less than a bag of candy. Whether you go spooky with zombie hands and dripping letters, cute with blushing ghosts, or funny with a sassy saying, your doormat is the first hello your house gives every trick-or-treater. Pick the design that made you grin, save this post to your Halloween board on Pinterest for later, and tag us when your mat is done — we want to see your porch steal the street.


One Comment