
If your dryer eats your favorite sweaters and your delicates come out smaller every wash, you need a better way to air-dry. A good laundry room drying rack saves your clothes, cuts your energy bill, and keeps wet laundry from taking over your home. The trick is picking the right style for your space, because a rack that blocks the door is worse than no rack at all.
This guide rounds up 18 laundry room drying rack ideas for every room size and budget, from wall-mounted accordion racks that vanish when folded to ceiling pulley racks that lift a full load out of the way. You will find renter-friendly options, clever DIY builds, and a few buys that look so good they double as decor. Pick one idea, or mix two, and laundry day gets noticeably easier.
1. Wall-Mounted Accordion Rack
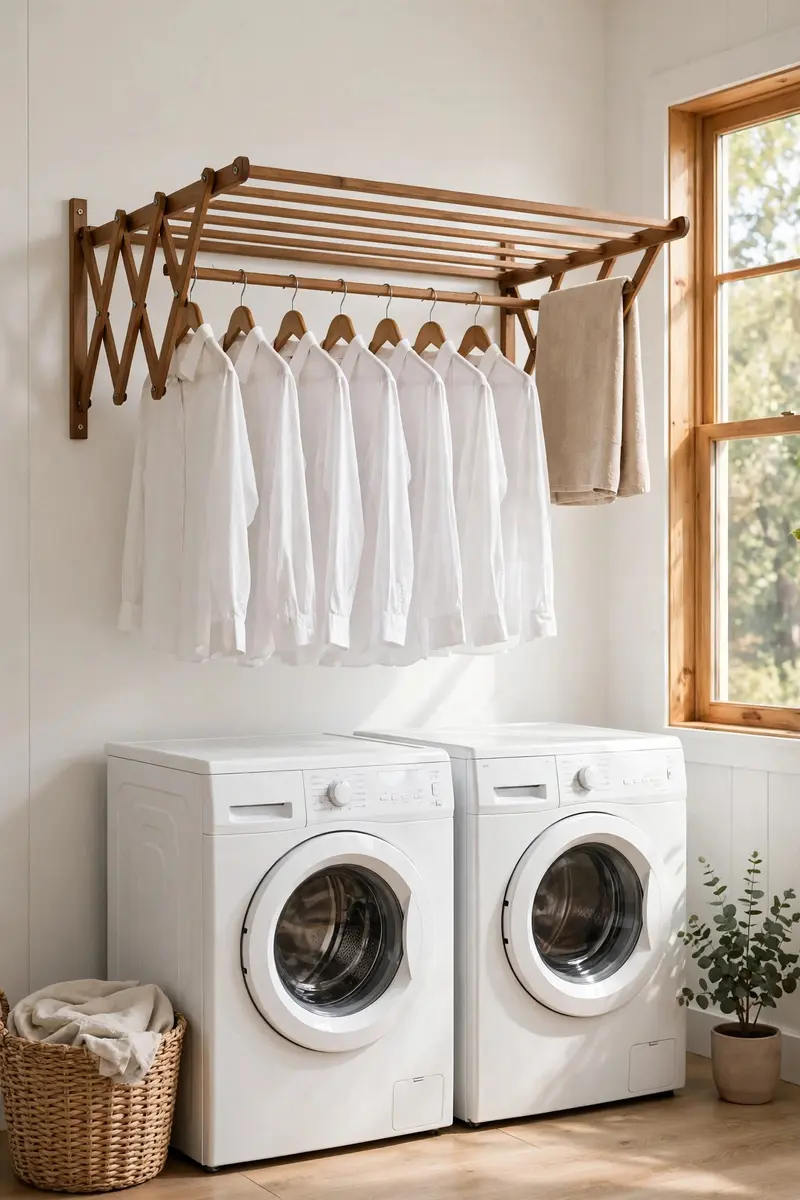
A wall-mounted accordion rack is the classic laundry room drying rack for small spaces, and it earns its reputation. It expands out from the wall to give you several rows of drying space, then folds back down to almost nothing when you are done. You get real capacity without giving up a single square foot of floor.
You will need a wooden or metal accordion rack, a stud finder, screws, and wall anchors. Ready-made racks cost $25–$60, and most install in under 30 minutes. Mount it at chest height on a bare wall, ideally right above or beside your washer so wet clothes travel only a few steps.
Hang shirts on the bars and drape smaller items over the rungs. Leave a little space between pieces so air can move around them, which is what actually dries clothes faster. Wipe the bars dry after each use if your rack is wood, so it stays smooth and splinter-free. Better Homes & Gardens also recommends accordion racks for tight laundry rooms in their roundup of drying rack ideas.
Tip: Mount your laundry room drying rack on the wall studs, not just drywall, so it holds a full load of wet jeans without sagging.
Variation: Paint a plain wooden accordion rack to match your wall color and it nearly disappears when folded flat.
2. Ceiling Pulley Drying Rack
A ceiling pulley rack is the smartest laundry room drying rack when floor space is truly zero. It hangs from the ceiling on ropes and pulleys, so you lower it to chest height to load it, then pull it back up near the ceiling while everything dries. Your laundry floats above your head and out of the way.
You will need a pulley rack kit, ceiling hooks or joist mounts, rope, and a cleat to tie off the rope. Kits run $40–$90, and you will want a stud finder and a drill. Install it over a spot you do not walk through constantly, such as above the washer or a folding counter.
Load heavier items in the center and lighter pieces toward the ends so the rack stays level as it rises. Lower it slowly and tie the rope off securely before you walk away. This style is wonderful for long items like dresses and table linens that need to hang straight.
Tip: A ceiling-mounted laundry room drying rack dries clothes faster, because warm air rises and circulates around the hanging pieces.
Variation: Add a small shelf on top of the rack frame and it doubles as storage for jars and folded towels when it is raised.

3. Over-the-Door Drying Rack
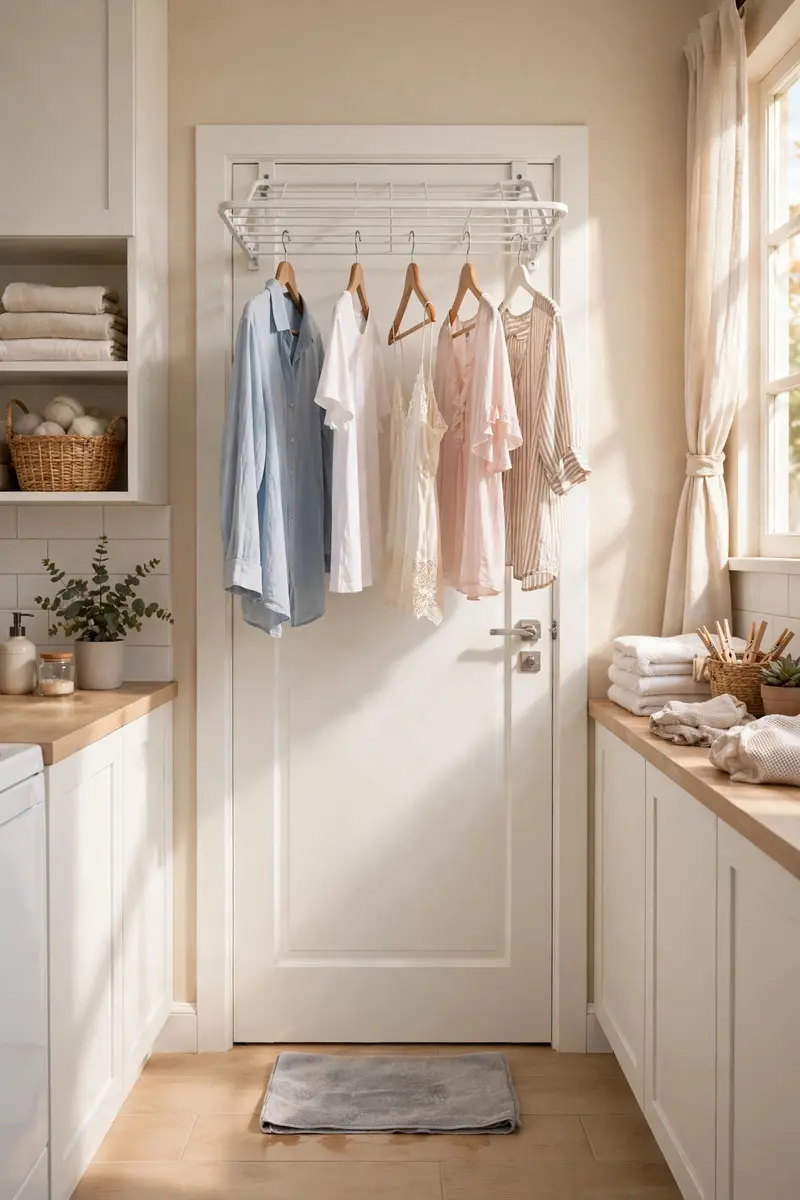
An over-the-door rack is the fastest laundry room drying rack to set up, because there is nothing to install. It hooks over the top of your laundry room door and gives you instant hanging space for shirts, delicates, and anything that needs to drip-dry. When you need the door clear, you lift it off in seconds.
You will need only the rack itself, which costs $15–$35. Look for one with rubber-coated hooks so it does not scratch the door, and check that your door still closes with the rack in place. Most standard interior doors work fine, but very thick doors may need an adjustable-hook model.
Hang the rack on the inside of the door so dripping clothes stay over tile or a washable floor. Keep heavier wet items near the bottom hooks so the rack stays stable. This is one of the best renter-friendly choices because it leaves no holes at all.
Tip: Slip a small towel on the floor under your over-the-door laundry room drying rack to catch drips and protect the flooring.
Variation: Use it on a closet door in a hallway laundry nook when your laundry room has no door of its own.
4. Pull-Out Drying Drawer
A pull-out drying drawer looks like an ordinary cabinet drawer until you open it and reveal a full slatted rack inside. It is the most invisible laundry room drying rack on this list, which makes it perfect for laundry rooms where you want a clean, built-in look with zero visual clutter.
You will need a drawer slide kit, slats or dowels, and a cabinet or drawer box to convert. A DIY version costs $60–$150 in materials, while a ready-made pull-out rack starts around $120. The rack slides in on the same hardware as any drawer, so it takes up no extra floor space when closed.
Build or buy the rack to fit your drawer opening exactly, with slats spaced about an inch apart for airflow. Pull it out to load, push it back in to dry, and pull it out again to unload. It works beautifully under a folding counter where the space is already warm and dry. The same pull-out thinking works in our small bathroom storage ideas DIY guide, where hidden storage keeps tiny rooms tidy.
Tip: Choose a drawer near the washer for your pull-out laundry room drying rack so the transfer from machine to rack is a single step.
Variation: Convert a deep lower cabinet instead of a drawer for a wider rack that holds a full load of shirts.

5. Brass Retractable Clothesline
A brass retractable clothesline is the laundry room drying rack that is going viral for a reason. It is a neat little wall-mounted box with a slim wire that pulls across the room and clicks into a small hook on the opposite wall. When you are done, the wire retracts and the box looks like a tiny piece of decor.
You will need the retractable unit, two screws, and a wall anchor. Good ones cost $15–$30, and the brass finish is the one trending on Pinterest because it looks far more polished than the plastic versions most of us grew up with. Installation takes about ten minutes.
Mount the box at shoulder height and the receiving hook directly across from it, keeping the line level. The wire typically holds around 15 kg, which covers school uniforms, delicates, towels, and even a quilt. Always retract the line when it is empty so nobody walks into it.
Tip: Install your retractable laundry room drying rack above the sink or counter so any drips land where they are easy to wipe.
Variation: Run two units in parallel, one high and one low, to double your line space in a narrow room.

6. Double Rods Above the Washer
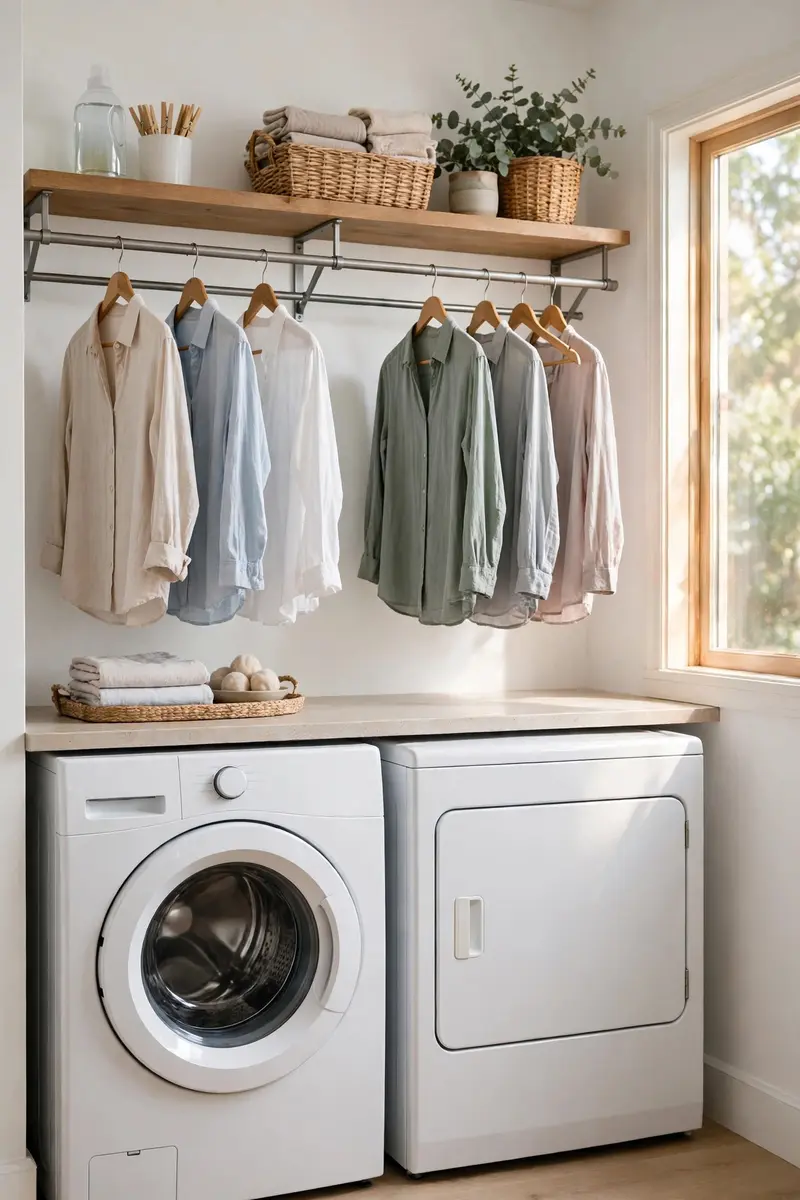
Two hanging rods above your washer and dryer turn wasted air space into the hardest-working laundry room drying rack in the house. You hang clothes straight from the washer onto hangers, and they dry right where you will fold or put them away. It is simple, cheap, and shockingly effective.
You will need two closet rods or metal pipes, brackets, and screws, for a total of $20–$50. Mount the first rod high and the second one lower and slightly forward, so clothes on the back rod do not drip onto the front row. A shelf above the rods gives you a spot for detergent and baskets.
Keep a dozen quality hangers on the rods at all times so drying is a grab-and-hang motion, not a project. Use slim velvet hangers so clothes do not slide off, and leave a gap between hangers for airflow. This setup handles a surprising amount of laundry for such a small footprint.
Tip: A double-rod laundry room drying rack works best when the lower rod sits at least 18 inches above the washer lid so the lid still opens fully.
Variation: Swap the lower rod for a wooden dowel on decorative brackets to make the whole wall look intentional and styled.
7. Fold-Flat Freestanding Rack
A fold-flat freestanding rack is the flexible laundry room drying rack for rooms that change their mind. It stands on the floor when you need it, holds a full load across its tiers, and folds down to a slim panel you can slide behind the washer or into a closet when you are done.
You will need a folding rack in wood, bamboo, or coated metal, costing $25–$60. Look for one with at least two tiers and sturdy hinges, since cheap racks wobble under wet towels. Open it fully on a flat floor and keep the legs locked before you load anything heavy.
Drape heavier items like jeans and towels on the lower bars and lighter shirts up top, where warm air helps them dry faster. Because it is portable, you can move it near a window or a sunny spot on laundry day, then fold it away so the room stays clear.
Tip: A freestanding laundry room drying rack dries fastest near a window or vent, so park it in the brightest, breeziest corner while it works.
Variation: Choose a bamboo rack for a warm, natural look that fits a laundry room styled with wood and woven baskets. If your laundry corner shares space with a tiny apartment, our small apartment decor ideas show how to keep small rooms feeling open.

8. Repurposed Wooden Ladder Rack
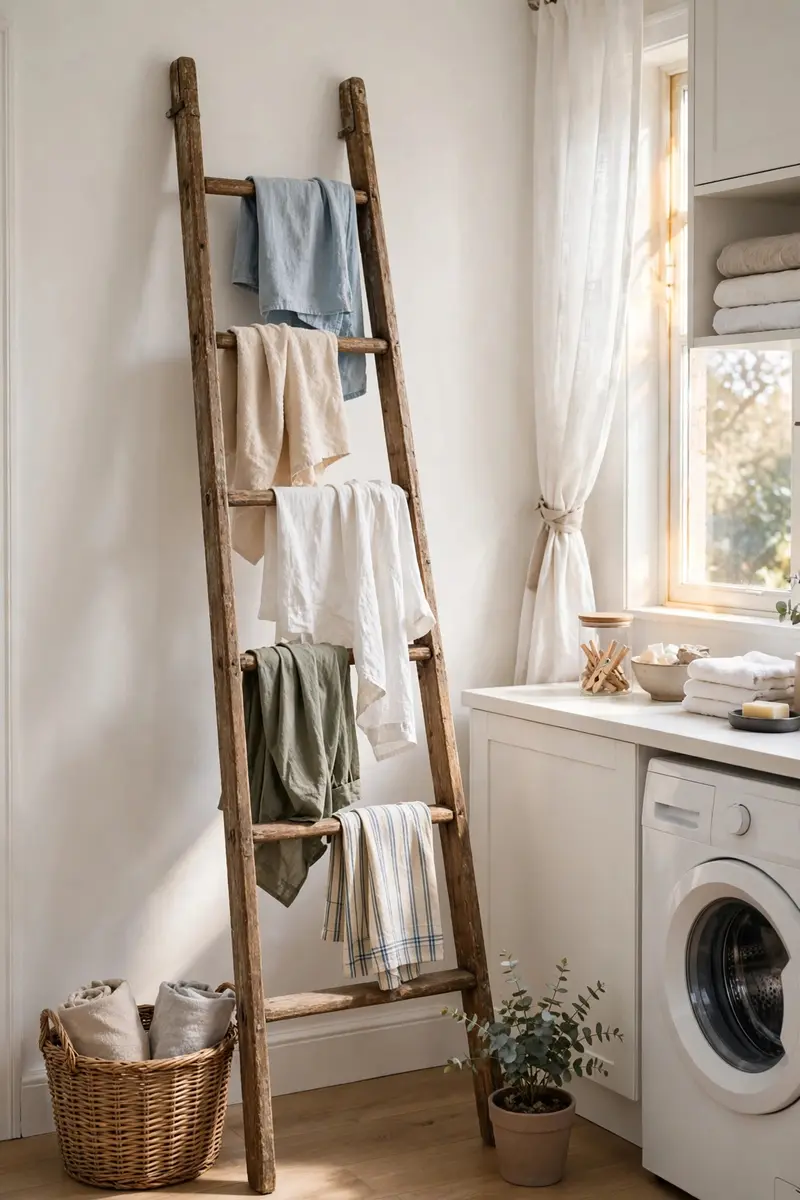
A vintage wooden ladder makes a charming laundry room drying rack with real farmhouse character. Lean it against the wall or hang it horizontally, and its rungs become perfect bars for draping shirts, towels, and delicates. It is a budget find that looks like a deliberate design choice.
You will need an old wooden ladder, sandpaper, and a clear sealant or paint. Thrifted ladders cost $0–$40, and a quick sanding plus a coat of sealant keeps the wood smooth and moisture-safe. Lean it at a slight angle or mount it flat to the wall with brackets for stability.
Hang clothes over the rungs with space between them, and use the top rung for hangers. A ladder rack suits a laundry room with rustic or vintage styling, and it pairs beautifully with woven baskets and a wooden folding counter.
Tip: Seal your ladder laundry room drying rack with a water-resistant finish, or damp clothes will raise the grain and leave it rough.
Variation: Paint the ladder a soft sage green or creamy white so it reads as decor, not a leftover from the garage. Thrifted finds like this are a staple of our DIY home decor ideas on a budget guide.
9. Swivel Multi-Arm Wall Rack
A swivel multi-arm rack is the sleek, space-saving laundry room drying rack for narrow walls. Several slim arms fan out from a single wall mount like a folding fan, giving you a surprising amount of hanging space from a strip of wall barely wider than a door frame.
You will need a swivel-arm rack kit, screws, and wall anchors, costing $30–$70. Mount it on a narrow wall strip, beside the washer, or in the gap between cabinets. The arms swing out when you need them and fold back flat against the wall when you do not.
Fan the arms out at different angles so clothes do not overlap, and use the outer arms for longer items. This style is ideal for delicates and small loads, and its minimal metal look suits a modern laundry room perfectly.
Tip: A swivel-arm laundry room drying rack is best for lighter loads, so save heavy wet towels for a sturdier bar or freestanding rack.
Variation: Mount two swivel racks at different heights on the same wall for a stacked drying station that still folds flat.

10. Mesh Flat-Lay Sweater Rack
Wool and cashmere sweaters stretch out of shape if you hang them, which is why a mesh flat-lay rack is the laundry room drying rack your knitwear has been waiting for. The mesh shelves let air flow underneath while the sweater lies flat and keeps its shape.
You will need a stackable mesh drying rack, which costs $15–$30. Many models hang from a rod or hook, while others stand on the counter. Lay the sweater flat, gently reshape the sleeves and body, and let it dry undisturbed. Flip it once halfway through for even drying.
Stack the mesh tiers for several sweaters at once, or use a single tier for one special piece. This rack is small, light, and easy to store, and it is the only drying method that truly protects expensive knits.
Tip: Never hang a wet sweater on any laundry room drying rack, because the weight of the water pulls the shoulders out of shape as it dries.
Variation: Use the mesh tiers for baby clothes, swimwear, and hand-washed bras that also need flat, gentle drying.

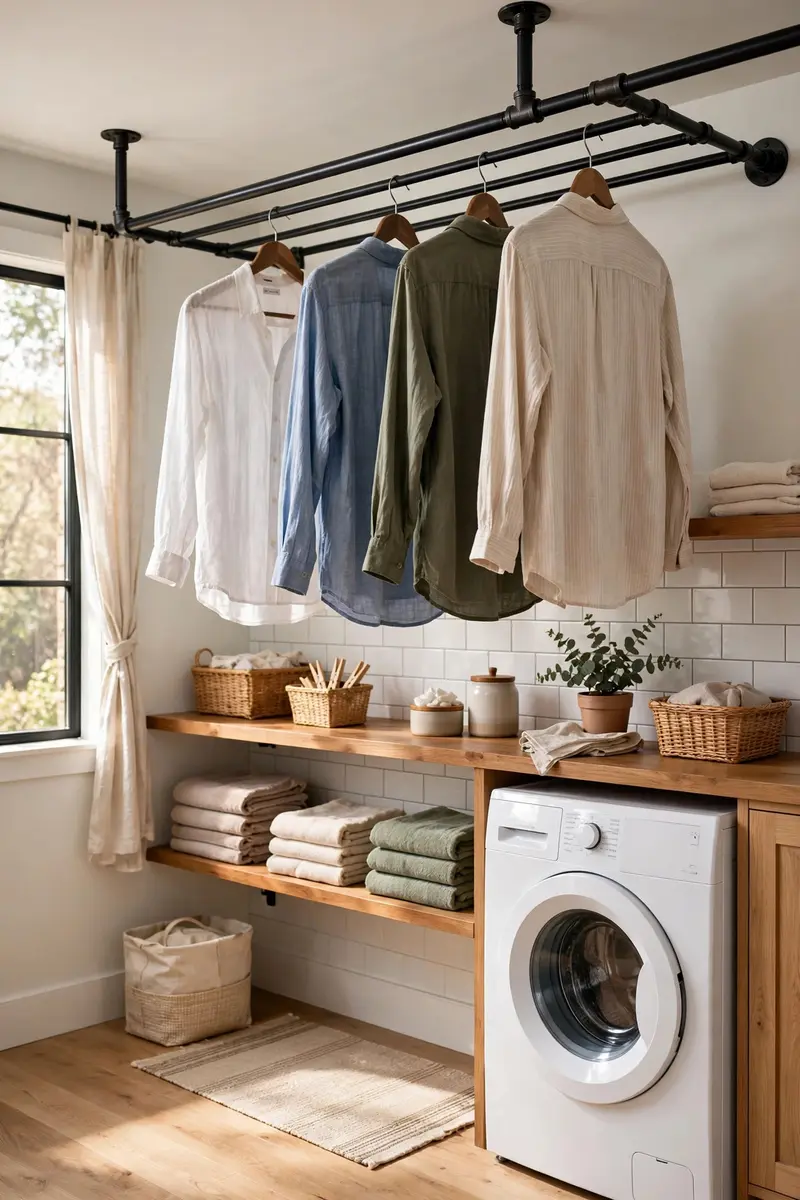
11. Industrial Pipe Ceiling Rack
An industrial pipe ceiling rack turns your laundry room drying rack into a design feature. Black metal pipe fixed to the ceiling gives you a long hanging bar that runs the length of the room, with an edgy, boutique look that suits modern and farmhouse laundry rooms alike.
You will need black iron pipe, flanges, elbows, and screws, costing $40–$100 depending on length. Anchor the flanges into ceiling joists, not just drywall, because a full load of wet clothes is heavy. Keep the bar high enough to walk under comfortably, around 6 feet or more.
Hang shirts on hangers along the bar and drape towels over it in sections. The open design means air circulates freely, and the pipe look pairs beautifully with open shelves, Edison bulbs, and a concrete or butcher-block counter below.
Tip: A pipe laundry room drying rack holds serious weight when it is anchored into joists, so confirm the joist locations with a stud finder before you drill.
Variation: Run the pipe along the ceiling above a row of open shelves, so hanging clothes and folded storage never compete for the same space.
12. Hidden Cabinet-Door Rack
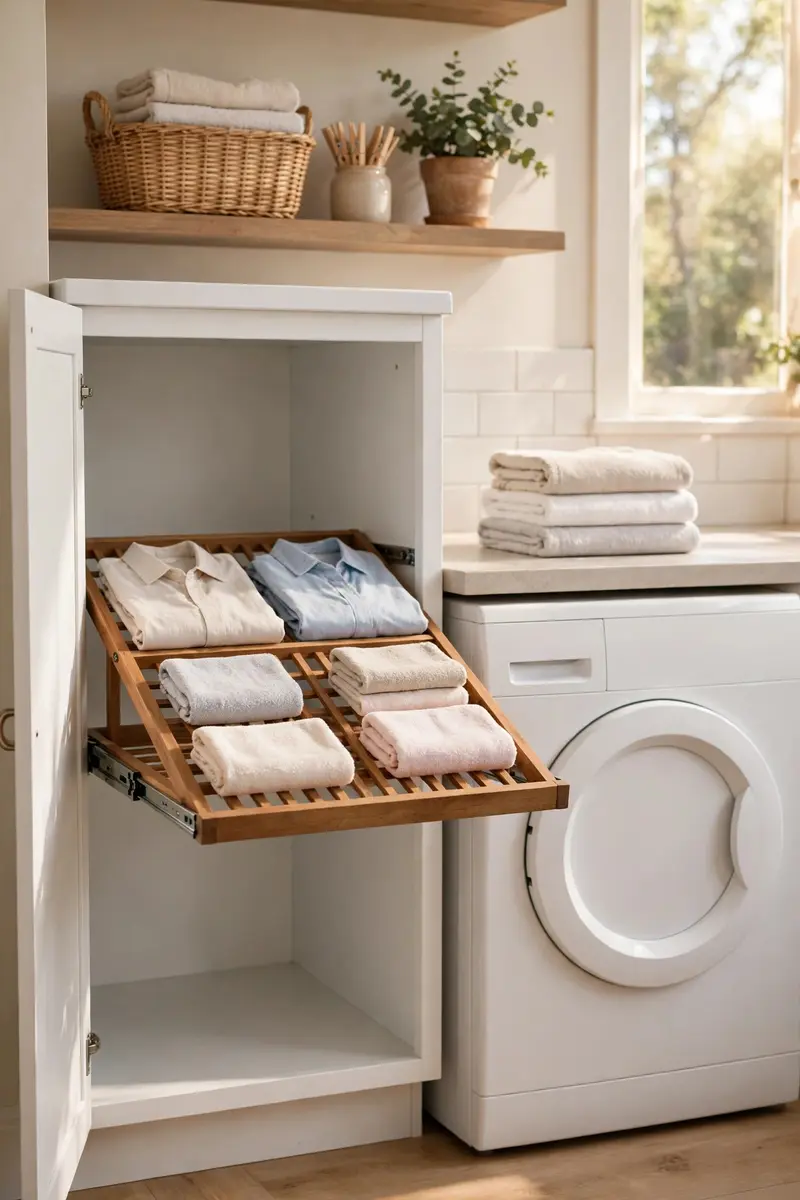
A hidden cabinet-door rack is the laundry room drying rack for people who love a tidy room. It looks like an ordinary cabinet until the front pulls open and a full slatted rack extends out with it, ready to hold a load of delicates. Close the door and it vanishes completely.
You will need a pull-out rack kit or a DIY slatted frame on drawer slides, costing $30–$80. Fit it inside a tall cabinet or a base cabinet near the washer. The rack extends on the same smooth hardware as a drawer, so it glides out easily even when loaded.
Load it with delicates, baby clothes, and hand-wash items that need gentle air-drying. Because it hides behind a cabinet door, it is perfect for laundry rooms that double as mudrooms or guest bathrooms, where you want the work to disappear.
Tip: Leave a few inches of clearance inside the cabinet so your hidden laundry room drying rack slides out without catching on shelves or pipes.
Variation: Add a second hidden rack in the cabinet beside it and you have a full drying station that no guest will ever notice.
13. IKEA Fold-Out Rack Hack
The IKEA fold-out rack hack is the cleverest DIY laundry room drying rack on Pinterest right now. It uses a FORSAND wardrobe door as a mounting board and two KOMPLEMENT pants hangers on hinges and ropes, creating a fold-down air-drying rack that tilts out when you need it and tucks flat against the wall when you do not.
You will need one FORSAND door panel (about $50), two KOMPLEMENT pants hangers (about $40 each), hinges, cord, and screws. The total lands just under $150, which is a fair price for a custom-looking built-in. Mount the door panel flat to the wall, hinge the hangers at the bottom, and add cords that hold them level when open.
Tilt the hangers out to load them with shirts and delicates, then fold them back up when laundry day is done. The white stained-oak finish looks clean and Scandinavian, and the whole unit reads as a purposeful wall feature rather than a drying rack.
Tip: This fold-out laundry room drying rack needs solid wall anchors, so check the weight rating of your anchors before you load both hangers fully.
Variation: Skip the IKEA parts and build the same fold-down design from plywood and dowels for a budget version under $60.

14. Peg Rail Drying Station
A peg rail is the prettiest laundry room drying rack you can install in an afternoon. A simple wooden rail with evenly spaced pegs holds hangers, tote bags, and a fold-down rack, turning a blank wall into one of the most useful corners of the room. It looks like decor and works like a drying station.
You will need a wooden peg rail, screws, wall anchors, and a few S-hooks, costing $20–$45. Mount the rail at shoulder height on an empty wall, ideally near the washer. Hang clothes on hangers from the pegs, and add a small fold-down drying rack below the rail for items that need to lie flat.
The peg rail also holds your apron, a linen towel, and a market tote, so the wall earns its keep even between laundry days. Paint it the same color as your trim for a built-in look, or leave the wood natural for warmth.
Tip: Space the pegs on your laundry room drying rack rail about 6 inches apart so hangers do not crowd each other and clothes dry evenly.
Variation: Add a second, shorter peg rail above the folding counter to hold spray bottles and clothespins within easy reach.

15. Rolling Garment Rack with Shelves
A rolling garment rack with shelves is the laundry room drying rack that moves where the work is. It rolls on casters, holds a full load of hangers on its top bar, and gives you shelf space below for baskets, detergent, and folded towels. When you are done, roll it into a closet or against the wall.
You will need a rolling rack with a sturdy frame and locking casters, costing $40–$90. Look for one with a weight rating of at least 50 pounds so it stays stable under wet clothes. Lock the wheels before you load it, and unlock them only to move it.
Hang freshly washed shirts straight from the washer onto the bar, then roll the rack near a window or vent to speed drying. The shelves below keep your laundry supplies organized, which makes the whole room feel calmer and more efficient.
Tip: A rolling laundry room drying rack is a lifesaver in a shared laundry space, because you can roll your clean clothes to your own room to fold them.
Variation: Choose a rack with a lower hanging bar as well, so you can dry two rows of clothes in the same footprint.
16. Under-Shelf Hanging Bar
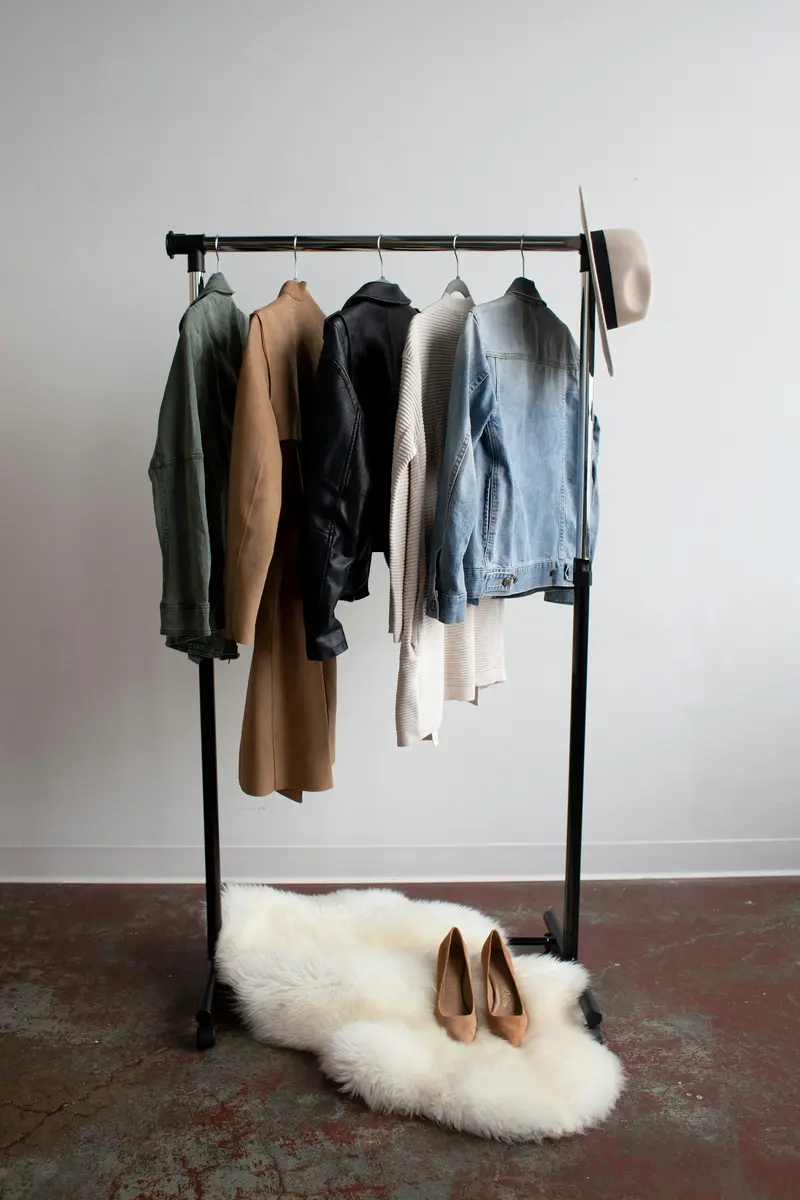
An under-shelf hanging bar is the smallest laundry room drying rack on this list, and sometimes the smartest. A slim metal bar mounted beneath a wall shelf gives you a full row of hanger space using air that was doing nothing at all. It costs almost nothing and installs in minutes.
You will need a closet rod or metal bar, two brackets, and screws, costing $10–$25. Mount the bar under a sturdy shelf, leaving enough clearance below it for shirts to hang freely. This is a perfect add-on rack in a laundry room that already has a main drying setup but needs a little more capacity.
Use it for the handful of items that always need air-drying, like workout tops, swimsuits, and blouses. Because it hides under a shelf, it never looks cluttered, and the shelf above still holds your detergent and baskets.
Tip: Mount your under-shelf laundry room drying rack at least 24 inches above the counter or washer so hanging clothes clear the surface below.
Variation: Install two short bars under two different shelves to create a drying zone on each side of the room.

17. Corner Two-Tier Wall Rack
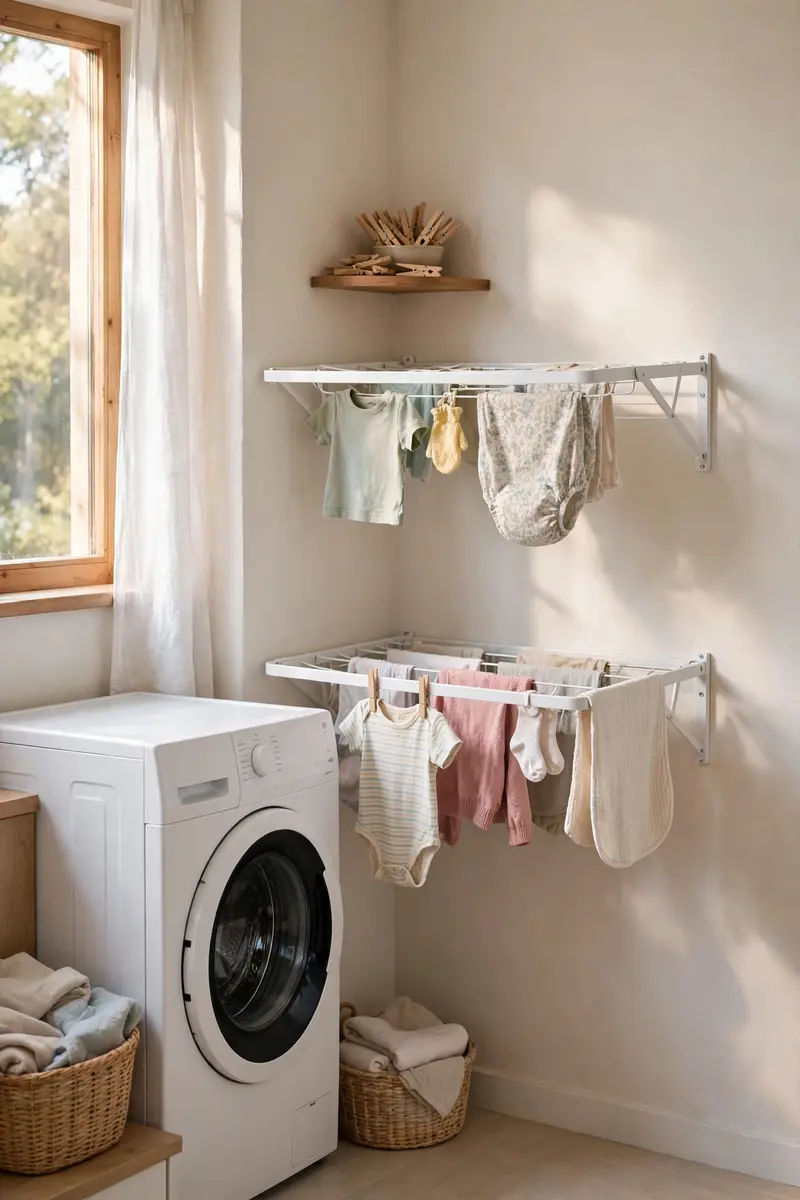
A corner two-tier rack is the laundry room drying rack that rescues the most awkward spot in the room. Corners are usually wasted space, but two short wall-mounted racks stacked one above the other turn that dead zone into a drying station for a surprising amount of laundry.
You will need two short accordion or fixed wall racks, brackets, and screws, costing $35–$75. Mount the lower rack at waist height and the upper one about 18 inches above it, leaving room for clothes to hang between them. A narrow corner near the washer is the ideal spot.
Hang shorter items like kids’ clothes and delicates on the lower tier and longer shirts up top. The stacked design doubles your capacity without taking any floor space, and it keeps drying laundry tucked neatly out of the walkway.
Tip: A corner laundry room drying rack works best with lightweight items on the upper tier, so the wall anchors are never overloaded.
Variation: Add a small corner shelf above the racks for clothespins and a spray bottle, keeping every drying supply in one spot.
18. Heated Drying Airer
A heated drying airer is the laundry room drying rack for damp climates and winter laundry days. It looks like a standard folding airer, but its bars gently warm up, drying clothes noticeably faster than air alone while using far less energy than a tumble dryer.
You will need an electric heated airer, costing $60–$120. Set it up on a flat floor near an outlet, drape clothes over the heated bars, and switch it on. Most models have a timer and a safety cut-off, and many fold flat for storage when the season changes.
Use it for towels, bedding, and the everyday loads that pile up in wet weather. It is especially helpful in apartments without outdoor drying space, and it keeps the laundry room warm and dry, which also helps prevent damp and mildew.
Tip: A heated laundry room drying rack dries clothes fastest when you leave a small gap between items, so warm air can rise between them.
Variation: Pair the heated airer with a dehumidifier in a windowless laundry room for the fastest indoor drying setup you can build.

Frequently Asked Questions
What is the best drying rack for a small laundry room?
The best laundry room drying rack for a small space is a wall-mounted accordion rack or a retractable clothesline, because both fold away to almost nothing when you are not using them. A ceiling pulley rack is another strong choice, since it uses air space above your head. Avoid large freestanding racks in tiny rooms, because they eat the floor space you need to move around.
How do you dry clothes in a laundry room without a dryer?
You can dry clothes in a laundry room without a dryer by hanging them on a laundry room drying rack with good airflow. Spread items out so air can move between them, point a small fan at the rack, and open a window or run a vent fan if you have one. Thinner fabrics dry in a few hours, while heavy towels and jeans may need overnight. A heated airer speeds things up on damp days.
Are wall-mounted drying racks worth it?
Yes, wall-mounted drying racks are worth it if you air-dry clothes regularly. A good laundry room drying rack mounted on wall studs holds a full load, folds flat when you are done, and frees your floor completely. The installation takes under an hour, and the rack pays for itself by extending the life of your clothes and cutting dryer energy use.
What is the best material for a laundry drying rack?
Stainless steel is the most durable choice for a laundry room drying rack because it resists rust and holds heavy wet laundry for years. Bamboo looks warm and stylish but needs to be dried after use in humid rooms. Coated metal is a good middle ground, while plastic racks are light and cheap but can warp under heavy wet items.
How much weight can a wall-mounted drying rack hold?
Most wall-mounted drying racks hold 20–30 pounds when they are anchored into wall studs, which is enough for a full load of shirts and delicates. A laundry room drying rack held by drywall anchors alone typically manages only 10–15 pounds, so always mount into studs for heavier loads like wet jeans and towels. Check the manufacturer’s rating before you buy.
Conclusion
The right laundry room drying rack turns a chore into a system. Whether you pick a wall-mounted accordion rack that disappears when folded, a ceiling pulley rack that lifts laundry out of the way, or a simple over-the-door rack that needs no tools at all, you will save your clothes, lower your energy bill, and reclaim the floor of your laundry room.
Start with the idea that fits your space today. Even one good rack changes laundry day completely, and you can always add a second style later as your routine grows. Save this post to Pinterest so you can find your favorite drying rack idea when you are ready to build or buy it, and share it with a friend whose laundry room could use the same upgrade.




Leave a Reply