

Pumpkin Painting Ideas: 30 Easy No-Carve Designs That Wow
If you love the look of decorated pumpkins but dread the slimy, smelly mess of carving, these pumpkin painting ideas are exactly what you need. No knives, no scooping, no rotting jack-o’-lantern sagging on your porch by October 28th — just paint, a pumpkin, and an afternoon. Whether you’re crafting with toddlers, styling a Pinterest-worthy entryway, or going full spooky for Halloween night, there’s a no-carve design here for every skill level.
Painted pumpkins last weeks longer than carved ones, they’re completely kid-safe, and the designs range from silly to genuinely elegant. Below you’ll find 30 genuinely different pumpkin painting ideas — cute kid crafts, aesthetic pastels, spooky Halloween looks, and neutral fall designs — each with realistic costs, simple how-to steps, and one practical tip to make it turn out right the first time. Grab your paintbrushes and pick your favorites.
1. Classic Painted Jack-o’-Lantern Face
The simplest of all pumpkin painting ideas is also the most beloved: a classic jack-o’-lantern face, painted instead of carved. It delivers the full Halloween look with zero knife work, and kids can do the whole thing themselves.
Materials + cost: one pumpkin ($4–$8), orange and black acrylic paint ($2–$3 each), paintbrushes. Total: under $12.
Paint the pumpkin orange if it isn’t already (two thin coats). Sketch the face lightly in pencil — triangle eyes, a small nose, a wide grin with square teeth — then fill in with black paint using a small flat brush.
Tip: Paint the face last. Finish the orange base completely and let it dry before adding features — wet base paint smears into the black and turns muddy.
Variation: Give it vampire fangs or a goofy snaggletooth for extra personality.

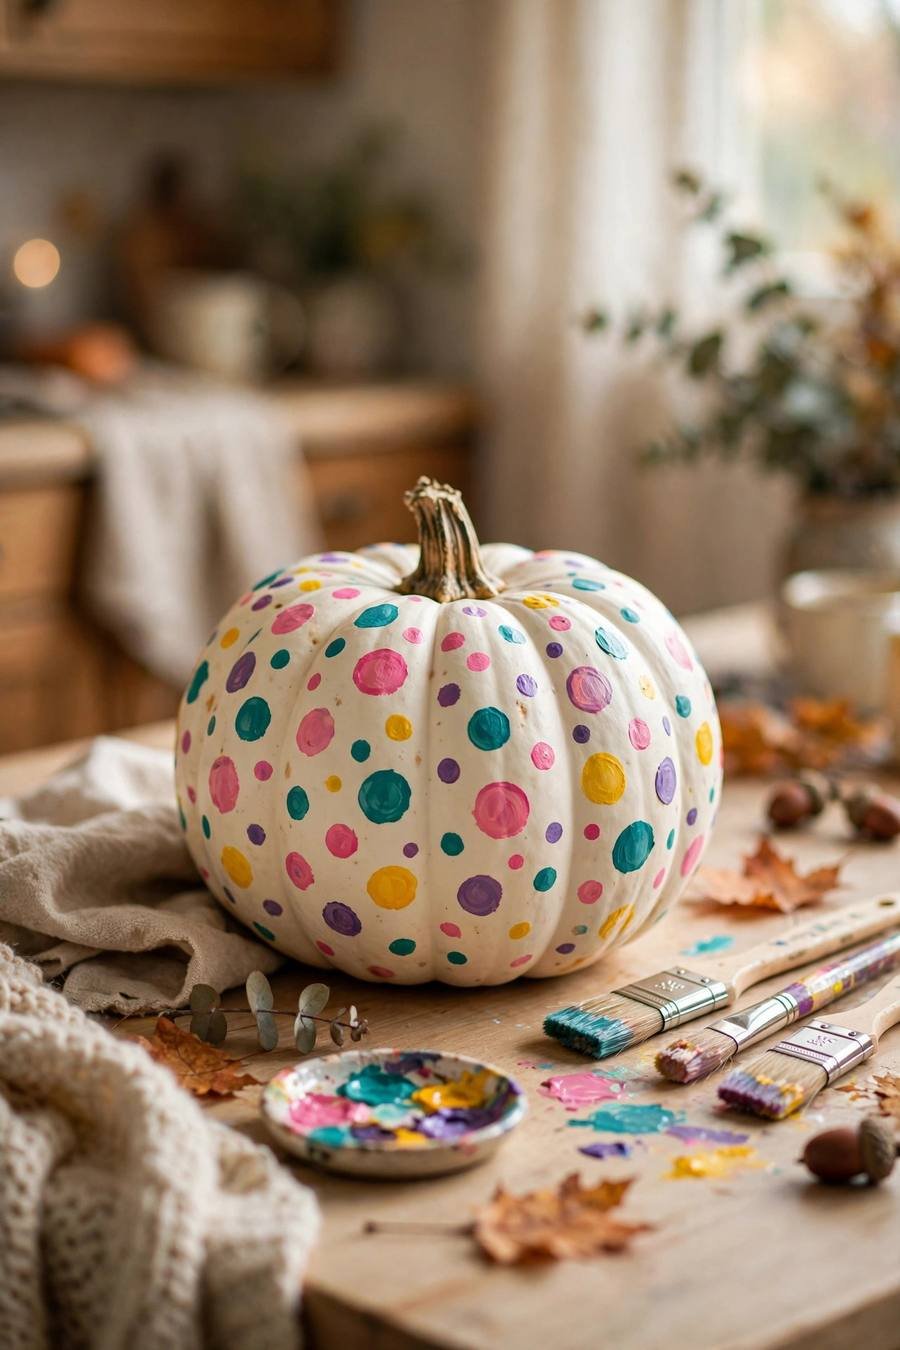
2. Polka Dot Party Pumpkin
Few pumpkin painting ideas are as cheerful — or as foolproof — as polka dots. This is the ultimate toddler craft: no drawing skill required, and the more random the dots, the better it looks.
Materials + cost: one white or orange pumpkin ($4–$7), 3–4 bright acrylic paint colors ($2–$3 each). Total: under $12.
Paint a white base coat if starting with orange. Dip the round wooden end of a paintbrush into paint and dot it across the pumpkin. Vary the sizes by using both ends of the brush — and a fingertip for the big dots.
Tip: Load less paint than you think. A nearly-dry brush end makes crisp round dots; a loaded one makes blobs.
Variation: Metallic gold dots on a matte black pumpkin for a glam version.
3. Rainbow Stripe Pumpkin
Painted in rainbow order around its natural ridges, this cheerful design turns the pumpkin’s grooves into built-in stripe guides. These rainbow pumpkin painting ideas work for Halloween and Thanksgiving alike.
Materials + cost: one round pumpkin ($4–$8), acrylic paints in rainbow colors or a rainbow paint set ($8–$12). Total: under $15.
Starting at the stem, paint one ridge red, the next orange, then yellow, green, blue, purple, repeating around. Use a flat brush and follow each groove — the ridges keep your lines straight automatically.
Tip: Paint every other stripe first. Letting alternate colors dry before filling the gaps prevents bleeding at the edges.
Variation: Pastel rainbow stripes on a white pumpkin for a softer, nursery-friendly look.

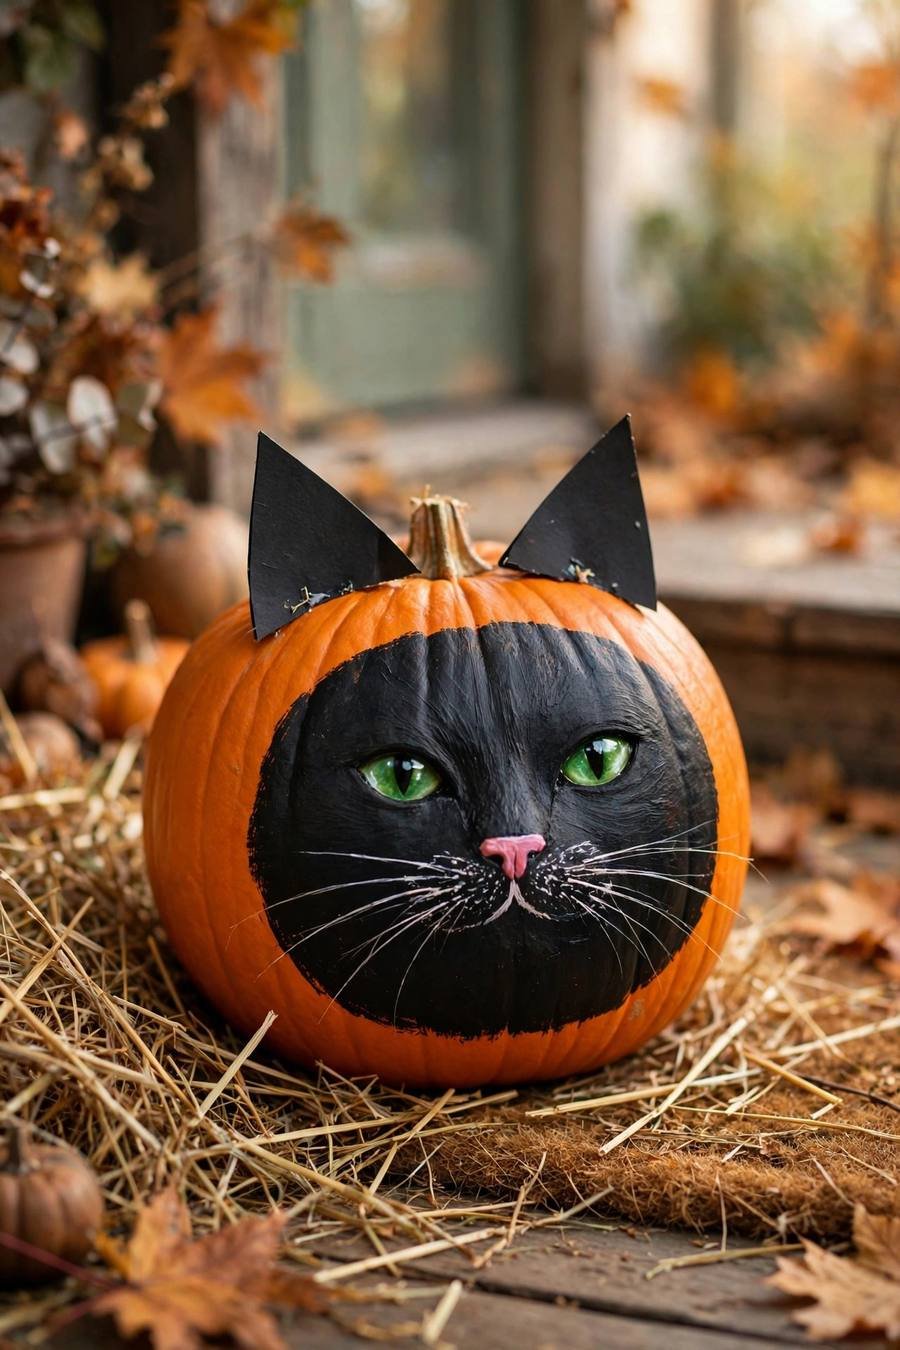
4. Black Cat Face Pumpkin
An orange pumpkin is already halfway to being a black cat — add the face and ears and Halloween’s most iconic animal is done. This is one of those pumpkin painting ideas that looks impressive but takes twenty minutes.
Materials + cost: one orange pumpkin ($4–$7), black acrylic paint ($2–$3), green and white paint for eyes, black cardstock for ears, hot glue. Total: under $10.
Paint a large black oval face on the front. Add green almond eyes with white highlights, a pink triangle nose, and white whiskers with a thin brush. Cut two triangle ears from cardstock and hot-glue them to the top.
Tip: Curve the whiskers slightly. Perfectly straight whiskers look stiff; a gentle arc makes the cat look alive.
Variation: Paint the whole pumpkin black first for a midnight-cat version with yellow eyes.
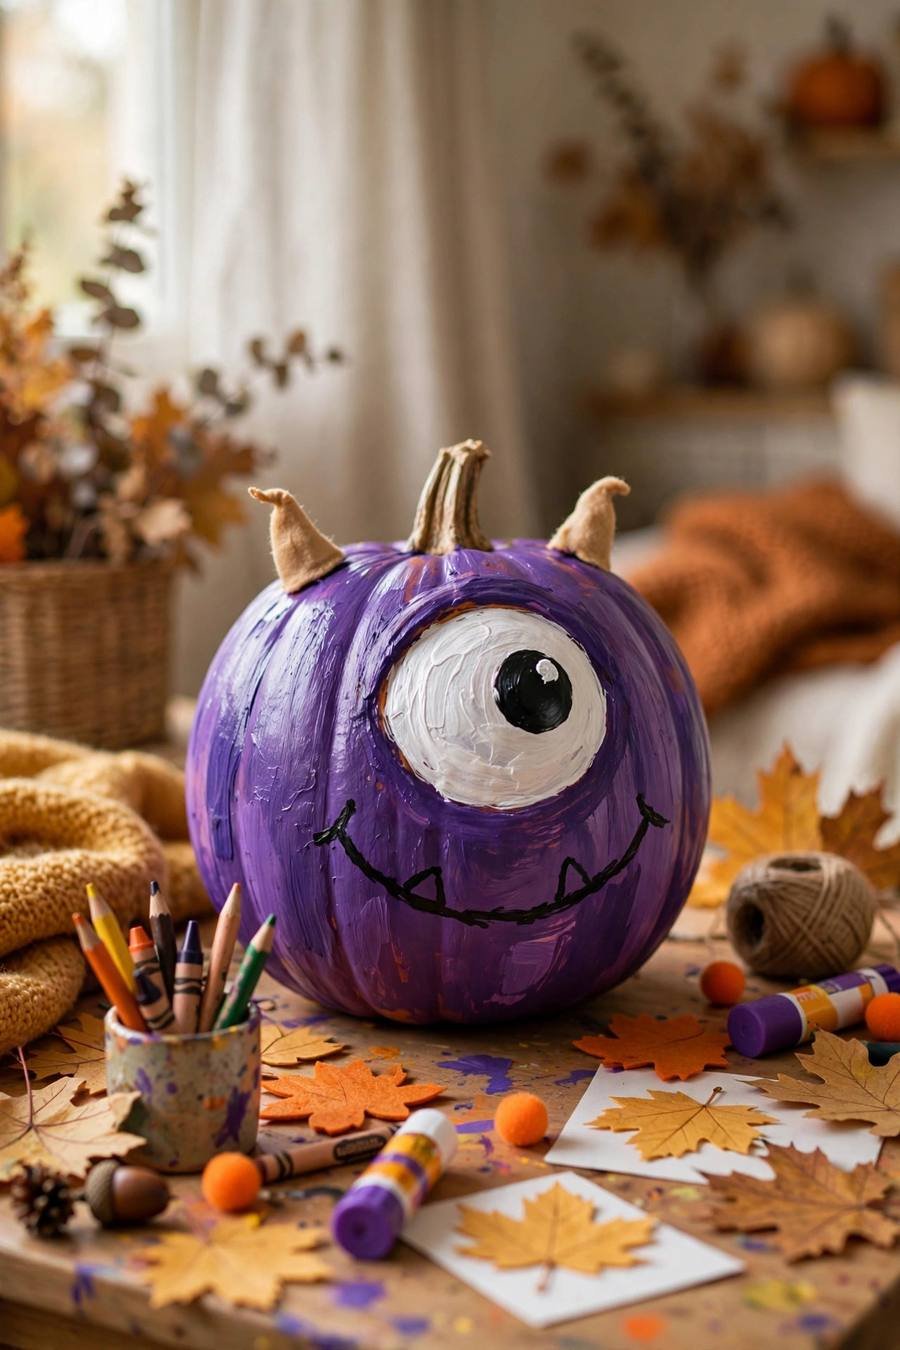
5. Goofy One-Eyed Monster Pumpkin
Purple skin, one giant eye, tiny horns — this silly monster is pure joy for kids who find spooky Halloween a little too spooky. These monster pumpkin painting ideas celebrate the goofy: every monster comes out different, which is exactly the point.
Materials + cost: one pumpkin ($4–$7), purple and white acrylic paint ($2–$3 each), black paint pen, small cones or paper for horns. Total: under $12.
Paint the pumpkin purple (two coats). Paint one huge white circle for the eye, then add a big black pupil slightly off-center for maximum goofiness. Draw a wobbly mouth with the paint pen and glue on two small horns.
Tip: Place the pupil looking sideways. A cross-eyed or side-glancing monster is ten times funnier than one staring straight ahead.
Variation: Add felt fangs or a unibrow for a whole monster family.
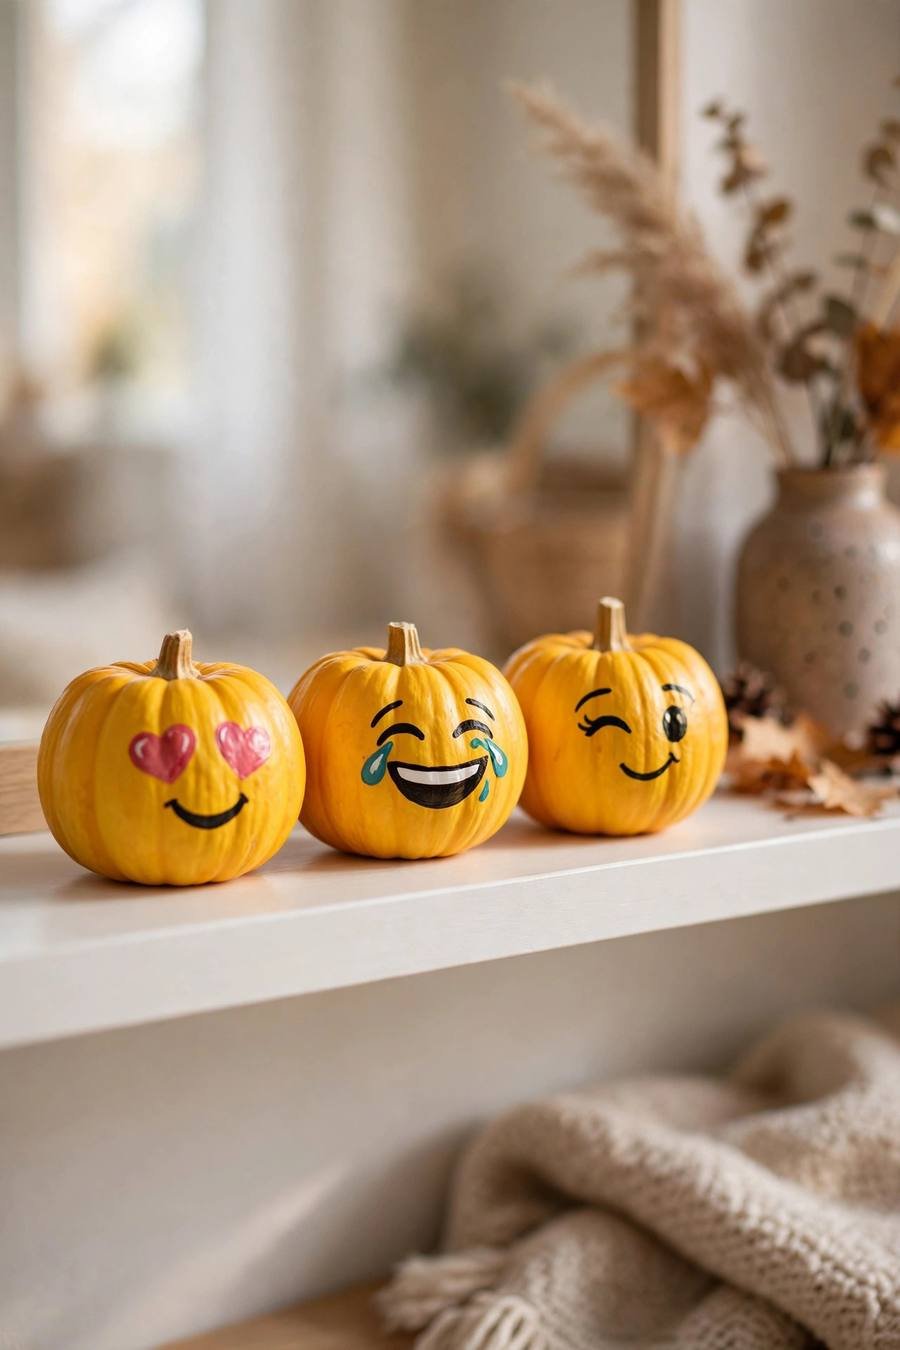
6. Emoji Face Pumpkins
Heart-eyes, laughing-crying, mind-blown — giant emoji pumpkins are instantly recognizable, nearly impossible to mess up, and hilarious lined up on porch steps. Kids pick their favorite emoji and own the design.
Materials + cost: 3 small pumpkins ($3–$5 each), yellow acrylic paint ($2–$3), black and red paint pens. Total: under $15.
Paint each pumpkin yellow with two thin coats. Once dry, draw the emoji features with paint pens — they give cleaner lines than brushes for faces. Add red hearts or tears as needed.
Tip: Sketch with pencil first. Emoji faces are all about placement; light pencil guides keep the eyes level.
Variation: Do the poop emoji (brown paint, white eyes, smile) — kids find it endlessly funny.
7. Handprint Keepsake Pumpkin
Part craft, part time capsule: press your child’s painted hand onto a pumpkin and turn the print into art. Date the bottom and you’ll pull it out every October with tears in your eyes.
Materials + cost: one white pumpkin ($5–$9), washable-safe acrylic paints ($2–$3), fine brushes. Total: under $12.
Paint your child’s palm and fingers with a thin coat of paint and press firmly onto the pumpkin — one confident press, no wiggling. Once dry, turn the print into a spider (add eight legs), a ghost (add a face above), or autumn leaves (fingers become leaves).
Tip: Do a practice press on paper first. It shows you exactly how the hand will land and how much paint to load.
Variation: The whole family adds handprints in different colors around one big pumpkin.

8. Sticker Resist Pumpkin
Here’s a professional-looking trick with almost no skill involved: stickers block the paint, then peel away to reveal perfect shapes underneath. It looks like you hired an artist — and the supplies cost less than a coffee run to our dollar tree halloween decor diy ideas aisle.
Materials + cost: one pumpkin ($4–$7), Halloween stickers or vinyl shapes ($2–$4), black acrylic paint ($2–$3). Total: under $12.
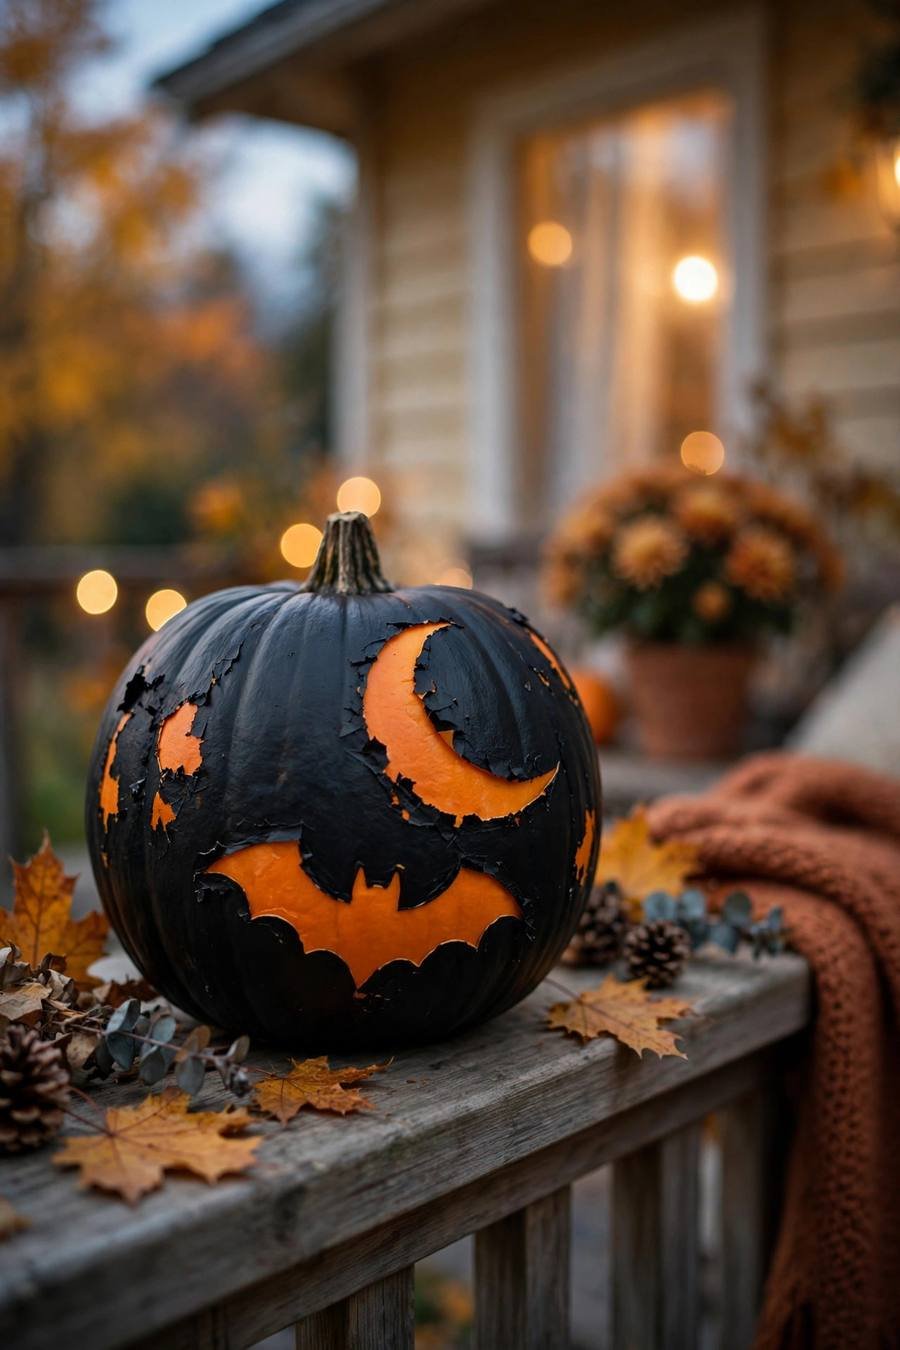
Stick bats, moons, or stars firmly onto the pumpkin, pressing edges down tight. Paint the entire pumpkin black over the stickers. While the paint is just tacky (not fully dry), peel the stickers off to reveal crisp orange shapes.
Tip: Seal sticker edges first. A thin coat of the base color over the sticker edges prevents paint bleeding underneath for razor-sharp lines.
Variation: Use letter stickers to spell BOO or your family name across the pumpkin.
9. Pastel Painted Pumpkins
Forget orange — blush pink, sage, lavender, and cream pumpkins are the farmhouse-cottagecore dream. These soft pumpkin painting ideas photograph beautifully and work from September straight through Thanksgiving.
Materials + cost: 3–5 pumpkins, pastel acrylic paints or a pastel set ($8–$14). Total: under $20.
Give each pumpkin two coats of a different pastel shade. That’s genuinely it — the color palette does all the design work. Group in odd numbers with dried eucalyptus for a styled look.
Tip: Add one white pumpkin to the group. It brightens the whole arrangement and makes the pastels look intentional, not washed out.
Variation: Add thin gold pinstripes around the middle of each for a designer touch.

10. Hand-Painted Floral Pumpkin
Delicate painted blooms on a cream pumpkin look like they belong in a boutique — and these floral pumpkin painting ideas are easier than they look. Five-petal flowers and dot centers fool everyone into thinking you’re an artist.
Materials + cost: one white or cream pumpkin ($5–$9), acrylic paints in 2–3 floral colors + green ($2–$3 each), small round brush. Total: under $15.
Paint simple five-petal flowers: five teardrop petals around a dot center. Add small green leaves and curling vines between blooms. Cluster the design on one side rather than covering the whole pumpkin — restraint looks elegant.
Tip: Keep a damp cotton swab handy. One quick wipe erases a wobbly petal before the paint dries — no stress.
Variation: Paint moody dark florals (burgundy, navy, black) on a white pumpkin for a dramatic fall centerpiece.

11. Boho Geometric Pumpkin
Terracotta triangles, mustard diamonds, cream dots — geometric patterns give pumpkins a trendy boho look that fits modern and eclectic homes way better than a scary face does. These geometric pumpkin painting ideas are pure Pinterest bait.
Materials + cost: one pumpkin ($4–$8), 3 earthy acrylic paint colors ($2–$3 each), painter’s tape. Total: under $15.
Use thin strips of painter’s tape to map out triangles, diamonds, or chevrons. Paint inside the tape lines, peel the tape while the paint is slightly tacky, and fill small gaps with dot details.
Tip: Peel tape at a 45-degree angle. Pulling straight up can lift paint; the angle gives the crispest line.
Variation: Metallic copper geometric lines on a matte white pumpkin for a luxe boho look.

12. Buffalo Check Pumpkin
The cozy farmhouse check you love on blankets works magic on pumpkins too. It sounds complicated — it’s just overlapping squares — and the result screams autumn from across the street.
Materials + cost: one pumpkin ($4–$8), white and black acrylic paint ($2–$3 each), flat brush. Total: under $12.
Paint the whole pumpkin white first. Paint evenly spaced vertical black stripes, then horizontal black stripes over them — where they cross, the check appears. Keep stripes the same width for a true buffalo check.
Tip: Mark stripe positions with tiny pencil dots first. Even spacing is the whole trick; eyeballing it leads to wobbly checks.
Variation: Red and black buffalo check for a cabin-Christmas crossover (it works in November too).

13. Gold Foil Accent Pumpkin
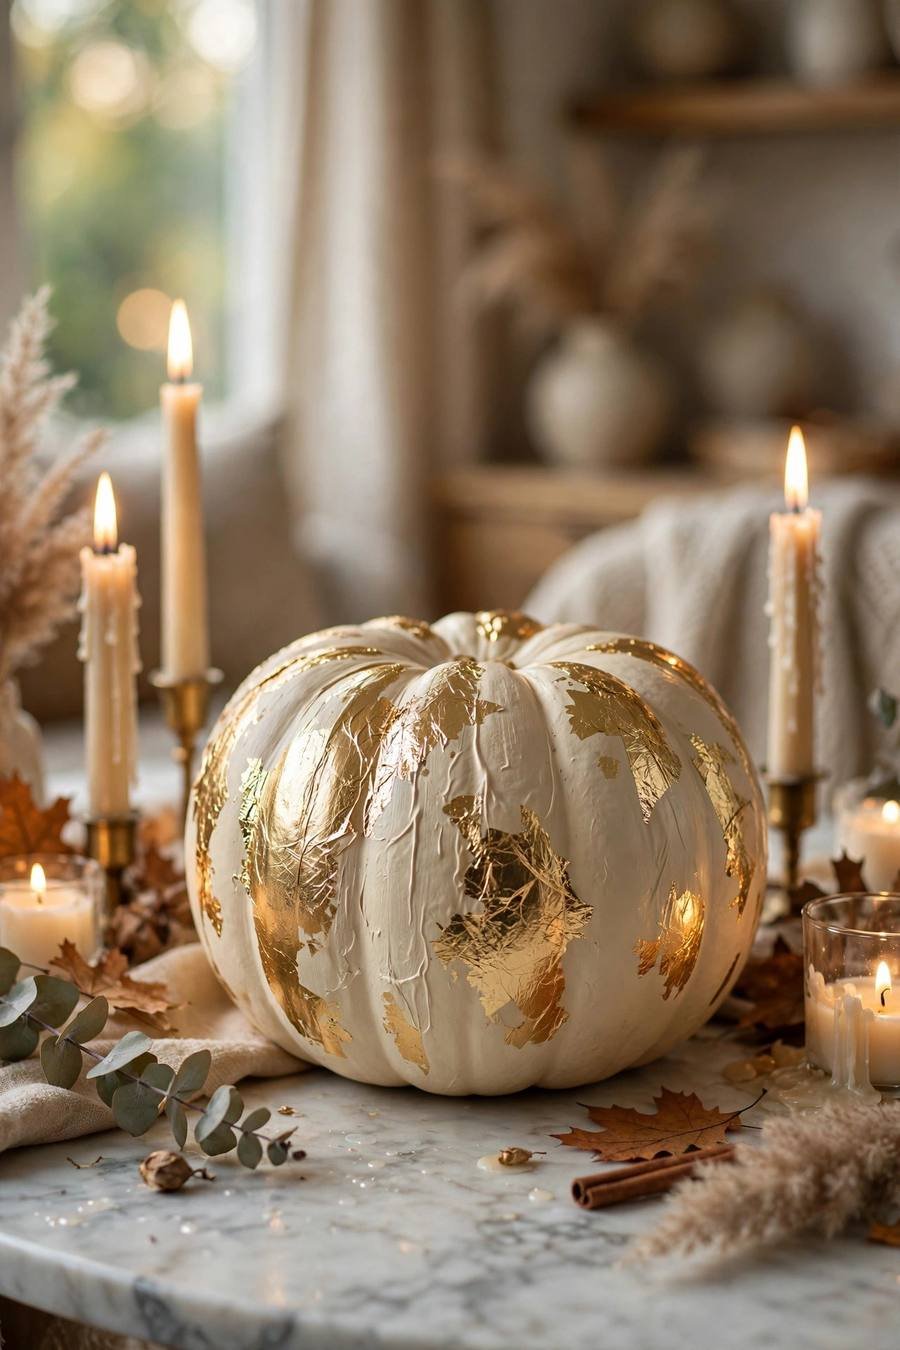
A few sheets of gold foil turn a plain painted pumpkin into something that looks genuinely expensive. This is the dinner-party centerpiece of pumpkin painting ideas — metallic shine against matte paint.
Materials + cost: one pumpkin ($4–$8), acrylic paint in any solid color ($2–$3), gold foil sheets ($4–$6), tacky glue. Total: under $15.
Paint the pumpkin your base color and let it dry fully. Dab tacky glue in random patches, wait until it turns clear and tacky, then press gold foil sheets on and smooth gently. Peel back the backing — the foil stays where the glue was.
Tip: Tear the foil, don’t cut it. Ragged torn edges blend into the paint; cut edges show obvious lines.
Variation: Copper or rose-gold foil on a blush pumpkin for a softer metallic look.
14. Marbled Swirl Mini Pumpkins
Drip nail polish into water, swirl, dip a mini pumpkin — thirty seconds later you have a one-of-a-kind marbled masterpiece. These marbled pumpkin painting ideas are dangerously addictive because no two ever look alike.
Materials + cost: 3–5 mini white pumpkins ($1–$3 each), 2–3 nail polish colors ($1–$3 each), a disposable bucket, stick. Total: under $12.
Fill the bucket with room-temperature water. Drip nail polish onto the surface, swirl once with a stick, and dip the pumpkin straight down, then lift. The polish film wraps the pumpkin in marble swirls.
Tip: Work fast with room-temperature water. Cold water makes polish clump; hot water spreads it too thin to catch.
Variation: Black and gold polish on white minis for an elegant marbled set. (Do this outside — the fumes are strong.)

15. Chalkboard Message Pumpkin
One pumpkin, endless messages: coat it in chalkboard paint and rewrite the design all season. Countdown to Halloween, your family name, tonight’s dinner menu — the hardest-working pumpkin on the porch.
Materials + cost: one pumpkin ($4–$8), chalkboard spray paint ($5–$8), chalk markers ($3–$5). Total: under $18.
Spray the pumpkin with 2–3 light coats of chalkboard paint, letting each dry. Cure 24 hours, then “season” it: rub chalk all over and wipe off (prevents ghosting). Write your message with chalk markers.
Tip: Seasoning is non-negotiable. Skip the rub-and-wipe and your first message will haunt every future design as a faint ghost.
Variation: White mini pumpkin + black chalk marker for an inverted high-contrast version.

16. Galaxy Night-Sky Pumpkin
Deep blues, purples, and a spray of stars — a galaxy pumpkin looks absolutely unreal glowing on a dark porch. It’s the showstopper of spooky pumpkin painting ideas, and easier than it looks.
Materials + cost: one pumpkin ($4–$8), dark blue, purple, black, and white acrylic paint ($2–$3 each), sponge, old toothbrush. Total: under $15.
Sponge on layers of dark blue, purple, and black, blending the edges. While the base is slightly tacky, flick white paint off a toothbrush for stars. Add a tiny ringed planet with white and light blue.
Tip: Flick stars from at least 12 inches away. Close flicks make blobs; distance makes a fine, realistic starfield.
Variation: Add a crescent moon in pale yellow for a focal point. (Prefer carving stars instead? Our pumpkin carving ideas has a celestial design.)

17. Haunted House Scene Pumpkin
A crooked haunted house silhouette with glowing windows is the Halloween scene people stop to photograph. Silhouettes are forgiving — wobbly lines just look spookier.
Materials + cost: one pumpkin ($4–$8), black acrylic paint ($2–$3), orange and yellow paint for windows and moon, fine brush. Total: under $12.
Paint the pumpkin solid black. Sketch a haunted house (crooked roof, tower, fence) lightly in pencil, then paint the scene in orange and yellow directly on the black for a glowing effect. Add a yellow moon and bat silhouettes.
Tip: Keep the house large and left-of-center. A big simple silhouette reads from the street; tiny details disappear.
Variation: Paint the scene in glow-in-the-dark paint over the black for a night-time reveal.

18. Spiderweb Pumpkin
A white web radiating across dark purple or black is creepy-elegant in about fifteen minutes. These spiderweb pumpkin painting ideas are the minimalist’s Halloween pumpkin — one motif, maximum effect.
Materials + cost: one pumpkin ($4–$8), black or deep purple acrylic paint ($2–$3), white paint pen. Total: under $10.
Paint the pumpkin dark and let dry. Starting at the top near the stem, draw radiating straight lines down like wheel spokes with the white paint pen. Connect them with curved arcs, working outward. Add a small spider hanging from the stem on a thread line.
Tip: Draw all the spokes before any arcs. Evenly spaced spokes make the web look professional; uneven ones look tangled.
Variation: Metallic silver web on a navy pumpkin for an icy elegant version.

19. Sugar Skull Pumpkin
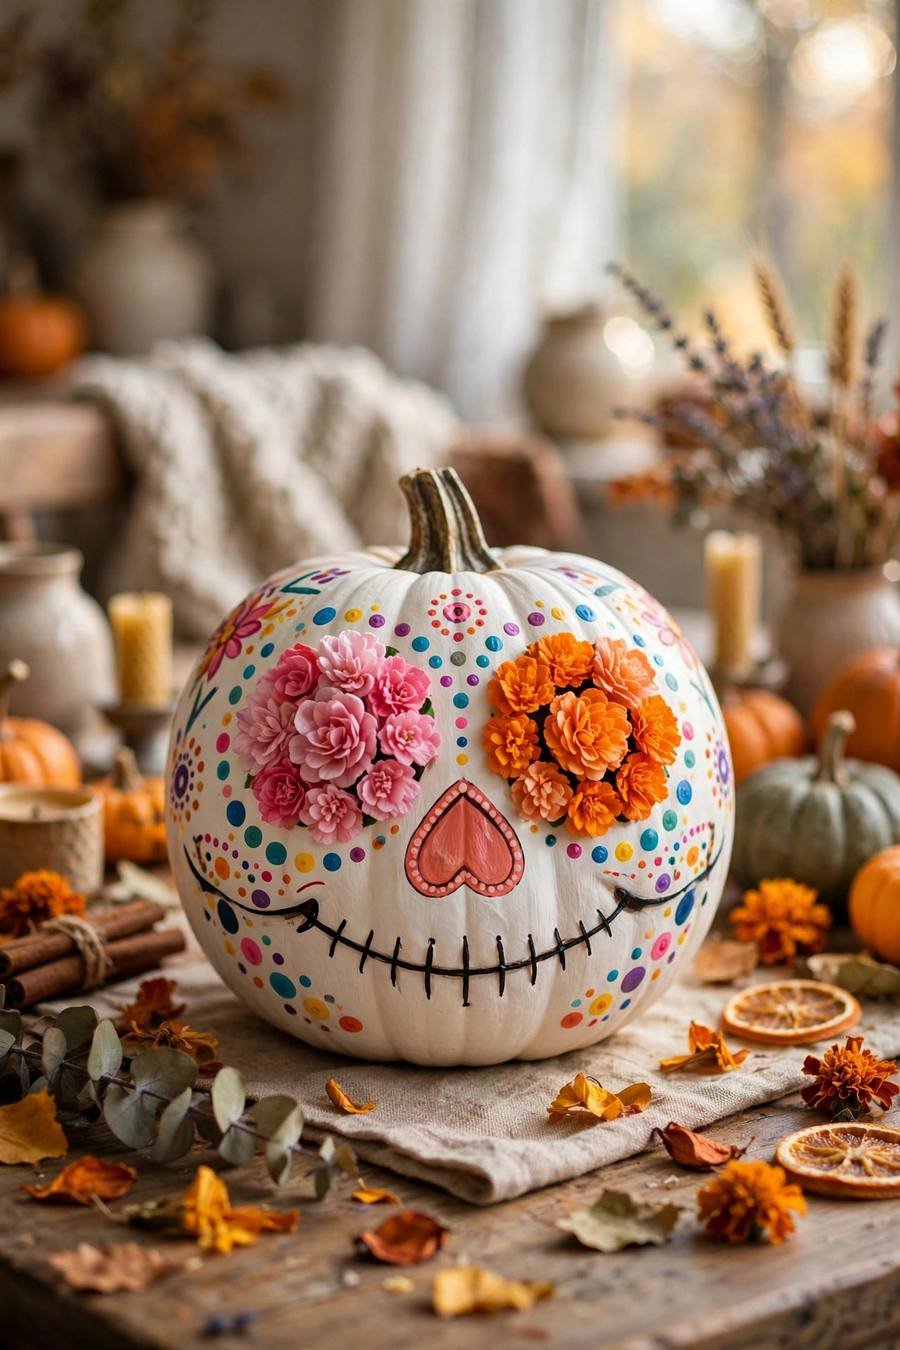
Inspired by Día de los Muertos, a sugar skull pumpkin is a riot of color — flower eyes, heart nose, stitched smile. It’s joyful rather than scary, and absolutely unforgettable on a porch.
Materials + cost: one white pumpkin ($5–$9), bright acrylic paints — pink, orange, turquoise, purple ($2–$3 each), fine detail brushes. Total: under $18.
Sketch the skull lightly: large round eye sockets, heart-shaped nose, wide stitched grin. Fill the eyes with layered flower petals in bright colors, then add dots and scrollwork around the face. Symmetry matters more than perfection.
Tip: Work one color at a time across the whole design. It keeps colors clean and saves you from washing brushes every two minutes.
Variation: Add marigold-orange cheek swirls and a flower crown painted around the stem.
20. Glow-in-the-Dark Ghost Pumpkin
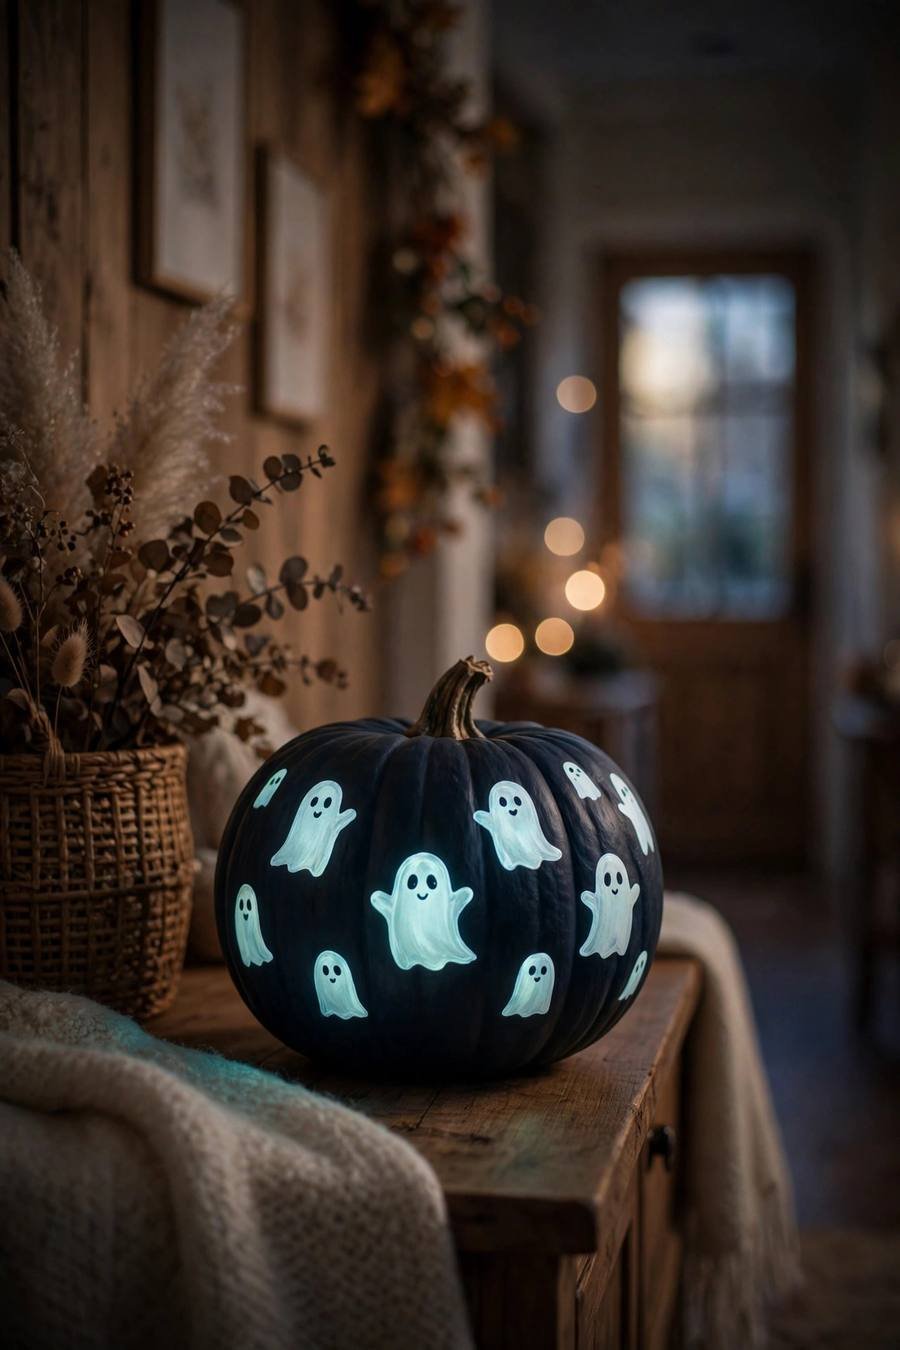
By day it’s a subtle dark pumpkin; by night, glowing ghosts float across it. Kids lose their minds over this one — these glow pumpkin painting ideas are the easiest “wow” on this list.
Materials + cost: one pumpkin ($4–$8), dark base paint ($2–$3), glow-in-the-dark paint ($4–$6). Total: under $15.
Paint the pumpkin a dark base color. Paint simple ghost shapes (rounded tops, wavy bottoms, oval eyes) in glow paint — two coats for maximum glow. Charge under a bright lamp for an hour before dark.
Tip: Two thin coats glow brighter than one thick one. Let the first coat dry fully or it peels when you recoat.
Variation: Glow-in-the-dark constellation dots instead of ghosts for a subtler night effect.
21. All-White Minimalist Pumpkins
Sometimes restraint wins: a cluster of matte white pumpkins looks impossibly chic on any porch or table. These minimalist pumpkin painting ideas are the easiest elegant look here, and they never look cheap.
Materials + cost: 3–5 pumpkins in varied sizes ($4–$8 each), white matte spray paint or acrylic ($5–$8). Total: under $25.
Spray or brush every pumpkin matte white — spray gives the smoothest finish. Vary the sizes and cluster in odd numbers. That’s the whole design; the monochrome palette does the work.
Tip: Spray in light passes from 10 inches away. Heavy coats drip; three light coats look factory-smooth.
Variation: Add one black pumpkin to the cluster for a striking monochrome contrast.

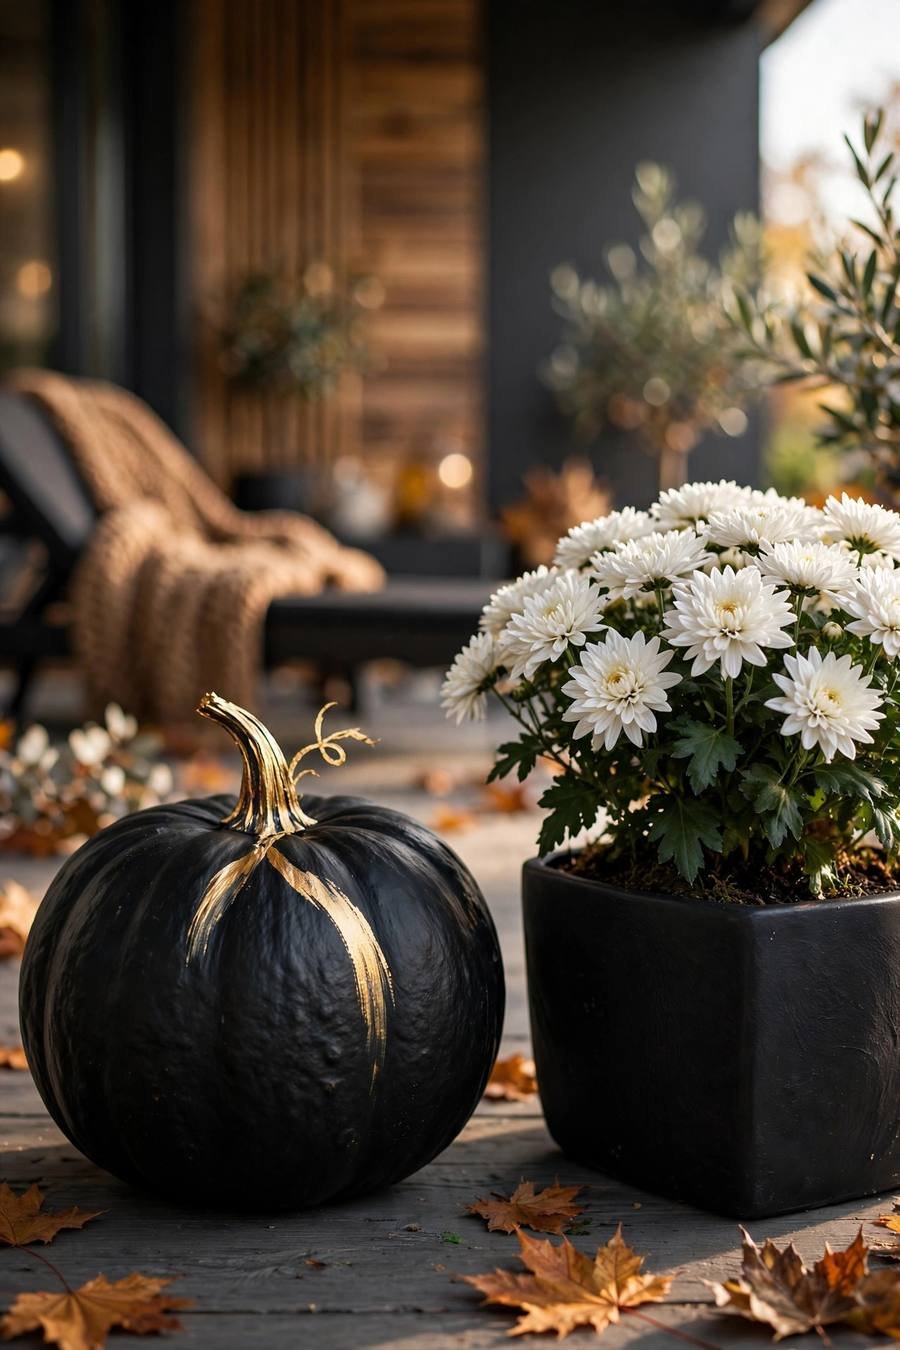
22. Matte Black Pumpkin
Matte black pumpkins are pure drama — modern, moody, and incredible against white mums or pale gourds. One can of spray paint, ten minutes, total transformation. Style them with the rest of our halloween porch decor ideas for a full gothic entryway.
Materials + cost: 1–3 pumpkins ($4–$8 each), matte black spray paint ($5–$7). Total: under $15.
Spray pumpkins matte black in light even coats. Display against white or cream elements (mums, candles, pale pumpkins) so the black pops. Paint the stems gold for a designer detail.
Tip: Paint the stem separately with a brush. Masking tape on a bumpy stem never seals — hand-painting it gold looks cleaner.
Variation: Group black pumpkins with metallic gold ones for a luxe Halloween tablescape.
23. Metallic Gold Pumpkin
Gold spray paint is a magic wand: it turns even the lumpiest grocery-store pumpkin into something that looks straight from a stylist’s shelf. Essential for Thanksgiving tables.
Materials + cost: 2–4 pumpkins ($4–$8 each), metallic gold spray paint ($6–$9). Total: under $25.
Spray in light coats, rotating the pumpkin for even coverage. Style with deep green eucalyptus, dark taper candles, or navy linens — gold loves dark, moody companions.
Tip: Warm the can in room-temperature water for five minutes first. Slightly warm paint atomizes finer and lays down smoother metallic coverage.
Variation: Copper or champagne metallic for a softer take on the gilded look.

24. Blue & White Porcelain Pumpkin
Delicate blue florals on white — the chinoiserie porcelain look — turn a pumpkin into a genuine conversation piece. Nobody expects it, everybody photographs it.
Materials + cost: one white pumpkin ($5–$9), white acrylic paint ($2–$3), blue paint in 2 shades + fine detail brush ($2–$3). Total: under $15.
Ensure a smooth white base. Paint loose floral sprays in medium blue, then add darker blue detail lines and dots. Keep the pattern airy — porcelain style is about negative space, not coverage.
Tip: Keep one reference photo of blue-and-white porcelain nearby. Borrowing real motifs beats inventing them and looks instantly authentic.
Variation: Add a thin blue band around the middle like a porcelain vase stripe.

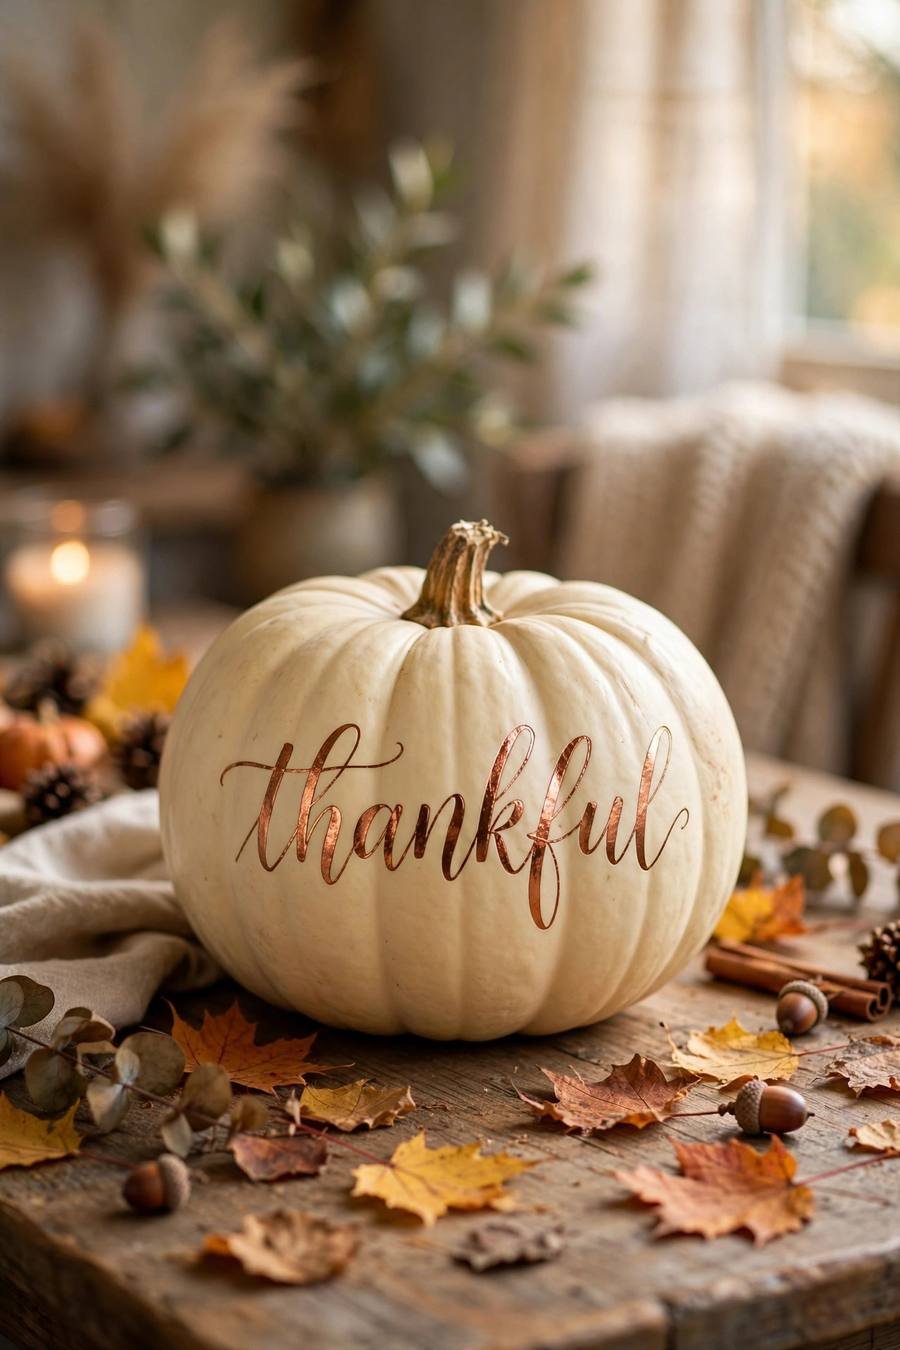
25. Copper Calligraphy Pumpkin
Hand-lettered words like “thankful” and “gather” in metallic copper turn cream pumpkins into Thanksgiving’s most elegant guests. Wobbly lettering just reads as charming — that’s the beauty of calligraphy-style pumpkin painting ideas.
Materials + cost: 2–3 cream or pale pumpkins ($5–$9 each), cream acrylic paint ($2–$3), copper metallic paint + small script brush ($3–$5). Total: under $20.
Paint pumpkins a soft cream. Lightly pencil your word in script, then trace with copper paint using a small round brush. Add a tiny flourished underline or leaf sprig.
Tip: Write the word on paper first at the same size. One practice run fixes spacing disasters before they touch the pumpkin.
Variation: Number the pumpkins 1–31 as an October countdown calendar.
26. Mini Succulent Pumpkins
Painted sage green with pointed leaf layers, mini pumpkins become succulents that never need watering. These succulent pumpkin painting ideas always get a double-take — group them in a bowl and watch.
Materials + cost: 3–5 mini pumpkins ($1–$3 each), sage and dark green acrylic paint ($2–$3 each). Total: under $10.
Paint minis sage green. Once dry, paint pointed oval “leaves” in darker green radiating from the top center in overlapping rings, like an echeveria. Tuck them into a shallow bowl with moss.
Tip: Start leaves at the top and work outward-down. Real succulents grow center-out; copying that reads instantly as “plant.”
Variation: Dust the leaf tips with a little white paint for a “frosted” succulent look.

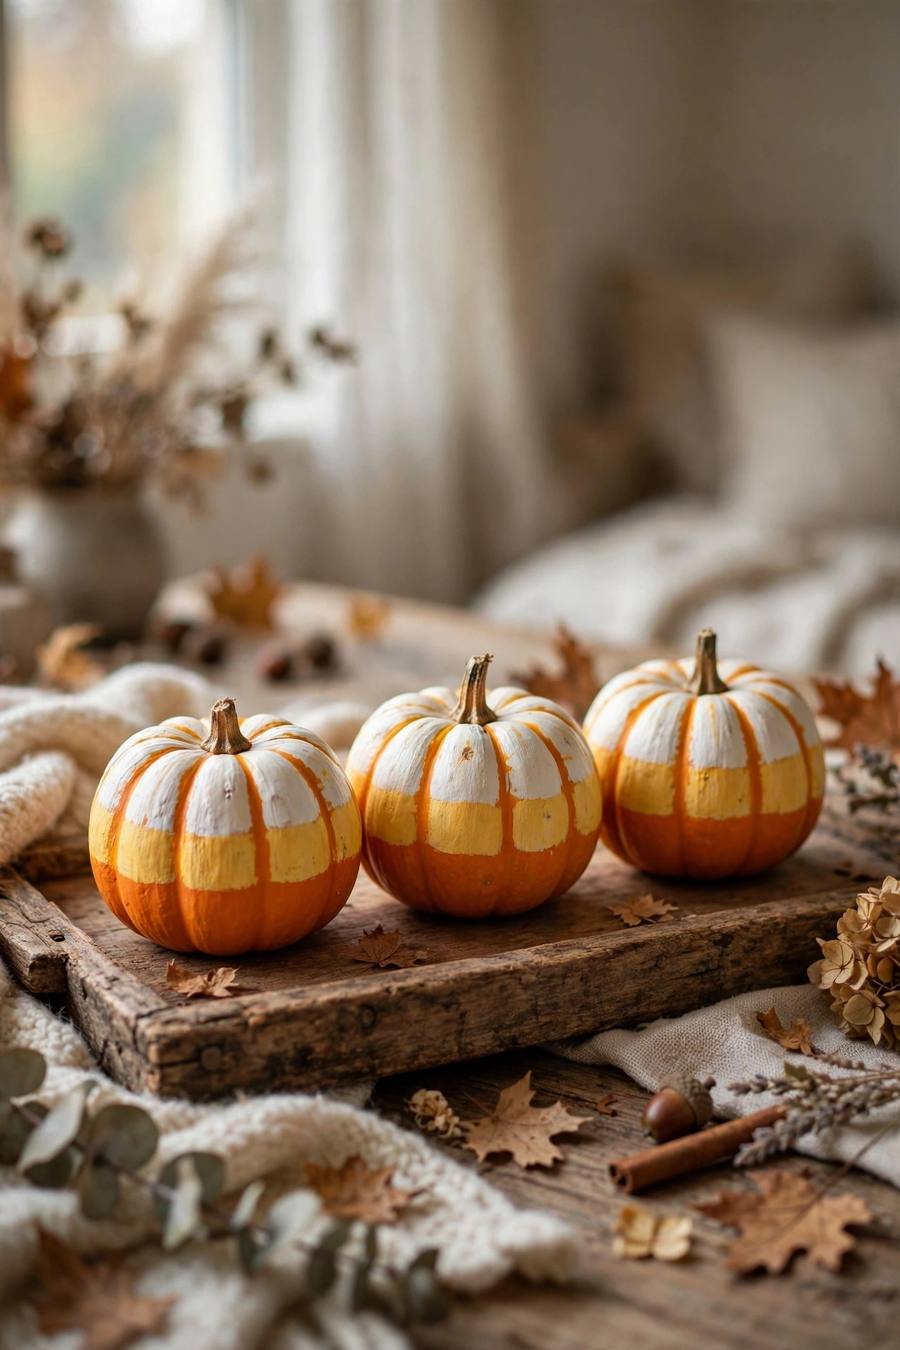
27. Candy Corn Mini Pumpkins
Orange bottom, yellow middle, white top — candy corn stripes on mini pumpkins are tiny, adorable, and done in ten minutes flat. The ultimate last-minute craft.
Materials + cost: 3–5 mini pumpkins ($1–$3 each), orange, yellow, white acrylic paint ($2–$3 each). Total: under $10.
Paint the bottom third orange, the middle third yellow, the top third white. Use the pumpkin’s ridges as rough guides — perfect lines don’t matter at this scale.
Tip: Paint white last, slightly over the yellow edge. Crisp white tips sell the candy corn illusion more than any other stripe.
Variation: Giant candy corn — do the same stripes on a large tall pumpkin for porch impact.
28. Donut Mini Pumpkins
Pink frosting, white icing drips, rainbow sprinkles — donut pumpkins are almost too cute to put outside. These donut pumpkin painting ideas are faster than real donuts, and kids beg to make them.
Materials + cost: 3–5 mini pumpkins ($1–$3 each), pink and white acrylic paint ($2–$3 each), sprinkle dots. Total: under $10.
Paint the top two-thirds pink for frosting, letting the edge drip naturally over the orange “dough.” While tacky, add white icing drips from the top and tiny sprinkle dashes in rainbow colors with a brush tip.
Tip: Let the pink go slightly tacky before sprinkles. Wet paint swallows sprinkles; tacky paint grips them.
Variation: Chocolate frosting with white sprinkles, or mint with chocolate chips.

29. Washi Tape Pattern Pumpkin
Zero drying time for the pattern part: paint a solid base, then wrap washi tape in stripes and chevrons. Endless patterns, instant results — and it peels right off if you change your mind.
Materials + cost: 1–2 mini or small pumpkins ($3–$6), solid acrylic paint ($2–$3), patterned washi tape ($3–$5). Total: under $12.
Paint the pumpkin a solid color and let dry completely. Wrap strips of washi tape around it — straight stripes, crisscross lattice, or chevrons. Burnish edges with your fingernail so they lie flat on the curves.
Tip: The base must be fully dry. Tape on tacky paint pulls the paint right off when you reposition it.
Variation: Black and gold washi on a white pumpkin for instant New Year’s Eve crossover.

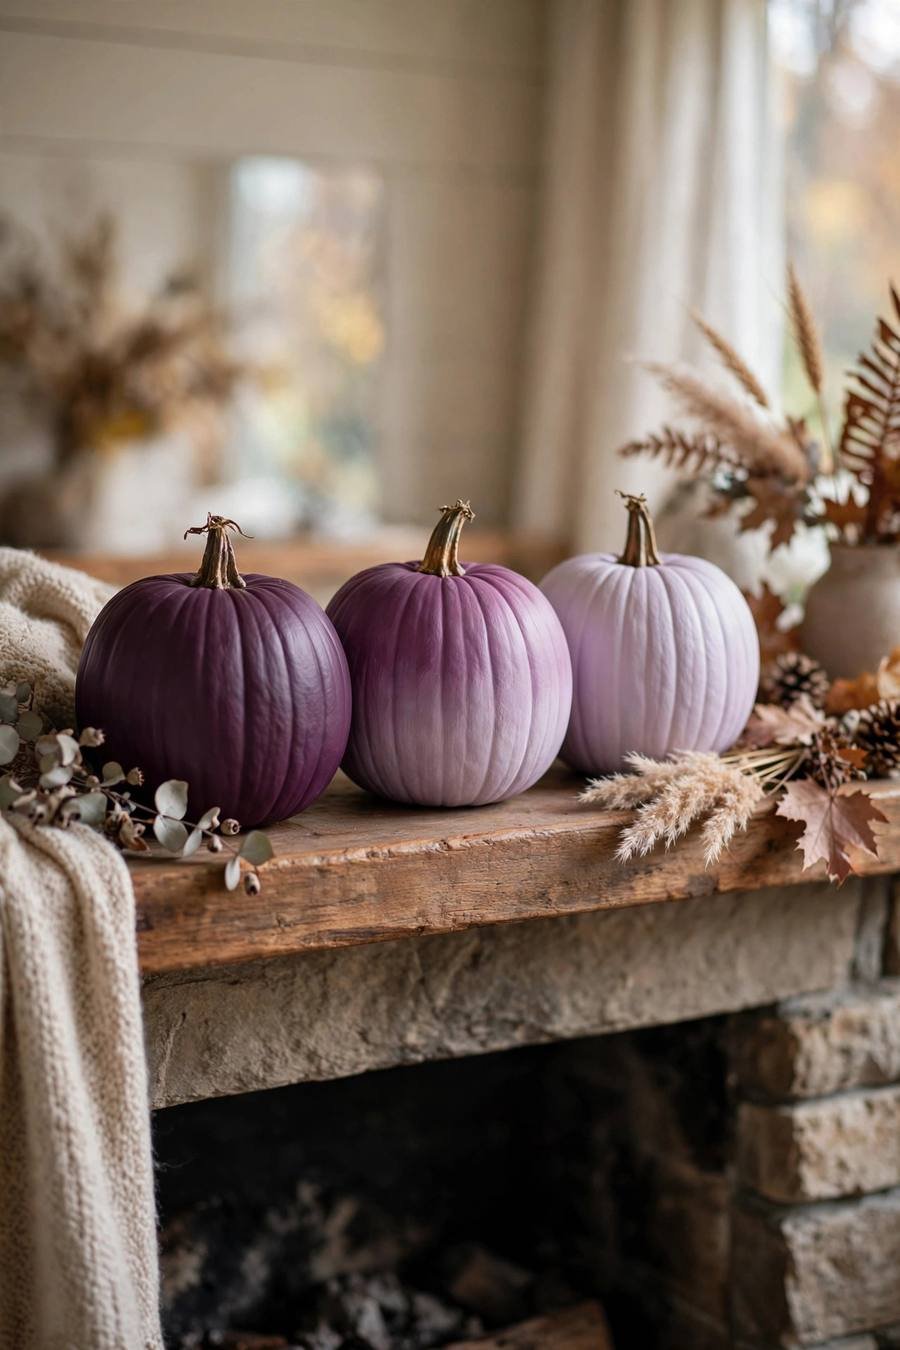
30. Ombre Gradient Pumpkin
Deep plum melting into pale lavender — a gradient paint job looks sophisticated and takes one brush and three shades. These ombre pumpkin painting ideas are stunning lined up as a mantel garland.
Materials + cost: 2–3 pumpkins ($4–$8 each), 3 shades of one color family ($2–$3 each), wide flat brush. Total: under $15.
Paint the bottom third darkest, the top third lightest. While both are wet, blend the middle with horizontal strokes, feathering where they meet. Work quickly — acrylics wait for no one.
Tip: Blend with a dry brush. A clean dry flat brush softens the transition line better than adding more paint does.
Variation: Forest-to-mint green ombre for a fresh take, or sunset orange-to-yellow.
Pumpkin Painting FAQ
What kind of paint do you use on pumpkins?
Acrylic craft paint is the best choice for pumpkin painting ideas. It sticks to pumpkin skin, dries fast, and comes in every color imaginable. For large base coats, spray paint gives the smoothest, most even finish. Skip watercolors and washable kids’ paint — they bead up and wash right off. For extra inspiration, Apartment Therapy’s painted pumpkins roundup shows how far a brush can go.
How long do painted pumpkins last?
Uncarved painted pumpkins last 2–4 weeks indoors and 1–3 weeks outdoors depending on weather — far longer than carved pumpkins, which often rot within a week. Faux pumpkins painted with acrylics last for years; just store them carefully after the season and they’ll look fresh next October.
Do you need to prime a pumpkin before painting?
It’s not required, but a white primer or base coat makes colors brighter and more even — especially important when painting light colors over an orange pumpkin. For dark designs on orange pumpkins, you can usually skip the primer entirely.
Can you use spray paint on pumpkins?
Yes! Spray paint gives the smoothest, most even base coat of any method. Use light, even passes from about 10 inches away, working outdoors or in a ventilated area. It’s perfect for the all-white, matte black, and metallic pumpkin painting ideas above.
What are the easiest pumpkin painting ideas for kids?
Stick to simple shapes: polka dots, handprints, emoji faces, and sticker-resist designs — no wrong answers, maximum fun. Cover the table, use washable smocks, and keep baby wipes handy. When the kids are ready for the real thing, our pumpkin carving ideas walk through every classic cut.

9 Comments