

26 Attic Bedroom Ideas That Wow
If you have ever stood in a dusty attic and wondered whether it could ever feel like a real bedroom, you are not alone. Attic bedroom ideas are some of the most saved rooms on Pinterest right now, because a sloped ceiling that once felt like a problem turns out to be the coziest feature a bedroom can have. The trick is to stop fighting the angles and start designing with them: low furniture where the ceiling is low, storage tucked into the eaves, and light pulled in through skylights and gable windows. You do not need a full renovation to get there. Many of the rooms below cost less than a new bedroom set, and several can be done in a single weekend. Below are 26 attic bedroom ideas, each one distinct, so you can steal one idea or combine a handful into a full attic transformation.
1. Tuck a Low Platform Bed Under the Slope
A low platform bed is the single best move in an attic bedroom, because it puts your head exactly where the ceiling is highest when you sit up, and it keeps sightlines long and calm. It makes the slope feel intentional, like a cocoon, instead of something you keep bumping into.
Materials + realistic cost: low platform bed frame ($120–$300); a firm mattress you already own or a new one in a box ($200–$400); linen-look bedding ($40–$80). Total: $160–$780.
Measure first: sit on the bed (or a stack of boxes at bed height) and check you can sit up comfortably without touching the slope. Place the headboard end under the tallest part of the slope, not flat against the lowest knee wall. Keep bedding in soft, light neutrals so the bed reads as one calm block, then add one textured throw at the foot.
Practical tip: Skip a tall headboard entirely — a low upholstered headboard, or even a row of large cushions, keeps the slope visible and the room feeling taller.
Variation: Try the bed sideways across the gable wall, so you wake up facing the window instead of the slope.
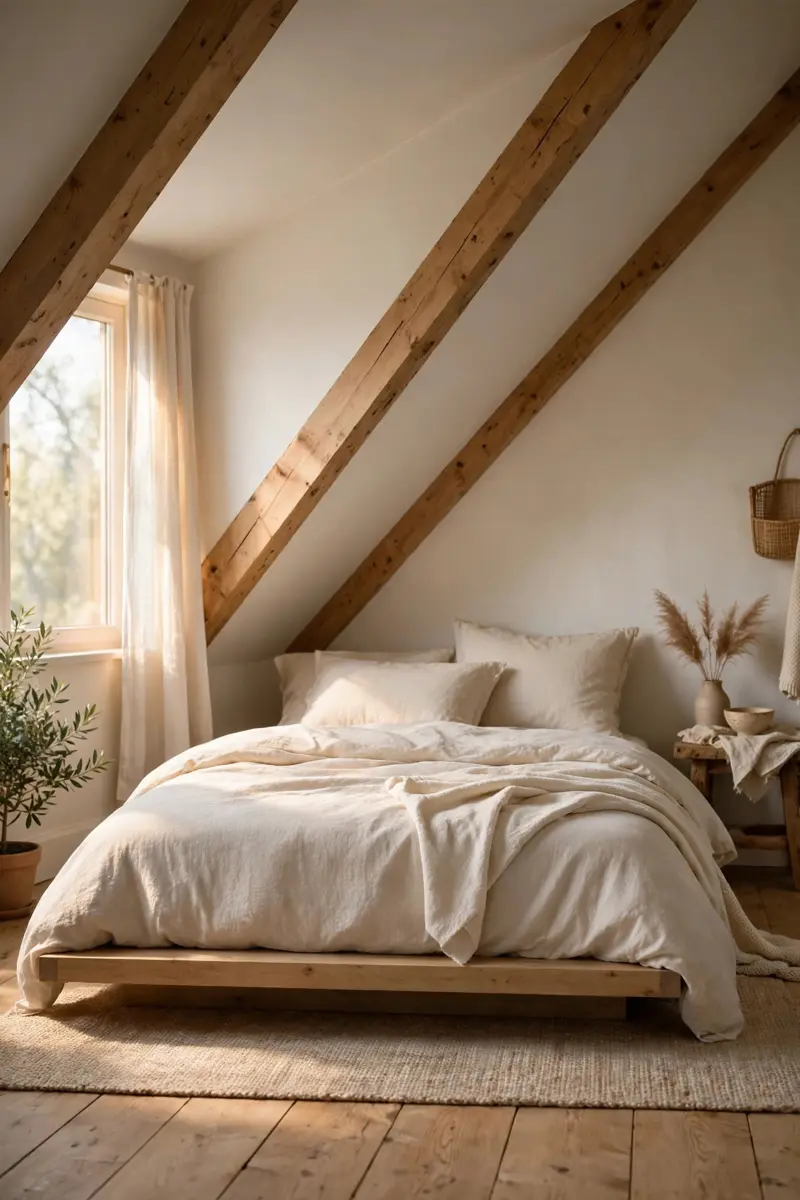
2. Whitewash the Slopes for a Scandi Calm
Whitewashed slopes are the fastest way to make a small attic bedroom feel twice as big. Pale paint bounces every bit of daylight around the room, softens harsh angles, and lets warm wood and soft linen do the talking. This is the classic Scandinavian attic bedroom idea, and it works in almost any attic.
Materials + realistic cost: primer and white or warm-white paint ($40–$70); rollers and an angled brush for the seams ($15–$25); a pale wool rug ($50–$120). Total: $105–$215.
Paint the sloped planes and the flat ceiling the same warm white so the room reads as one continuous shell, then warm it up with an oak bench, a rattan basket, and cream bedding. Keep furniture low and leggy so you can still see the floor, and edit accessories down to a few thoughtful pieces rather than a crowded shelf.
Practical tip: Choose warm white (not stark blue-white) or the room can feel cold under skylight light — test a swatch on the slope itself, in daylight and at night.
Variation: Use whitewashed tongue-and-groove boards on one slope for subtle texture without visual weight.

3. Build a Skylight Sleeping Nook
A skylight over the bed turns an ordinary attic bedroom into a stargazing retreat. You get daylight all day and a view of the sky at night, which no regular window can match, and the room feels taller because your eye travels up and out.
Materials + realistic cost: a new skylight installed ($800–$1,500, pro job); blackout skylight blind ($60–$120); dimmable bedside sconces ($30–$60 each). Total: $920–$1,740, or $60–$180 if your skylight already exists.
If you already have a skylight, center the bed under it and add a blackout blind on a remote so you control morning light. If you are adding one, put it above the bed or the reading corner, never above a wardrobe you will never look up at. Add a dimmer for evening so the nook stays cozy after dark.
Practical tip: Skylights leak heat in winter and gain it in summer, so pair yours with a blind and check the flashing and insulation before you decorate around it.
Variation: Two small skylights spaced along the slope beat one huge one — they spread light evenly and cost less to shade.
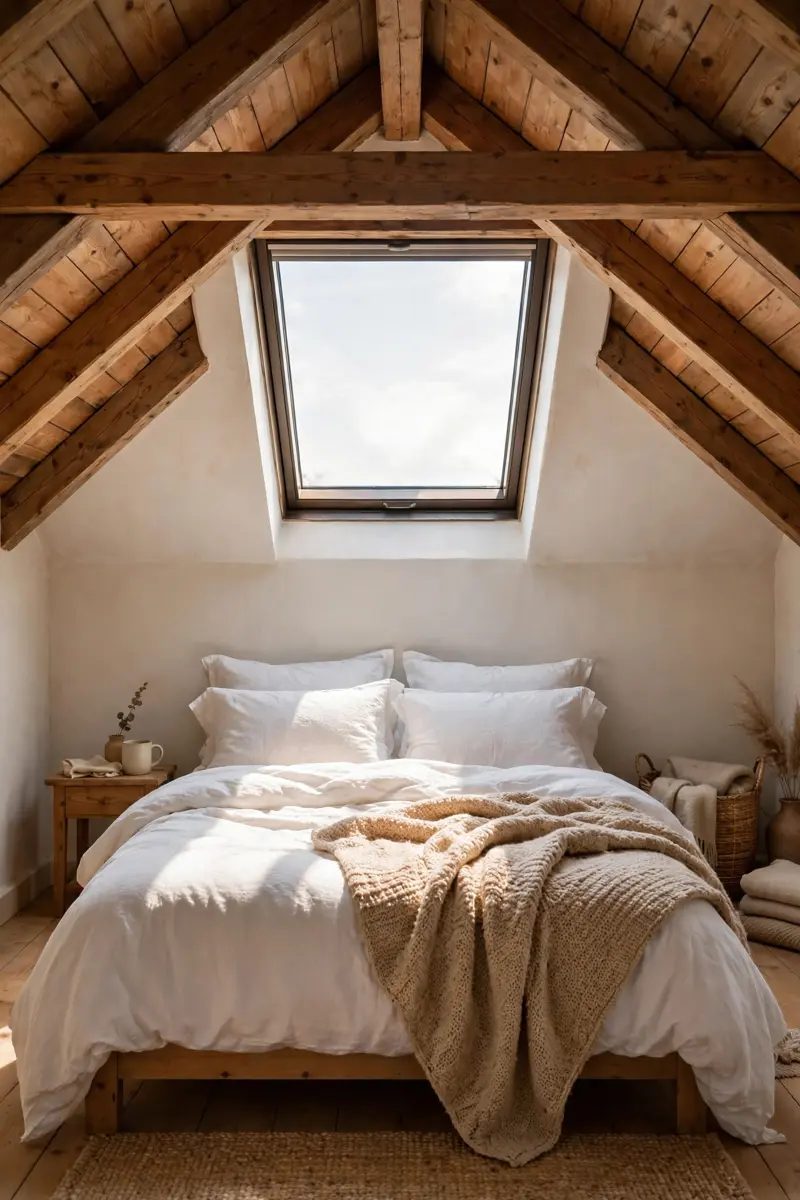
4. Hide Storage in Built-In Eave Drawers
The space under the eaves is too low to stand in, which makes it perfect for drawers. Built-in eave drawers turn dead space into the room’s main dresser, freeing the rest of the attic bedroom for living, sleeping, and breathing room.
Materials + realistic cost: DIY drawer boxes and drawer fronts ($150–$400); soft-close slides ($30–$60); paint to match the walls ($20–$40). Total: $200–$500 DIY, or $1,000–$2,500 custom-built.
Measure the knee wall height and depth, then build or order drawer units that step back as the slope drops, so no drawer is too deep to reach. Label the inside of each drawer (seasonal clothes, bedding, shoes) and keep everyday clothes in the tallest drawers nearest the room. Paint the fronts the wall color so they disappear.
Practical tip: Put the drawers on full-extension slides — a drawer you can only open halfway under a slope is a drawer you will stop using.
Variation: If drawers feel like too much work, slide low rolling bins under the eaves and hide them behind a simple curtain panel.
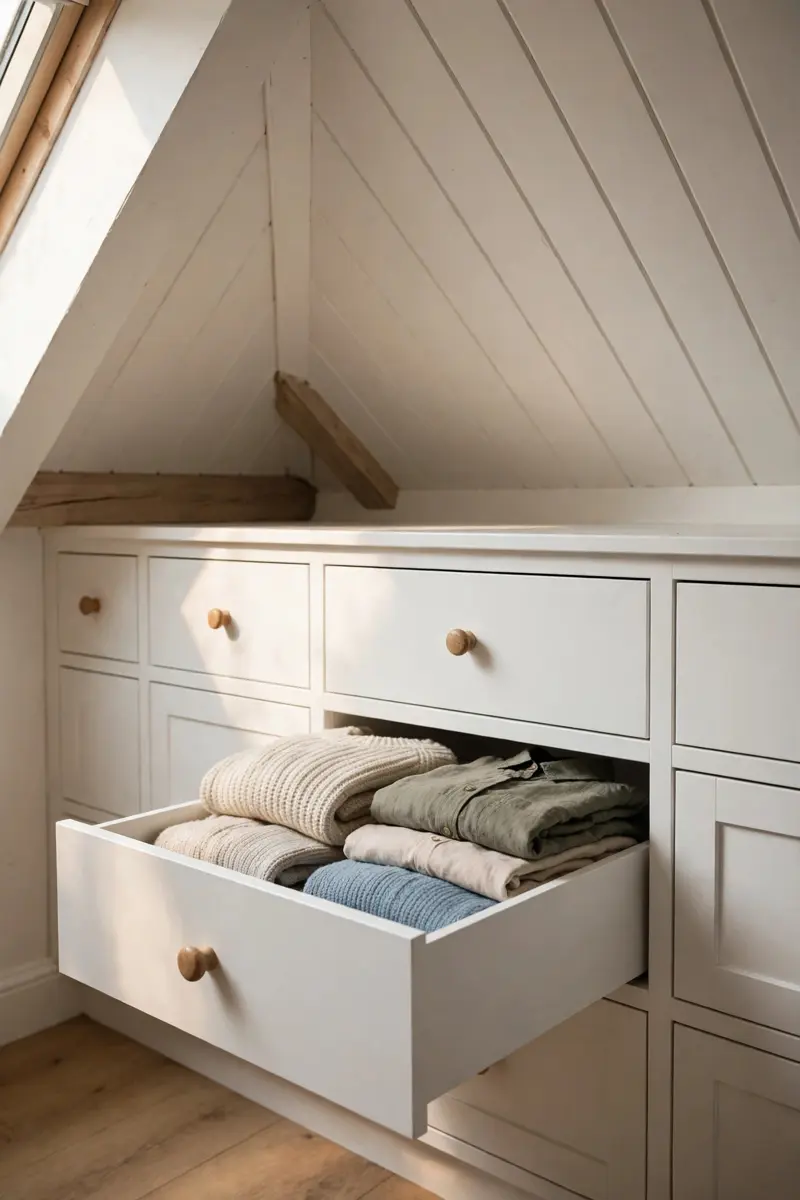
5. Carve a Reading Nook Into the Lowest Eave
That awkward corner where the ceiling nearly meets the floor is wasted space in most attics, and it is the best reading nook you will ever own. A chair, a lamp, and a shelf at arm’s height turn it into a hideaway that feels made just for you.
Materials + realistic cost: a comfortable armchair ($100–$250); a swing-arm wall sconce ($35–$70); a small floating shelf ($20–$40); a soft throw ($25–$45). Total: $180–$405.
Push the chair into the corner at an angle so you face into the room, not the wall, and mount the light on the slope itself or the knee wall so it shines over your shoulder. Add a tiny side table or a wall-mounted cup holder shelf for tea, and keep a basket of books beside the chair rather than a tall bookcase that fights the slope.
Practical tip: Sit in the chair before you buy it — a chair that is perfect in a showroom can be impossible to get in and out of under a low slope.
Variation: Swap the chair for a thick floor cushion and a low backrest if the ceiling is very low; it reads younger and costs far less.
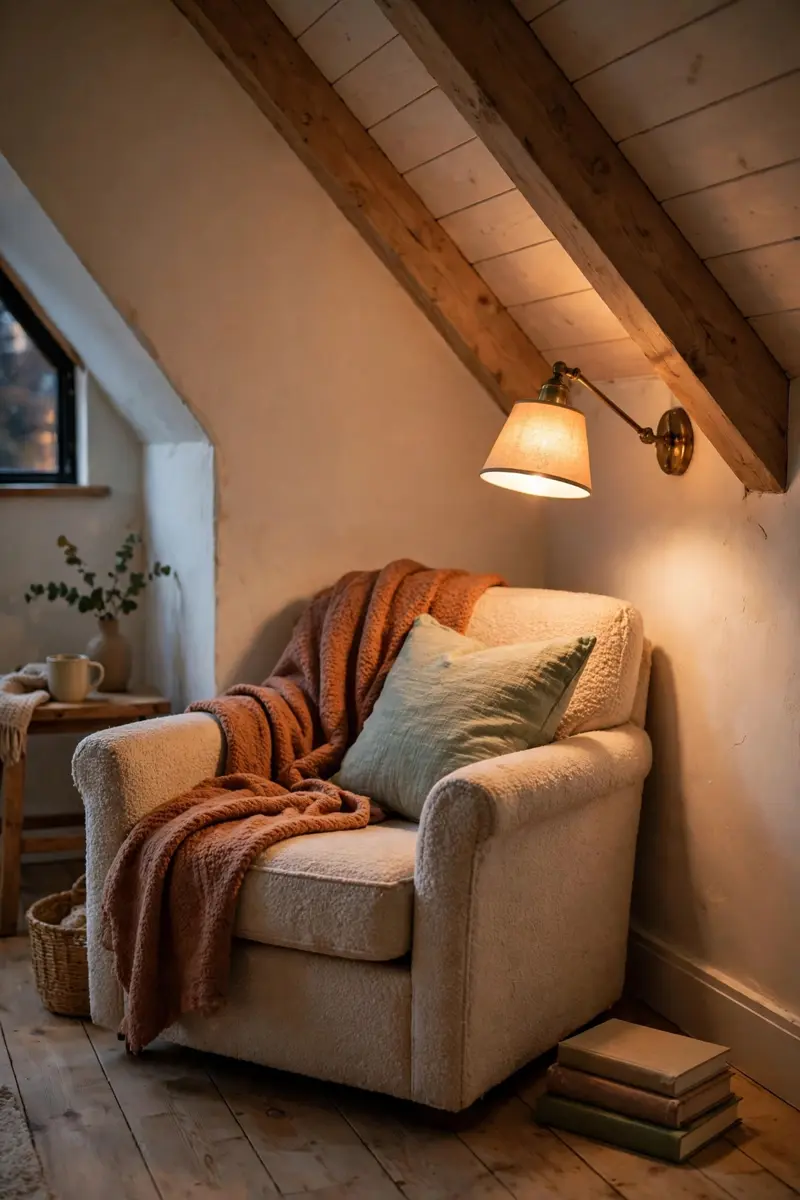
6. Show Off Exposed Wooden Beams
Exposed beams give an attic bedroom instant character that no flat-ceiling room can fake. They add rhythm to the slope, warm up white walls, and make the room feel like a cabin retreat even in a suburban house.
Materials + realistic cost: cleaning and sealing existing beams ($30–$60 in oil or matte sealant); if you are adding faux beams, hollow wood-look beams ($150–$400); warm LED strip or uplights ($20–$40). Total: $50–$440.
If your beams are already there, clean them, seal them in a natural or slightly darkened finish, and keep the rest of the room simple so the beams stay the star. If you are adding faux beams, space them evenly along the slope and stain them to match your floor or furniture, not a random dark walnut that clashes.
Practical tip: Never paint beams white just to match the walls — you lose the one architectural feature that makes the attic special.
Variation: Wrap beams in soft fairy lights for the holidays, then remove them in spring for a cleaner look.
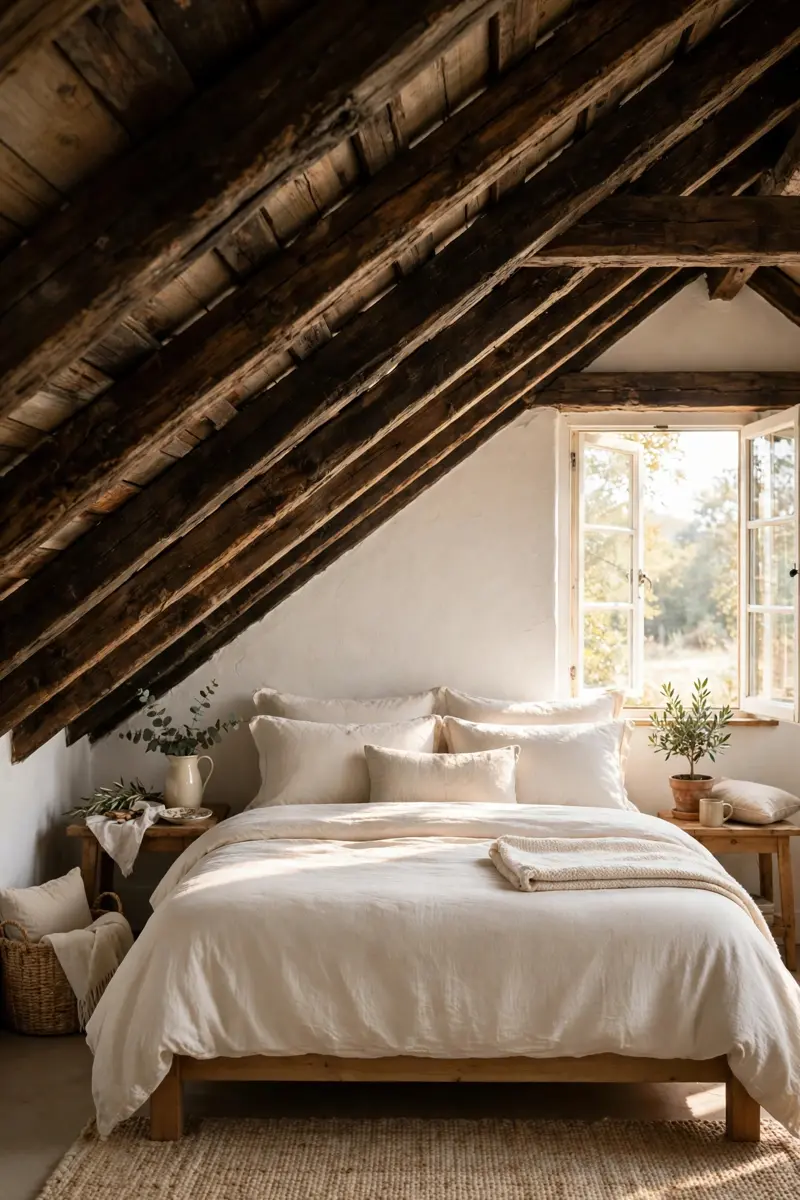
7. Make the Gable Window the Star
A gable window is an attic bedroom’s best natural artwork: a tall triangle or arched window that floods the room with light and frames the view. Treat it like a feature wall and let everything else in the room stay quiet.
Materials + realistic cost: sheer linen curtain panels ($30–$60); a simple curtain rod that follows the window shape or tension rods ($20–$40); a low bench or window seat cushion ($60–$150). Total: $110–$250.
Keep window treatments sheer so you never block the light, and place a low bench or a pair of plants beneath the window to anchor it. Paint the wall around it a soft contrasting color — pale sage, warm greige, or dusty blue — so the window shape pops, and keep furniture away from the glass so the view stays clear.
Practical tip: If the gable window gets harsh afternoon sun, add a sheer roller blind behind the curtains rather than heavy drapes that kill the shape.
Variation: Hang a single pendant light in front of the gable window at night so the room glows from its centerpiece.

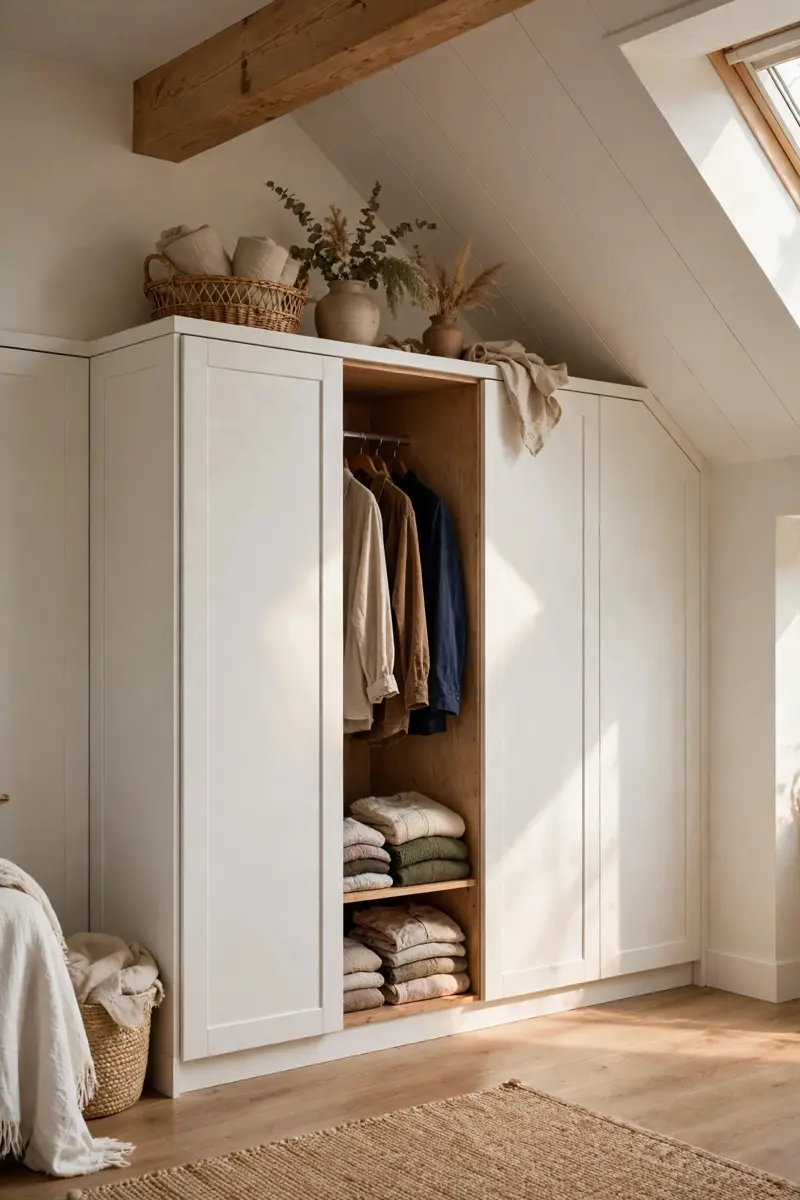
8. Fit a Knee-Wall Wardrobe
A knee-wall wardrobe is a closet built into the low wall under the eaves, with hanging space where the ceiling is tall enough and shelves and drawers where it is not. It looks built-in, costs less than a freestanding wardrobe, and never eats floor space.
Materials + realistic cost: a ready-made wardrobe system cut to fit ($200–$500); hanging rails and shelf boards ($40–$80); sliding or hinged doors ($80–$200). Total: $320–$780.
Plan the layout from the tallest end: hanging clothes go where you can stand, folded clothes and shoes go toward the low end. Use doors that match the wall color, or skip doors entirely and use linen curtains for a softer, cheaper finish. Add a small mirror on the inside of one door so you do not need a separate full-length mirror.
Practical tip: Leave a 2-inch gap at the back for air circulation — attics get humid, and clothes pressed against a cold slope can mildew.
Variation: Turn one section into a dressing nook with a small stool and a mirror, so getting ready feels like a boutique, not a closet.
9. Run Floating Shelves Along the Slope
Floating shelves that follow the slope turn an awkward angled wall into display space. They hold books, plants, and art at exactly the heights you can reach, and they cost a fraction of built-in cabinetry.
Materials + realistic cost: 3–4 floating shelves ($15–$35 each); brackets and wall anchors ($10–$20); small plants and books you already own. Total: $55–$160.
Mount shelves in a staggered line that steps down with the slope, rather than one long level shelf that collides with the ceiling. Keep the heaviest items on the lowest shelf, style in odd groups of three, and leave breathing room between objects so the shelves read curated, not cluttered.
Practical tip: Anchor every shelf into a stud or use heavy-duty wall anchors — a shelf that pulls out of plasterboard under a slope is a mess you do not want above a bed.
Variation: Use a single picture ledge shelf so you can swap art seasonally without new holes.

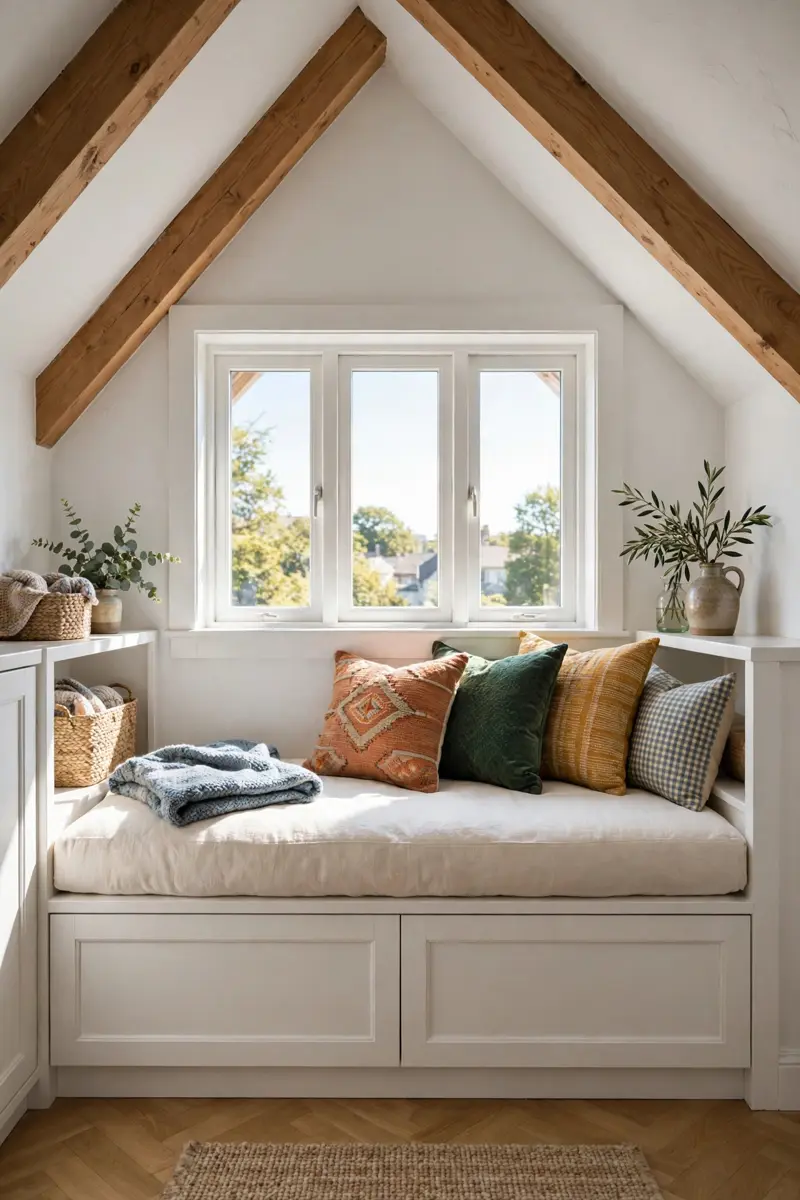
10. Add a Dormer Window Seat
A dormer window seat is the attic bedroom idea everyone saves on Pinterest, and for good reason: it adds a sunny perch, hidden storage underneath, and a reason to linger in the room. It turns a bump in the roof into the best seat in the house.
Materials + realistic cost: a built-in bench box ($150–$400 DIY); a custom seat cushion ($60–$120); throw pillows ($30–$60); storage baskets inside ($20–$40). Total: $260–$620.
Build the bench to the full width of the dormer, hinge the top or add drawer fronts for blanket and book storage, and top it with a thick cushion in a washable fabric. Add pillows in two sizes — a firm back pillow and a soft accent pillow — and keep a small reading light on the dormer wall.
Practical tip: Make the cushion removable and washable, because a window seat collects sun, dust, and the occasional coffee spill.
Variation: No dormer? A low bench under any attic window gives you 80 percent of the charm for a fraction of the work.
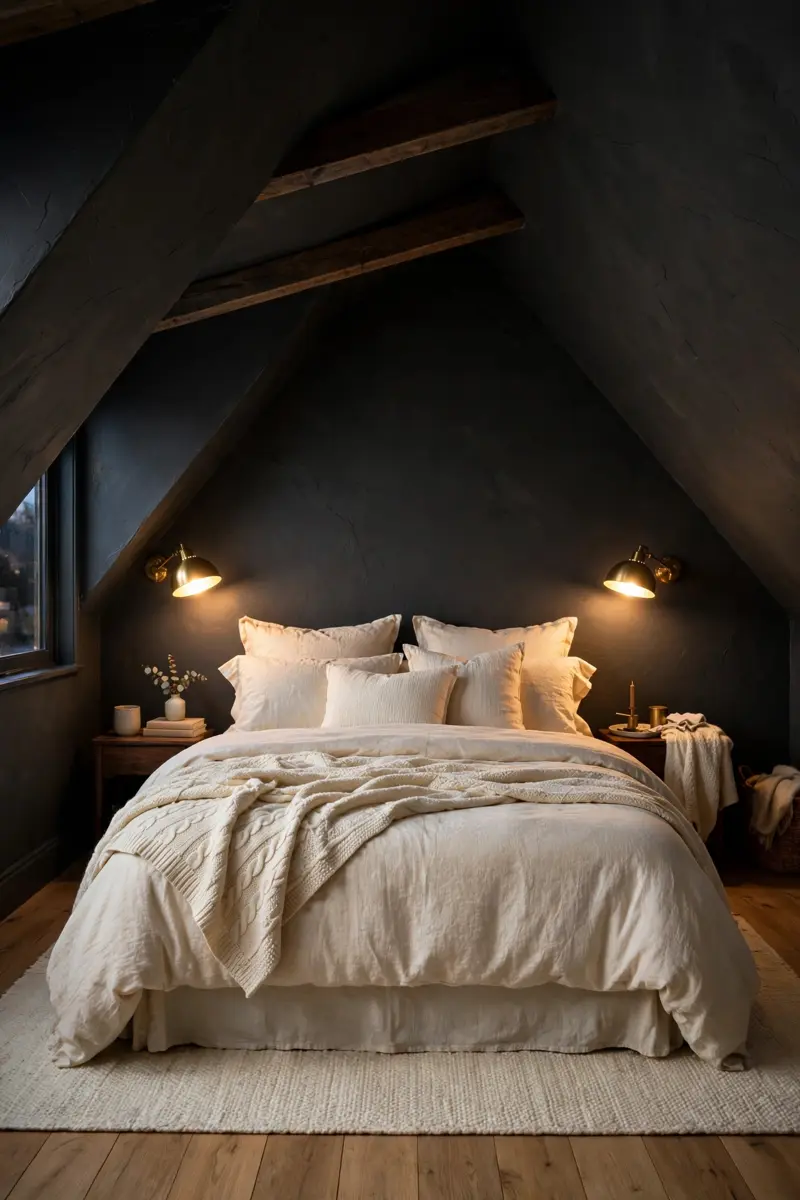
11. Go Dark and Moody for a Cocoon
Going dark in a small attic bedroom sounds wrong, and it works beautifully. Deep charcoal, forest green, or navy on the slopes makes the ceiling disappear into shadow, so the low pitch stops feeling like a limit and starts feeling like a cocoon.
Materials + realistic cost: dark paint for slopes and knee walls ($40–$70); warm brass or wood lamps ($40–$90); cream and rust bedding to contrast ($50–$100). Total: $130–$260.
Paint slopes and walls the same dark tone for a wrapped effect, then layer in warm light — table lamps, sconces, and candles, never a single harsh ceiling light. Keep bedding and rugs light so the bed stands out, and add one natural texture (wood, rattan, wool) to stop the room feeling flat.
Practical tip: Dark rooms need more light sources, not fewer — aim for three warm light points at different heights.
Variation: Paint just one slope dark as an accent, and keep the rest pale, if a full dark room feels too brave for you.
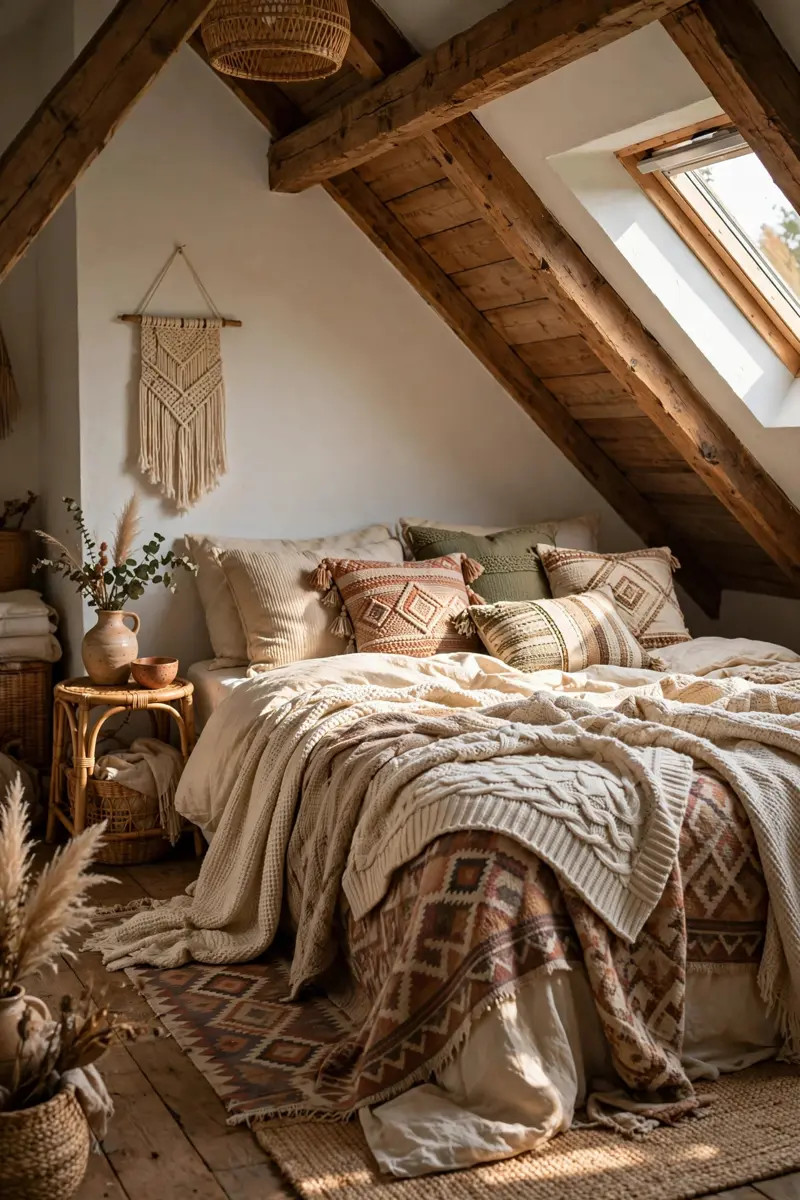
12. Layer Boho Textiles Until It Feels Like a Nest
Boho layering is made for attic bedrooms: the slope already feels like a tent, so pile on the textiles and lean into it. Layered rugs, throws, and cushions make the room feel soft, personal, and forgiving of odd angles.
Materials + realistic cost: a large woven rug ($60–$120); two or three throws in different textures ($25–$45 each); mixed cushions ($8–$15 each). Total: $135–$270.
Start with a rug that anchors the bed zone, add a quilt or coverlet in a warm pattern, then drape a chunky throw across the foot at an angle. Mix textures — smooth linen, woven cotton, chunky knit — rather than matching sets, and stick to three or four colors so the layers feel collected, not chaotic. For more boho bedroom inspiration, see our boho teen bedroom ideas post at https://ourhomeandgardens.com/boho-teen-bedroom-ideas/
Practical tip: Keep one surface clear — a bare nightstand or an empty bench — so the layered look reads cozy, not cluttered.
Variation: Hang a macramé wall piece on the tallest wall to echo the textiles without adding more furniture.
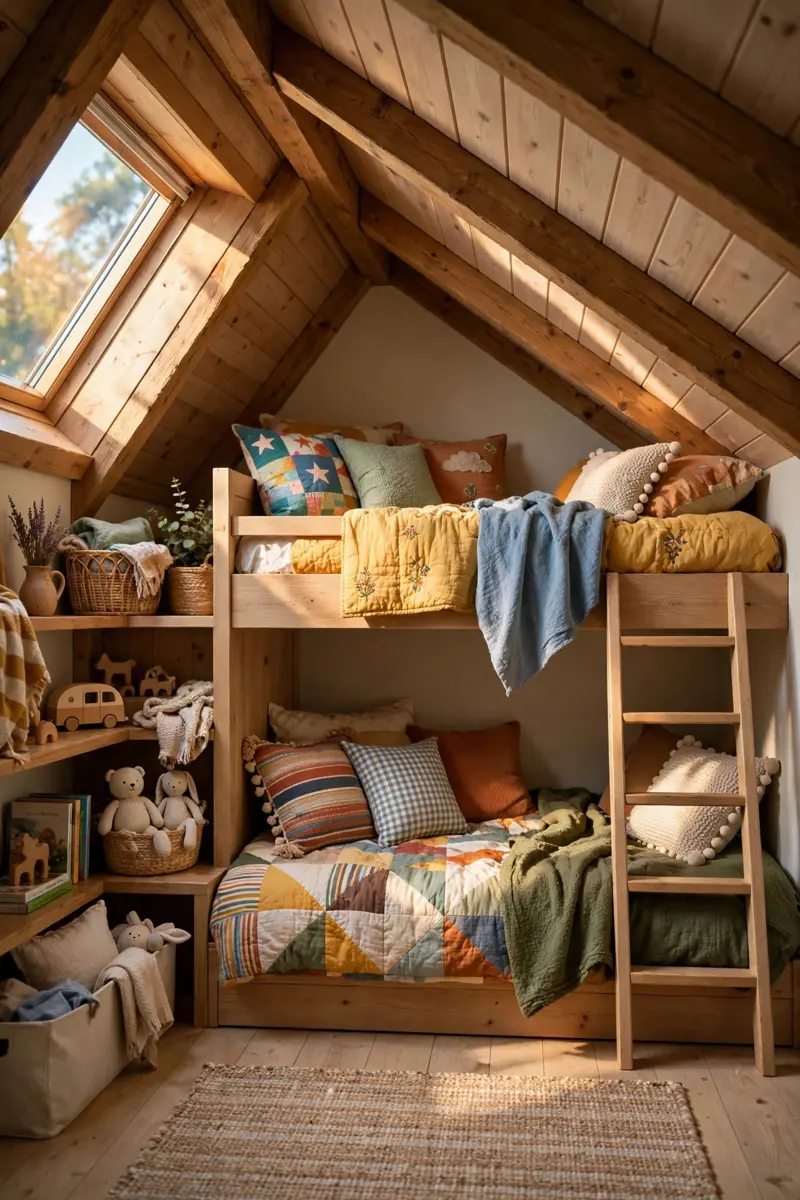
13. Design a Kids’ Attic Bunk Nook
Kids love attic bedrooms because the low ceilings feel like a treehouse, and a bunk nook built into the slope is the ultimate version of that. It gives each child their own cozy cave while leaving floor space for play.
Materials + realistic cost: a low bunk bed or two twin platform beds ($250–$500); guard rails and a safe ladder ($40–$80); fun bedding in each child’s color ($40–$80 per bed). Total: $330–$660.
Place bunks along the slope with the top bunk only where a child can sit up safely, and use the lowest eave for toy bins and book storage. Give each bunk its own clip-on reading light and a small shelf for a water bottle and a book, and keep the ladder at the tall end of the room.
Practical tip: Measure sitting height on the top bunk before you buy — a bunk that looks fine on a showroom floor can be unusable under a slope.
Variation: For one child, a single loft bed with a play den underneath uses the same treehouse magic in half the space.
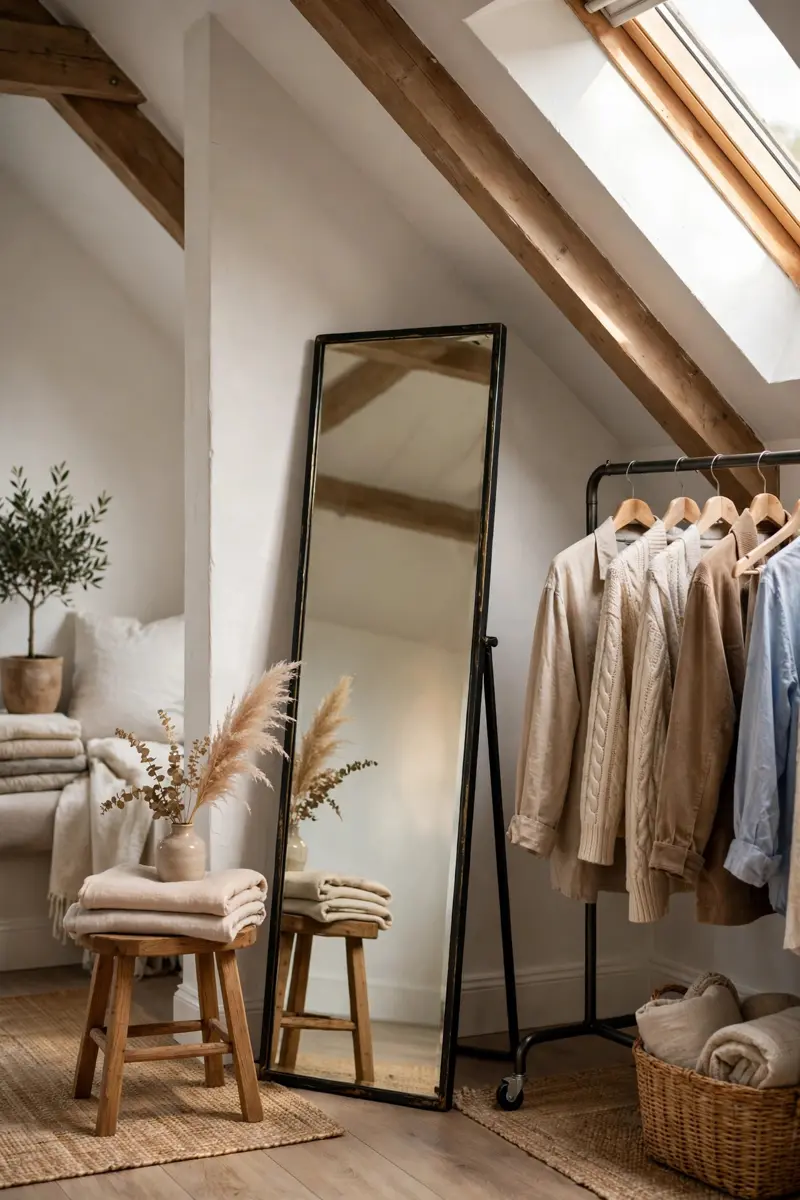
14. Create a Guest Suite With a Mini Dressing Corner
An attic guest bedroom feels luxurious when it has its own dressing corner, even a tiny one. A mirror, a stool, and a rail for hanging clothes tell guests you thought about them, and it costs almost nothing to set up.
Materials + realistic cost: a leaning full-length mirror ($40–$80); a small stool or pouf ($30–$60); a rolling clothes rail ($25–$45); a luggage rack ($30–$50). Total: $125–$235.
Set the corner near the tallest wall, where guests can stand comfortably, and add a tray for jewelry and a hook for a robe. Keep fresh towels and a spare blanket in an eave drawer or basket nearby, and leave a card with the Wi-Fi password on the nightstand — small touches guests remember.
Practical tip: Put a small lamp in the dressing corner, not just overhead light, so guests can actually see themselves in the mirror.
Variation: If space is tight, a mirror on the back of the door and a wall hook rail give you the same function with zero floor space.
15. Squeeze a Work Corner Under the Eave
You cannot stand under the lowest eave, but you can sit there perfectly well, which makes it ideal for a desk. A work corner tucked under the slope keeps the rest of the attic bedroom for sleeping and relaxing.
Materials + realistic cost: a compact desk or wall-mounted fold-down desk ($80–$200); a comfortable chair ($60–$120); a clip-on or sconce task light ($25–$50). Total: $165–$370.
Mount the desk against the knee wall, facing into the room so you are not staring at a wall, and add a shelf above the desk at the height where the slope still allows it. Keep cables tidy with a small tray, and use a chair you can push fully under the desk so the corner disappears when work ends. For more small-room layout tricks, see our small apartment decor ideas post at https://ourhomeandgardens.com/small-apartment-decor-ideas/
Practical tip: Face the desk toward the room’s light source (skylight or gable window) so you are not working in your own shadow.
Variation: A fold-down wall desk is perfect for renters and tiny attics — it folds away flat when the workday ends.

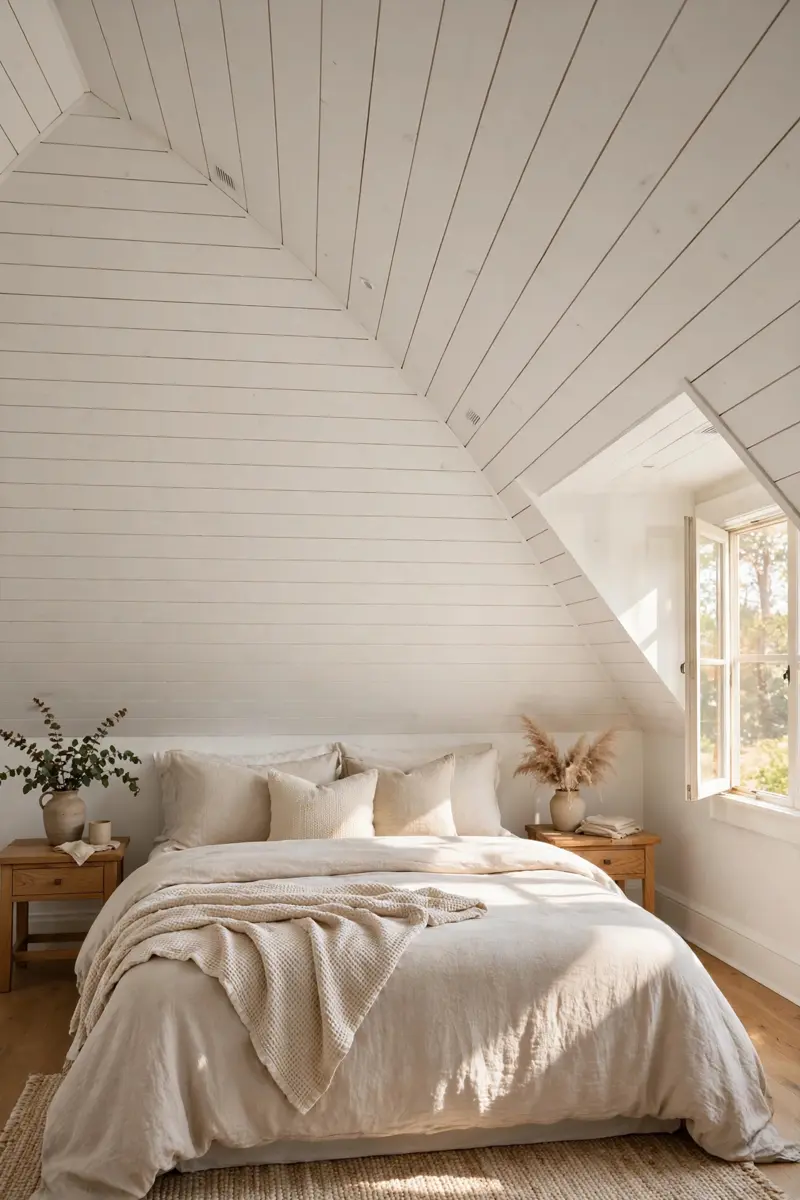
16. Clad the Slope in Shiplap
Shiplap on a sloped ceiling adds texture and a farmhouse-cottage feel that flat paint cannot match. The horizontal lines draw the eye along the slope, making it feel longer and more intentional, and the shadow gaps add depth even in pale colors.
Materials + realistic cost: shiplap boards or MDF planks ($150–$350 for one slope); nails, adhesive, and paint ($40–$70). Total: $190–$420.
Run boards horizontally across the slope for a classic look, or vertically on the gable wall for height. Paint them the same color as the walls for a subtle effect, or a soft white against a colored wall for contrast. Fill nail holes, caulk the seams at the ridge, and seal the boards before painting so the finish lasts.
Practical tip: Shiplap adds weight and thickness, so check that it does not drop your headroom below a comfortable sitting height at the bed.
Variation: Use peel-and-stick shiplap planks if you rent or want a weekend project with no sawing.
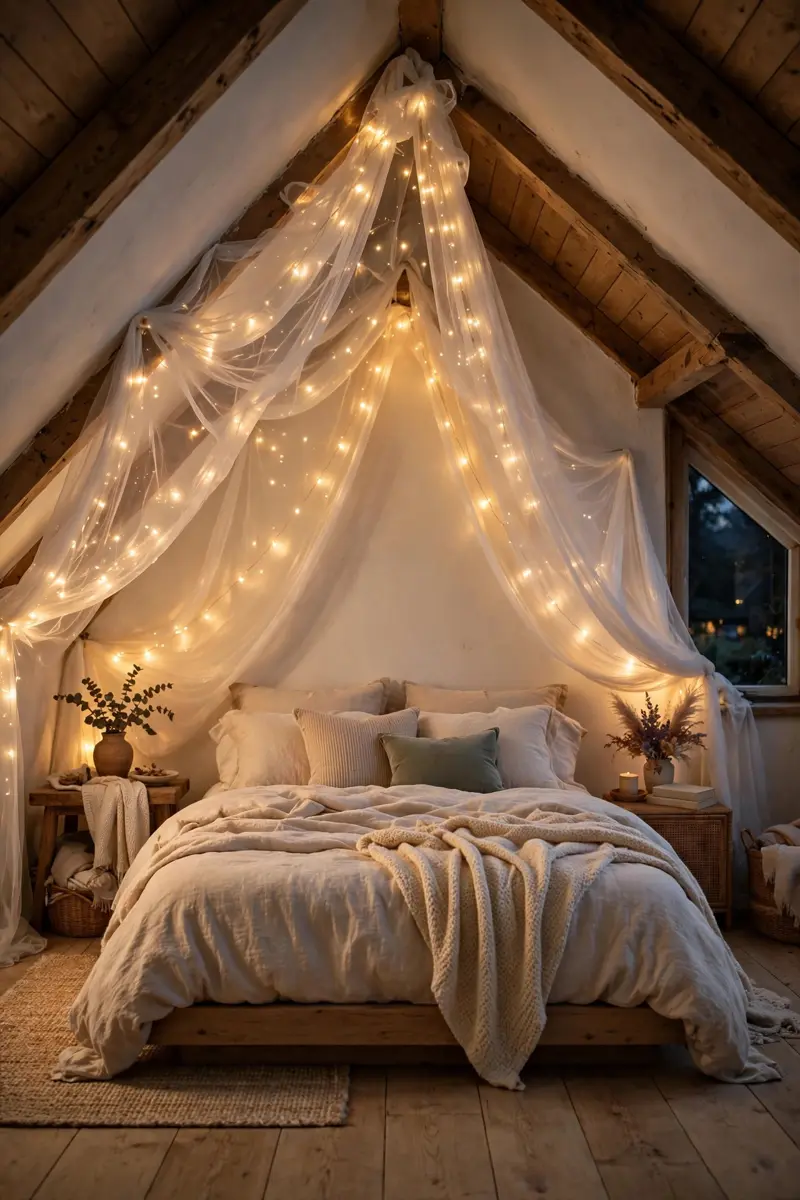
17. Hang a Fairy-Light Canopy Over the Bed
A fairy-light canopy turns an attic bedroom into a magical retreat for very little money. Draped along the slope above the bed, the lights soften the angles, glow warmly at night, and make the room feel like a celebration every evening.
Materials + realistic cost: two strands of warm-white fairy lights, 33ft each ($8–$12 each); sheer canopy fabric or a curtain panel ($20–$40); small adhesive hooks ($5–$10). Total: $41–$74.
Drape the fabric from the ridge down the slope on both sides of the bed, then weave the lights through it in loose swoops, securing them with clear hooks. Use battery lights with a timer so the canopy switches itself off, or plug-in lights on a dimmer for a steadier glow. Keep the fabric light and sheer so it never feels heavy overhead.
Practical tip: Warm white (2700K) looks cozy; cool white looks like a shop display — check the color temperature before you buy.
Variation: Skip the fabric and drape lights alone in a zigzag across the slope for a simpler, modern version.
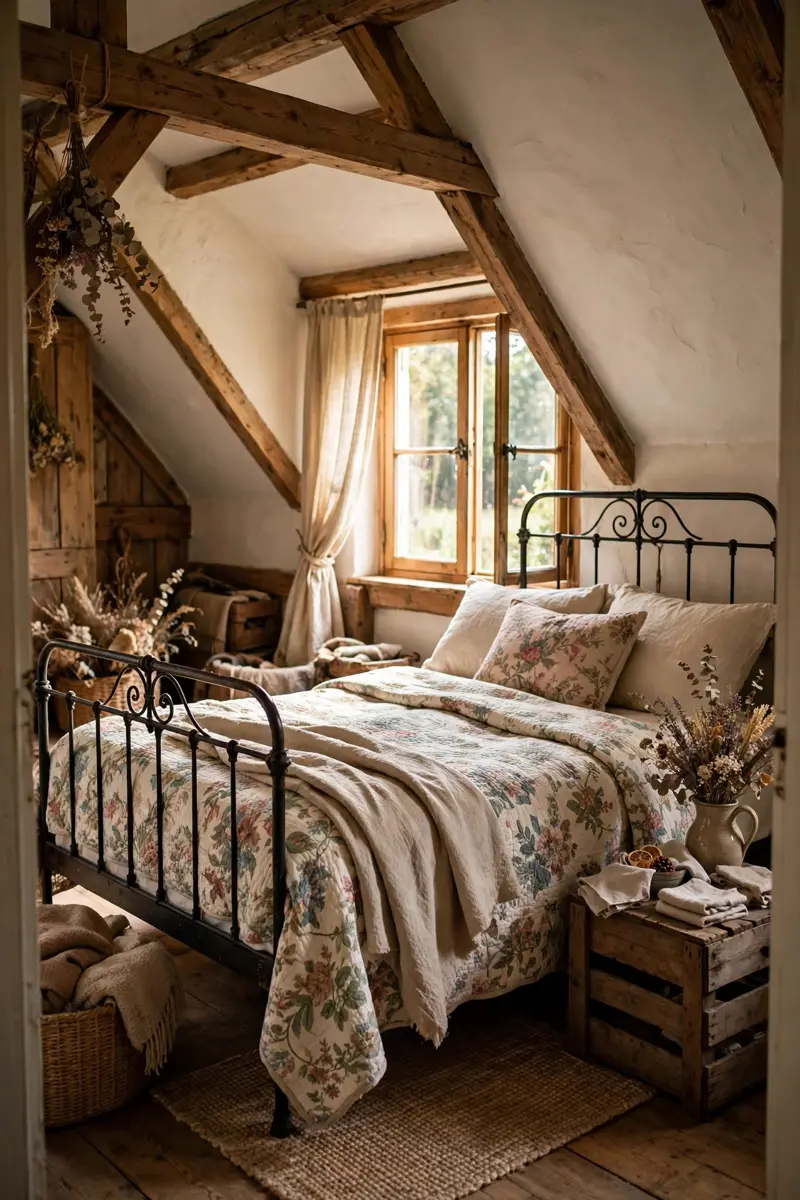
18. Style a Vintage Farmhouse Attic
A vintage farmhouse attic bedroom mixes chippy wood, iron, and soft floral prints into a room that feels collected over decades. The slope becomes a cottage roof, the beams become barn wood, and every thrifted find earns its place.
Materials + realistic cost: a vintage iron or wood bed frame, secondhand ($80–$200); floral or gingham bedding ($40–$80); thrifted wooden crates and an enamel pitcher ($20–$40). Total: $140–$320.
Start with a simple bed and a patchwork or floral quilt, add a wooden crate as a nightstand, and hang a wreath or dried flowers on the gable wall. Keep the palette soft — cream, sage, dusty rose — and let one or two genuinely old pieces (a mirror, a trunk) carry the vintage story rather than buying everything new and distressed.
Practical tip: One real vintage piece beats five fake-distressed ones; let the room’s age come from texture, not from a theme-park set.
Variation: Swap florals for ticking stripes and galvanized metal for a cleaner, more modern farmhouse feel.
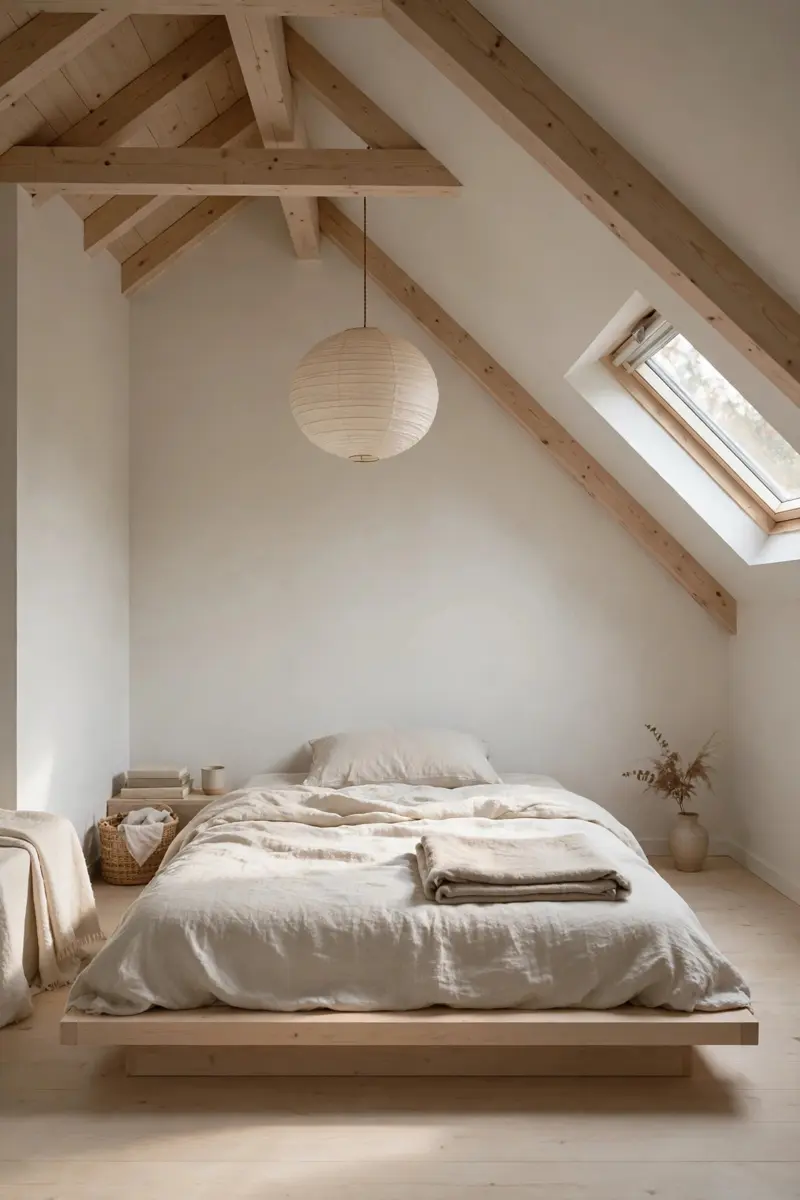
19. Keep It Minimal With a Japanese Low Bed
A Japanese-inspired attic bedroom is calm by design: a very low bed, almost no furniture, and a palette of wood, linen, and stone. It suits attics perfectly, because low furniture and empty floor space make low ceilings feel deliberate rather than cramped.
Materials + realistic cost: a low tatami-style platform or futon base ($150–$300); natural linen bedding ($50–$90); a single paper lantern pendant ($25–$50). Total: $225–$440.
Place the bed low and centered, add one low wooden stool as a nightstand, and hang a single paper lantern where the ceiling is highest. Keep walls pale, floors bare or covered with one flat-weave rug, and store everything else in eave drawers so surfaces stay clear.
Practical tip: Minimal does not mean empty — one beautiful object (a ceramic vase, a framed print) on an otherwise clear wall gives the room a focal point.
Variation: Add a low wooden tray for tea and a book beside the bed for a ritual that makes minimal living feel warm, not stark.
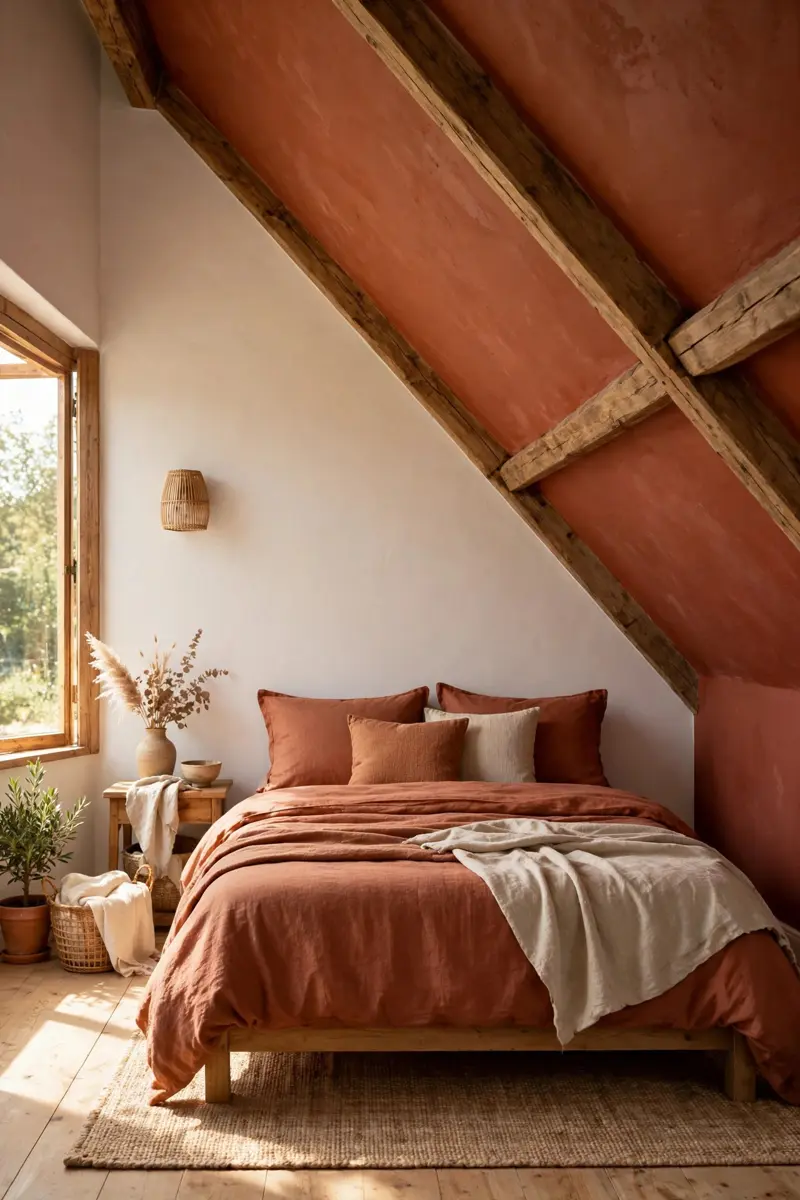
20. Color-Drench One Slope for Drama
Color-drenching means painting one slope, its knee wall, and the trim all in one bold color, turning the architecture into a statement. It works brilliantly in attics because the slope itself becomes the feature wall — no art required.
Materials + realistic cost: paint for one slope ($30–$50); a contrasting bedding set ($40–$80); one or two cushions that pick up the color ($15–$30). Total: $85–$160.
Choose a color you love living with — deep teal, terracotta, olive, or dusty blue — and paint the slope, knee wall, and any built-ins in the same tone. Keep the opposite wall and ceiling pale so the room still breathes, and repeat the color once in bedding or art so it feels connected.
Practical tip: Test the color on the slope in morning and evening light; bold colors shift dramatically under skylights.
Variation: For a softer version, color-drench in a pale tone — sage, blush, or butter yellow — for drama without darkness.
21. Use Mirrors to Double the Light
Mirrors are an attic bedroom’s best friend: they bounce skylight and gable-window light into dark corners, and they make a sloped room feel wider than it is. One well-placed mirror beats a whole wall of art in a small attic.
Materials + realistic cost: a large leaning mirror ($60–$120); a smaller wall mirror for the dressing corner ($25–$45); hanging hardware ($5–$10). Total: $90–$175.
Lean a tall mirror against the tallest wall, opposite or beside the window, so it reflects light rather than a blank wall. Avoid placing a mirror directly opposite the bed if it disturbs your sleep, and keep the frame simple — wood, brass, or black — so it blends with the room.
Practical tip: Angle a leaning mirror slightly forward at the top so it reflects the skylight and the room, not just the ceiling.
Variation: A group of three small round mirrors on the gable wall adds sparkle without the commitment of one huge mirror.
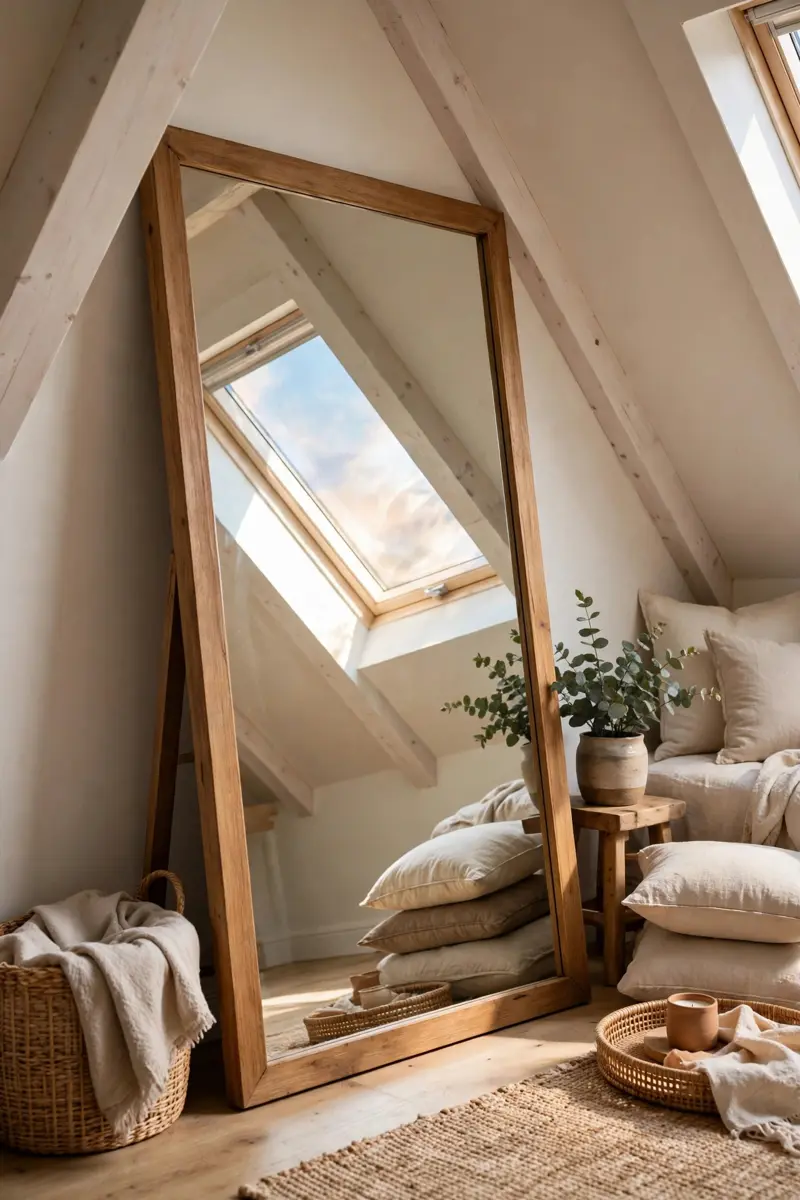
22. Build a Headboard Wall With Sconces
A built-in headboard wall — panels, shelving, or shiplap behind the bed with a sconce on each side — gives an attic bedroom a hotel feel and solves the “where does the lamp go” problem under a slope. It also hides the awkward junction where the slope meets the wall.
Materials + realistic cost: plywood panels or shiplap for the headboard wall ($80–$180); two plug-in or hardwired sconces ($35–$70 each); paint or stain ($20–$40). Total: $170–$360.
Build the headboard wall to the height where the slope still allows comfortable sitting, mount sconces at shoulder height when sitting up in bed, and add a narrow shelf on each side for a phone and a book. Wire sconces to a dimmer so you can read without waking a partner.
Practical tip: Mount sconces slightly wider than the pillows, not directly above them, so the light falls on the book, not in your eyes.
Variation: Use battery-operated sconces with a remote if you cannot run wiring — they look identical from the bed.
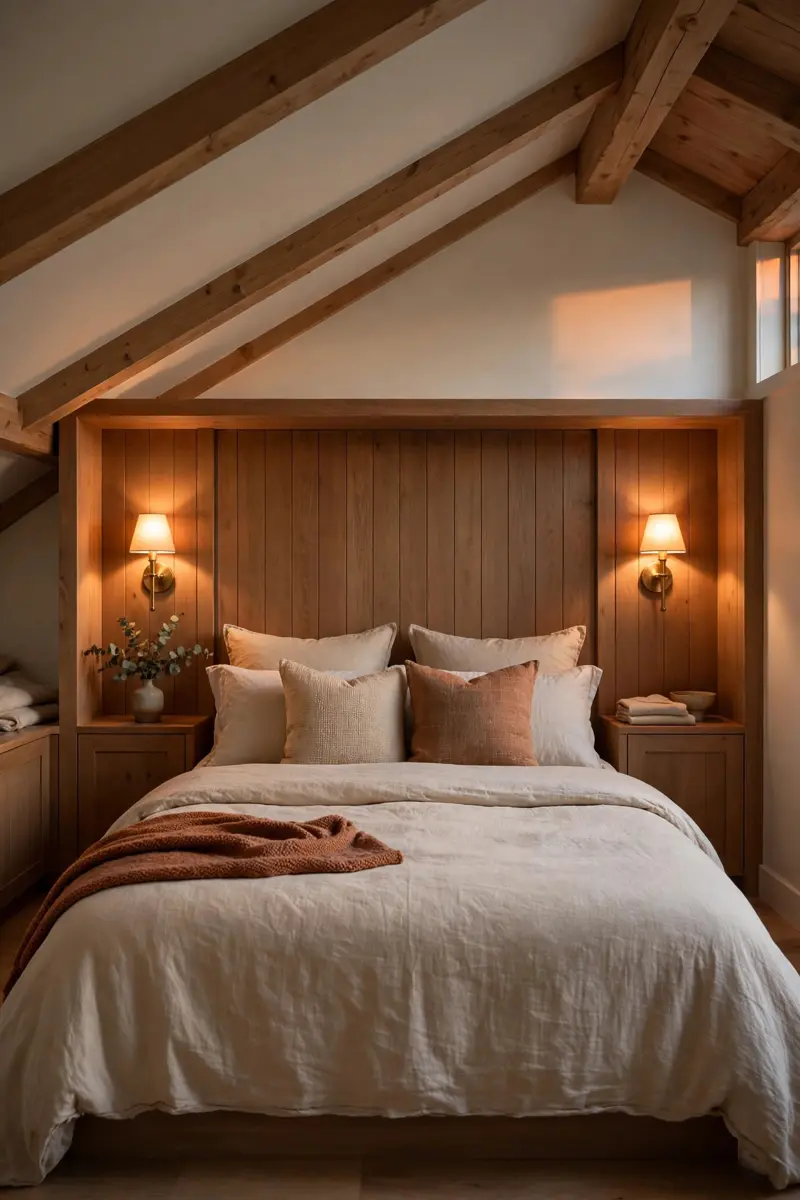
23. Turn the Attic Into a Teen Hideaway
Teenagers love attic bedrooms because they feel private, separate, and a little bit secret. Lean into that with a hangout zone — a floor lounge, a gaming corner, or a vanity — alongside the bed, and let your teen choose the color story.
Materials + realistic cost: floor cushions or a beanbag lounge ($60–$120); a small vanity or desk ($80–$150); string lights and posters ($20–$40). Total: $160–$310.
Zone the room: bed under the slope, lounge or desk at the tall end, and storage in the eaves. Let your teen pick one bold accent (a neon sign, a gallery wall, a bright rug) and keep the rest neutral so the room can grow with them. Add a lockable drawer for valuables and a charging station near the bed.
Practical tip: Give teens a say in the layout — a room they helped design is a room they will actually keep tidy.
Variation: A curtain across the eave storage turns it into a secret den for younger teens, no building work needed.
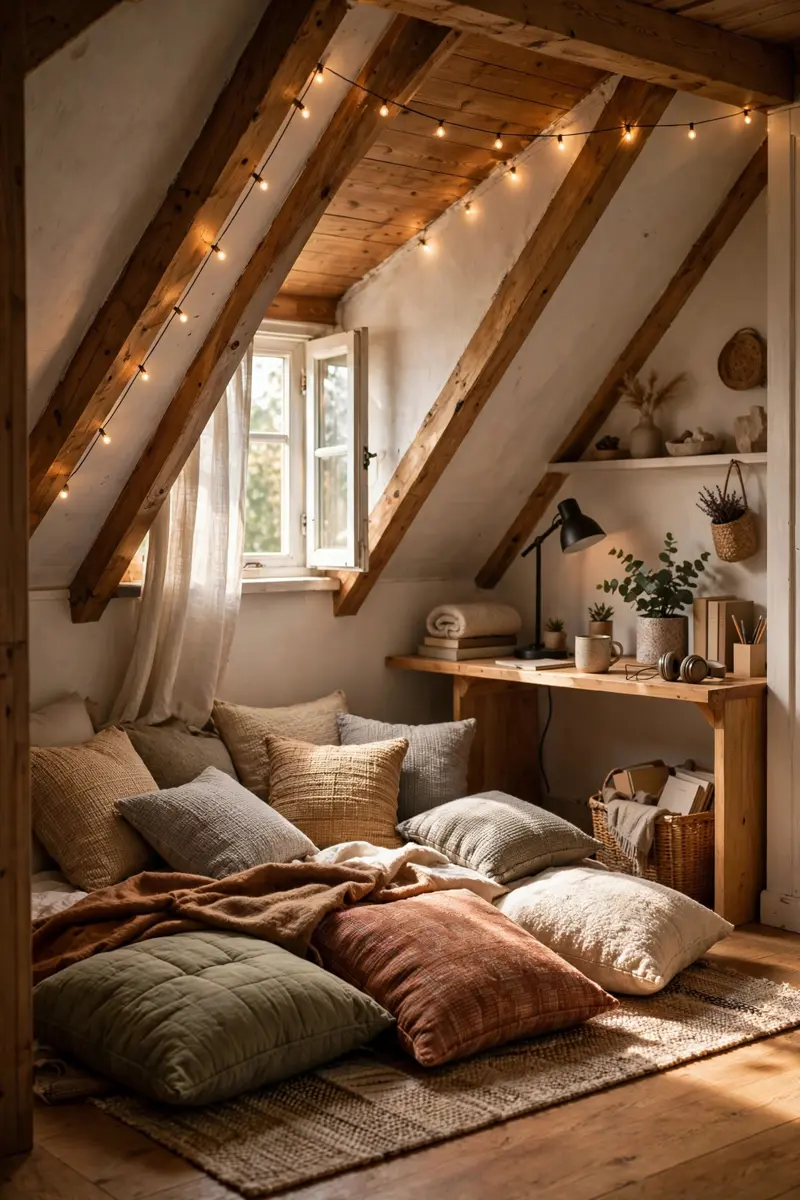
24. Hide a Dressing Nook Behind the Knee Wall
The space behind a knee wall is often hollow, and opening it up creates a walk-in dressing nook without stealing a single inch of floor space. It is the attic bedroom’s best-kept secret.
Materials + realistic cost: an access door or curtain panel ($30–$80); a hanging rail and shelves inside ($40–$80); a battery light strip ($10–$20). Total: $80–$180.
Cut or open an access panel in the knee wall, add a rail at the tallest point and shelves stepping down with the slope, and light it with a motion-sensor strip so you can see inside. Keep out-of-season clothes here and everyday clothes in the main wardrobe, so the nook stays organized.
Practical tip: Check for insulation, wiring, and ventilation before you open a knee wall — some hollow spaces are part of the roof’s airflow system.
Variation: If you cannot open the wall, a curtained rail along the knee wall gives you a dressing rail with the same boutique feel.
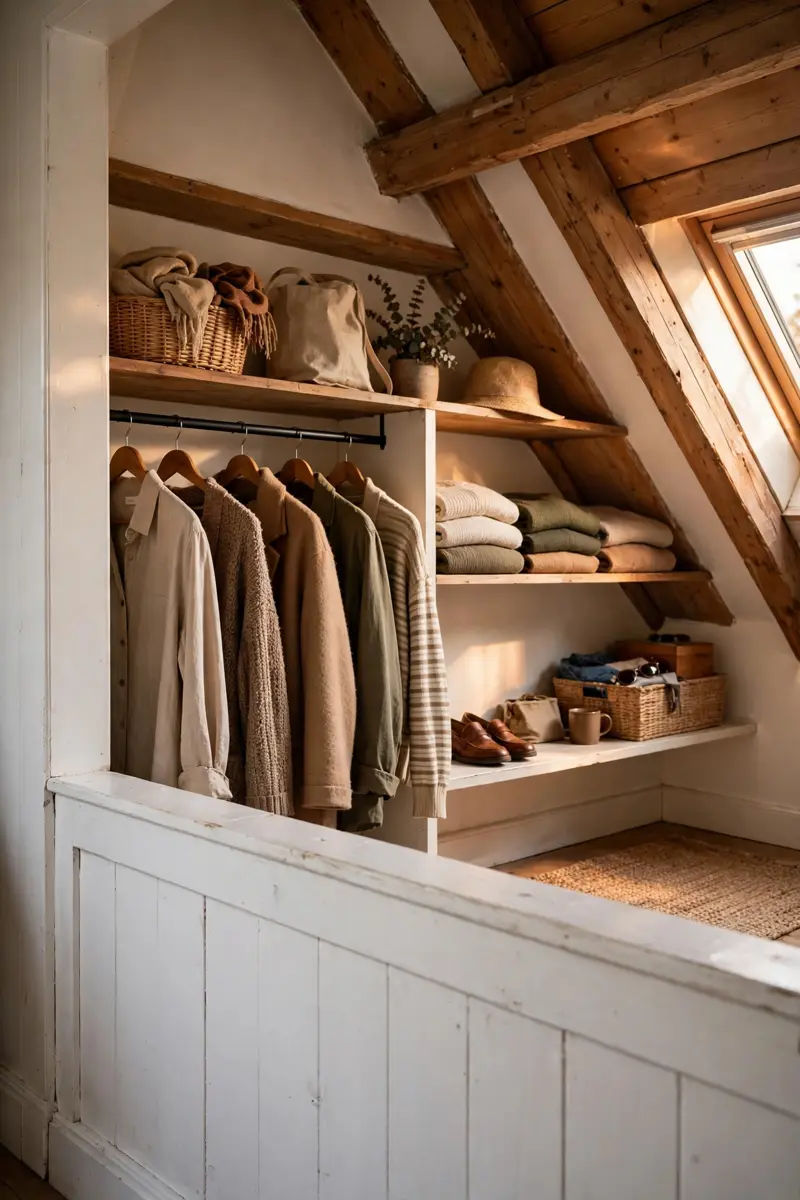
25. Fill a Bright Attic With Plants
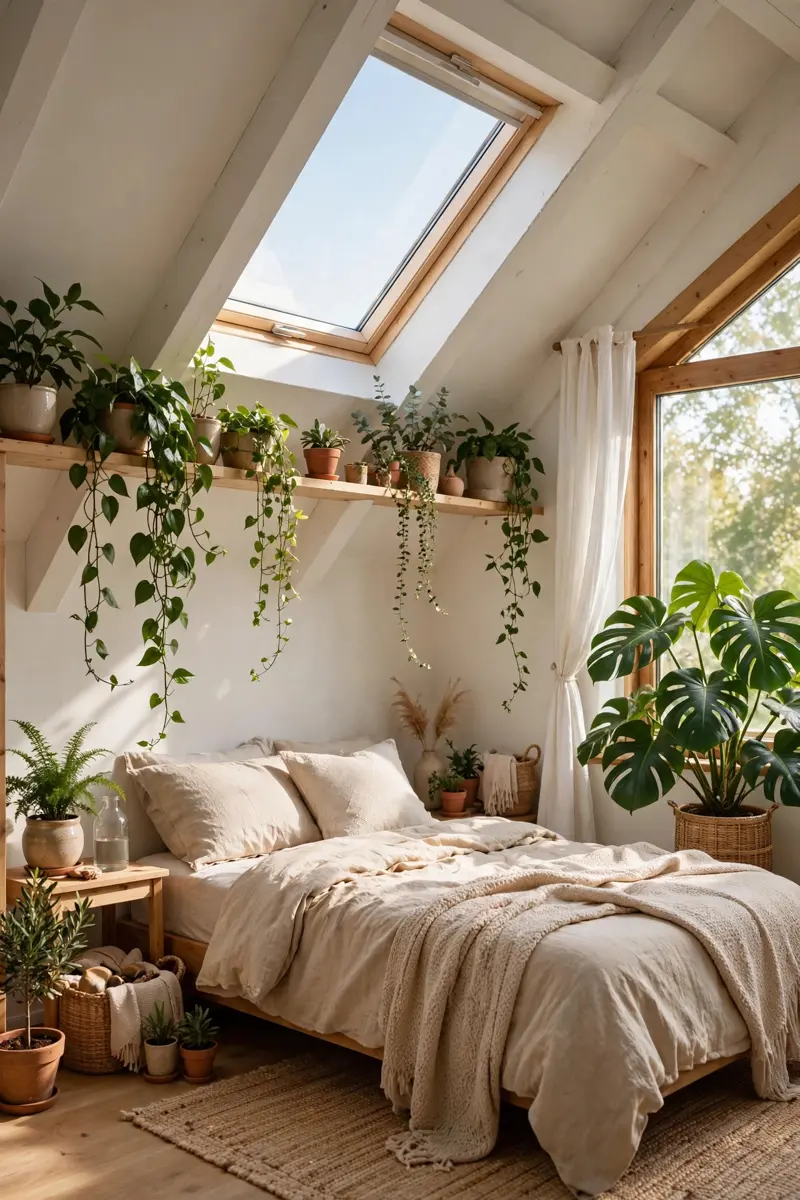
Plants thrive in bright attic bedrooms, especially under skylights, and they soften every hard angle in the room. A plant-filled attic feels alive, fresh, and less like a converted storage space.
Materials + realistic cost: 5–7 beginner plants ($8–$15 each); terracotta or woven pots ($4–$10 each); a watering can and a plant stand ($20–$40). Total: $80–$175.
Place trailing plants on high shelves so vines cascade down the slope, upright plants in floor corners, and one statement plant (a fiddle-leaf fig or monstera) by the gable window. Group plants in odd numbers, rotate them monthly for even growth, and water only when the top inch of soil is dry.
Practical tip: Skylight sun can scorch delicate leaves in summer — move sensitive plants a foot or two away from direct skylight beams in July and August.
Variation: If your attic is dark, high-quality faux plants in the same spots give you the look with none of the watering.
26. Add an Electric Fireplace Under the Gable
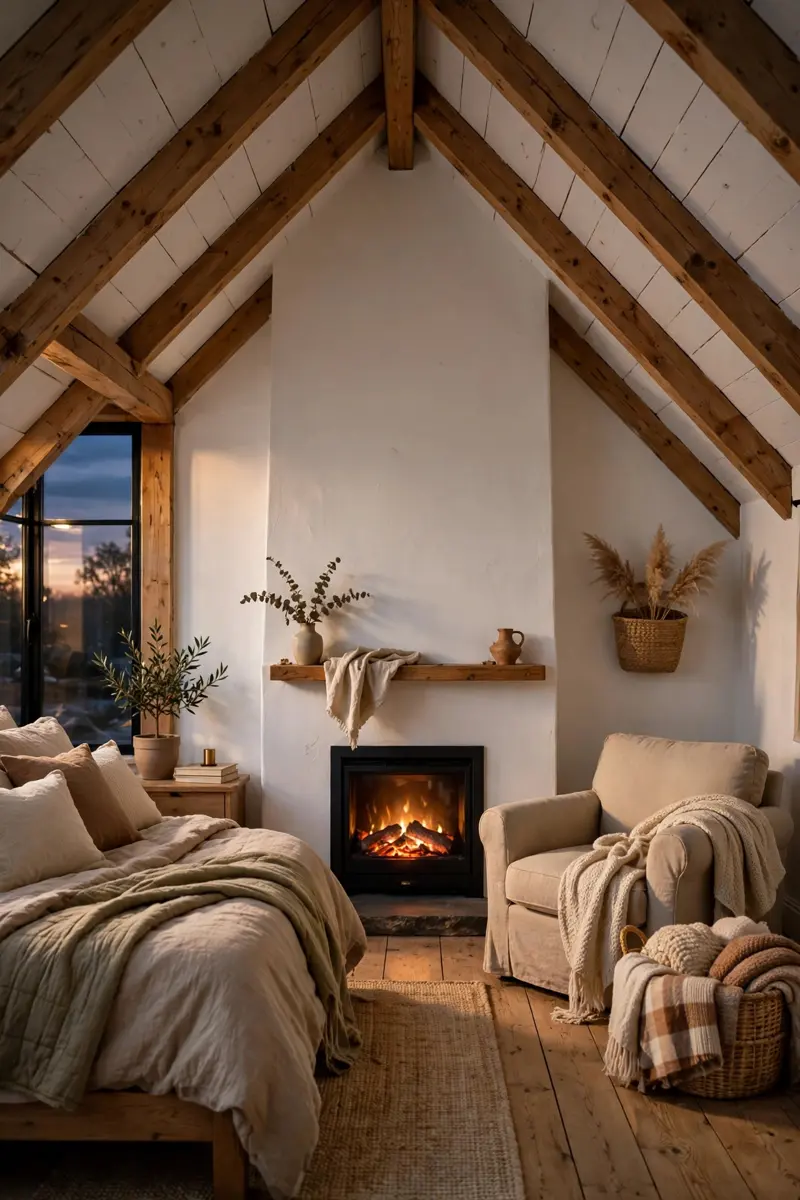
An electric fireplace under the gable wall gives an attic bedroom a hearth, a focal point, and real warmth on cold nights — with no chimney, no venting, and no building work. It turns the tallest wall into the room’s heart.
Materials + realistic cost: a freestanding electric fireplace or wall-mounted unit ($150–$350); a simple mantel shelf ($40–$80); candles and a basket of throws beside it ($25–$45). Total: $215–$475.
Center the fireplace on the gable wall, flank it with low bookcases or plants, and hang a mirror or art above the mantel. Choose a unit with a heater you can switch off in summer so you keep the flame glow year-round, and keep bedding and curtains well clear of the heat outlet.
Practical tip: An electric fireplace needs only a standard outlet, but do not run it on the same circuit as a space heater — attics often share circuits with the floor below.
Variation: A faux fireplace surround with candles inside gives you the same cozy focal point for under $100, with no electricity at all.
Frequently Asked Questions
Can you put a bed under a sloped ceiling in an attic bedroom?
Yes, if you can sit up in bed without hitting the slope. Choose a low platform bed, place the head end where the ceiling is tallest, and skip tall headboards. Measure sitting height before you buy — it is the one measurement that matters most in attic bedroom ideas.
How do you get enough storage in an attic bedroom?
Use the space you cannot stand in: built-in eave drawers, knee-wall wardrobes, and dressing nooks behind the knee wall. Keep everyday clothes where the ceiling is tallest and seasonal items in the lowest eaves, and use full-extension drawer slides so nothing gets lost at the back.
What color makes a low attic bedroom feel bigger?
Warm white and pale neutrals make a low attic bedroom feel bigger, because they bounce skylight and window light around the slopes. If you love color, paint one slope in a bold tone and keep the rest pale, so the room keeps its sense of air.
Do attic bedrooms need skylights?
Not always, but skylights transform attic bedrooms more than any other single change — they add daylight, a view of the sky, and a sense of height. If you already have a gable window, sheer curtains and mirrors can spread that light further without new construction. The Spruce’s guide to small attic rooms with low ceilings at https://www.thespruce.com/low-ceiling-small-attic-room-ideas-8405338 shows how light and low furniture work together in real rooms.
How do you keep an attic bedroom warm in winter and cool in summer?
Insulation comes first: check roof, knee-wall, and floor insulation, seal air leaks, and make sure the roof can still ventilate. Then add a skylight blind for summer shade, layered bedding you can adjust, and a fan or small heater for the shoulder seasons. Decor alone cannot fix a poorly insulated attic, so sort the building fabric before you buy furniture. For more small-room ideas that work in tight spaces, see our sage green and grey bedroom ideas post at https://ourhomeandgardens.com/sage-green-and-grey-bedroom-ideas/
Conclusion
An attic bedroom does not need to feel like a compromise — with the right bed height, smart eave storage, and light pulled in through skylights and gable windows, it can become the coziest room in your house. Start with one idea from this list: a low bed under the slope, a reading nook in the lowest eave, or a coat of warm white paint on the slopes. Then add the next idea when you are ready. If you found a favorite, save this post to Pinterest so you can find it again when you start your attic makeover — your future self, curled up in that skylight nook, will thank you.