
If you have ever opened a drawer to find one earring, a tangle, and a missing back, you know the problem is not your collection. It is the system. These earring storage ideas fix that, with a home for every pair, from tiny studs to long chandelier drops, and a setup that fits your space and budget.
Below you will find 28 ways to store and display earrings, from under-$5 DIY tricks to a full jewelry armoire. Each idea includes honest costs, simple steps, and a practical tip you can use today. Start with the one that matches your biggest frustration, then borrow tricks from the rest. For more small-space inspiration, see our cozy home decor ideas and our home office ideas for two.
1. Velvet-Lined Drawer Tray for Everyday Pairs
A velvet-lined tray turns a messy drawer into a calm getting-ready station, and it is one of the simplest earring storage ideas for daily wearers. Each pair gets its own soft compartment, so studs stop rolling and hoops stop snagging. You see everything at a glance, which means you actually wear more of what you own.
You will need:
- A velvet-lined jewelry tray, $15-$35
- Small felt rolls or dividers, $8-$15
- A tiny dish for earring backs, $3-$8
Measure your drawer first, then choose a tray that leaves no wasted gaps at the sides. Sort pairs by type first: studs in the small squares, hoops in the long slots. Put your five most-worn pairs in the front row so mornings take seconds, not minutes.
Tip: Keep one spare set of earring backs in the tray’s corner dish, so a lost back never sidelines a favorite pair.
Line a thrifted tray with self-adhesive velvet sheets for the same soft finish at half the price.

2. Framed Mesh Wall Display for Dangling Earrings
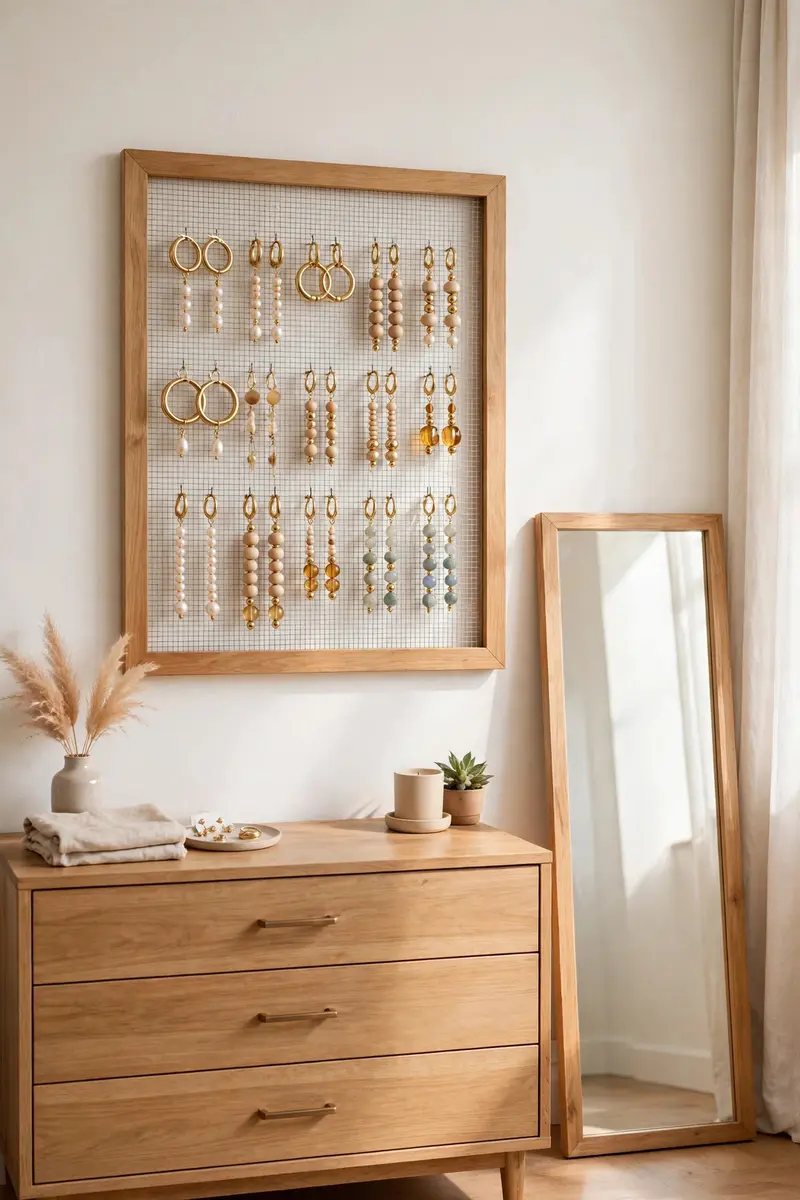
A framed mesh panel turns dangling earrings into wall art, and it is one of the prettiest earring storage ideas for renters and collectors alike. Hooks slide straight into the mesh, so long drops hang freely without tangling. Your collection becomes decor, and choosing a pair feels like shopping your own boutique.
You will need:
- A wood picture frame, $10-$25
- Wire mesh or screen, $8-$15
- A staple gun and wall hook, $15-$30
Remove the glass and backing from the frame, then staple mesh tightly across the back. Hang it at eye level near your mirror, leaving room below for the longest earrings to swing free. Group pairs by length, with the longest drops at the bottom rows.
Tip: Use small S-hooks for chunky statement earrings, so heavy pieces never stretch the mesh.
Paint the frame gold or blush pink to match your bedroom, or leave the wood natural for a boho look.
3. Slotted Acrylic Wall Organizer for Studs
A slotted acrylic organizer solves the stud problem in one move, and it is one of the smartest earring storage ideas for small spaces. You slide earrings into slots without removing their backs, so putting them away takes two seconds. Clear acrylic keeps every pair visible, and the slim profile fits inside a cabinet door.
You will need:
- A slotted acrylic earring organizer, $12-$25
- Adhesive strips or small screws, $5-$10
Mount the panel inside a wardrobe door or beside your mirror, at a height where you can reach the top row comfortably. Slide studs in from the top of each slot, keeping pairs side by side. Reserve one row for your everyday favorites so they are always first.
Tip: Wipe the acrylic with a dry microfiber cloth weekly, since dust shows fast on clear panels.
Cut a long panel to fit a narrow cabinet shelf, a trick that works beautifully in tiny bedrooms.

4. Rotating Jewelry Tree for the Dresser
A rotating jewelry tree keeps your favorite pairs spinning within reach, and it is one of the most charming earring storage ideas for a dresser top. Branches hold hoops and drops at different heights, while the base catches studs and backs. One spin shows the whole rotation, no digging required.
You will need:
- A metal or wood jewelry tree, $15-$35
- A small tray for the base, $5-$12
Place the tree near your mirror, away from the edge where sleeves could knock it. Hang longer earrings on the lower branches so they never tangle with shorter pairs above. Keep only your current rotation on the tree, and store the rest elsewhere.
Tip: Put a felt pad under the base to protect the dresser and stop the tree sliding when you spin it.
Choose a branch-style tree for boho collections, or a sleek metal T-bar for a modern bedroom.

5. Ice-Cube Tray Stud System Under $5
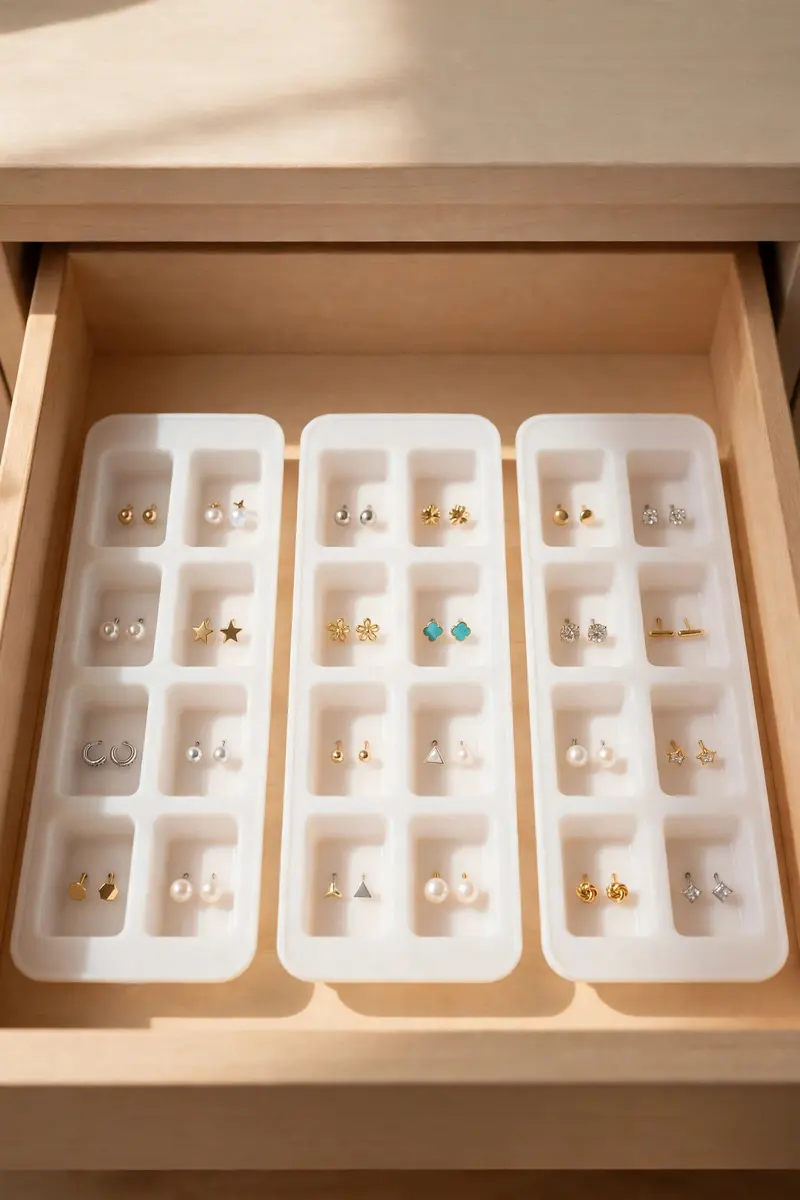
An ice-cube tray is the cheapest stud system that actually works, and it is one of the most budget-friendly earring storage ideas in this list. Each cube holds one pair, separated and visible, and trays stack neatly in a drawer. It is a five-minute fix that ends the single-earring hunt for good.
You will need:
- Two ice-cube trays, $2-$5
- A drawer or shelf to stack them on
Wash and dry the trays first, then place one pair per cube, backs attached. Label the tray edge by color or occasion if your collection is large. Stack a second tray on top only when the first is full, so pairs never get crushed.
Tip: Keep one empty cube at the end of each tray for the pair you are wearing today.
Spray-paint the tray gold or cover it with washi tape for a pretty look that still costs under $5.
6. Weekly Pill Organizer for Tiny Studs
A weekly pill organizer is a travel-sized hero for studs, and it is one of the cleverest earring storage ideas for tiny collections. Seven lidded compartments keep pairs separated, and the clear lids let you see everything without opening a single door. It slips into a handbag, a drawer, or a suitcase pocket.
You will need:
- A 7-day pill organizer, $3-$8
- Small labels, $2-$4
Assign one compartment per pair, or one per day of the week if you plan outfits ahead. Snap each lid shut after placing the pair, backs and all, so nothing migrates. Keep the organizer in your travel bag permanently, ready for the next trip.
Tip: Use the largest compartment for chunky studs, and save the small ones for delicate pairs.
Buy two organizers: one for everyday studs at home, and one that lives in your travel kit.

7. Hanging Pocket Organizer Behind the Door
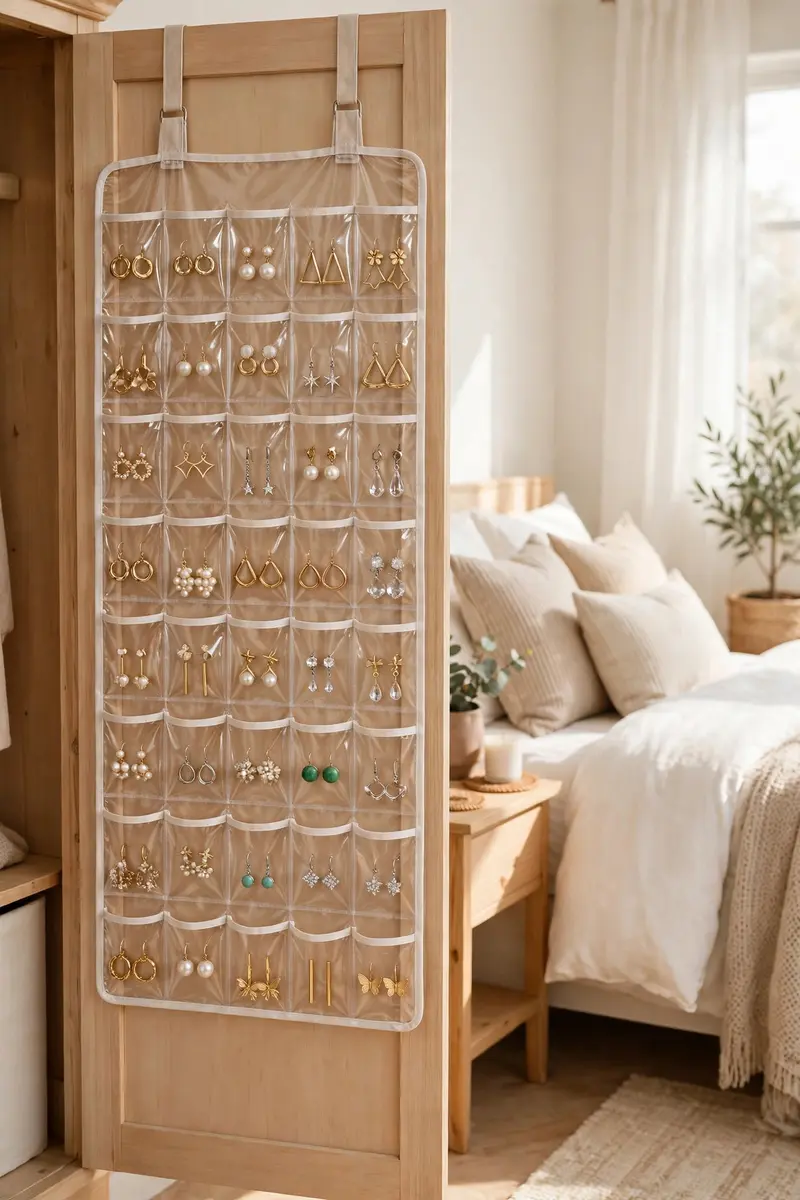
A clear hanging pocket organizer turns dead door space into a full earring wall, and it is one of the most space-saving earring storage ideas for small bedrooms. Dozens of pockets hold pairs, backs, and small accessories, all visible through the clear plastic. Close the door and the whole collection disappears.
You will need:
- A clear hanging shoe or jewelry organizer, $10-$20
- An over-door hook, included or $5-$10
Hang the organizer on the inside of your wardrobe or bedroom door, where it stays hidden but reachable. Put one pair per pocket, with the backs in the same pocket, never loose. Reserve the top row for everyday pairs and the bottom rows for occasion pieces.
Tip: Photograph the filled organizer once, so you can find a pair fast even when the door is closed.
Cut a tall organizer in half for a short door, and use the second half inside a closet.
8. Shadow Box Display for Heirloom Pairs
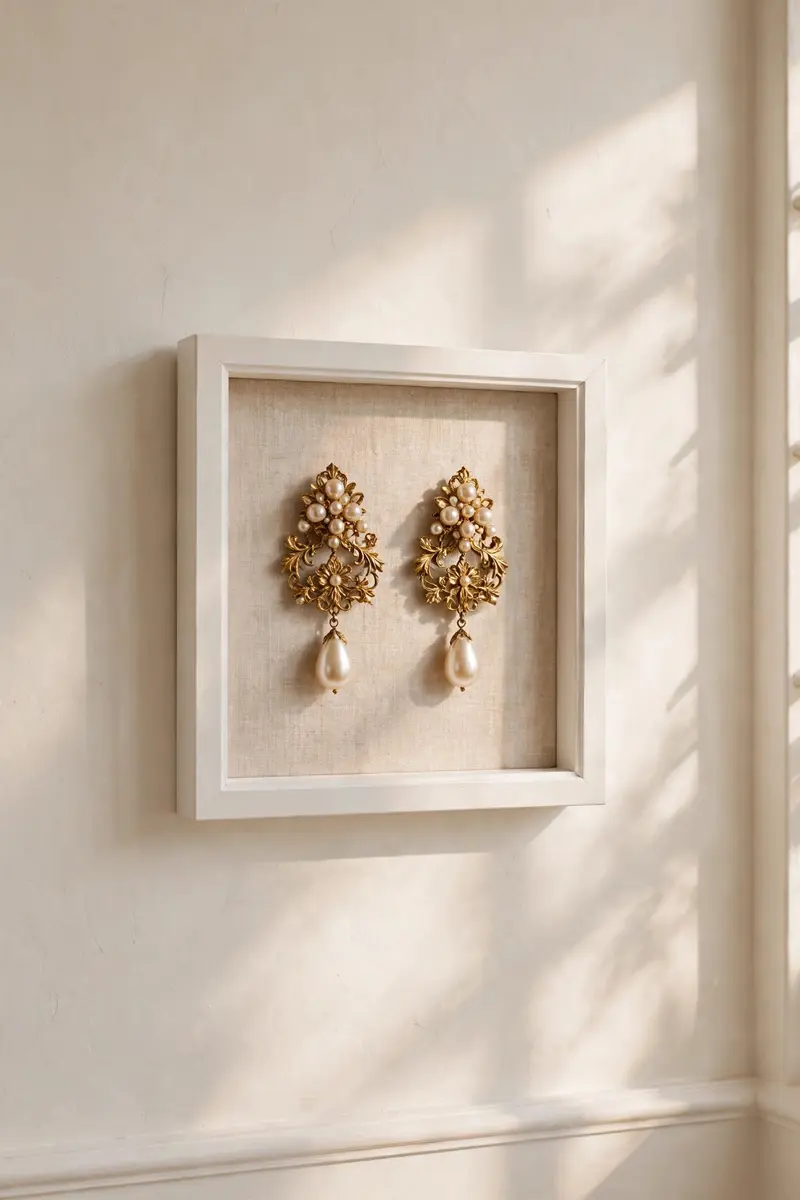
A shadow box gives heirloom earrings the respect they deserve, and it is one of the most sentimental earring storage ideas for pieces you rarely wear. Pairs pin to a fabric backing behind glass, protected from dust and damage, yet still visible every day. It turns memory into decor instead of a box in a drawer.
You will need:
- A shadow box frame, $15-$30
- Linen or velvet backing fabric, $5-$12
- Small pins or earring cards, $3-$8
Line the back panel with linen, then pin each pair through its card or directly into the fabric. Arrange the most meaningful pair at eye level in the center. Hang the box away from direct sunlight, which can fade stones and tarnish metals over time.
Tip: Add a tiny handwritten label under each pair with who gave it to you, so the story stays with the piece.
Use a deep box for chunky vintage drops, and a shallow one for flat studs and brooches.
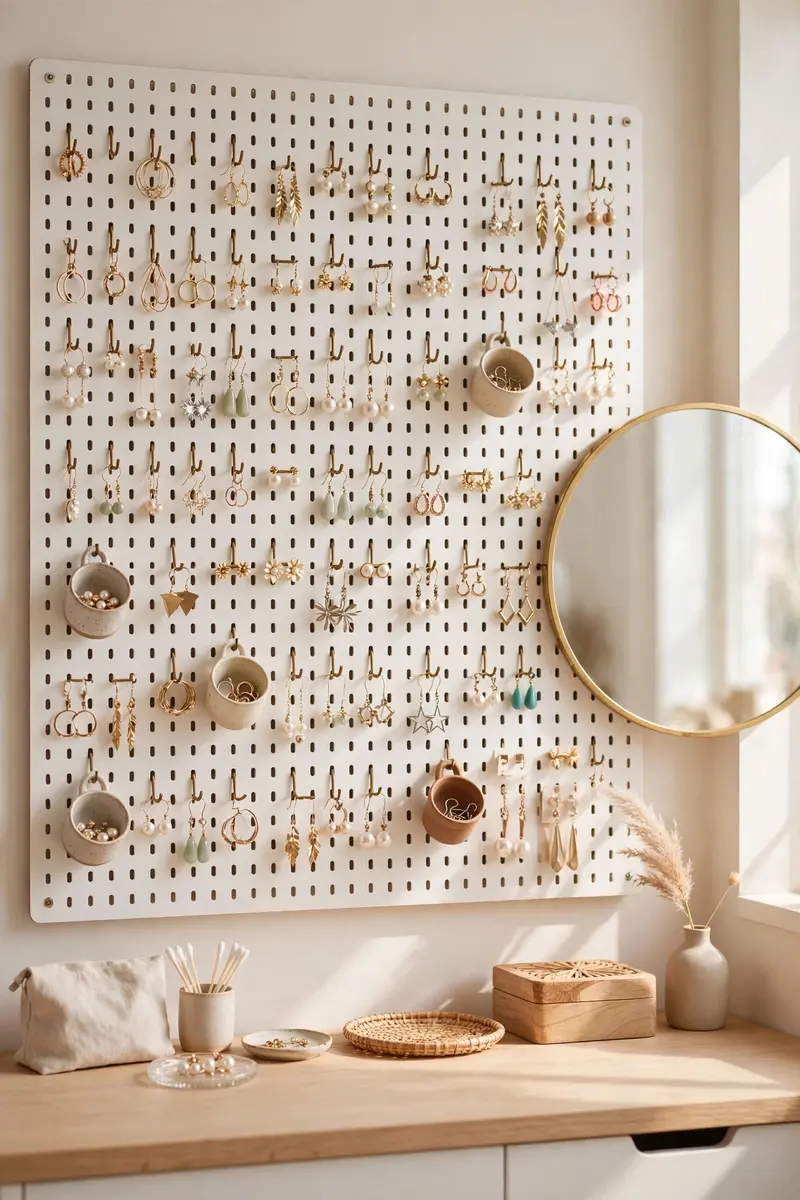
9. Pegboard Vanity Wall for a Full Collection
A pegboard wall puts your whole collection on display and in reach, and it is one of the most flexible earring storage ideas for serious collectors. Hooks, cups, and small shelves rearrange in minutes as the collection changes. You see every pair at once, which ends the forgotten-earring problem completely.
You will need:
- A pegboard panel, $15-$30
- An assortment of hooks and cups, $10-$20
- Wall anchors, $5-$10
Mount the board beside your vanity mirror, using anchors rated for the board plus jewelry weight. Hang dangles from hooks, place stud cards in small cups, and keep a cup for spare backs. Leave breathing room between rows so long earrings never catch on the pair below.
Tip: Paint the pegboard the same color as your wall for a calm look, or a soft sage for a boutique feel.
Frame the pegboard with trim boards for a finished, built-in appearance that looks custom.
10. Tiered Tray Dresser Station
A tiered tray stacks three levels of storage on one small footprint, and it is one of the prettiest earring storage ideas for dresser tops. Studs live on the top tier, hoops in the middle, and statement drops on the bottom. The whole station takes up less space than a dinner plate.
You will need:
- A 2- or 3-tiered tray stand, $18-$35
- Small dishes or cups for studs, $5-$12
Set the tray on your dresser near the mirror, with the tallest tier at the back. Sort by size from top to bottom, so you never lift a tier to find a pair. Keep a tiny dish on the top tier just for earring backs, which are the first thing to go missing.
Tip: Line each tier with a felt circle to stop metal sliding and scratching the tray.
Use a ceramic tiered stand for a classic bedroom, or a gold metal one for a glam vanity.

11. Teacup and Trinket Dish Pairs Station
Vintage teacups turn earring storage into a treasure hunt you enjoy, and this is one of the most charming earring storage ideas for romantics. Each cup holds a few favorite pairs, grouped by color or occasion, and the saucers catch stray backs. Thrifted cups cost almost nothing and look like they belong in a boutique.
You will need:
- Three vintage teacups with saucers, $6-$15 thrifted
- A small tray to group them, $8-$15
Group the cups on a tray by theme: golds in one, silvers in another, color pops in the third. Place one pair per cup section, never a jumble, so pairs stay together. Keep the tray on your nightstand or dresser where you undress each evening.
Tip: Drop earring backs into the matching saucer, so they never roll off the dresser.
Mix patterns boldly: mismatched teacups look intentional when they share one color, like blush or cream.

12. Fabric-Covered Corkboard for Studs and Drops
A fabric-covered corkboard is soft, pretty, and endlessly rearrangeable, and it is one of the most popular earring storage ideas on Pinterest for good reason. Studs push straight into the cork, while drops hang from decorative pins. Change the fabric with the seasons and the board looks brand new.
You will need:
- A corkboard, $10-$20
- Fabric and decorative pushpins, $8-$15
- A frame or ribbon trim, $5-$10
Stretch fabric tightly over the corkboard and staple it at the back, smoothing wrinkles as you go. Pin studs in neat rows by color, and hang drops from pearl-headed pins along the bottom. Hang the board where you get dressed, not across the room.
Tip: Use flat-headed pins for studs and T-pins for heavy drops, so nothing slips overnight.
Choose linen for a calm neutral board, or a bold floral for a statement wall piece.

13. Natural Branch Display for Boho Collections
A painted branch in a vase is sculpture first and storage second, and it is one of the most beautiful earring storage ideas for boho bedrooms. Drops hang from twigs at different heights, catching light like ornaments. It costs almost nothing, yet guests always ask where you bought it.
You will need:
- A sturdy branch, free or $5-$10
- A vase or pot, $8-$18
- Spray paint, optional, $5-$8
Choose a branch with several sturdy side twigs, trim it to vase height, and secure it with stones or floral foam. Hang one pair per twig, keeping heavy pieces near the trunk. Place the vase on a dresser away from doorways, where it cannot be bumped.
Tip: Spray the branch white or gold for a polished look, or leave bark natural for rustic charm.
Swap branches seasonally: blossom twigs in spring, bare branches in winter, both work beautifully.

14. Ladder Rail for Long Dangling Earrings
A small ladder rail gives long earrings the vertical space they need, and it is one of the most practical earring storage ideas for statement lovers. Rungs hold hooks at different heights, so chandelier drops never tangle with each other. It leans against a wall, so no drilling is required at all.
You will need:
- A small decorative ladder or rail, $20-$40
- S-hooks, $5-$10
Lean the ladder against your vanity wall at a safe angle, or mount a short rail at shoulder height. Hang the longest earrings on the lowest rung, working upward to shorter pairs. Keep a small dish at the base for the backs you remove while trying pairs on.
Tip: Space hooks at least two inches apart, since long drops swing and catch when crowded.
Paint a wooden ladder blush or sage to match your room, or choose bamboo for a natural look.

15. Magnetic Board for Studs That Stay Put
A magnetic board holds studs firmly with zero holes or slots, and it is one of the most modern earring storage ideas for minimalists. A thin steel sheet behind fabric or paper grips magnetic backs, or holds posts through a soft layer. Pairs stay exactly where you left them, even if the board gets bumped.
You will need:
- A steel sheet or magnetic board, $12-$25
- Small magnets or magnetic earring backs, $5-$12
- Fabric to cover, optional, $5-$10
Mount the steel sheet inside a frame, cover it with thin fabric if you prefer a soft look, and attach magnetic backs to your studs. Arrange pairs in a grid so you can scan the whole collection in seconds. Keep the board near your mirror for quick morning choices.
Tip: Test one pair first, since very heavy studs need stronger magnets than delicate ones.
Use a framed magnetic board as art between jewelry seasons, swapping in photos when you travel.

16. Travel Roll With Zipped Pouches
A jewelry travel roll keeps every pair safe on the road, and it is one of the most essential earring storage ideas for frequent travelers. Zipped pouches separate pairs, a padded roll protects delicate drops, and the whole thing ties shut like a clutch. Unroll it at the hotel and your vanity is ready instantly.
You will need:
- A jewelry travel roll, $15-$30
- Small zip pouches, included or $5-$10
Place one pair per pouch, with backs attached, and zip each pouch before rolling. Put delicate or beaded pairs in the center pouches, where padding is thickest. Keep the roll in your carry-on, never checked luggage, so it stays with you.
Tip: Photograph the roll’s contents before packing, so a lost bag still leaves you a record.
Choose a roll with a hanging hook for hotel bathrooms with no counter space.

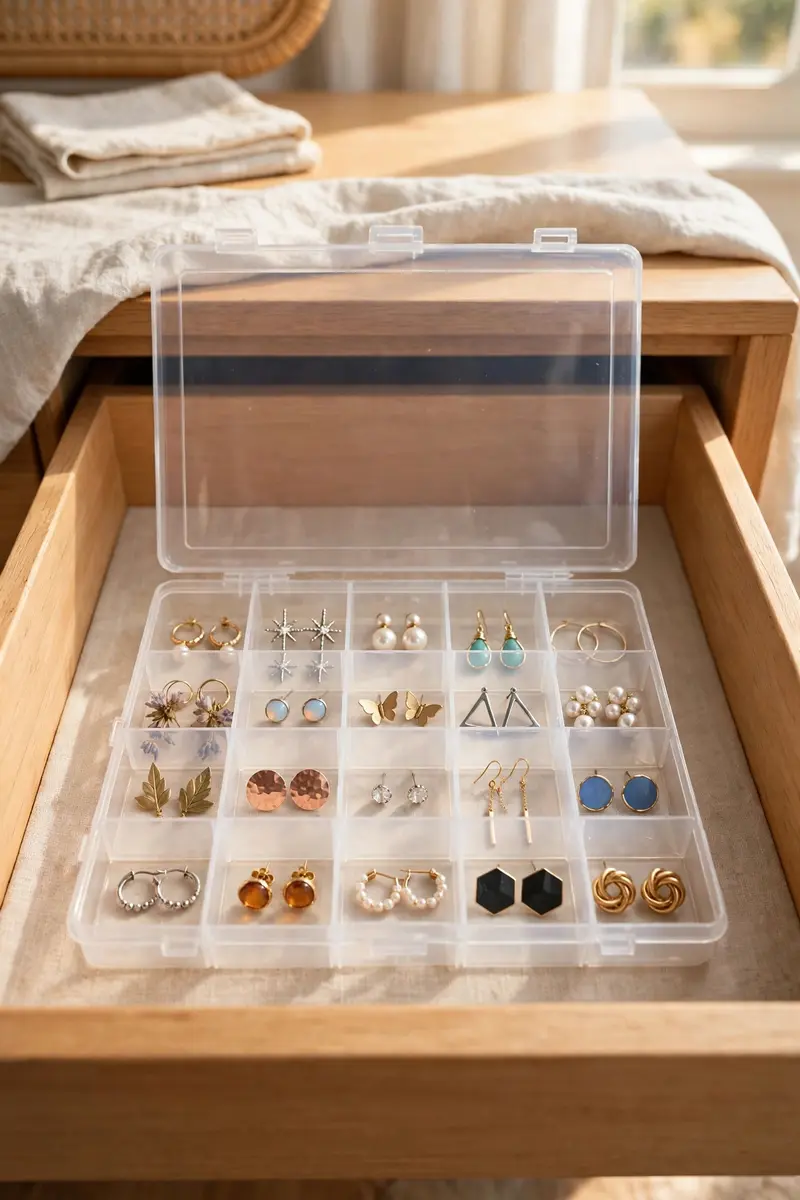
17. Craft Box With Tiny Compartments
A craft or tackle box with adjustable dividers is a secret weapon for big collections, and it is one of the most organized earring storage ideas for under $15. Dozens of tiny compartments keep every pair separate, and the clear lid shows everything without opening the box. It stacks, labels, and travels beautifully.
You will need:
- A compartment craft box, $8-$15
- Labels, $2-$4
Adjust the dividers to fit your largest hoops, then fill compartments one pair at a time, backs included. Label each row by type or color so you can find a pair without lifting the lid. Store the box flat in a drawer, never upright, so pairs cannot migrate between compartments.
Tip: Line compartments with tiny felt squares to protect plated finishes from hard plastic.
Buy two boxes and split the collection: everyday in one, occasion pairs in the other.
18. Mirror-Front Jewelry Cabinet for Hidden Storage
A mirror-front cabinet hides a full earring collection behind your reflection, and it is one of the sleekest earring storage ideas for small bedrooms. Open the mirror to reveal hooks, slots, and shelves; close it and the room looks uncluttered. It is the best of both worlds: display when dressing, hidden the rest of the day.
You will need:
- A wall-mounted mirror jewelry cabinet, $40-$90
- Wall anchors, $8-$15
Mount the cabinet at eye level beside your dressing area, into studs or with heavy-duty anchors. Hang drops from the hooks, slide studs into the slots, and keep daily pairs on the easiest-to-reach row. Lock the cabinet if it holds fine jewelry, and keep the key somewhere sensible.
Tip: Add a small LED strip inside if your cabinet lacks one, since dark interiors hide pairs.
Choose a full-length mirror cabinet for a bedroom, or a small vanity mirror version for a bathroom.

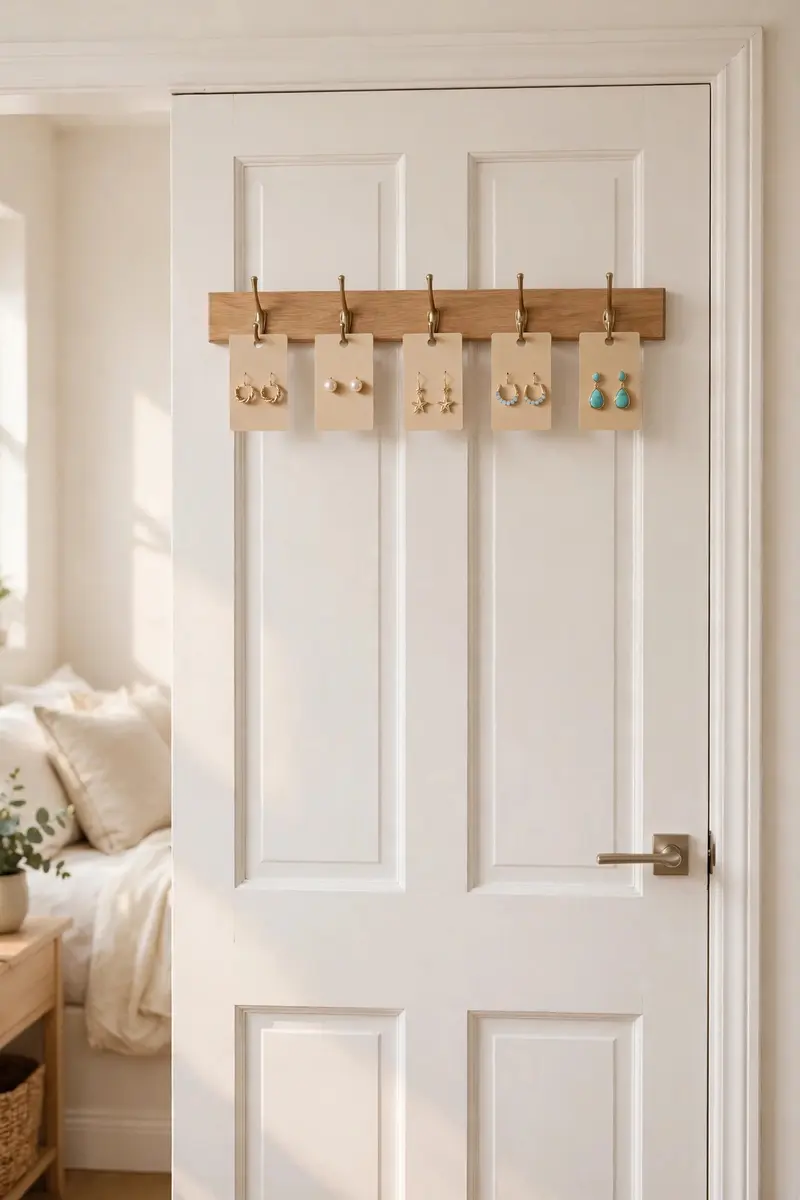
19. Over-Door Hooks and Earring Cards
Over-door hooks paired with earring cards create instant hanging storage, and this is one of the easiest earring storage ideas for dorms and rentals. Cards clip to hooks or hang from a rail, keeping pairs together and visible. No tools, no damage, and the whole system moves with you.
You will need:
- An over-door hook rail, $8-$15
- Earring cards or small clips, $5-$10
Hang the rail over your wardrobe or bedroom door, then clip one earring card per hook. Sort cards by color down the rail, so your eye finds the right pair fast. Keep the rail on the door you open least, to avoid swinging pairs off their hooks.
Tip: Punch a small hole in each card and thread a ribbon loop, so cards hang neatly from any hook.
Use kraft cards for a natural look, or white cards with handwritten labels for a boutique feel.
20. Stackable Clear Mini Drawers
Stackable clear mini drawers turn a drawer or shelf into a tiny jewelry shop, and they are one of the most satisfying earring storage ideas for visual organizers. Each drawer holds a category, the clear fronts show the contents, and the stack grows with your collection. Pull a drawer, choose a pair, slide it shut.
You will need:
- A set of stackable mini drawers, $15-$30
- Labels, $2-$4
Stack the drawers on your dresser or inside a wardrobe shelf, no more than four high for stability. Label each drawer: studs, hoops, drops, statement. Place one pair per section inside, using small cups for tiny studs that would otherwise roll.
Tip: Keep the everyday drawer at the top of the stack, so mornings never start with a search.
Add felt liners to each drawer to stop earrings sliding when you pull them open.

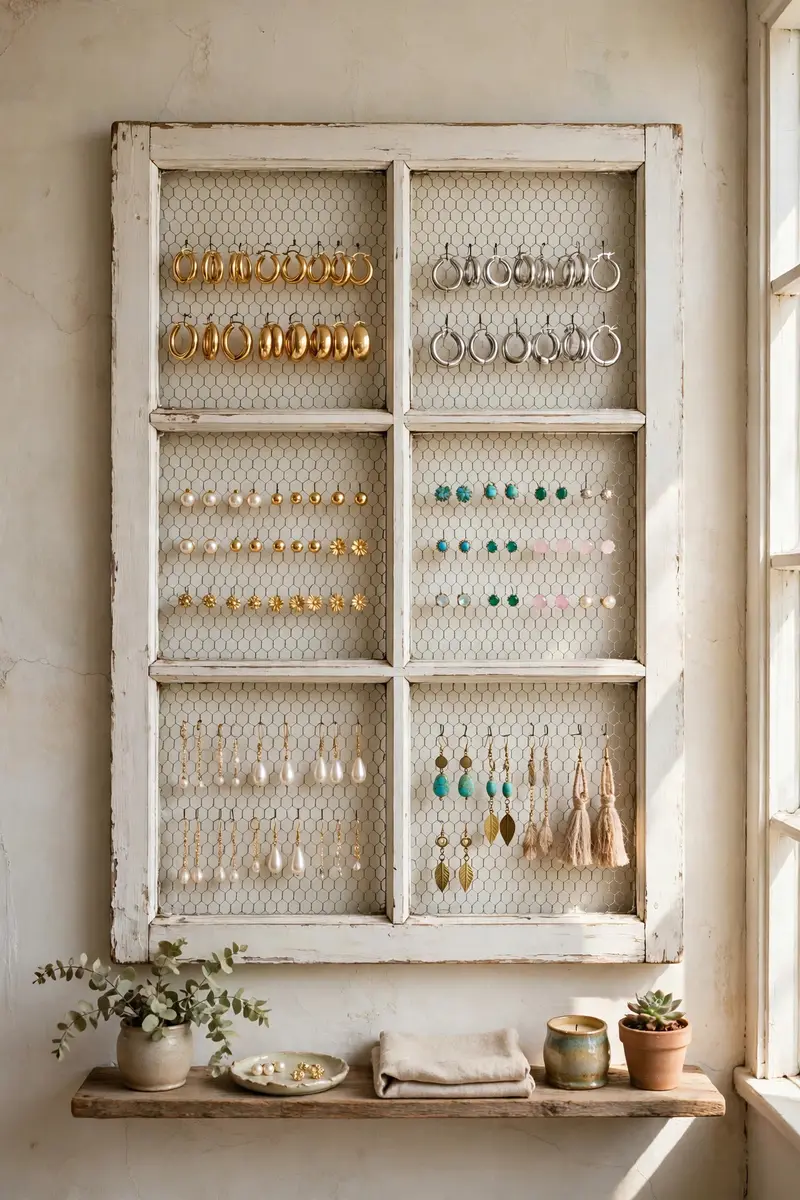
21. Vintage Window Frame Earring Screen
An old window frame with mesh panes becomes a statement earring screen, and it is one of the most creative earring storage ideas for vintage lovers. Each pane holds a different category, and the frame itself is decor even before you add a single pair. It leans or hangs, and it fills a blank wall beautifully.
You will need:
- A vintage window frame, $15-$35 thrifted
- Mesh or screen, $8-$15
- Hooks or pins, $5-$10
Clean and sand the frame, then staple mesh across each pane from the back. Lean it on a dresser or hang it with sturdy anchors, checking that it sits level. Assign one pane per category: studs top left, hoops top right, drops along the bottom.
Tip: Add a row of small hooks along the bottom rail for necklaces, so the screen serves double duty.
Paint the frame distressed white for farmhouse charm, or black for a bold modern contrast.
22. Mini Jewelry Armoire for a Growing Collection
A mini armoire is the grown-up upgrade when trays overflow, and it is one of the most complete earring storage ideas for collectors. Drawers, hooks, and a mirror combine in one piece of furniture that looks like it belongs in a boutique. Everything has a dedicated spot, from tiny studs to long chandeliers.
You will need:
- A tabletop jewelry armoire, $35-$70
Place the armoire on your dresser where its mirror catches natural light. Use the top drawers for studs, the side doors for drops, and the bottom drawer for occasion sets. Do a monthly edit: if a pair has not been worn in a year, move it to the shadow box or pass it on.
Tip: Keep silica gel packets in the bottom drawer to fight tarnish in humid rooms.
Choose a white armoire for a bright bedroom, or a walnut one for a warmer, classic look.

23. Felt Roll Drawer Divider for Studs
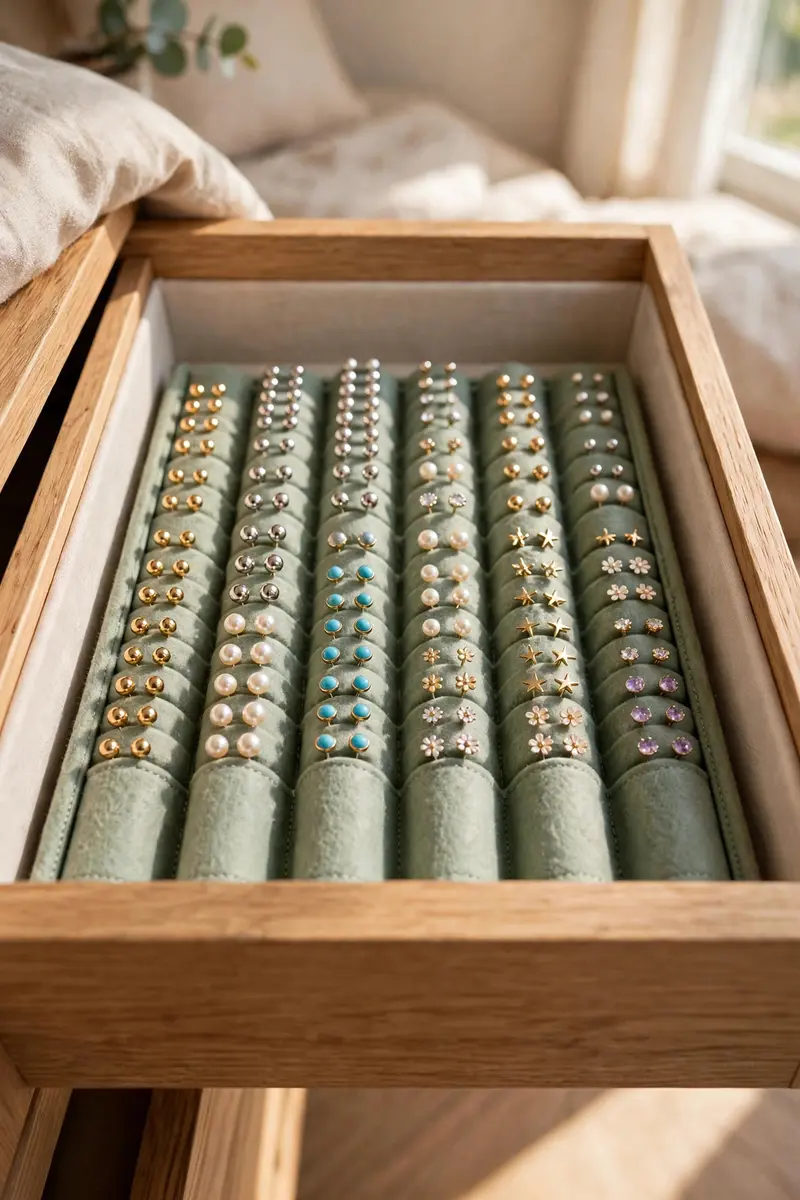
Felt rolls in a drawer divider hold studs upright and separated, and this is one of the neatest earring storage ideas for drawer lovers. Posts slip between the rolls, so pairs stay in order and never roll to the back of the drawer. Open the drawer and the whole stud collection stands at attention.
You will need:
- A drawer divider with felt rolls, $12-$25
- Or felt fabric and dowels to DIY, $8-$15
Fit the divider snugly in a shallow drawer, then press stud posts between the felt rolls in pairs. Keep hoops in a separate section, since their weight can crush the rolls. Place the divider in the drawer you open while dressing, not a distant one.
Tip: Roll the felt a little tighter for heavy studs, and looser for delicate pearl posts.
Make your own by wrapping dowels in felt and gluing them into a shallow tray.
24. Photo Album Binder for Earring Cards
A photo album binder turns earring cards into a flip-through catalog, and it is one of the most portable earring storage ideas for large collections. Sleeves hold one card per pocket, pages flip like a lookbook, and the binder slips onto a shelf. It is oddly satisfying to browse your earrings like a magazine.
You will need:
- A small photo album or binder, $8-$15
- Earring cards, $5-$10
Slide one earring card into each sleeve pocket, keeping pairs visible through the clear plastic. Organize pages by color or occasion, and add a tab for everyday favorites at the front. Store the binder upright on a shelf near your mirror, never flat under heavy items.
Tip: Photograph each page once, so you can plan outfits from your phone without opening the binder.
Use a pretty fabric-covered binder that doubles as shelf decor when closed.

25. Dowel Frame Display, the IKEA Hack
A simple frame with wooden dowels is a famous budget hack, and it is one of the most shared earring storage ideas for DIY fans. Earrings hang from dowels threaded through the frame, staggered so drops have room to swing. Paint the back panel your wall color and the frame seems to float.
You will need:
- A wood frame, $8-$15
- Wooden dowels, $3-$6
- Paint, $5-$10
Drill holes through the frame sides, stagger the dowels front to back, and glue the tips in place. Paint the back panel to match your wall, then hang the frame at eye level. Hang one pair per dowel section, keeping heavier pieces near the frame edges for balance.
Tip: Wrap a ribbon around the bottom dowel to hold studs that cannot hang from a rod.
Build two matching frames side by side for a large collection, or one small frame for a starter set.

26. Anti-Tarnish Pouches for Fine Pairs
Anti-tarnish pouches protect fine pairs from air, moisture, and scratches, and they are one of the most important earring storage ideas for gold, silver, and pearl pieces. Each pouch seals a pair away from the rest, slowing tarnish dramatically. Fine jewelry lasts longer simply because it is stored properly.
You will need:
- Anti-tarnish pouches, $10-$18 for a set
- Silica gel packets, $3-$6
Place one pair per pouch, backs included, and press out excess air before sealing. Store pouches flat in a lined box, grouped by metal type, never mixed. Add one silica packet per box section in humid climates, and replace packets every few months.
Tip: Never store pearls in sealed plastic long-term; use soft cloth pouches that breathe instead.
Label each pouch with a tiny tag noting the metal and occasion, so you never open five pouches to find one pair.

27. Color-Sorted Wall Rail by Outfit
A color-sorted wall rail turns getting dressed into a matching game, and it is one of the most joyful earring storage ideas for outfit planners. Hooks run in rainbow order, so golds, silvers, and color pops each have their zone. You match earrings to your outfit in seconds, without opening a single drawer.
You will need:
- A wall rail with hooks, $12-$25
- Small hooks or clips, $5-$10
Mount the rail near your wardrobe at eye level, then sort hooks from neutrals to brights, left to right. Hang one pair per hook, with statement pieces spaced wider so they never tangle. Keep a small mirror nearby to test a pair against your outfit instantly.
Tip: Move your current week’s pairs to the front hooks on Sunday, so weekday mornings run on autopilot.
Use a brass rail for warm metals, or a black rail for a modern, gallery-like wall.

28. Everyday Grab Tray and Backs Jar
An everyday grab tray plus a backs jar is the simplest system that sticks, and it is one of the most realistic earring storage ideas for busy mornings. Tonight’s pair goes in the tray, tomorrow’s pair is already chosen, and spare backs live in one jar. The whole routine takes ten seconds, and it actually gets done.
You will need:
- A small ceramic tray, $8-$15
- A tiny lidded jar, $3-$8
Place the tray on your nightstand or dresser, right where you take earrings off at night. Each evening, place tomorrow’s pair in the tray and drop any loose backs in the jar. Once a week, return stray backs to their pairs, so the jar never becomes a mystery collection.
Tip: Keep only five pairs in rotation on the tray; the rest live in your main system, not in the way.
Choose a tray in your bedroom’s accent color so this tiny station looks intentional, not improvised.

Frequently Asked Questions
How do you store stud earrings without losing the backs?
Give every stud pair its own small compartment, and keep the backs in that same compartment, never loose in a drawer. Ice-cube trays, pill organizers, felt rolls, and slotted panels all work because each pair has a defined home. Add one small dish or jar for spare backs, and check it weekly so strays get reunited with their pairs.
What is the best way to store dangling earrings?
Hang dangling earrings so they fall freely, with space between pairs. Mesh frames, pegboards, dowel frames, and ladder rails all keep drops untangled and visible. Avoid tossing drops in a drawer or box, where hooks catch on each other and beads chip. The best earring storage ideas for drops always give length room to hang.
How do you prevent earrings from tarnishing in storage?
Keep fine pairs in separate anti-tarnish pouches or lined compartments, away from air and moisture. Add silica gel packets in humid rooms, and never pile different metals together, since contact speeds tarnish. Clean earrings before storing them, and keep pearl pieces in breathable cloth, not sealed plastic.
How do you organize earrings in a small space?
Use vertical space first: wall panels, door organizers, and cabinet-door mounts hold dozens of pairs without touching a dresser. Then add one drawer tray or stackable drawer set for the rest. A small-space system works when everyday pairs stay within arm’s reach and occasion pairs live one step further away.
How do you organize a large earring collection?
Sort first by type, then by color or occasion, and give each group its own zone: a wall display for drops, a tray for studs, and a binder or box for occasion sets. Do a yearly edit and pass on pairs you no longer wear, since a collection you can see is one you will actually use. For more organizing inspiration, see Apartment Therapy’s wall-mounted jewelry organizers and our dining room decor ideas.
Conclusion
The best earring storage ideas are the ones you will actually use every night, not the prettiest ones in a photo. Start with one system from this list, give every pair a home, and live with it for two weeks before buying anything else. A small system, used daily, beats a perfect setup that nobody maintains.
Found a setup you want to try? Save this post to Pinterest so you can find it when you shop for supplies, and share it with anyone whose earrings live in one tangled drawer. Your future, calmer mornings will thank you.



Leave a Reply