
If your open-plan room feels like one big, undefined space, you are not alone. A studio that doubles as an office, a living room that bleeds into a dining area, or a bedroom corner that needs privacy can all feel unsettled without a clear edge. That is where floor ceiling room dividers earn their keep.
In this guide, you will find 18 floor ceiling room dividers ideas for every budget, from renter-friendly curtains under $200 to glass partitions and double-sided fireplaces. Each idea includes realistic costs, simple installation guidance, and a variation, so you can pick the divider that fits your room, your light, and your lease. For more inspiration on dividing open spaces, The Spruce’s room divider ideas and their DIY room dividers show how curtains, bookcases, and glass panels work in real homes.
Before you buy anything, measure twice: ceiling height in three spots, the width of the opening, and how light moves through the room during the day. A divider that blocks your only window will make a room feel smaller, while one that filters light will make two zones feel larger than one big room ever did.
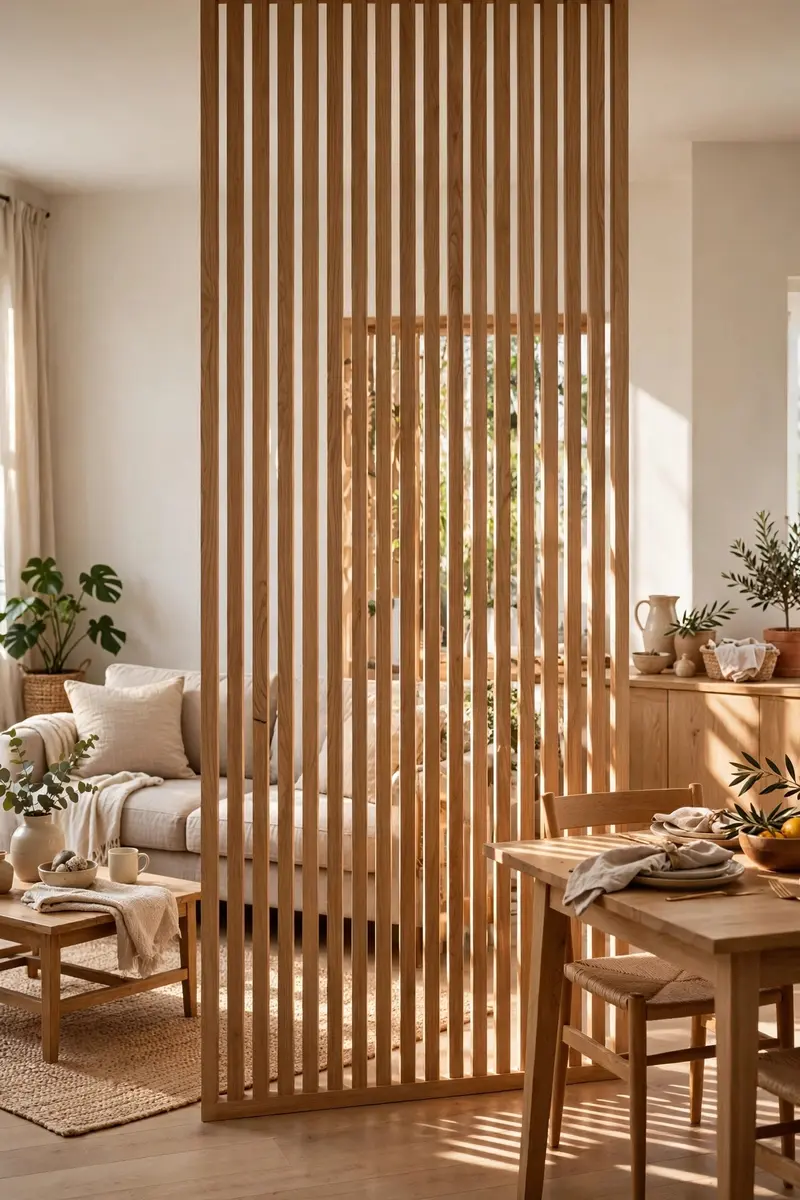
1. Vertical Wood Slat Divider
A vertical wood slat divider is the most popular of all floor ceiling room dividers because it separates a room without closing it off. Light and air pass between the slats, so both sides stay bright, while the rhythm of the wood gives an open plan a clear, finished edge.
Materials: Pine or oak slats ($4-$9 each), top and bottom rails ($30-$60), brackets and screws ($15-$30), and stain or paint ($15-$25). Total: about $120-$350 for a 4-foot-wide divider.
Measure your ceiling height in three spots, since floors and ceilings are rarely perfectly level. Space slats 1-2 inches apart, fix a top rail to a ceiling joist, and use a level on every third slat so the whole run stays straight.
Tip: Choose light oak, birch, or ash if your room is small. Dark slats look dramatic, but pale wood keeps the divider feeling airy and lets light through.
Variation: Curve the run slightly, or add a planter box at one end, to soften the straight line and give the divider a second job.
2. Open-Back Bookshelf Divider
An open-back bookshelf is one of the most useful floor ceiling room dividers because it stores books, plants, and baskets while marking a boundary. With no back panel, light filters through from both sides, so neither zone feels boxed in.
Materials: A tall open shelving unit ($120-$400), wall-anchoring straps ($10-$20), and baskets or bins ($20-$50). Total: about $150-$470.
Place the shelf perpendicular to a wall, not floating in the middle of a room, and anchor it to a stud at the top. Style it from both sides, mixing books with plants and a few empty spaces, so it reads as furniture rather than a wall.
Tip: Anchor every tall shelf, even if it feels stable. A child, a pet, or a bumped vacuum can topple an unanchored unit in seconds.
Variation: Stack a shorter unit on a low console to reach ceiling height in a loft, or use two matching units with a gap between them for a doorway feel.

3. Ceiling-Track Sheer Curtains
Sheer curtains on a ceiling track are the softest floor ceiling room dividers, and the most forgiving in a rental. You can close them for privacy, pull them fully back for an open room, and change the fabric whenever your style changes.
Materials: A ceiling curtain track ($25-$70), sheer panels ($20-$60 each), and ceiling anchors ($10-$15). Total: about $55-$200.
Mount the track to ceiling joists, or use toggle bolts in drywall, and hang panels so they just kiss the floor. A track that runs past the divider on one side lets you stack the curtains against a wall when you want the room open.
Tip: Hang the track as close to the ceiling as possible. A gap above the curtain breaks the floor-to-ceiling illusion and lets the divider look temporary.
Variation: Layer a sheer panel with a heavier linen panel on a double track, so you get daytime softness and evening privacy from the same system.

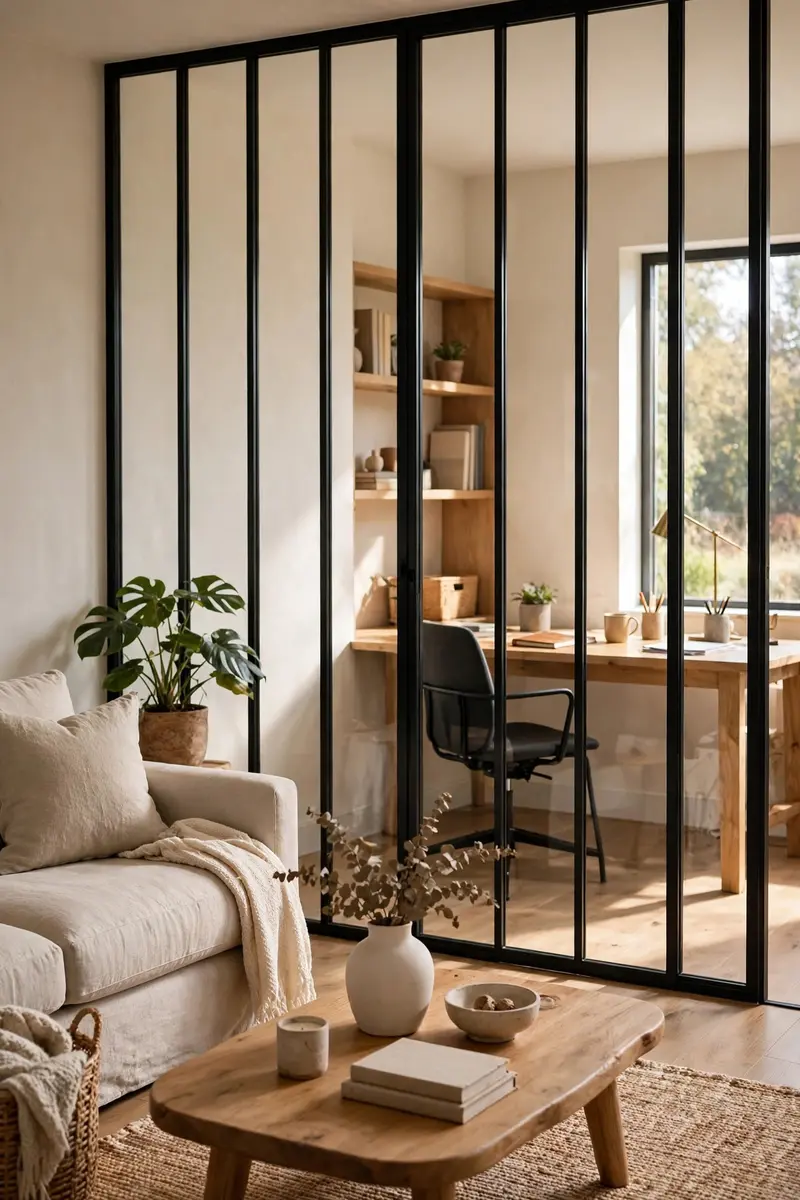
4. Black-Framed Glass Partition
A black-framed glass partition is the most polished of all floor ceiling room dividers, giving you the definition of a wall with almost no loss of light. It suits lofts, home offices, and kitchens that open onto living rooms.
Materials: A framed glass panel system ($400-$1,200), a sliding or fixed track ($80-$200), and professional installation ($200-$500). Total: about $680-$1,900.
Measure the opening precisely, including any floor unevenness, and decide between fixed panels, a sliding door, or a mix. Tempered glass is essential for safety, and a slim black frame keeps the look modern without heavy visual weight.
Tip: Add frosted film to the lower half if you need privacy at desk height. You keep the light, but video calls and messy desks stay hidden.
Variation: Try brass or white frames instead of black for a softer, more traditional room, or use fluted glass for privacy with texture.
5. Sliding Barn Door Divider
A sliding barn door gives floor ceiling room dividers a warm, farmhouse character while saving the swing space a hinged door wastes. One wide door can close off a bedroom, office, or laundry zone in seconds.
Materials: A barn door slab ($150-$450), sliding hardware kit ($60-$150), and a floor guide ($10-$20). Total: about $220-$620.
Mount the rail into studs or a header board, since a barn door is heavy and a rail in drywall alone will fail. Leave a small gap at the floor for the guide, and check that the door clears baseboards and light switches.
Tip: Choose a door that is at least 2 inches wider than the opening on each side. A door that only just covers the gap leaks sound and light around its edges.
Variation: Use a double barn door that splits in the middle for a wide opening, or a glass-paneled barn door when you want light to pass through.

6. Freestanding Folding Screen
A folding screen is the easiest of all floor ceiling room dividers to live with, because it needs no tools, no holes, and no commitment. You can angle it, fold it away, or move it to another room whenever the layout changes.
Materials: A tall folding screen ($80-$300) and felt pads for the feet ($5). Total: about $85-$305.
Choose a screen at least 6 feet tall if you want real privacy, and angle the panels in a gentle zigzag so it stands on its own. Place a heavy plant or a small stool behind one panel if the screen wobbles on a slick floor.
Tip: A screen with fabric or rice-paper panels lets light through and feels lighter than solid wood, which matters in a small, dark room.
Variation: Look for a shoji-style screen for a calm, Japanese-inspired room, or a rattan screen for warmth and texture in a boho space.

7. Living Plant Wall Divider
A plant wall turns floor ceiling room dividers into a living feature, cleaning the air visually even if it does not literally purify it. Tall plants in a row, or a vertical planter frame, soften a hard room edge better than any solid material.
Materials: Tall planters ($25-$60 each), 3-5 large plants ($20-$50 each), and a drip tray or saucer set ($15-$25). Total: about $130-$335.
Pick plants that suit your light: snake plants and ZZ plants for low light, fiddle-leaf figs and olive trees for bright rooms. Keep taller plants at the ends and shorter ones in the middle, so the divider reads as a designed row rather than a jungle.
Tip: Put every planter on casters or a tray. You will need to move the row to clean, water, and rotate plants, and dragging heavy pots scratches floors.
Variation: Use a tall open frame with hanging planters at different heights for a lighter, airier plant divider that still reads floor to ceiling.

8. Rope and Macrame Hanging Divider
Rope and macrame bring a handmade, boho softness to floor ceiling room dividers, and they cost far less than a built partition. Thick cotton rope or a knotted macrame panel filters the view without blocking light or air.
Materials: A ceiling-mounted dowel or rod ($20-$40), cotton rope or a ready-made macrame panel ($40-$150), and ceiling hooks ($10-$15). Total: about $70-$205.
Fix the rod into joists, since a rope divider gets heavy once it is fully knotted. Hang strands with small gaps between them, and keep the lowest ends above furniture height so nothing snags when you walk past.
Tip: Keep rope dividers away from radiators, candles, and cooking areas. Natural fiber looks beautiful, but it is not a good neighbor for open flames.
Variation: Use chunky jute rope for a coastal look, or fine white cotton macrame for a softer, more romantic bedroom divider.

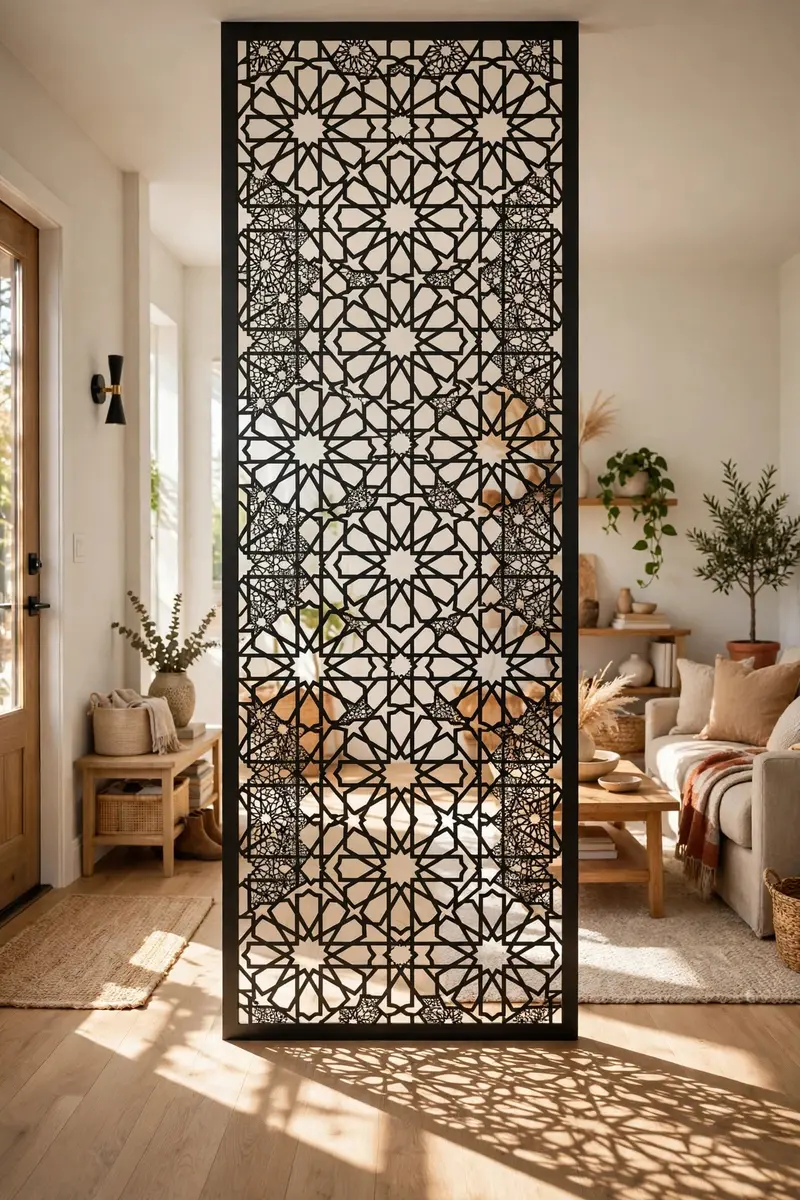
9. Laser-Cut Metal Screen
A laser-cut metal screen is the most artistic of all floor ceiling room dividers, turning a plain opening into a patterned feature wall. Light passing through the cutouts throws shifting shadows, so the divider changes through the day.
Materials: A laser-cut metal panel set ($200-$600), a ceiling and floor track ($40-$100), and mounting hardware ($20-$40). Total: about $260-$740.
Order panels sized to your ceiling height, and frame them in slim steel or wood so the edges look finished. Backlighting the screen with a floor washer or LED strip at night makes the pattern glow and doubles as evening lighting.
Tip: Choose a pattern with at least 40 percent open area if the room beyond has the only window. A dense pattern can darken the second zone more than you expect.
Variation: Use a geometric pattern for a modern room, a botanical cutout for a softer space, or a single panel as an entry feature with open space beside it.
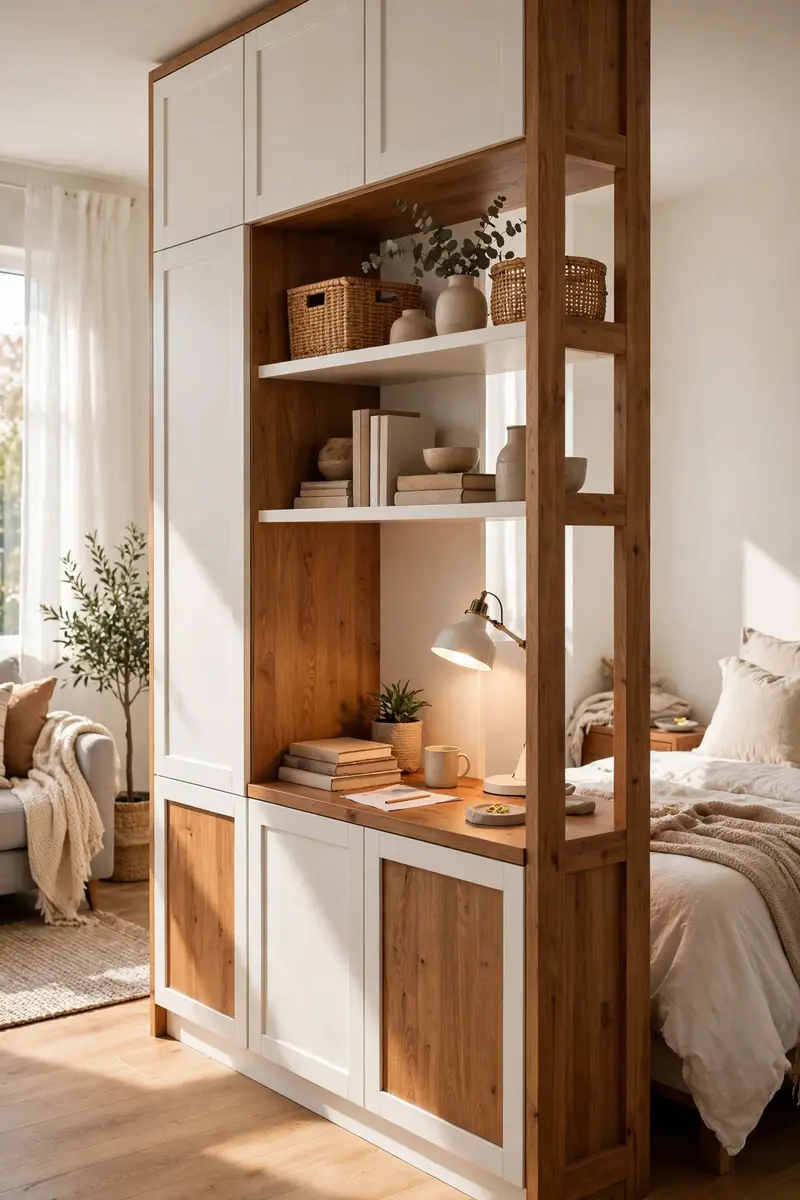
10. Storage Wall With a Desk Nook
A storage wall with a desk nook is the hardest-working of all floor ceiling room dividers, because it divides, stores, and creates a workspace in one build. It suits studios and shared rooms where every square foot must earn its keep.
Materials: Tall cabinets or shelving ($300-$900), a desk board ($40-$100), and task lighting ($25-$60). Total: about $365-$1,060.
Build the wall from the outside in: tall storage on both ends, a desk-height opening in the middle, and open shelves above it. Leave a cable gap behind the desk, and add a small lamp so the nook works after dark.
Tip: Face the desk toward the room, not into the divider. A desk that faces a wall inside a divider feels like a cupboard, while one facing out feels like a room.
Variation: Swap the desk for a fold-down table in a tiny studio, or a reading bench with storage below it in a family room.
11. No-Drill Tension Columns
Tension columns are the renter’s secret weapon among floor ceiling room dividers, because they wedge between floor and ceiling with no screws at all. Slim posts in wood or metal create a slat effect you can take with you when you move.
Materials: Adjustable tension posts ($25-$50 each, 5-9 needed), and optional shelves or hooks ($20-$40). Total: about $145-$490.
Measure ceiling height at each post position, since a post that fits one spot may be loose in another. Twist each post tight by hand, check it with a level, and re-tighten after a week, as floors and ceilings settle.
Tip: Place posts 5-8 centimeters apart for the classic slat look. Wider gaps feel sparse, while tighter gaps block too much light.
Variation: Add small shelves between two posts for plants, or hang a curtain from a rod clipped to the posts for instant privacy.

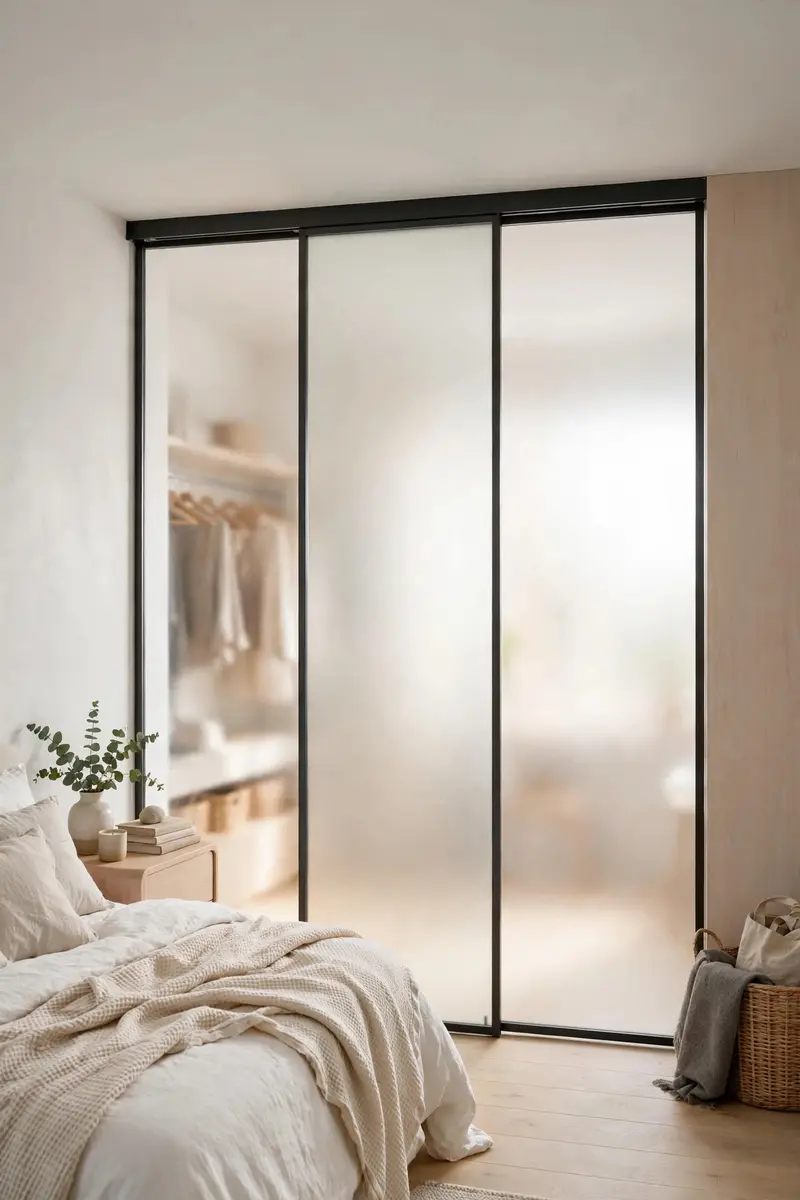
12. Frosted Glass Sliding Doors
Frosted glass sliding doors give floor ceiling room dividers a clean, hotel-like finish, with privacy that clear glass cannot offer. They suit bathrooms, dressing areas, and home offices carved from a larger room.
Materials: Frosted glass sliding panels ($300-$800), a ceiling track ($60-$150), and soft-close hardware ($30-$60). Total: about $390-$1,010.
Choose a track that can carry the full weight of glass, and add a floor guide so the doors never swing. Frosted film on clear glass is a cheaper route to the same look, and it can be removed when you move out.
Tip: Test frosted glass at night with the room lights on. Some films look private by day but turn see-through when a bright room sits behind them.
Variation: Use one frosted panel fixed and one sliding, so you get a permanent edge plus a door, or pair frosted glass with wood frames for warmth.
13. Entryway Bookcase and Bench
An entryway bookcase with a bench is one of the most welcoming floor ceiling room dividers, because it greets you with storage the moment you walk in. It separates a foyer from a living room while giving shoes, coats, and keys a home.
Materials: A tall bookcase ($150-$400), a bench or low cabinet ($80-$200), and hooks and baskets ($30-$60). Total: about $260-$660.
Run the bookcase from the wall toward the room, and place the bench on the living-room side so the entry side stays clear. Keep the top shelf styled lightly, since a cluttered top makes an entry feel chaotic rather than organized.
Tip: Leave one open hook per person, plus one spare. An entry divider fails the day coats start piling on chairs because the hooks ran out.
Variation: Add a mirror on the entry side of the bookcase, so guests can check themselves before leaving, and the entry feels larger.

14. Curved Slat Divider
A curved slat divider softens floor ceiling room dividers in a way straight lines never do, guiding the eye around a corner instead of stopping it. It suits open plans where a living area flows into a dining space.
Materials: Flexible slat panels or steam-bent slats ($250-$700), curved top and bottom rails ($60-$150), and brackets ($20-$40). Total: about $330-$890.
Mark the curve on the floor with painter’s tape first, and live with it for a day before you build. A gentle curve feels natural, while a tight curve eats floor space and makes furniture placement awkward.
Tip: Keep furniture at least 18 inches from a curved divider. Chairs and sofas pushed against a curve look cramped and block the shape you paid for.
Variation: Use a half-curve that starts at a wall and ends free-standing, creating a partial nook rather than a full division.

15. Pony Wall With Glass Above
A pony wall topped with glass is a practical compromise among floor ceiling room dividers, giving you a solid base for outlets and art plus a light-filled top. It suits kitchens, stairs, and rooms where a full wall would feel too heavy.
Materials: Framing and drywall or wood cladding ($150-$400), a glass panel ($100-$300), and trim ($30-$60). Total: about $280-$760.
Build the pony wall to counter or chair height, usually 36-42 inches, then set the glass in a slim channel on top. Run an outlet into the solid base if the divider will sit near a sofa or desk, since power makes the wall genuinely useful.
Tip: Cap the pony wall with a wide wood ledge. It becomes a display shelf, a drink rest, and a visual finish all at once.
Variation: Use reeded or fluted glass above the pony wall for privacy, or leave the top open with a wood cap for a simpler, more casual divider.

16. Mirrored Panel Divider
Mirrored panels make floor ceiling room dividers do double duty, dividing a room while bouncing light and making a small space feel larger. They suit entryways, dressing areas, and studios where every bit of brightness counts.
Materials: Mirrored panels or a mirrored sliding system ($250-$700), a track ($50-$120), and safety backing film ($20-$30). Total: about $320-$850.
Hang mirrors so they reflect a window or a bright wall, not a cluttered corner, since a mirror doubles whatever it faces. Use safety-backed mirror panels, and keep the track clean so sliding panels glide smoothly.
Tip: Clean mirrored dividers with a microfiber cloth and plain water first. Harsh cleaners streak, and streaks on a full-height mirror show from across the room.
Variation: Use antiqued or smoked mirror for a softer, moodier effect, or alternate mirror panels with wood slats for a less hall-of-mirrors feel.

17. Fabric Panel Track System
A fabric panel track system is the most flexible of all floor ceiling room dividers, with flat panels that slide, stack, and swap like giant swatches. It suits renters, studios, and anyone who redecorates often.
Materials: A panel track kit ($60-$150), fabric panels ($25-$50 each), and ceiling mounts ($15-$25). Total: about $100-$325.
Mount the track to the ceiling, hang panels so they overlap slightly, and test the slide before you style anything. Panels that overlap by an inch block sightlines far better than panels that just meet edge to edge.
Tip: Choose a washable fabric. Panel dividers collect dust and cooking smells faster than walls do, and a fabric you cannot wash will look tired within a year.
Variation: Mix solid panels with one patterned panel for a focal point, or use linen panels in summer and heavier cotton in winter.

18. Double-Sided Fireplace Divider
A double-sided fireplace is the most luxurious of all floor ceiling room dividers, warming two zones from one fire and anchoring an open plan. It suits living and dining rooms that share one large space.
Materials: A double-sided electric fireplace unit ($600-$1,500), a surround and mantel build ($300-$800), and installation ($200-$500). Total: about $1,100-$2,800.
Plan the fireplace early, since it needs power and a clear zone on both sides. An electric unit is the simplest retrofit, while gas and wood options need venting and professional installation.
Tip: Keep furniture at least 36 inches from each fireplace face. A double-sided fire invites seating on both sides, and both sides need safe clearance.
Variation: Use a double-sided console or credenza with a fireplace insert below it, or a see-through ethanol burner for a vent-free focal point.

Frequently Asked Questions
How tall should floor ceiling room dividers be?
True floor ceiling room dividers run from the floor to the ceiling with no gap, usually 8-10 feet in most homes. Measure in several spots, since ceilings vary, and choose adjustable or custom-cut systems that can absorb a small difference without looking crooked.
Are floor ceiling room dividers renter-friendly?
Yes, if you choose the right type. Tension columns, folding screens, curtain tracks with toggle bolts, and freestanding shelves need no permanent changes. Avoid built-in glass walls and pony walls in a rental unless your landlord agrees in writing.
Do floor ceiling room dividers block light?
Solid dividers do, but most modern options do not. Slats, open shelves, glass, sheer curtains, and plant rows all let light through, so choose an open or translucent design if the second zone has no window of its own.
How much do floor ceiling room dividers cost?
A curtain or folding screen divider can cost under $200, a wood slat or bookshelf divider usually runs $150-$500, and a glass partition or double-sided fireplace can reach $1,000-$2,800. Start with a freestanding option to test the layout before committing to a built version.
How do I keep a tall divider safe and stable?
Anchor tall furniture to studs, mount ceiling tracks into joists, and use tension posts that are tightened correctly. Check fixings every few months, especially in homes with children or pets, and never rely on a freestanding shelf that has not been secured.
Conclusion
Your home does not need a new wall to feel organized — it needs a clear edge that still lets light through. Start with the idea that matches your budget and your lease, and remember that 18 floor ceiling room dividers ideas all share the same goal: two rooms that feel intentional instead of one room that feels unfinished.
If you found a divider you love, save this post to Pinterest so you can find it again when you are ready to measure and shop. For more small-space inspiration, see our small apartment decor ideas, our drapes for living room, and our dining room decor.
Measure your ceiling tonight, pick one of these floor ceiling room dividers ideas this weekend, and enjoy a home that finally has rooms within rooms — without losing the light that made you love the open plan in the first place.




Leave a Reply